The Seed of Victory (7.07c)
Coryn02
December 4, 2017
Introduction
Hello! Cory here, and this is my guide to  Lone Druid. It’s also my first guide, but I don’t see that as a problem and moreso a challenge to overcome. I’ll go over all of the things I have learned about playing Lone Druid, and it will be updated as the hero and the game changes. At the very least, I’ll be trying to help new players learn the hero.
As it happens, an update which changes half of the content in the game just dropped, which makes a lot of this guide’s information change. I’d rather stay with the times, so I will be doing my best to keep it updated. Can't say I'm not annoyed at having to go back and rewrite things, but I want this guide to be good.
Before we move on, I’d like to emphasize that what I will share with you is not absolute. My understanding isn't perfect, the build is simply a suggestion, and the best way to improve is to develop your own understanding. I am limited by the skill of my fellow players, so at different levels of expertise my advice may become less relevant. And for the record, I am not an expert Lone Druid player.
Then again, most people barely know the hero exists, so as far as I’m concerned I might as well be. Let’s move on before that goes to my head, yes?
Lore

Long before the first words of the first histories there rose the druidic Bear Clan. Wise and just they were, and focused in their ways to seek an understanding of the natural order.
The arch forces of nature saw this, and so sought the most learned among them. Wise old Sylla, clan justiciar and seer, stepped forward for his kin, and to him was given the Seed with these words:
'When all of the world has dimmed, when civilization has left these lands, when the world is slain and wracked by the endless deserts at the end of ages, plant the Seed.'
As he grasped his trust, Sylla felt his years recede and his vitality returned. Vast knowledge burst into his mind. He found himself able to project his very will into reality and, with some concentration, alter his own physical form as well.
Yet subtle whispers and cruel ears brought word of the Seed and its power to other peoples, and a terrible war crashed upon the Bear Clan. As his ancestral home burned, Sylla took his burden and fled to the wild places.
Ages passed, and time and myth forgot the Bear Clan, forgot Sylla and the Seed, forgot wondrous civilizations that rose and fell in Bear Clan's wake. For millenia Sylla has waited, waited for word from his deities, waited for peace to come to the ever warring realms, waited in exile and in secret for the end of all things and for the conclusion of his sacred commitment, preparing himself always to face and destroy whatever would dare threaten his purpose.
Hero Summary
Lone Druid is an Agility carry who is most known for his ability to push towers very quickly. He is defined largely by his first spell,  Summon Spirit Bear, which gives him a companion capable of holding items. Lone Druid excels in lane presence thanks to the exceedingly tanky bear and can play largely independent from his team. The specialty of the druid and his bear are in physical damage-dealing and split-pushing, but can also gank and teamfight if itemized and played properly. In short, this hero is versatile enough to do whatever his team requires.
Spells & Skilling - Druid
The reason you play the hero. The Spirit Bear starts tankier than
every hero in the game at level 1, and with more points it gets spells and grows progressively stronger in almost every way. It has a
6-slot inventory like a hero, and building items for it is your top priority. It can only attack within a
limited range of the druid, but the range is pretty good (far enough to attack just past the river at mid, if my memory is correct). The bear starts with 300 mana and 0.5 mana regeneration at all levels, so items with actives can be used on it.
Summon Spirit Bear should be maxed first due to the importance of getting its stats improved and unlocking its spells.
Some other things to note:
- It has a long resummon cooldown, so treat its death as one of your own. You do also take 10% of your maximum health as pure damage when it is killed, so that might do you in if you're not careful. It’s possible to deny the bear without negative repercussions however, so don’t be afraid to do so if you know it can’t survive. The re-summon of the bear is cancelled when it takes damage, so that is a good time to deny it if the enemy team is coming.
- Most people don’t play Lone Druid for the same reason they don’t play other multi-unit heroes: micromanagement is tough. My tip? Use control groups. Hold Control and press a number while selecting at least one unit. Now, whenever you press that number, those units will be selected again. I use 1 for the druid, 2 for the bear, and 3 for both at once. You may also use TAB to cycle through your selected units.
- Do note that the Spirit Bear doesn’t benefit from Attributes (Strength, Agility, and Intelligence). Why? It doesn’t have any, it only uses base stats and whatever it gets from items. For the same reason, the bear can’t have illusions, and stat thieves like Outworld Devourer and
 Slark can’t take them away. This is why
  Heart of Tarrasque and
  Eye of Skadi aren't good items for it in spite of what you'd think.
- The Spirit Bear isn't a creep, it's a creep-hero. This weird gray area of unit classification is only shared by the Primal Split brewlings, Warlock's Golems, and Visage's Familiars. Most spells will affect the bear like it's a hero, but not all. here's a Reddit post with one player's findings about how the Spirit Bear is affected by some spells. Some things may have changed since it was written, so I may do some testing myself and make a chart.
Rabid
Pretty simple spell. It buffs
movement and attack speed for the druid and bear. You will want to avoid spamming this before level 4, as its mana cost doesn’t scale and the duration and effectiveness are reduced at lower levels. Just like most applied buffs, it
can be purged by any dispel. If your bear is killed, save it for when you can re-summon to re-apply the buff.
Rabid should be maxed second, since the added attack speed and mobility will speed up Lone Druid's farm and help him run away faster from potential dangers.
- The movement speed increase is percentage-based, so I'd recommend switching to druid form if using the mobility.
- If you plan to try using
 Battle Cry for taking structures, save Rabid for then to make the most of the bonus attack damage.
I love how unique this is: a short-range AOE fear spell; it prevents enemy heroes from acting (read: do
anything) for its duration and sends a move command to their fountain. It can break channeling spells, so that during a gank of your own they can’t just teleport away from you.
Savage Roar should be maxed last since it doesn't play into pushing very much, but with a value point at level 2 for safety and utility.
- Make use of this spell in teamfight to scatter your foes. This can split the battlefield into manageable conflicts or peel the enemy carries off your supports. Of course, most of your fighting will be done by the bear as you stay just close enough for it to attack if it’s unsafe, so be wary if you cast this yourself.
- Also note this only works on heroes, so don’t waste it if there are no enemy heroes around.
You mean I already have a bear and I can be a bear too? Yes, please. A transformation spell that makes the druid become a melee bear with loads of
bonus health, armor, and slightly faster attack time at the cost of
reduced movement speed. For someone so innately squishy as
Lone Druid, this is a great help in keep yourself alive. As soon as you have this, you can start playing more aggressively (do still be careful, though).
True Form should be maxed as soon as possible after Summon Spirit Bear because of Lone Druid's inherent fragility.
- There are few reasons you’ll want to turn this off (which can be done with a sub-ability), but it’s best not to be in bear form when you are moving around the map or regenerating health.
- The transformation time can also disjoint some projectiles, but make sure you know which ones can be disjointed before you try it. As of the 7.00 update, the transformation back to a druid is actually faster than that into a bear, so it's worth it to switch out to make a run for it, but it does make disjointing a bit harder. And of course, make sure to change back again if you think danger is coming.
You might be confused now, but
Lone Druid actually gets a
sub-ability from his ultimate. This one is a short duration buff that massively increases
damage and armor. This is incredibly valuable, since you'll be up front hitting things constantly, especially if you have ways of locking down opponents or enough room to take towers. Another good use is on stacked camps (mostly Ancients), which I sometimes prefer to using it during a push.
- Be warned that Glyph of Fortification will negate nearly all of Battle Cry's duration and it has a very long cooldown, so be careful if you're using it to push.
- Try to use both your druid and Spirit Bear when you activate Battle Cry. Sometimes you can only attack with the bear, but if no danger is coming move your druid into the fight to kill things faster while it's up. This is especially relevant to tower pushes where you know the enemy is occupied with a teamfight.
- Battle Cry will affect all units Lone Druid controls, but only when they are within a radius around himself. Make sure your Spirit Bear is in it at least. If you're feeling saucy, try building
 Necronomicon or
  Helm of the Dominator to abuse it.
Spells & Skilling - Spirit Bear
As if the Spirit Bear wasn't awesome enough, it gets spells too. I'll go over these like we did the druid's since I think you need to know both sets to use the hero effectively. You don't get to skill these since each only has one level, so the title is a bit of a misnomer.
... Let's move on.
Think of this like your bear’s global
 Blink Dagger
. When used, it teleports the bear right next to you
instantly, no channel required. Quite useful for getting out of sticky situations.
There are two main drawbacks to Return: first, it is disabled upon taking any damage from a player, no matter the source or amount. Second, you can only ever teleport to the druid with Return. If you want to teleport anywhere else, you either need to get a
 Town Portal Scroll
,
 Boots of Travel
, or get the druid to go there and have the bear Return right after.
- In lane, use Return to disjoint projectiles. All physical attacks and some spells can be disjointed. This is particularly useful in lane when the tower targets your bear as you harass.
- Your bear will always teleport to the top-right of your hero, so use it to move your bear around faster between areas. Avoid blocking yourself or your bear when moving to the top-right.
- If you have an
 Aghanim's Scepter, casting this will teleport your bear where Lone Druid died. Take advantage of this to push and defend.
A handy root effect that is sometimes applied on right-click. (When I mention a root in this guide, assume I mean this.) It does physical damage over time to an affected unit,
pierces spell immunity, and lasts longer on creeps. If you do get a root on a jungle creep, focus your attention to the other creeps in the camp, and if it will die to the damage, feel free to go to the next instead of finishing it off.
- Root as a status effect was just buffed to prevent the use of most mobility spells, though it's not exactly a buff since it was supposed to do that anyways. At any rate, this makes blink heroes a lot more interesting to fight since you have a way to pin them down.
- Focus on moving the bear in chases. When in lane, landing Entangling Claws on the opposing hero can sometimes be enough for a kill, especially if they were weakened beforehand. You can get more hits in, and thus more chances for Entangling Claws to proc so you can secure the kill. Oftentimes, however, it won’t last long enough for Battle Cry, so don’t waste it for that unless you’re sure you can make use of it all.
- As an added layer of skill, the cooldown of the spell (along with all the others your bear has) refreshes when it levels up. Save your level 4 Summon Spirit Bear point so you get a fresh Entangling Claws to use right after the first. Two roots generally ensure a kill on any target during the laning phase.
- Do note that Entangling Claws has a 5-second cooldown and only 3 seconds of duration, meaning you can’t keep a target rooted forever. Furthermore, nothing stops them from fighting back, using items, and casting spells. Do be wary of hunting down enemies who have something that might be able to save them, such as a Town Portal Scroll or a Force Staff.

Your bear gets
Savage Roar too! How cool is that? The spell
shares cooldown between the druid and Spirit Bear, so using it on one means they both have to wait to use it again.
- Your bear can scare away enemies while you are stunned so you can escape. Most of your Savage Roar castings should be from the bear since it won't be risking as much by moving in to use it, due to its tankiness. Just make sure you've selected the proper unit when casting the spell, as its range is very short.
- Entangling Claws prevents movement, while Savage Roar prevents all actions but movement. Landing a good root on a hero and then roaring allows you to quickly render them helpless.
Most carries get a single vital spell that defines the way they scale into the late-game, and the best carries usually have more than one. For
Lone Druid,
 Demolish
 is that spell.
After level 4, your bear gains
33% spell resistance (most heroes have 25% for reference) and now deals
40% bonus damage to all structures.
Structures are any buildings and siege engines.
It’s for this reason that you should build lots of damage and attack speed on your bear; if your bear has 65 damage, hitting a tower makes it deal 91 damage instead (before accounting for the tower's armor, of course). Combining this with armor reduction and even more items can make
Demolish quite ludicrous. More on this in the
Math Corner.
Of course, this isn’t really a passive for
late-game by this definition, since it gets very tough to take advantage of more structure damage if the entire enemy team will actively defend their high-ground. As such,
try to start taking towers as early as you can, since the enemy team will eventually get to a point where they will no longer fear your bear.
Talent Tree
UPDATE: Hoo boy, things have changed. With the Dueling Fates update, the talent trees for every hero in the game have been updated, among many other changes. I suggest you read them for yourself, but I have helpfully updated the talent tree section of my guide to account for them.
This is an entirely new section dedicated to the new mechanic the New Journey update has introduced. Essentially, instead of the Attribute Bonus you’d end up skilling after you max out all of your spells at level 16, each hero now has a number of specific bonuses to choose from.
I personally feel this is much more appropriate for the majority of the hero pool because it’s often something stats would not be able to compensate for, in addition to the fact that many spell-based heroes (especially supports) don’t benefit from stats all that much.
The way this works is that at levels 10, 15, 20, and 25, you have two options to pick as a specific perk for your hero. You can only pick one of the two, and afterwards the alternative options become unavailable, so you have to be careful in what you decide.
In particular, the Talent Tree encourages two styles of play: The Bear Focus and the Battle Druid builds. The first is the traditional method of building items primarily on the Spirit Bear and pushing towers, while the new style focuses on making the druid strong enough to battle more like a traditional carry in teamfights.
I find that the way I play leans towards the Bear Focus build, but with some hybridization due to the addition of the talent system and Aghanim's Scepter upgrade.
Level 10
+250 Health vs. +175 Attack Range

Spoiler: Click to view
To Bear Focus players, the added health will make you even harder to take down, especially when armor is factored in, while the attack range won't be that useful since you won't be in druid form very often.
Battle Druids will want to take the bonus attack range every time, since it provides a net of safety far greater than more health and has an added benefit: since you're attacking from further away, you don't need to get as close to your enemies and thus risk being focused. It also speeds farm a little since you won't have to be as close to the creeps to kill them.
Level 15
+10 Spirit Bear Armor vs. -8s Savage Roar Cooldown
Spoiler: Click to view
The breakdown for this choice is fairly straightforward, though the reasons vary simply from what build path you may be taking. The armor is useful for
Bear Focus players, since it will help them tank up without buying additional items. For a
Battle Druid, this armor is not so useful, and
Savage Roar is pretty good at keeping an otherwise squishy
Lone Druid safe in fights by keeping away dangerous gap-closers.[/color]
Level 20
+40 Rabid attack speed vs. -25s Battle Cry cooldown
Spoiler: Click to view
Now
here's an interesting talent choice. Both build types can benefit from this, as you will still want to use
Battle Cry even with the ranged build, and Rabid is crucial for both builds.
It's preferable to take the reduced
Battle Cry cooldown in
Bear Focus games, since they will always have it at their disposal due to constantly being in
 True Form
.
That said, the bonus Rabid attack speed makes it very strong, since this is another bonus you get without any items. It lends itself more to
Battle Druids with their ranged strikes, but both styles can effectively use this bonus.
Level 25
Entangle has 0 second cooldown vs. Battle Cry grants spell immunity
Spoiler: Click to view
This one is an
extremely close call, since both talents are just amazing. Without a cooldown, your Spirit Bear can repeatedly proc
 Entangling Claws
 on a target, which allows it to continue tearing their face open with the high damage and attack speed it will certainly have by this point in the game. While it is unreliable, this is my recommendation for a
Battle Druid, given they will not be too concerned with spells by using a long attack range as a safety net in fights.
Spell immunity is awesome for
Bear Focus players. Normally,
Lone Druid doesn't build
 Black King Bar
, not just because it's less necessary since you will be spending time split-pushing and farming rather than teamfight, or because the Spirit Bear has more base health than every hero in the game and
Demolish to boot, but simply due to it not working well with anything he wants to do. This is a bit of a shame, since it leaves
Lone Druid and his ursine companion vulnerable to crowd control, especially with percent-based health damage like
 Enigma
 or Necrophos.
Adding this talent to the mix makes your already terrifying Spirit Bear deal more damage, have
boosted attack speed,
bonus armor and damage, and is now
spell-immune, making most attempts at fending it off useless. Need I say more?
Item Build Justification - Spirit Bear

I get it, he looks cute this way. But please, don't build these items on your Spirit Bear. Except for the Pipe of Insight... That might be fine.
The Spirit Bear should be the focus of your items. Most of what you build should be
damage per second,
survivability (if needed), and
cheap effective items in that order of priority.
Aura items are good too because they will affect both you and your bear.
Often you'll find yourself running out of room for the cheap stuff when building large items with several components. It's at this point you should consider
giving the less valuable items to the druid instead, to make space for the crucial ones.
A new in 7.00 feature is the
backpack, a
3-slot inventory section where items are muted. This helps in carrying utility items like
 Observer Ward
s,
 Dust of Appearance
 and components for your next big item. As if that wasn't enough, your Spirit Bear gets a backpack too!
It does make building items for your hero a lot easier, since inventory organization isn't hell anymore (well, it
still is, but much less so than before). Unfortunately, your Spirit Bear still can't place wards. Ah well, maybe someday...
Starting Items
Having this allows the bear to soak up a lot more physical harass than otherwise. Since the bear doesn’t have as much damage early on, it will probably take more damage than it deals, so this helps. Unfortunately, it doesn’t upgrade into anything useful to us other than Abyssal Blade, but if you will be buying a Skull Basher you may want to keep it for then.
Early Game
Boots
Footwear is essential for everybody in Dota 2. Unlike mana-based midlaners who rush a Bottle or Ring of Aquila, Lone Druid rushes two sets of boots so that he can threaten his enemies with a very fast duo. You’ll probably also want to upgrade these as soon as possible, even if you could get your farming item faster. Don’t give in to greed,
upgrade your boots.
Subsection: Boot Upgrades
Aside from elaborating on boot choices, I have one suggestion: Do the
boot swap. Once
Summon Spirit Bear and Rabid are level 4, give your bear the faster boots. This way, it will have more movement speed for chases and general mobility, and if they’re Tranquil Boots it should be at
maximum movement speed as long as they're not broken.
More damage and a unit-walking active. Generally the best bear boots, as it needs all the damage and movement speed it can get. After the boot swap, you will need the active to keep up with your bear, so be sure to use it! The unit-walking will often be more useful for you than the Spirit Bear by then because you'll be slower and bumping into other units more.
 (Not recommended)
You’d think these would make good bear boots, but they don’t. Sure, they’re cost-effective and give attack speed, but the main thing that makes these useful is Tread switching. This does absolutely nothing for the bear, since it has no Attributes. Moving on.
 (not recommended)
More mana to use on
what, exactly? You don’t have any spells that cost more than 100 mana and the Spirit Bear starts with mana now, so even Dagon isn't an excuse. You usually want to keep your mana items on the druid anyways.
Farming Items
Just like any other item-dependent carry, your Spirit Bear needs one good farm item to help it get more money to start making core items. Most of these also help in pushing in some way, but you shouldn't build more than one unless the first was named Hand of Midas.
Choose One
Arguably the best farming item in this list. A classic
Lone Druid item, providing a good damage boost and a
burn aura dealing magic damage in an AOE that inflicts a miss chance on enemy units. You will want to try for this every game if you can for the heavy impact it will have: most heroes can't take the literal heat at the 20-minute mark. But if you
don’t have the Sacred Relic by the 20-minute mark, it’s time to switch to another option.
- DO NOT SIT IN THE BASE AND FARM WITH A RADIANCE. Go push with all four of your teammates.
- Don’t get the recipe first, it's useless by itself and if you're desperate enough to get the recipe before the Sacred Relic you're better off giving up and getting something more affordable.
- The Spirit Bear counts as a hero for the purposes of Radiance, and as such will get the burn aura of 60 and not 35 like illusions would get.
The second-most preferred option. Damage, attack speed, and a conditional effect that deals
chain magic damage to units. This isn't as strong as Radiance's burn aura, but the actual difference is minimal when backed up with attack speed. Buy Maelstrom if you need a farming item with
better buildup than Radiance. Otherwise, buy this if you need damage but don’t require lockdown or a situational item.
The attack speed is nice, but you really want this for the active, which
regularly gives 190 reliable gold. Use it on large creeps and ranged lane creeps to get more experience and on small creeps for more money.
Unfortunately, you need to
reliably use the active to get your money back in good time, which also assumes you don’t die before then and always have it on cooldown. Midas is all about timing and uninterrupted farm:
6-9 minutes is your window, and it pays for itself in about 20. If you're doing well enough to justify a Midas, buy Radiance next.
Cheap Items
This is the category for all the items that are cheap but effective. Most heroes can't get these because of item slot restraints, but since we basically have two heroes this isn't a problem. I generally buy mine either before my farming item if I'm having a hard time completing it. If you're in a Radiance game, you can afford to skip most of these until after it's assembled.
The added 24 damage you get from this will help in last-hitting early and pushing later on, especially since your Spirit Bear doesn't get stat growth (meaning no Agility for damage). It also works against
Roshan, so if your team plans to take it, keep it around for then.
You know how I said Boots of Speed are needed for everyone? Well,
Orb of Venom is the anti-boots. The
movement speed slow will allow your bear to continually harass your opponent since they can’t flee; the
poison damage is icing on the cake. I usually get one of these in all my games.
UPDATE: Along with other sources of damage over time, Orb of Venom no longer disables
Blink Dagger or certain consumables. But since this is only applied with a basic attack, which
will disable those things, I think this change is mostly meaningless.
Blight Stone
Armor reduction is quite good since all the damage you can deal is physical, effectively makes you more powerful overall. Blight Stone also upgrades into
 Desolator
 and
 Medallion of Courage
.

→

The intermediate to high magic damage solution. It also upgrades into Hood of Defiance for more magic resistance, health regeneration, and the
Barrier active. There's not much else to elaborate on this, except that magic resistance follows the law of diminishing returns just like armor does.
- If you're fighting a core of high-damage magic heroes, I'd recommend picking up a Pipe of Insight on your druid, since they'll probably kill you before they kill your Spirit Bear, especially if you took the level 15 magic resistance talent.
Core Items
Spoiler: Click to view
One of the most slot-effective items for Lone Druid: even more
armor for you and surrounding allies,
attack speed, and an
armor reduction aura. Buy this
as soon as possible after your farming item.
- If you don’t get it around the 30-minute mark, the enemy carries will probably be able to come online and you will be quite useless thereafter. If you can't make the timing, you should probably focus on helping in teamfights and getting cheap items to make the most of your money.
- If you’re going to build a core item in any game as Lone Druid, there’s little reason not to get this before anything else since every game has several carries. In high-skill situations, you will want to purchase this only when fighting strong physical carries.
An excellent offensive item that is also very slot-effective. It builds on what Maelstrom had by offering even more attack speed and an active:
Static Shield, which has a chance to shock nearby enemies for magic damage when the affected unit is hit by a physical attack.
This can serve as even more deterrent for physical attackers wanting to hurt your bear, and the attack speed helps you speed up farming and pushing. While a good option in many games, I only buy Mjollnir if I either purchased Maelstrom first (and even then only after Assault Cuirass) and that I don’t need another damage item with different utility.
Buying this gives your bear
a 45% chance to stun opponents upon attacking them, assuming
Entangling Claws is off cooldown. This can be helpful against slippery opponents and carries who decide to fight back.
This isn’t a core item for me in a lot of my games because
Lone Druid can often get a lot accomplished pushing by himself if the rest of his team is occupied fighting the enemy. If you
will be doing a lot of teamfighting, it becomes core. The Strength is regrettably wasted on the Spirit Bear, but it’s still best to have it carry the item.
UPDATE: Skull Basher's passive no longer misses, meaning it is now an effective way to deal with evasive heroes. The item itself no longer gives damage due to its recipe rework, but it now has a more damaging bash to compensate.
Situational/Luxury Items
All of the items below might be considered good in specific circumstances, but please use your own good judgement in purchases.
Lone Druid can farm many items, so build what you think fits the situation and however much money you have! (This is a slight reiteration from the start of the guide. Moving on.)
Those carries got you down with their
Black King Bars? This item’s active will help by stunning them
through spell immunity. Of course, your bear can still root through spell immunity, but having a guaranteed stun in general works wonders. Abyssal Blade also incorporates Vanguard, which by itself isn’t worth buying on the Spirit Bear but does make it tankier.
If the enemy team has high armor, this is the way to reduce it. Combined with Assault Cuirass, they will lose
12 armor, making them very easy to take down if you can hit them. Most of the time you won’t need this for the base, so get it against
high-armor foes if you plan to teamfight. The damage and armor reduction
do factor nicely into
Demolish, making you able to crush enemy structures with impunity.
UPDATE: Reduces 1 less armor than before the
Dueling Fates update.
Should you be battling anyone who has innate
evasion,
miss chance, or
items that provide such benefits, get this. While it won't let you hit them every time, you probably won't have trouble with
 Phantom Assassin
 anymore since
you will land every 4/5 strikes. It gives attack speed now instead of damage, which is still nice, but the mini-bash has been replaced with a
60 Pure damage proc, which is especially good when combined with
Entangling Claws.
Probably a Bad Idea
Ahh, the game-throwing sword of destiny. Sure, it’s the single most damaging item in the whole game, which makes me drool just thinking about how well
Demolish can use that. The problem with a
 Divine Rapier
 is that
it’s easy to get yourself killed and lose it. The Spirit Bear may be tanky, but you can bet everyone will focus it the moment they know it’s holding the thing, and no amount of items and buffs will save you from five people blowing all their spells on you at once.
With this in mind, I have three main tips on when and how to use a
Divine Rapier:
- Only build one when you’ll lose the game otherwise and never push without your team when you have it.
- Keep an empty inventory slot on the druid to take it yourself should the Spirit Bear go down.
- Buy an Aghanim's Scepter so the enemy can't just kill you and get a free Rapier.
That said, if the enemy builds and loses a
Divine Rapier of their own, you (more specifically, your Spirit Bear) are probably one of the best heroes in the game to carry it, right up there with
 Medusa
 and
 Wraith King
. Don’t be afraid to take up the sword if the enemy loses theirs. Abuse
Demolish to punish them for their stupidity. Just remember that your bear and you can’t swap a ‘stolen’ rapier.
Rejected
Spoiler: Click to view
The old Mask of Madness wasn’t all that good to begin with. It gave the same benefits it does now, except that instead of the penalty being
increased damage from all sources, now you lose
5 armor and are
silenced for the duration. Your bear needs as much armor as it can get. And sure, the Spirit Bear doesn’t have any big spells, but aren’t
Return and
Savage Roar pretty important?
Attack speed isn't the premium stat for early pushing on
Lone Druid, which is the only reason you'd consider a Mask of Madness to begin with: for early pushing. The movement speed doesn't help us like it would a
 Sven
Sven because it's difficult enough to kite a Spirit Bear holding Tranquil Boots with max Rabid, so we aren't getting any extra movement speed we desperately need.
Mask of Madness also competes too heavily with Vladmir’s Offering, which works for both units, gives us a damage percentage buff instead of attack speed, and also provides mana and health regeneration on the side. Mask of Madness is just
too risky for not enough payoff on
Lone Druid.
The critical hit isn’t as effective due to the
Basic attack type conundrum reducing our bear’s damage (and thus the critical damage). Criticals also don’t work on structures, which are really what the Spirit Bear should be attacking later into the game. Furthermore, Monkey King Bar competes with it by being a superior damage item at a similar price that also bashes and counters evasion.
This item is a joke… But fine, I’ll indulge the trolls. The bear can’t attack from across the map, but it
can cast spells and use items. So, a magic nuke for kill-stealing. Everything but the active here is wasted, and unless you’re so far ahead you’ll win anyways you should really be building something else. There are better heroes and methods to pull this off, go play
 Nyx Assassin
 or something.
I can see why some people would build this for the Spirit Bear. The double right-click and subsequent movement stop are good for most melee carries to keep their targets immobilized.
Lone Druid doesn't have this issue because of
Entangling Claws. Furthermore, all the Attributes it factors into are again useless for it, along with the druid. I'm also under the impression people who make this out to be a good bear item consider it a way to get double Entangles (which it isn't). There are other items that give more damage and attack speed without being as wasteful.
Item Build Justification - Druid
If the Spirit Bear is a carry, then Sylla the Druid is more of a support. He's usually behind the front lines, buffing his bear and staying just close enough to let it attack before moving in to get the kill. He won't need many items in the game, but what he should invest in is
utility. Getting items that do more than what your bear already does is key to scaling in the later parts of the game.
Starting Items
These all go in the same category because they all have a single common distinction: They’re
consumable health regeneration. I will generally buy one of each of these; I’d prefer to have more regeneration than I need in case the lane is hard. The bear can benefit from holding the Faerie Fire to get damage, but your druid should be using the consumables since the healing they provide will barely make a difference to the bear’s health.
Iron Branches are the most efficient stat item in the game by gold value. They give you a bit of everything for a low price, which helps immensely early on. They can also upgrade into a
 Magic Wand
 or a
 Headdress
, a component for
 Pipe of Insight
 and Vladmir’s Offering. If you care that much, you can plant them and eat the happy little trees for more health. Just remember that
the Spirit Bear can’t use Attributes, so the druid needs to hold these.
Early Game
You should probably get your bear's set of boots before your druid's, though ideally in a good lane you would have them both delivered to you at once. It's very important you do get them in good time, however: Your Spirit Bear still has that nasty
attack range leash to worry about. If you're chasing someone and your druid is too far behind, your bear will just sadly contemplate their backside with a broken sword floating above its head. Buy boots early and for
both of your units.
Are you tired of
 Tinker
 and
 Lina
Lina ruining your life? Do you want an easy way to defeat them?
... Well, sorry, I can't do that for you. But a Magic Stick helps a lot by giving you charges every time they use their spells. When you upgrade it (which you should do against aforementioned lane bullies), it also incorporates your Iron Branches and gives you a reason to start the game with an
 Enchanted Mango
.
Infused Raindrop
This item also falls into the category of 'my enemy midlaner's a magic jerk and I need to dodge death'.
The mana regeneration is nice, but the real reason you want this is the
magic damage block passive, which will considerably aid you in surviving against enemy nukes.
Should you be fighting the likes of
Tinker, you will need to get one before your Boots of Speed so he doesn't melt your face.
While it will only last so long against a persistent high-damage nuker in lane, at level 1 it will give you a total of ~40 mana over the duration of Rabid, which is nearly enough to cast it again.
Boot Upgrades
As I went over in the previous section, remember to do
the boot swap.
This is usually the boot of choice for the druid; having the regeneration and extra movement speed allows him to maneuver the map more efficiently and regain lost health. Remember to
switch out of True Form to make them work faster and stay out of sight while the bear farms.
A very lucrative option late-game, allowing you to teleport to any allied unit except heroes and not waste money on Town Portal Scrolls. I generally buy these if the game doesn’t look like it can be won through a fight and then push, and that
split-pushing is the only option.
- You can teleport to your Spirit Bear, since it doesn’t count as a hero.
- It also counteracts the movement speed reduction from True Form.
UPDATE: Boots of Travel now target towers from further range, meaning you no longer have to click directly on a tower to make if your target destination.
Core Items
Best Upgrade Ever
The item you’ve all been waiting for. Scepter gives some stats, but that's an afterthought compared to the upgrade for
Summon Spirit Bear: Your bear will no longer die when you die, and it no longer has an attack range leash.
Essentially, you now have two heroes to use.
This is absolutely
game-changing, since you could now be on the other side of the map farming while the bear takes barracks with the team. It also serves well if the enemy team tries to kill you instead of the bear to take you both out of the fight: they can't kill you because you're not even there. In order to effectively use Aghanim’s Scepter, you should (at the very least) have built a farming item and then an
 Assault Cuirass
 beforehand.
That said, Aghanim’s Scepter is not a perfect item, just because of how it’s designed. Since you need to control both units to make the most of it, a Scepter
can complicate micro on an already difficult hero by requiring you to have higher map awareness as well. It's also pretty useless if you don't have the aforementioned items; if your bear's right-click doesn't mean anything or it can easily be killed, Aghanim's Scepter won't help you.
Another problem I have with Aghanim's Scepter is the fact that
Battle Cry is not global: it only affects units the druid controls
in an AOE. You need to be right next to your Spirit Bear for it to get the damage and armor, so for best results you should be there with it.
Auras also become less effective after this, since your druid will be holding most of them. For this reason, if you have an aura your bear won't be holding it might be best to accompany it in pushes (
Boots of Travel come to mind).
Generally, you should gauge the enemy team’s ability to pressure your structures when thinking about buying an Aghanim’s Scepter. If your team is
doing reasonably well, it's not as necessary. But if your own base is being assaulted by
the entire enemy team at once, you should get the Aghanim’s as soon as you’re finished Assault Cuirass (which by now you should have).
Spoiler: Click to view
Ahh, the double Basher build. Is it a good idea? I'd say it can be; there's quite a bit of latent power in having two agile units to perma-bash an enemy hero into oblivion, and it does give the druid a bit of reason to be helping his bear more.
For me at least, double Basher doesn't get much credit because I'd rather split-push while my team fights without me or prioritize the tower during the teamfight and then help my team. In these situations, having one Skull Basher
isn't always useful, let alone two.
The lifesteal method of choice for our dynamic duo, considering it’s the only lifesteal item that works through an aura. It also provides attributes, armor, health and mana regeneration, and
a 15% damage increase which helps the bear considerably. You’ll want to buy this if you and your bear are taking lots of damage, as you can then effectively heal while farming and pushing.
I feel like I am overselling its value somewhat, however. While the lifesteal does work with all the item damage your Spirit Bear is building,
the 15% damage increase does not, meaning it won't do much to increase your offensive potential. (This also applies to other similar buffs and auras, such as Packleader's Aura,
 Vengeance Aura
, etc.) As such, make it more of a consideration if you also have allied carries who would benefit from your carrying this item.
The reworked Helm of the Dominator is a very interesting generalist item I feel
Lone Druid can make good use of. For someone who won't be holding many items, the Attributes and attack speed are very useful overall. The Dominate active is still awesome, with creeps applicable for many situations (Ogre Frostmage, Satyr Tormentor, and Dark Troll Summoner are all good options).
What's interesting now is its aura:
10 attack speed and 8 health regeneration. Attack speed is always nice, helping to speed farming, fighting, and pushes. The health regeneration makes a big survivability difference. Ideally, you don't want to go home as
Lone Druid, and without having some form of burst healing on the team it's tough to stay in the field forever (this is why Tranquil Boots are essential, among other reasons). The aura health regeneration affects both druid and bear, the latter of whom can't get enough of this because of its titanic health pool.
Do remember that
Battle Cry will affect
all units
Lone Druid controls, not just him and the Spirit Bear. This extends to Dominate units, Necronomicon units, and even illusions (though the latter only get the armor). If you want to have way more tower damage than you need, it also goes to the skeletons created by the Dark Troll Summoner's Raise Dead.
A good item overall, I'd make a special consideration for it if you need a jungle creep active (Satyr Banisher's purge for
 Omniknight
, Ogre Frostmage for armor reduction, Satyr Mindstealer for
Medusa and
Wraith King, etc).
Cheap Items
Spoiler: Click to view
Not much difference to how it is on the Spirit Bear. Do prioritize getting one for the druid first, since it's more likely to be targeted. Unlike the Spirit Bear, you should probably
upgrade it all the way to a Pipe of Insight to get a Barrier active that extends to your teammates as well.
A fairly typical buy on most heroes, but especially important in the mid-lane where your enemy will be throwing a lot of spells in your general direction. Forgo the Faerie Fire and Healing Salve to buy this if your enemy mid is this sort of hero. Save your charges for when you need to recover health and mana quickly, upgrade it into a Magic Wand if you’re going to be fighting early, and don’t forget to switch out of True Form before using it!
Honestly, I don't know why more people don't get their own wards. To farm and push, you need to not be dead, and wards help you see danger before it arrives. Of course, to use a ward properly you actually
do need to pay attention to the minimap when you have them placed down, so if you can't do this don't waste your money on them.
Situational / Luxury Items
Spoiler: Click to view
This is meant to punish over-aggression by sending the damage back at your enemies; a little bit of Intelligence and armor isn’t bad either. Note that this works best on glass cannon heroes with a mixture of damage types; Pipe of Insight mitigates magic pretty significantly, and your bear's Assault Cuirass takes care of most physical threats.
Item meant for teamfights. More armor, enough INT that you probably won’t need to go home for mana anymore, AOE attack speed reduction, and the active Arctic Blast that damages and slows movement speed in a growing radius In most games, you probably won’t need more armor, and it becomes less efficient to build it after having so much already, but if you're in a lot of fights and have the farm, go ahead.
Should more defenses be unable to keep you alive, this is the ultimate survival item. A stack of health and its passive ability Health Regeneration, which should sustain your health for the rest of the game by itself. So long as you aren’t caught out of position, having suitable magic resistance and armor make you extremely tough to take down. The buildup is
disgusting, so make sure there is no other way to stay alive first.
The almighty sheepstick! If you do somehow have enough money and the enemy carry is out of hand, this is probably the best item you can buy. The Intelligence-related stats aren't the best, the Hex active is what you’re really after. You basically get a stun of your own, which should allow your team to get the edge on them in the fight.
On a related note, the active will also instantly destroy illusions, so if you don't need it for anything else, I guess that's an option.
If you need to prevent a specific right-clicking hero from doing their job, this is the way to do it. The 5-second disarm active cannot be removed, the Strength and damage are welcome, and the evasion helps your druid stay alive far longer. Avoid buying this if someone on the enemy team will be purchasing
 Monkey King Bar
, as the evasion factor will then become totally useless.
If you bought this and the enemy
did buy a MKB anyways, feel free to use the active, which will temporarily grant you bonus movement speed (which is useful anyways, but especially so if the evasion becomes irrelevant).
A very good answer to invisible people (
 Riki
Riki,
 Bounty Hunter
,
 Clinkz
, anyone who builds
 Shadow Blade
). The druid can use the stats and certainly has the ability to farm it up to level 3, but the active is where it’s at. True Sight as a passive on units nobody wants to kill because of
Last Will is great, which is why Necronomicon should be your long-term purchase against invisible heroes (or anyone who builds a
Shadow Blade).
The Necronomicon Archer has a
Purge active, and if you don’t need them for detection they come in handy for pushes. Most notably, they benefit from
Battle Cry when in range. I wouldn’t get more than one, since that’s a lot of money going to an item you already have and whose stats are useless on the bear.
Rejected
Another evasion counter. The only issue here is that it’s got more Intelligence focus than
Monkey King Bar, meaning part of it is wasted on the Spirit Bear and you will need to put yourself at risk to use its active and defeat the evasion hero you're countering with it.
It also doesn’t give any damage at all and not very much attack speed, which isn’t effective for increasing DPS. Critical hits also don’t work on structures, which Monkey King Bar does. I want to like this item, but for us it’s not good enough.
UPDATE: The Dueling Fates update has reworked Monkey King Bar, but it's still better than Bloodthorn for the most part, especially due to its occasional
Pure damage proc.
A cheap early-game item. Most supports buy this for inexpensive stats to stay alive more easily, but Lone Druid doesn’t have this problem after level 6 since
True Form gives him more health.
The real reason you buy this is to get more movement speed and attack speed for a short time with the active. Rabid and boot upgrades should make this a non-issue (in fact, your Spirit Bear will quickly outrun you after the Boot Swap). I just don’t see the need for it.
Gameplay (Game Progression)
Lone Druid can lane anywhere on the map and still be somewhat relevant. My experience is that mid is the best place to spend the laning phase, as you will only have to deal with one person and be able to quickly take the tower if they leave. As such, I will assume you are mid-laning for the remainder of this section. I may perhaps expand the guide with gameplay sections relevant to other lanes in the future.
NOTE: This section of the guide was written before I added the Battle Druid build, so it will probably reflect that perspective. I'll update it in time to account for the new build.
Early Game
At the beginning of the game, you should immediately skill and cast
Summon Spirit Bear. Move in front of your bear so it won't slow you down and make your way towards one of the Bounty rune spots. Since it's best that you get your Boots of Speed as fast as possible, you should usually be the one to grab it when it spawns. Since the first round of Bounty runes don't give experience anymore, it doesn't matter if you or your Spirit Bear is the one to do so.
Offensive maneuvers towards the enemy Bounty runes are
not recommended as
Lone Druid, since you don't have
Entangling Claws yet and your two units will make chasing difficult. Furthermore, if you or your bear die at this point you could well lose the lane.
Lone Druid players can lane anywhere on the map with sufficient experience, but I would strongly recommend the
mid-lane. Why? It gives you only one opponent to deal with, meaning it will be that much easier to assert dominance. Your Spirit Bear essentially forces the enemy midlaner into a 2v1.
UPDATE: The safelane is still possible, but not as easy as it used to be, since
 Orb of Venom
,
 Blades of Attack
, and
 Stout Shield
 can no longer be purchased at the side shop.
The key to being a good carry is to
last-hit properly and always find safe farm.
Lone Druid is an excellent last-hitter because he has two units to use. Time your attacks so they connect at the same time. Freeze the lane by denying creeps when it pushes out and have your bear tank the wave to keep it out of tower range.
UPDATE: Denying now gives only 25% of experience to the enemy, instead of 70%. Make denying your second priority after last-hits, provided they are still within experience range.
If the wave pushes too far anyways,
go take some jungle camps while you wait for it to come back. In this situation, it may be wise to purchase
Observer Wards of your own so you can keep an eye on areas just outside where you farm; nobody likes being interrupted.
The jungle is a sort of
safe haven for farm if the lanes are far away or heavily manned; the Secret Shop, several camps of various sizes, a Bounty rune spot, and a
Shrine to act as a regeneration area and teleport vector. You can use Shrines to heal your druid and Spirit Bear, but they have a
5-minute cooldown, so be sure to share. Don't underestimate the power of the Shrine active; Sanctuary can easily heal over 1000 health on a level 4 Spirit Bear.
Jungle camps now respawn every odd minute (1:00, 3:00, 5:00 and so on), so stack them when you can't take them. This is especially true for Ancient camps, which will be worth a lot of money when you can kill them and can be reached quickly with a Shrine teleport.
Here is a map that marks all of the camps, Shrines, and Rune spots on the standard Dota 2 map as of the New Journey update:
Spoiler: Click to view
If your lane is empty, try to
take the tower. As always, watch for the
Fortification Glyph, since wasting
Battle Cry on it is unfortunate.
Ganks may also be incoming, especially if you have already taken towers and the enemy team realizes just how screwed they are if they leave you alone, so you might want to keep your druid back a bit so he has a head start if someone comes after you.
Before level 6,
Lone Druid is painfully squishy. Play carefully and try to keep your distance from the enemy. Get your boots and farming item as soon as you can; at this stage, offense is the best defense. After your bear gets
Entangling Claws, you can get kills, and after you get
True Form and
Demolish on the bear you can push effectively.
This period of the match is also crucial for your item build: If you buy the Sacred Relic before the 20-minute mark, complete the
 Radiance
. If you don't have it yet, switch to
 Maelstrom
 instead. If you're free-farming, buy
 Hand of Midas
 and proceed to either of the previous options. Buy your cheap items as the necessity demands, and always have
Town Portal Scrolls on your druid.
Mid-Game
You really start to shine in the mid-game, as it's when you have either won or lost the lane and start to move into the other lanes. You are a
pushing machine; if nobody is farming a lane and you aren't needed elsewhere, try to take the tower. If they teleport in, back the druid off and keep hitting with the bear until you need to retreat.
At this period, players of both teams may gather in lanes to teamfight and take objectives. On one hand,
pushing objectives is very important, and a whole team behind a druid and his bear are very hard to stop before the enemy carries come online. Then again, it's possible you will either be unable to turn the tides of battle by helping or simply be too far away to help. In this case, you should probably just keep pushing the lane to take a tower while everyone's distracted.
The decision is tough to make, but make sure you're in
the right place at the right time.
Lone Druid should ideally be farming the most profitable creep camp near where a fight is about to break out if he knows he can help win it. Always have a
Town Portal Scroll ready to be where your team needs you. It takes time and practice to figure out when a fight will happen and when you should be helping, and even I make mistakes at times.
Practice is the key word here.
This generally makes one of two things happen: Either the enemy team will keep fighting your allies as you take the tower largely without trouble, or they will
teleport to the threatened tower to defend it. Both of these are wins for you: The enemy's teamfight is weakened because one person or more had to go stop you, meaning the rest who are still fighting are easier for your allies to deal with. If they don't respond
at all, you get a free tower and farm.
Even if you're there, sometimes the best thing you can do is
prioritize the objective and hit the tower while the fight erupts around you. That way, you can either get back once it falls or stand your ground if the fight is going your way. Taking towers is
the most critical thing that will win the game. Heroes respawn, towers and barracks do not. Plus, you get money for destroying them, and who
doesn't love money?
You will also need to decide on your next big item. You should have a farming item and maybe some cheap trinkets between you and your Spirit Bear.
Assault Cuirass is pretty much core every game and should be next up, but after that it's open to the need.
Monkey King Bar for countering evasion,
Necronomicon for invisible units,
Desolator for high-armor heroes,
 Skull Basher
 for teamfighting, etc.
Late-Game
You're not as strong by now, but depending on how well the early and mid-game shaped up, there's still a lot you can do. Keep on
pushing out the lanes and
taking towers when you can, and be present for
teamfights your team can win.
Now, let's talk about
Roshan. Should you have succeeded in taing towers early on, your team should have a good amount of map control, meaning the enemy team will not be able to contest as easily (make sure at least one or two of them are dead, just to be safe). You're not the best person to hold the
 Aegis of the Immortal
, but your Spirit Bear can keep fighting as you resurrect and you come back in
True Form if you'd been in it before you died, so you're by no means the worst carrier. You should also
take the time as soon as Roshan dies,
especially if you're the one carrying the Aegis. The Aegis disappears 5 minutes after Roshan's death, and he respawns 8-11 minutes after being killed. Work within these parameters to win fights with a numbers advantage, and know to back off if your Aegis is about to expire.
Cutting off the enemy's
Shrines is crucial by now. If the enemy can teleport and heal by their jungle camps, they will continue to farm, have a fountain away from home, and as such could potentially outcarry you. To kill them, all the T2 towers (every tower outside the high-ground of their base) must have been destroyed.
Do be wary that the enemy team will try to get rid of your own
Shrines as well if your towers are gone, so make sure to
keep them safe if this happens. Being cut off from your own jungle puts you at a
big disadvantage, since you need to be able to take camps and access the Secret Shop without worry of being murdered to keep up the pressure.
No matter the game, at some point you will probably want to buy an
Aghanim's Scepter. It's just that amazing; you can keep farming your jungle (or the enemy's) as the bear fights with your team or pushes lanes. At this point, however,
ganks become far more commonplace, so make sure you can
Return your bear to save it or yourself.
In general, the game will probably be decided by this point, but there are matches that are just too even to know the end beforehand.
Don't give up! Keep trying your best, defend with the team whenever you can, and take advantage of big teamfights. You should also avoid teleporting anywhere if you can, since you may need the item off cooldown to defend your base.
Math Corner
I originally wasn’t going to do one of these, but I decided having a bit of above-and-beyond thinking would benefit players reading my guide. Before you ask, yes, I also met Safecyn, and he was the one who suggested it, so I'm not stealing his idea or anything. Today, we’re going to discuss effective hitpoints and pseudo-random distribution. Onwards to learning!
The Law of Diminishing Returns and Armor
Before we begin, do remember that all forms of armor in Dota 2 follow the
law of diminishing returns: more armor will block less damage, so there isn’t a linear increase, as after about 20 points in either direction further efforts become less effective.
Effective hitpoints (or
EHP) is the amount of health a unit has with relevance to a specific damage type. As an example, a level 1 Spirit Bear has 1400 maximum health and 3 armor. If we wanted to kill it with physical damage alone, we would need to evaluate how much physical damage it needs to take to bypass the protection its armor provides. Every point of armor gives roughly 6% protection from physical damage. 3 points will give a unit 18% protection, meaning in addition to its total max health (100%) the Spirit Bear can take 118% of its health pool in damage discounting regeneration.
1.18 * 1400 = 1652 EHP
As such, we can conclude a level 1 Spirit Bear can actually take around 250 more damage from physical attacks with its base armor than its health bar would suggest.
We can apply this to
magic resistance as well, which works in the same way. A level 4 Spirit Bear has 2700 max HP and 0% inherent magic resistance, but it gets 33% magic resistance from
Demolish. If we add in a
Hood of Defiance, which gives another 30% magic resistance, the bear now has 53.1% resistance to magical damage when we account for diminishing returns. This means it can take 153.1% of its own health pool in magic damage. We’re discounting regeneration for this again because my brain would hurt if we didn't.
1.531 * 2700 = 4133.7 EHP
... Okay, that surprised me, I didn’t expect it to be
that high.
But anyways, the point I’m trying to make is that both overall health and armor factor into
EHP. You’ll want to build mostly armor and magic resistance to surpass this, the Spirit Bear already has a
huge health pool. Even magic resistance isn’t as much of a problem because spells have cooldowns,
so more armor is usually the answer.
That said, armor follows the
law of diminishing returns, meaning the more we have the less effective it is overall. This is also why we focus on offensive items for the bear: Damage doesn't follow the law of diminishing returns. We can build damage items all day long, but armor and magic resistance only get us so far.
This is also why the
+12 Armor for the Spirit Bear perk in the Talent Tree is so useful: We get nearly as much efficiency as a
 Chainmail
 without spending a penny. That increased tankiness without further spending goes a long way, and while it is affected by the
law of diminishing returns, it's not as bad since we aren't wasting any effort in getting that armor.
Unfortunately, the Spirit Bear doesn’t have it easy. Since Valve had to be sneaky when they made sure this thing couldn’t steal everyone’s left shoe, they gave it
Basic damage and armor type. What does that mean? Well, every unit in the game has a secret
armor and damage classification which affects how much of its damage will be dealt to a target before resistances. The hero damage type will do full damage to a unit with
Basic armor, while a unit with
Basic attack damage like our bear can only deal 75% of its damage to a hero.
If we assume our level 4 Spirit Bear has 65 damage only and it attacks a level 1
 Ogre Magi
, who has 8 armor, around 35% of that damage would be nullified by the armor. Therefore, we multiply the damage dealt by the remaining percentage, which is 65%:
65 * 0.65 = 42.25 damage
Unfortunately, we haven’t taken the armor type into account yet. Since Basic units only deal 75% damage to a hero, the math changes to the following:
(65 * 0.75) * 0.65 = 31.6875 damage
What I’m explaining is the reason why
Lone Druid has a tough time scaling into the late-game: a lot of the damage it deals ends up being wasted on heroes. Over half of that damage was prevented by the 8 armor of the
Ogre Magi from a Spirit Bear already as powerful as it was going to get without items, and late-game most carries will usually have twice as much armor. So in the end,
Lone Druid isn’t the best at fighting heroes for this reason. By the ultra-late game, you will
have to fight heroes to get to their structures, so do you really want to let it wait long enough that they can manfight your bear because it doesn’t deal enough damage to scare them anymore?
On the other hand, we do have
Demolish to think about. As it turns out, it only works the way it does because of damage types as well, so let’s run numbers for that too.
A Tier 1 tower has 20 Structure-type armor. Heroes only deal 50% of their damage to units with Structure-type armor, further reduced by their high armor, which protects from 55% of damage. If the same level 1
Ogre Magi tries to club the tower for 64 damage, the actual damage will be massively reduced.
(64 * 0.5) * 0.45 = 14.4 damage
As such, killing a tower early on is a pretty tall order, especially given its high attack damage which makes not dying a bit difficult to say the
least. Now, let’s figure out what the Spirit Bear can do. A level 4 bear has 65 damage, Basic attack type which only deals 70% damage to structures. Since it’s level 4, it has
Demolish, granting an extra 40% bonus damage to structures, meaning it actually deals 110% of its damage against the same tower.
(65 * 1.1) * 0.45 = 32.175 damage
Perhaps not a significant difference in the example, but it didn’t get reduced nearly as much as the hero damage.
Demolish also accounts for
]ALL damage, not just base damage. This is why we build so much attack damage on the Spirit Bear.
Lone Druid was literally made to be a
pushing hero, so use him to take towers early! That’s not to say he can’t do other things (he can and does), but you need to take advantage of his strengths if you plan to win. And everyone likes to win, right?
Pseudo-random distribution and Bernoulli Trials
Next up is the
pseudo-random distribution system. Essentially, this is the calculation type Valve uses for chance elements in Dota 2. Rather than actual chance, which can be a bit unfair in a video game, it balances the probability of likelihood based on previous successes and failures.
If you just got a proc from an ability or item that used pseudo-random distribution, it’s probably not to happen again right away. Conversely, if it hasn’t happened it will be more likely to occur. This is defined by a
Bernoulli trial, an event which either results in failure or success (either the effect happens or it doesn't). With each trial, the likelihood of the specific effect goes up or down by this system.
The exact formula employed for these calculations is
P(N) = C * N.
P(N) means that
P, or probability, is a function of
N, meaning we are plugging N into the equation.
N is the number of trials, while
C is the constant percentage of the occurrence for the event. According to this formula, the chance for our pseudo-random event to happen multiplies itself whenever it doesn’t happen, resetting when it does. I think an example is in order.
Let’s say we want to figure out how likely it is that a Spirit Bear gets an root after 3 hits. This means we’ve run 3 trials, so
N = 3. Since
Entangling Claws has a 20% average proc rate, 0.05570 is the decimal base chance of its occurrence (with 1.0 or higher being a proc), or about 5.57%. The maximum number of times a bear can hit without proccing Entangling Claws is 18, as after that it surpasses 1 and will always happen.
Therefore,
P(3) = 0.05570 * 3 = 16.71% proc rate
The logical way we can take advantage of pseudo-random distribution is by hitting some other unit a few times before we go after a hero, but there’s no tell about when the proc will happen, so this is unreliable at best. There’s also the trouble of
Entangling Claws working on a cooldown, during which pseudo-random distribution does not apply because the chance will
remain at 0% until it’s ready again.
The only other way to influence it is through more
Bernoulli trials. The more trials we perform, the more often the event will occur. In this case, we should lots of attack speed to make more attacks that may proc a root.
While having a mixture of attack speed and damage is important in general, I feel that the low damage of Entangling Claws along with the aforementioned damage and armor type issues mean that prioritizing hero kills over tower destruction isn’t the best way to go about it.
Lone Druid also already has an attack speed steroid inherently through Rabid, so you’ll have some to work with even if it’s best to build more.
Focus on pushing if all things are equal.
Thanks for visiting the Math Corner, I hope you learned something. Back to your regularly scheduled guide...
Bonus Chapter: Battle Druid (Ranged Build)
NOTE: As with everything in this guide, this section is subject to change, but especially this one since it's new and I might have to fix it up and add more information about gameplay specific to it.
Well, I guess it's time.
Time for what, may you ask? Well, time for me to realize the error in thinking that all my readers would agree with me. Because apparently, a lot of people prefer what I'll tentatively call the Battle Druid build. Some other people invented this, not me, so I'm not claiming any credit on their behalf.
When 7.00 first came out, everyone was buzzing about the new possibilities the Talent Tree system would offer. One particular build that the competitive players picked up was the Battle Druid. Essentially, you forgo nearly everything on the Spirit Bear in favor of making the Lone Druid more threatening instead.
Before we continue, I'd like to say that I believe in innovation. Sure, the guide I've made is largely similar to the way people have been playing the hero for a while now, but that's because it works. Innovation is great for Dota 2, as it keeps the experience from becoming stale and helps make things interesting.
At the same time, I'll be the first person to say that just because a build is old, doesn't make it any less useful. Anything can work, given the situation. This new fancy ranged build isn't going to outclass the traditional way to play Lone Druid anytime soon, and I won't stop using it.
Now, to best highlight how the Battle Druid differs from the traditional Bear Focus build, we will need to go over another list of pros and cons for each. Besides, it saves me typing space and makes the guide look more interesting.
Battle Druid
Attack range is much higher, allowing for some safety
Not as vulnerable when Spirit Bear dies
Can easily kite enemies with high speed
Deals high damage to heroes and creeps
Can't use Savage Roar effectively on druid
Squishy due to no True Form
Spirit Bear becomes largely useless and easy to kill
Weaker at pushing due to Demolish neglect
|
|
Bear Focus
Difficult to kill due to bonus HP and armor
Slightly higher DPS inherently
Constant access to Battle Cry
Demolish boosts structure damage greatly
Only about as fast as most heroes
Reliant on Spirit Bear being alive
Melee range means being nearer to danger
|
Now, did you notice something interesting about my list? That's right; neither of these builds deviates from what
Lone Druid inherently is. He's still a single-target physical carry, he's still strong at pushing, and he's still useless without farm and good micromanagement.
Lone Druid is still Lone Druid. So why are we acting like he's some new thing just because of a new build coming out? It's not like you couldn't do this before, it's just way easier with the new talents.
With that out of the way, let's finally get to talking about what the
Battle Druid is all about!
Items
Quite a few items that don't have much sense in the
Bear Focus build are far better for
Battle Druids. Just remember to get those cheap efficient items I talked about before, those are still great on the Spirit Bear no matter what.
Strange early buy, but hear me out. If you want a mixture of stats prioritizing damage on an
Agility hero, these guys are the best you'll have. Getting several can compensate for a lack of farm if you miss your Radiance deadline. It also builds into
 Ring of Aquila
, but we really want this for our
 Hurricane Pike
 later.
These actually become the go-to druid boots. Since Tranquil Boots are not as useful since you won't be taking damage, more attack speed will be better since it lets you hit things more.
Battle Druids want consistent buildup, so Radiance is out of the question. Since it helps speed farm and the Chain Lightning is useful in a teamfight, we build this as the principal core item. Since we want to fight, Hand of Midas isn't necessary as it slows down item progress too much. As with Radiance on the
Bear Focus build, you should start fighting and pushing with your team as soon as you get it.

→
Pretty much always a good purchase. Easy to afford with very good stats (the Strength is useful for a
Battle Druid who won't be getting
True Form health and armor) and added attack range to keep you safe. After you get the Level 10 attack range talent, it will stack with Dragon Lance and allow you to attack a very long way from your target. Once you get it upgraded, it also combines a useful active that lets you theoretically expand your range even further, gain some team utility, and being mobile around the map.
Battle Druids are good at kiting their enemies. Skadi makes this even easier to do by constantly slowing down your opponents with every attack. It also gives you a generous amount of Attributes, health and mana, which make you harder to take down in the event that someone closes the distance.
UPDATE:
Eye of Skadi no longer builds from
Orb of Venom.
In the item section relevant to this item, I went over why it might be useful but admitted I was giving it too much credit. A percent-based increase of 65 damage (95 with the talent) isn't going to give you very much since Vladmir's Aura
only uses base damage. On the
Battle Druid build, Vladmir's Offering becomes substantially better since the druid himself is dishing out much more consistent DPS than his Spirit Bear, in addition to the fact that his base damage gets higher over time (stat growth).
I only talked about Vladmir's Offering in this section, but it goes for anything with a percent-based damage increase that doesn't factor in
bonus damage from items, such as Magnus'
 Empower
, Sven's
 God's Strength
,
 Packleader Aura
, and so on. There are still much better items for increasing the damage of the druid alone, so unless you have other carries on the team who are outscaling you, you should probably let someone else buy it.
→

Congratulations, your name is
Clinkz. The basic idea behind this build is to infiltrate the enemy territory, sneak up on someone you can burst down,
Return your Spirit Bear and try for an Entangling Claws proc, and then attack your target to
break the invisibility and start hitting them so you can kill them quickly.
Unfortunately, if you want to get your Spirit Bear in the fight (which is only a maybe since it won't be getting attention with this build and will die very quickly) you need to be right next to them unless you want to blow your cover. It shouldn't always work, but if you're in a game where your enemies treat invisibility like godmode, it should be fun to cause a bit of mayhem with. And if you're really into that, the Silver Edge carries Break which helps
counter people with strong passives.
- If the enemy team is paying attention to the Spirit Bear's disarm icon, they can use it to identify whether or not you are near your bear... Or they'll just catch on and know to dust when your bear wanders into their jungle seemingly by itself.
UPDATE: Silver Edge no longer reduces the attack damage of a target when attacking out of invisibility, so be very careful who you plan to kill.
A simple
purge that also gives you illusions. I haven't tested whether or not they benefit from your attack range passive (the damage shouldn't work since Illusions only get Attributes), but Lone Druid is still a ranged Agility carry with good stat growth. It also makes you a little faster (not that you need to be, but why pass it up?), but it doesn't synergize perfectly with an abundance of bonus damage, which is what Lone Druid should be building between attack speed.
If you want a high amount of damage but don't need or want a Monkey King Bar / Divine Rapier, this is your best option. Aside from that, it also grants a
critical hit chance that will make your damage even higher. Do remember that unlike other items, it has no defensive benefit or utility, so think carefully before you buy it.
An offensive item with less double-edged offensiveness than usual. Evasion, damage, Agility, and attack speed. All of these are very useful on a
Battle Druids who doesn't care about raw health for the sake of maximizing DPS. It has very expensive components, so leave it for the later parts of the game and watch out for a
Monkey King Bar purchase on the enemy team.
UPDATE: The active Flutter no longer removes the passive evasion granted by  Butterfly.
This is a snowballing item. You buy it when you're very far ahead and don't feel the need for anything aside from Maelstrom and Dragon Lance. As with Monkey King Bar, it's
only an offensive item, so be willing to disregard it if things aren't looking good. Also has some slight use when ganking at night or when defending from ganks at night, since your higher vision range means you can get more attacks in from range.
Matchups: Allies
Being isolated from the world for so long has made it tough for Lone Druid to find allies in the War of the Ancients. Similarly, his playstyle in a Dota 2 match is quite independent, in that he doesn't often need help to farm and push lanes. That said, there are still quite a few people he likes having around.
Having more armor is just great, especially if both you and your bear can have it. Since you both have high health and probably have all the magic resistance you'll ever get with dual Cloaks, more armor is the best way to stay alive later in the game. Of course, two of these heroes have a way to reduce armor instead, which is also handy because all of your damage is physical and single-target. Dazzle can do both at once with
 Weave
Weave, so he's a great example.
These heroes all have a way to buff your physical attack, through raw damage or attack speed (or both if you're named Invoker). Wraith King is basically walking lifesteal, which adds on to Vladmir's Offering if either of you have one. The prize for aura
variety goes to Enchantress, Chen, and Doom for their ability to use creep abilities to help in pushes. Special considerations are the Frost Ogre, Alpha Wolf, and Ancient creeps. If you want team items, Drum of Endurance and Guardian Greaves are both great to have on an ally.
These heroes (though they are by no means the only) have strong single-target stuns with good duration and a magic nuke to follow up. These combined with
Entangling Claws should help you net a kill. They are regrettably fragile on their own, which is why you can help by keeping them safe.
SPECIAL MENTION
I haven't tried it yet, but on paper this combination sounds like it would work quite well.
 Warcry
's armor and movement speed are very helpful in pushes and teamfights, especially since they apply to the bear as well.
 Storm Hammer
 is an awesome stun in general, which will allow you and Sven to catch up to your target and potentially root them.
 Great Cleave
 makes Sven as potent a pushing hero as you, meaning he can help put up double the pressure in addition to scaling late-game far better than you generally will. Finally, if Sven buys an Aghanim's Scepter,
God's Strength will
transfer to all allies in a 900 AOE, which will make your druid hit much harder.
Matchups: Enemies
Lone Druid might be capable of functioning independently from his teammates, but there are still a number of heroes who just make him cry... Know your enemy, right? Let's find out what you can do about it. And if you just got beat by a Lone Druid, here's a list of names and ideas he won't like seeing again.
Generally bad news for just about anybody who goes mid. Viper's
 Poison Attack
 prevents you from winning the lane.
 Nethertoxin
 makes him hurt even more when you're damaged, with particular regards to your Spirit Bear.
 Corrosive Skin
 means you probably shouldn't make a Radiance against him since it will constantly damage and slow your bear.
Viperstrike can also be difficult to deal with since it gimps your carrying powers while it lasts and does high damage. He's not as tanky as you, so close the distance and out-DPS him when you have high health. Consider dual
Cloaks against Viper. A
 Heaven's Halberd
 might also be a good pickup, since everything he has to directly damage you is based on his auto-attack except for Viperstrike. Silences are also worth mentioning, since
Poison Attack is a spell despite being an attack modifier.
UPDATE: Viper is strong in mid, but that's all he's good at. He has no stuns and is bad at ganking, meaning he can't snowball as well as other mids. The only way he will perform well enough to gank is if he gets kills in lane. I've found over time that it is possible to kick a Viper out of lane with DPS. You will have to
play with high-ground, since he will have the advantage trading from his side of the river.
Another mid destroyer. Burning Spears make him as bad as Viper in lane.
 Berserker's Blood
 makes low-health skirmishes very threatening to you, while
 Life Break
 takes a lot of health since it's percent-based. Huskar has low armor, but high health, so trying to take the offensive is not a good idea if you're alone. Build a
Heaven's Halberd, armor reduction, make use of
Savage Roar to save allies, and pray he never buys an Aghanim's Scepter.
Science rules, but the third lane-wrecker of this section has me seeing red. Equipped with potent spell damage (which also includes the
Pure kind) in
 Laser
Laser and Heat-Seeking Missiles, he will make your laning phase quite painful to endure. Worse still, Laser applies a 100% blind, making efforts at harass potentially impossible.
You will need a Magic Stick in your starting items and an Infused Raindrop as soon as possible.
Beyond that, he's also a potent pushing hero with March of the Machine,
 Rearm
Rearm and Boots of Travel giving him constant global farming ability. That said, it can only hurt units, so you have the advantage in directly hitting towers while he does not.
- Don't stand on the robots. If there are no robots, you won't get hurt for being there.
- Monkey King Bar can mini-bash Tinker out of his teleport and will make Laser's blind not an issue for you. Skull Basher does the former as well with much more effectiveness.
- Aghanim's Scepter is an item to be feared. Tinker gets double the missiles (which still only target you) and Laser will target multiple units, potentially allowing him to blind you and your bear. Buy your own to push without having to worry about him killing you.
- Contribute to pushes early and often. Tinker gets an advantage the further out creep waves are. Make sure none of them are close enough for March of the Machine to close the distance and you severely limit his global presence.
Behold, the anti-carry.  Static Link
 reduces you or your bear's damage to nothing very fast unless you break it.
 Eye of the Storm
 allows Razor to manfight you more effectively by reducing your armor, and
 Unstable Current
 makes rooting him a bit of a double-edged sword since it purges Rabid and makes him much faster (and thus difficult to catch in the first place). Break Static Link with
Return and don't fight when Eye of the Storm is up. Since he can't really hurt more than one person at once without
 Plasma Field
, it's easier to handle him with friends.
Screw nightmares, Bane will give you migraines.
 Enfeeble
 is absolutely crippling for your Spirit Bear and might as well make
Demolish useless.
 Brain Sap
 spam in lane will inflict
Pure damage on your bear and keep him in good health, even if you harrass him.
 Fiend's Grip
 makes either of your units helpless for its duration and deals heavy damage.
 Nightmare
 will mess with your micro quite a bit by inflicting what is essentially a transferable stun. Try to keep your bear free from
Nightmare and engage when he doesn't have spells left to use. He's mostly a teamfight problem, but if he tries to stop your pushes, get your team to take advantage of his absence.
 Sacrifice
 will slowly take away experience and gold from your lane, which will inevitably put you behind.
 Frost Blast
 spam is annoying and will drain your bear's health early on. Ice Armor will make killing people with your bear difficult, and
 Chain Frost
 takes advantage of your two units to do lots of damage. Try to switch lanes if you can and split your bear and druid apart when
Chain Frost is cast.
More bouncing spell madness!
 Paralyzing Cask
 is a really good stun, but if he catches you away from a creep wave it will have perfect efficiency.
 Maledict
 is a very strong damaging spell that will hurt you the more damage you take; since it's a DOT it will also put
Return on cooldown. Thankfully, his
 Death Ward
 channel won't hurt the Spirit Bear and can be broken with
Savage Roar or
Entangling Claws. Separate your units when Paralyzing Cask is out and you should be fine; he has low armor and is helpless without his spells.
Windranger's spells will make your life hell:
 Shackleshot
, a multi-target stun that can also use trees and prioritizes your druid.
 Windrun
, a spell that gives her 100% evasion and doubles as an escape.
 Powershot
, a high-range magic nuke. And
 Focus Fire
, a channelled ultimate that lets her push towers as fast as you by accelerating her attack speed. Consider Windranger a very dangerous and slippery opponent.
- It's usually best to try and shut down Windranger early, before she has levels and items. It will be tough for you since she can keep pushing the wave back and save herself with Windrun, but if you bring a friend with a stun you can employ Savage Roar to prevent spellcasting and kill her before she can use it.
- You should buy
 Magic Stick and Cloak if she is spamming Powershot, and try to separate your units if you think she might cast Shackleshot.
- Fortify your towers when she channels Focus Fire. She hates it as much as you do. Savage Roar can also drive her away from the tower if she's targeting it, with more effectiveness should she be under Windrun, since it increases her movement speed.
- Windranger can still close the distance while she attacks you with Focus Fire,
so try to keep running.
- Buy a Monkey King Bar to negate most of her evasion. The Pure damage will also rip through her low health pool
Another potent anti-carry.
 Thunder Clap
 gives Brewmaster a good laning presence and gets him farm while damaging your Spirit Bear and
slowing movement and attack speed. Drunken Haze is even worse since it applies
more movement speed slow and a
miss, to say nothing of
 Drunken Brawler
's passive critical and evasion. Under his ultimate
 Primal Split
, he's
not going down if you're the only one in the fight.
- The Storm Brewling can cyclone for an eternity and purge your buffs. The Earth Brewling is exceedingly tough to kill with an annoying ranged stun to spam. It's not worth the effort to kill them during the ultimate most of the time, especially if he's hit level 15 and picked the +1500 Brewling Health talent for his Brewlings. Instead, follow the Earth Brewling when he uses Primal Split to start targeting him when he comes back.
- Buy a Monkey King Bar. Drunken Haze, Drunken Brawler's evasion, and any other evasion/miss items he's build will become mostly useless, making him a lot easier to take down. Even a casual
 Javelin will help a little.
- A Radiance will also deter Blink initiation and escape if he's unwilling to purchase a Black King Bar.
- You may wish to consider the talent that gives spell immunity for Battle Cry, since Brewmaster is heavily reliant on his spells to perform in a teamfight. This is especially the case if he built Aghanim's Scepter, which gives his Brewlings access to his basic spells on cooldowns independent from his own.
With the new Dueling Fates update,
 Mortal Strike
 no longer deals tons of bonus damage against creeps. Now, it
instantly kills them. This includes our beloved Spirit Bear, meaning he can flush all our hard work down the toilet with a single basic attack. DO NOT FIGHT WRAITH KING WITH YOUR SPIRIT BEAR.
- I really don't have any tips for this one, except... Why isn't the Spirit Bear considered a hero for this interaction? God knows everything else in the game does.
- If you really feel like it, messing with his right-click using a Heaven's Halberd will help your team kill him.
- At the very least, opt for a Battle Druid playstyle so you can kite Wraith King, but try to keep your Spirit Bear away from him in a teamfight.
- Wraith King is one of those heroes that makes Roshan easy to kill. Keep the river warded for anyone who might be going inside his tarn.
Quite a few supports give you trouble, but the white knight of the All-Knowing One is especially good at it.
 Purification
 allows Omniknight to heal his allies easily throughout the game and deters your bear from harrassing due to its AOE
Pure damage.
 Repel
Repel will dispel
Entangling Claws, potentially saving anyone you otherwise had locked down.
 Degen Aura
 might not be a great passive, but it makes catching him or his teammates difficult. And finally,
 Guardian Angel
 can swing any fight in favor of his team with proper use. Worse still, with an Aghanim's Scepter he can completely stop you from pushing the base.
- Your best chance is to pressure him early so he can't build too many items. You might also want to buy Necronomicon to remove Guardian Angel in a fight with the Necronomicon Archer's active.
- Entangling Claws pierces spell immunity, so it can root someone who already has Repel active on them.
 Diffusal Blade can no longer purge his spell actives, but all types of cyclones and strong dispels can do so. It also burns Mana, which is useful since it will prevent him from repeatedly casting his spells throughout a fight due to his low Intelligence gain.
Templar Assassin

A very strong mid hero, and with a kit uniquely suited for her position there. While it is possible to outplay her, I'd be wary of underestimating a good
Templar Assassin, which is why she isn't in the Bear Chow section. Let's get to learning, shall we?
 Refraction is a big part of what makes Templar Assassin strong in lane. Unfortunately, with two units to hit her in the face, you will shred its charges quickly. Entangling Claws will also make short work of them. Orb of Venom won't do the trick anyore, but Radiance can render it trivial. Do be wary of the talent which increases the number of charges by 4.
 Meld is a free
  Shadow Amulet which grants up to 8 armor reduction on its first strike. It also has a talent to reduce 4 more armor. Thankfully, you can break Meld with Savage Roar and hurt her inside it with Dust of Appearance. Just don't use your druid for casting it, or she will unload her burst onto your face, and that armor reduction will hurt quite a bit.
 Psi Blades is especially useful against Lone Druid because she always has a target in front of the druid; your Spirit Bear. Sure, it's very tanky even in the early game, but the druid has far less health and she should really be trying to pressure your bear anyways to force you to send it home or resummon. It also gives her bonus attack range, making her harder to harass from high-ground. Adapt your micro to work around this. (It also has a talent which stuns the targets behind the first, so watch out for that.)
 Psionic Trap requires a good deal of map knowledge and planning to use effectively, but can be a powerful tool in chases and ganks. Considering Lone Druid's main defense from enemies is to run away, its 30% slow is very tough to deal with. If Templar Assassin isn't just spawning and activating her trap on you during a chase and it's had time to sit around, it slows for 60% instead. She can also set up a large number of them throughout the map. They never expire, and will also provide some vision. Expect her to use these to secure rune control, so ward your high spots. (She uh, also can get +100 damage or +3 max traps with talents... Man, Templar Assassin is getting all the cool tricks nowadays.)
- Most Templar Assassins buy a Blink Dagger to have better mobility and to turn Meld into a semi-escape. Buy that Radiance to shut this down.
- They also tend to get Desolator, which is bad news for you and your Spirit Bear since it stacks with Meld. Consider taking the armor talent along with Assault Cuirass, but also keep your distance ( Dragon Lance is also an item which exists, which stacks with the increased range from Psi Blades).
These things all have some way of dealing damage based on your maximum health pool. Lifestealer has  Feast, Necrophos has
  Heartstopper Aura and
  Reaper's Scythe (seriously, screw that spell), and Death Prophet has
  Spirit Siphon. You should avoid them all and build magic resistance for the latter two.
- You cannot manfight
 Lifestealer, so don't try. Just stay away from him as much as you can, and make sure your Spirit Bear has a Town Portal Scroll and that Lifestealer didn't build Skull Basher. He is also a terrifying late-game carry, so don't let him farm and try to take away his jungle access.
 Necrophos will become more dangerous the longer the fight goes on, so try to focus him first if you can.
  Glimmer Cape and other magic resistance sources can also neuter his Reaper's Scythe. That said, your higher health pool means he will always be doing lots of damage with it, so treat him with a great deal of caution.
 Death Prophet is slightly more manageable than the others. While she is one of those annoying mid-lane spell spammers you will need Infused Raindrop and Magic Stick for, if you can silence her, she's basically helpless.
  Orchid Malevolence is a good item, but try to wait out her use of
  Eul's Scepter of Divinity first.
 Spirit Vessel gives me the creeps. Not only does it give the hero carrying it a bunch of health, movement speed, and stats all around, but the active drains 3% of your current health per second when it hits you. This spells disaster for your Spirit Bear and his titanic healthpool, in addition to disabling Return like
  Urn of Shadows does.
These are all good ways to reduce the armor of the druid or his Spirit Bear, which also offsets the bonus armor you get from True Form. Weave and Amplify Damage last for a very long time, so watch out for ganks while under their effects.
- Solar Crest will also negate 40% of your evasion when cast on you, so it might not be a good idea to buy anything that uses it if you see one in the game.
These heroes are in this list as examples of serious out-scalers. Given enough time, they will become stronger than you no matter how far ahead you are. Early on, they might not have the power to fight you off, but make it your life's mission to secure the game before they can become relevant.
UPDATE: Apparently I felt like this needed a bit more information, so here I am. Hard carries like these people are not very good early game. Well,  Tiny is decent with proper support, but that's not my point. None of these people can deal with an enemy who wants to end early.
This is really what your split-pushing and farming is about. You want to secure as much of an advantage as you can in the early game before these guys get stronger, so that by the time they have whatever items they need to become relevant, they've lost everything worth defending. In a perfect world, you do outscale them because you have twelve item slots, but that is never going to happen since an enemy team with any amount of brainpower will never let you farm that much.
TLDR; End games early, kids.
Tanky enough to take the heat from you and can usually battle back in some manner, with reliable stuns and some manfighting capability. Unless you're sure you can kill them without any risk to yourself, it's best to avoid these guys. Consider purchasing a Desolator in matches against them.
- Dragon Knight is tricky. He's an AOE carry with his
 Elder Dragon Form's splashing breath, which becomes terrifying later after it gains a movement and attack speed slow.
  Dragon Tail is an instant stun and has decent range when he's transformed, and
  Breathe Fire is just an annoying spammable attack damage reduction. Thankfully, he's vulnerable to crowd control, meaning he can be kited. You can also root him through the Black King Bar he will almost certainly build.
- Tidehunter's
 Kraken Shell gives him insane damage block, allowing him to shrug off your harrass early game.
  Gush will make you weaker and slower, meaning it's harder to chase him down after.
  Anchor Smash's attack damage reduction is even more insane than
  Dragon Knight's, and his ultimate
  Ravage brings the house down for his team to wreck you. He'll need a Blink Dagger, though, and you just so happen to build Radiance. This might be a game where you want to be in the fights, unless someone else on your team can stop his initiations.
- Sven is scary. He's not as kiteable as other carries, since he has a reliable stun in Storm Gauntlet and a movement speed buff with Warcry. Your best bet is to use Savage Roar to disengage when his Black King Bar is down, and hope you can nail him down from a distance, since close-range combat will almost certainly mean the end of you.
Return is like a Blink Dagger in that it can be disabled by any damage which has a hero for a source (including summons, items, and spells). These heroes and items are especially difficult to handle because their effects will deal DOT that can keep it down, potentially long enough to get your Spirit Bear killed.
Several of these also have secondary effects attached to their DOT in the form of movement speed slow, attack speed slow, or stuns among others. Just be careful of your health and don't be afraid to back off if the damage ticks start to add up.
Lone Druid might have a strong pushing factor, but if the enemy has a hero who is just as capable of pressuring towers as you, they may be able to offset your advantage, especially if you're not present in the teamfights you have to help with. More than anything else, you will need to be ready to defend a lane at any time with a Town Portal Scroll or Boots of Travel.
 Lycan is a lot like you. Transformation ultimate, summon spell, damage and attack speed buffs, pretty cool. He's slightly different in that his wolves have invisibility (and obviously can't build items), and his ultimate is where he gets his movement speed from, along with a critical strike. In a fight, he will target your druid instead of your bear, so be prepared to build tanky.
- Lycan's also one of those people who loves to take Roshan, so ward up the tarn and keep a lookout. You can see him walking in even under
 Smoke of Deceit, but not on the minimap. He also tends to build Medallion of Courage.
 Keeper of the Light is a support hero, and a frail one at that. But don't be fooled, his spells are incredibly strong.
  Illuminate is his bread and butter, channeling to deal high magical damage in a line at long range.
  Mana Leak is his stun for chases (which also drains mana, obviously), while
  Chakra Magic allows him to constantly have mana and reduces his cooldowns to continue spamming. After he uses his
  Spirit Form, he gains access to
  Recall, which gives one of his teammates a free teleport, and
  Blinding Light, a large AOE which forces and blinds enemies hit. Build Monkey King Bar and murder him every chance you get provided he is alone.
 Nature's Prophet is a very common level 1 jungler, and is a versatile pick. He is a lot like Tinker in that he will show up to a lane, push it somewhat, then teleport away before anyone can punish him. Buy a
  Quelling Blade and chop down his trees to Savage Roar him out of his teleport, forcing him to either stand his ground or flee. Given the nature of things, you will probably come out on top if you proc Entangling Claws. Just watch out for Desolator and be ready to run if his team shows up.
Anti-Right Click Measures


As always, you can only deal single-target physical damage. These abilities and items will prevent you from killing their holders, either by hurting you when you try or making it very slow and tedious when you try. Unless you can find a way to work around these, you should probably avoid trying to kill these people.
 Return makes harrassing Centaur Warrunner impossible, so don't bother trying to kill him. His
  Stampede is also a global haste rune you should always be aware of if the enemy team is missing from the map.
- Enchantress may be a fellow of nature, but she will only cause you pain when you fight her. As with Centaur Warrunner ,
 Untouchable makes killing her nearly impossible with basic attacks.
  Impetus is a very real danger to you, since it doesn't care how much armor you have and will deal more damage the further away from her you are. With the right talents,
  Nature's Attendants can become an incredibly potent heal, allowing her team to sustain sieges. There isn't much you can do to kill her but hope your spell-oriented allies can handle it better.
These abilities make hitting their holders counter-productive by triggering alternative effects. This is worsened all the more on Lone Druid since you like to stack attack speed.  Legion Commander,
  Bristleback, and
  Axe are also quite tanky and build items to emphasize this, so killing them is difficult. Avoid doing so if you can.
- Legion Commander can use her
 Duel to devastating effect, not only allowing her to kill you easily and ignoring your Spirit Bear, but its bonus damage upon victory will make her scale harder than you by far. You can use Savage Roar to keep her away (but it won't disable Duel once it's started), and Radiance will disable her Blink Dagger. Never let her reach the late-game, and keep an eye out for alternative initiation methods such as Shadow Blade. You should also avoid playing the Battle Druid style, since your crazy attack speed and increased range won't save you once she's in your face. Also hope she never buys an Aghanim's Scepter, which ensures your Spirit Bear can never intervene to save you again. (Get one yourself, so you can still help if she catches you out.)
- Bristleback is just the worst.
 Viscous Nasal Goo slows you and reduces your movement speed,
  Quill Spray's damage adds up quickly and is applied to every unit around him (both of these stack with themselves).
  Bristleback makes chasing him irritating at best and dangerous at worst, and
  Warpath makes him faster and more dangerous as he casts spells (which he will be doing very frequently, if you hadn't gotten the memo).
- Axe is annoying. While he never becomes a carry, he will be a constant annoyance whenever you meet him. High armor and ridiculous HP regen ensure that killing him is very difficult.
 Counter Helix punishes you for doing so, especially since it deals the dreaded True damage type which will shred thrhough your otherwise tanky bear.
  Berserker's Call and Blink Dagger enable him to jump on your face and potentially hack you to bits, so keep your distance and build a Radiance. (While an afterthought,
  Battle Hunger is annoying in that it slows you or your Spirit Bear while speeding him up, potentially allowing him to escape an otherwise deadly situation.)
Matchups: Bear Chow (Easy opponents)
These are heroes you will want to see on the enemy team. Lots of heroes fit into this category early in the game, since most are not strong enough to fight off two heroes with nearly 2000 combined HP and 80 damage at level 1. Of course, many in this list will eventually become strong enough that Lone Druid cannot bully them anymore, so your priority is to secure a strong lead for your team before this happens.
High Mobility Heroes (among others)


As of the New Journey update, the root status effect was buffed to disable many more mobility spells than only true blinks.
Entangling Claws is a root, so it now prevents escape for many of these heroes. It's especially useful for the likes of invisible heroes, since Entangling Claws also reveals invisible units while it lasts, and most of them are squishy to start.
Oh hey,
another single-target physical damage carry like us! Seriously though, she's a very common pick and is sometimes seen in the mid lane. You
WILL need to know how to deal with her. She has high armor, but low health and needs farm to be relevant. Kill her when you can and build a Monkey King Bar in good time to keep her down.
- A mid-lane Phantom Assassin will probably be spamming her
 Stifling Dagger to get farm. Make sure you buy a Magic Stick if you think she will be your opponent. She'll probably also be throwing some of those daggers at you, so it might not be a bad idea to stay where she can't see you in lane, especially before level 6. If you can harass her before she has
  Blur, do so with great prejudice to slow her down.
 Phantom Strike acts like a unit-target blink that buffs attack speed. Use Savage Roar to disrupt this when she tries to go on somebody (including you). You may also want to watch out for her ultimate,
  Coup de Grace, which will crit for high amounts of damage and can also be applied to her dagger. Evasion (especially in the form of Heaven's Halberd) can be effective if she isn't building a Monkey King Bar herself.
- The real problem Phantom Assassin poses is in her Blur passive, which makes her very hard to hit and lets her split-push unnoticed from the minimap. For this, you will need to build a Monkey King Bar as soon as you're finished Assault Cuirass. The invisible-on-minimap component of Blur requires good map awareness, since you need to check every creep wave pushing to your towers for her presence. As with other hard carries, end the game before she can become relevant.

A textbook mid since the dawn of time. Where so many people go wrong with this guy is when they leave him in his lane, and then 30 minutes later he has an Aghanim's Scepter and starts slaughtering your entire team with his massive spell potential.
Lone Druid aims to win the lane, and that's precisely what Invoker can't fight if the other guy is being pushy. His Strength and armor are
very low early on, and without quick access to every spell in his repertoire he won't be able to fight back effectively.
- Buy Orb of Venom in lane with your boots and use your bear to harrass him whenever he goes to last-hit. Deny as much as possible when not taking last-hits yourself to slow down his leveling speed. If you manage to kill or drive him out, he'll play a lot safer around you.
- Destroy his tower so he can't farm there. If you snowball before he can come online, he'll have a tough time recovering, but when he has all his spells, the crowd control he will then possess is too great for you to nail him down by yourself.
- Should he kick you out of mid, watch for Sun Strike if you walk back to base.
- Tornado will purge Rabid and Battle Cry.
- Forge Spirits don't treat the Spirit Bear like a hero, so they won't reduce its armor with Melting Strike.
- If the game goes late, the level 25 talent that grants Battle Cry spell immunity ensures he will not be able to touch you while it's active. He won't even be able to purge your buffs anymore.

While not even as good of a mid anymore, people still play the Butcher there a lot. Against
Lone Druid, he will regret everything. Pudge is slow, has low armor, and very little manfighting capability outside of his spells, which you can disrupt. He also relies on positioning to get kills, whereas you can use his spells to get kills on him.
- Pudge's combo will kill most heroes early-game. Before you get True Form, Lone Druid is no exception. Stay on top of your micro by always keeping the bear between you and Pudge. If he does
 Meat Hook the bear, he probably won't try to kill it since it's too tanky and can hurt him a lot more. Once you have a level 3 Spirit Bear, proccing Entangling Claws lets you dish out some serious hurt.
- In the event Pudge does land Meat Hook on you, it's wise to quickly Return your bear and use Savage Roar to cancel
 Dismember. You may also want to build dual Cloaks against a Pudge, but as the game goes on he will fall off even harder than you unless he snowballed. If you're that worried, take an Observer Ward with you to place on his side of the river.
 Rot will take away Pudge's health when active. It does do a lot of magical damage, but your bear will have nearly double the health Pudge does early on, so it doesn't care. Harass him when he uses it to get last-hits; if he doesn't bother to turn it off you get free damage on him and maybe even a kill. It adds up very quickly and Pudge starts with pitiful armor.

Most of Silencer's kit isn't really that important for Lone Druid, but
 Glaives of Wisdom
 is a pretty strong Pure damage orb effect that scales with his Intelligence. This makes laning against him bothersome (again, especially before level 6). Silencer does has even lower armor than you to begin with, so
harass him in lane to make sure he can't start ganking and making your team stupid with his passive Intelligence theft.
- Avoid casting Rabid when you're hit by
 Arcane Curse. Should he be spamming it, buy a Magic Stick. Conversely, when affected by
  Last Word, cast a spell as soon as you can (unless it's Summon Spirit Bear) to mitigate the damage over time.
  Global Silence really doesn't matter to you since you don't have any big spells it'll prevent you from using. At worst, it'll delay your recast of Rabid.
- Whatever you do, don't let him kill you too much, not even in 1 for 1 trades. Silencer will always get the Intelligence as long as an enemy hero dies before he does. If you're losing too much Intelligence, consider buying items to rectify that, and Aghanim's Scepter to push lanes without worrying about him ganking you.
Another midlaner who is weak early game and requires lots of farm to become relevant. He will have
 Shadowraze
 to farm with, gets more damage through
 Necromastery
, usually buys armor reduction, and
 Requiem of Souls
 will unleash unspeakable horrors on your team. Needless to say, we must stop him early.
- Shadow Fiend relies on Necromastery for most of his damage in the early parts of the game. If you use your two units to get as many last-hits and denies as possible, his damage won't be nearly as consequential. Killing him actually eliminates half of his Necromastery stacks, so try for Entangling Claws if you can; he doesn't have very much health to start with. After he gets his Shadowraze, expect him to use it to secure farm and harass you, so don't stand still so that he can hit you and buy a Magic Stick.
 Presence of the Dark Lord reduces armor, which can make it harder to keep your bear alive near Shadow Fiend. He also tends to build Desolator, the combination of which will make your bear very sad. Several other big items on him such as Black King Bar, Shadow Blade, and Aghanim's Scepter will result in some potent teamfighting on his part. Do try and win before this happens, his flash-farming will allow him to recover later even if he dies.
- Do remember that Requiem of Souls casts again when Shadow Fiend dies, so if your health is low, it might not be worth killing him if it'll somehow finish you off.
Wrapping Things Up
Take a seat, children: It's storytime.
I first fell in love with Lone Druid long ago, back before the hero became relevant. This was when Synergy existed and  Juggernaut ran rampant in every game, so you can imagine my difficulties. While the hero himself was tough to play, I started to practice where I could, though I was nowhere close to what I had to accomplish to truly become a good player.
At the time, Lone Druid needed to hit at least level 10 or so to be truly relevant since, since he needed Synergy and Summon Spirit Bear maxed and a point in both his ultimate and Rabid. Otherwise the bear would have too little health, not enough damage, or not enough speed. This wasn’t even when Lone Druid became relevant as a mid, since this was before all the truly disgusting mid-laners were nerfed, so the only way to go was safe-lane, or offlane if you knew how. Summon Spirit Bear’s cooldown was also ridiculously high, making it easy to be bearless at any stage of the game.
I languished at these difficulties, though I still longed for a time when I could pick him freely. Recently, Lone Druid has been subject to a few groundbreaking balance changes: Summon Spirit Bear’s cooldown is a constant 120 seconds at all levels, Synergy’s stats have been incorporated into the spells it used to affect, and Synergy itself has been replaced with Savage Roar.
This has an enormous impact, since Synergy was just holding the hero back and the cooldown on Summon Spirit Bear was quite costly after it got a bounty. Along with some new items added to the game, these changes have made the hero a whole lot more interesting to play and much more viable than before. There's no way I could properly express how thrilled I am at the fact that Lone Druid is viable again.
I decided I’d start looking into some guides to see if some people smarter than me made guides to compensate for the improved viability, until I set my mind on writing something of my own. A few of the popular guides were outdated, so I felt there was something I could contribute in improving the hero in general as far as player understanding went. In particular, I feel like Aghanim’s Scepter isn’t being given the credit it deserves.
I called this guide “The Seed of Victory” because of two reasons: First, it comes from a Lone Druid quote, and it seems to be a weird tradition here on DOTAFire to name your guide after a voice line. Secondly, it carries meaning for how I believe the hero should be played. Lone Druid’s job is to push down enemy towers before anything else, to gain an advantage for the team and not just yourself. Your ultimate goal is to lock the enemy in their base so your team can out-farm them.
This is sowing the seed of a won match; either you take down everything the enemy has protecting their farming carries, or you make sure your own early game is strong enough to start taking objectives before they can fight back. Your job is not to get kills or farm constantly, but to help your team get an advantage that by pressuring the enemy.
I'd like to thank all of the wonderful people in the DOTAFire Discord for their advice and support in this endeavor. Particular thanks go out to Cuttleboss, Safecyn, and Sofa for their exemplary guides. AdmiralBulldog is also deserving of my thanks, since he made the guide that initially helped me understand the hero and sparked my interest in him.
Well, at least for now, this is all I have. Thanks so much for reading, I hope you learned something about Lone Druid from my guide, or at least that you had something interesting to think about when read it. As I said before, I will be expanding this guide in the near future: I plan to refine the content I already have, including a section with examples of well-played games with the hero.
Cory signing off!
To-Do List
- Add more items to the build & rejects ( Eye of Skadi,
 Moon Shard,
  Crimson Guard)
- Test new ideas (
 Lotus Orb,
  Drum of Endurance,
  Solar Crest,
  Aeon Disk)
- Add more heroes in matchups (Luna, Juggernaut, Templar Assassin*, Queen of Pain, Bristleback, Effect-stacking heroes in general?)
- Find a smaller Medic Bear picture
- Expand guide to include offlane and safelane positions, as well as a warning to jungling
- Talk about Battle Cry + Demolish in Math Corner
- Rune breakdown (Because why not? Lone Druid is a mid hero.)
- Add to the Spirit Bear's Savage Roar beeakdown about the Entangling Claws interaction
- Expand Math Corner to include more relevant calculations
- Add a section about jungling, when to do it, and why it's sometimes a terrible idea
- Add Techies and Winter Wyvern to the list of counters, update Viper's matchup in counters
- Add new section: "Bear Micro and You"
- Figure out how to make in-game build (can't edit old builds for some reason?)
Changelog
December 17, 2016 - Version 1.0 - First version of guide, published early to get advice
January 4, 2017 - Version 1.1 - Revisions to account for Helm of the Dominator, aura items for Aghanim's Scepter, Talent Tree update, admissions to previous overrating of Vladmir's Offering and similar percent-based damage buffs on Spirit Bear
February 3, 2017 - Version 1.12 - Second revision of guide, added in Battle Druid section and corresponding build to match, right-click answers in Counters
July 26, 2017 - Version 1.3 - Fixed pictures, touched up talents after changes, crossed stuff off the to-do list, returned from the dead
July 31, 2017 - Various touch-ups for visual effect, some revision of content
October 31, 2017 - Version 1.4 - Dueling Fates update. Added relevant information, updated percent-based damage in Counters section. Follow-up update is planned imminently
November 1, 2017 - Version 1.5 - Overhaul and added information to counters section, changed item formatting, updated talents
December 4, 2017 - Version 1.55 - Added Legion Commander, Bristleback, Axe, Templar Assassin to Counters


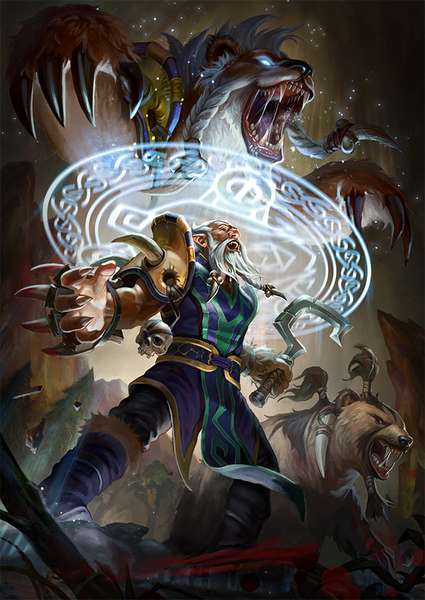



Quick Comment (4) View Comments
You need to log in before commenting.