Introduction
 Sven is one of my favorite heroes. I've tested these builds and variations in over 300 games; I've read many other guides, and this guide sums up a lot of tactical information. I've made it as complete as possible and also tried to make it shorter.
However, I know some of you might consider this guide too long.
If that is your case, I invite you to TAKE A SHORT TOUR!
Follow these tips to read this VERY LONG guide in 5 minutes or less!
Highlighted text contains the most important information.
Green text for positive factors, Pros and advantages of Sven and his items to take advantage of.
Red text for negative factors, Cons and problems with Sven or his items, and stuff to avoid.
This advanced guide is for intermediate/experienced players. If you're completely new to the game there are a LOT of good guides for you, such as:
The more you read and learn, the better you'll get at the game.
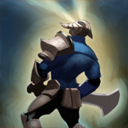
Sven
Sven is a melee strength hero with great
carry potential. He is very
item-dependent, and excels in team fights by dealing
tremendous amounts of physical damage to multiple enemies at once.
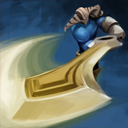 Great Cleave
 and
 God's Strength
 scale very well through the game, and make him a
carry, and a
pusher.
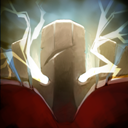
 Storm Hammer
 is a ranged area stun that makes him a
disabler and
initiator; but it's also a good
ganker skill.
 Warcry
 is an armor+speed team buff that makes him a
support; it can be used to
escape, and makes everyone more
durable.
Sven has a very versatile skill set, but only a few skills can truly focus on one particular purpose, and reveal his main role.
He is
not a powerful
support, his only buff
Warcry only lasts 7 seconds.
He is
not very
durable, because
Warcry has a long cooldown.
He is
not a good
escape hero either, because the movement speed boost is not very high.
He is
not a powerful
disabler, his
Storm Hammer only lasts 2 seconds.
He is
not a good
initiator, because his stun will mostly catch 2 enemies in it's short 255 radius (3 enemies is very rare).
Sven is a
very powerful CARRY, which is his main role (with some
pusher and
ganker potential).
Factors, Goals, Pros and Cons
There are a few important factors to make a good build. Every factor is subjective, and depends on each player's experience and play-style. By nature, a carry hero will own the late game - the early game is the hardest part. If you get fed, or free farm, even the early game is easy and the build is irrelevant. However, a good carry build focuses on the early game, prepares for the worst case scenario, and allows you to bounce back later even when the odds are against you.
Balance between active and passive items
|
Active Item OVERLOAD
When a build has too many active items, on a hero with many active skills. Those builds are complicated to use, the player keeps 'looking inside'; figuring out hotkeys and getting them wrong when he has a split-second to react. Instead, the player must 'look outside', and focus on map control, positioning, kill/push opportunities, risk of ganks, etc. |
|
Active item UNDERLOAD
When a build has too few active items, on a hero with many passive skills. Those builds are very easy to use, but not resourceful enough to deal with a wide variety of in-game situations.
|
Sven already has 3 active skills;
God's Strength is easy to use, but
Storm Hammer must be aimed, and
Warcry has a difficult timing. So, I recommend
2-3 active items.
Scaling is MUCH better than stacking
For item-intensive carries such as
Sven, it is important to get items that combine with each other and scale well into the late game. Getting different items with a variety of effects (
damage x critical x armor reduction) is better than stacking the same effect multiple times (
damage + damage + damage).
EHP and DPS
In general, you want to combine different effects between skills and items.
Stacking the same effect has diminishing returns.
|
DPS
The math behind DPS is that: the higher your damage is, the more attack speed bonuses are worth. The reverse is also true: the higher your attack speed is, the more damage bonuses are worth. For the best DPS, combine: damage boost x attack speed x critical damage x armor reduction. Critical damage may have a low chance to trigger, but gives unpredictable damage bursts which can insta-kill your enemies when they least expect it, with no chance to get back or recover. Armor reduction has the added benefit of also improving the damage of your allies. |
|
EHP
The math behind EHP is that: the higher your HP is, the more armor bonuses are worth. The reverse is also true: the higher your armor is, the more HP bonuses are worth. For the best EHP, combine: HP boost x armor x evasion (+ damage block?). Damage block is constant, so it is good for the early-mid game but does not scale into the late game. However, it takes effect before armor and damage amplification, so it is good when you have effects that amplify the damage you take ( Mask of Madness or Mask of Madness or  Slardar's Sprint). Evasion also denies all damage amplification, prevents secondary effects from enemy unique attack modifiers ( Slardar's Sprint). Evasion also denies all damage amplification, prevents secondary effects from enemy unique attack modifiers ( Eye of Skadi), and reduces the chance of the enemy triggering effects (critical damage, Eye of Skadi), and reduces the chance of the enemy triggering effects (critical damage,  Skull Basher or Skull Basher or  Phantom Lancer's Phantom Lancer's  Juxtapose). Juxtapose).
|
Goals
To improve DPS and EHP, and
maximize the odds of reaching the late-game with good farm, the goal is to:
- minimize the chances of getting killed early by reducing vulnerabilities (Cons).
- maximize the chances of getting early kills by taking advantage potentials (Pros).
The ideal is to reach these objectives fast, and
in the most cost-effective way.
|
Pros
+ Very strong and versatile late-game
A well farmed Sven can rampage through team fights, solo Roshan, push creep waves, destroy towers and barracks. Even if the early game goes wrong, you have a high chance of making a comeback if you reach the late-game.
+ High strength-based physical damage
Last hitting is easy with minimal strength improvements. Strength has a double-positive effect on Sven: more survivability, and more ultimate damage. Items like  Heart of Tarrasque make him tankier and improve his base damage, which is multiplied by God's Strength AND also affects Great Cleave. Heart of Tarrasque make him tankier and improve his base damage, which is multiplied by God's Strength AND also affects Great Cleave.
+ Best cleave in the game
In the late game, Great Cleave makes Sven a serious threat against multiple enemies in a small area, and a good friend of  Magnus and Magnus and  Enigma. He is a great pick against illusion heroes ( Phantom Lancer) and strong pushers ( Enigma. He is a great pick against illusion heroes ( Phantom Lancer) and strong pushers ( Nature's Prophet). Nature's Prophet).
+ A little bit of everything makes him a ganker
Even though Sven is a carry, his versatile skill set makes him useful during mid-game ganks; a great way to get early kills and start snowballing. However, to gank as Sven, first you need to deal with his severe Cons. |
Cons
- Mana dependent in early-game
Storm Hammer has a high mana-cost and cannot be used to harass. The low intelligence gain does not give enough regen to spam spells.
- Weak early-game against harass
Sven has no form of harass and a melee range; he is not very durable and has no good escape. Getting killed early can lose you the game, but staying back and playing it safe makes it difficult to farm and last-hit when facing strong harass.
- Melee range and low mobility
Getting lots of damage is useless if the enemy runs away or kites you. Sven has trouble chasing his enemies and keeping them in melee range. The 2 second stun and movement speed buff help, but they are not enough.
- Low attack speed
As a carry you are expected to reach very high levels of DPS. To do so, you must complement the high damage from God's Strength with a high attack speed. However, Sven has no attack speed skill, and a poor agility gain.
- Not very durable
Sven has a mediocre strength gain in comparison to other strength heroes. He relies on items to get life-steal and deal continuous damage to survive. You must pay close attention to his position, HP, and enemy focus.
- Weak against physical bashers
Even in the late-game, Sven has trouble dealing with fast-attack bashers, such as  Troll Warlord, Slardar or Troll Warlord, Slardar or  Spirit Breaker, or melee heroes with Skull Basher. Spirit Breaker, or melee heroes with Skull Basher.
|
Skills
Storm Hammer
A good area-damage and stun that makes a difference in ganks and team fights. The mana cost is high, so
do not harass;
wait for a kill opportunity. Max this skill early to improve damage without increasing mana cost. It deals significant magic damage in earlier levels. When lanning 2vs2,
stunning 2 heroes in 1 Storm Hammer gives your team a good chance to kill them both.
Early-game kills
If your current HP is high, you can get some early kills at level 2+.
1- Choose the easiest primary target - a non-durable, non-escape hero.
2- Communicate to show your intentions to your lane partner
3- Wait for the enemy creep wave to be almost dead, just before your creep wave advances.
4- Wait for an enemy hero to get close to the creep wave (to deny or last hit)
5- Cast Storm Hammer from up close, and try to hit both heroes and all the enemy creeps at the same time.
(Kills their creeps, grants you gold, stuns the enemies for 2 secs, your creeps start hitting them) |
6- Attack the hero for 2 seconds.
7- After the 2 secs stun, cast Warcry to move faster, and chase the enemy to his tower.
8- The armor from Warcry helps tank some creep and tower damage.
9- GET BACK and do not overextend! Sven is not very durable!
(Even if the enemy survives back to base, you have secured lane control and farm advantage)
|
Ganking, counter-ganking and team fighting
Ganking with
Storm Hammer is not easy, because of the slow projectile which
can be dodged by blink or invisibility. Heroes like
 Weaver
,
 Bounty Hunter
 or
 Clinkz
 are hard to hit. To pull a gank on these heroes, you have two choices:
A) Flank them, and
get close before stunning. A short range means short projectile travel time; give them no time to react. Stun them before they go invisible; you have 2 seconds to kill them.
B) Hit them with your ultimate to
scare them into going invisible prematurely. Use
 Dust of Appearance
 when they go invisible, stun them, and kill them.
Use
Storm Hammer to stun enemies that are chasing you, and run! Only do this if the enemy is close to you (600 range or less). In the late-game,
Storm Hammer's 2 secs can be long enough to get close and kill one or two heroes with low armor/HP. Avoid durable heroes or evasion heroes; try to hit the weaker heroes. With some luck, you stun 2 enemies in the 255 radius, and
Great Cleave's 300 range kills both in 2 or 3 swings.
Great Cleave
A
late-game team killer that works as 2 long range
 Battle Fury
s. Combined with
God's Strength's high base damage, it makes
Sven deal extreme damage to multiple targets in each hit. Helps
jungling,
flash farming, and
pushing lanes. Getting
Great Cleave early is a bad idea; it pushes the lane and makes farming more difficult; it does not help in mid-game ganking against single targets.
Cleave damage is not affected by armor, so armor reducing items (
 Desolator
,
 Assault Cuirass
) are not very effective: they only affect the damage of your primary target. Also,
cleave damage ignores evasion, so if an enemy has evasion, choose another target nearby, and make him take indirect cleave damage on every hit.
+ Stats
Get some early
+ Stats instead of
Great Cleave, because strength improves
last hitting,
survivability, and
single-target ultimate damage for ganks.
Warcry
A one-point-wonder, low-cost, life-saving skill that helps
run away, or
chase the enemy. More points will boost the team's armor, which helps
survive the heat of a team fight.
Always get Warcry at level 2 to prepare for the worse: an early life-or-death situation. After the first point, more armor gradually improves
Sven's EHP as his HP increases. Use it to
save an ally - if you see someone running from the enemy; move within 900 range, cast
Warcry, and move back. The armor and speed boost can give him a chance. If you are outnumbered,
DO NOT move closer to stun, or you might end up dead.
Cast
Warcry when
attacking an enemy tower to armor your creeps, so they can tank the tower damage.
In team fights, the armor boost is very important, but it only lasts for 7 seconds with a 14 second cool-down, so you only get 1 chance to cast the skill.
Cast it when the fight starts, and you are around your team (900 range). Do not cast it too soon, or the buff will end prematurely, and the armor was wasted.
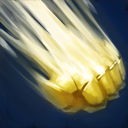
God's Strength
Greatly enhances physical damage, by multiplying
strength-based damage ONLY.
+Damage from items is NOT multiplied. I do not recommend +damage items (like
 Divine Rapier
 or
 Monkey King Bar
), which are generally a waste of gold and damage+survival potential.
The
first level of God's Strength let's you get
easy gank kills, if you use
Storm Hammer and
Warcry at the right time. Try to flank them, and
cast the ultimate outside the view of the enemy; otherwise, you will lose the element of surprise. They will see and hear you transform, and run away to safety. If you've wasted your ultimate, at least get some farm or try to push a lane/tower. Try to gank during night time; your enemy will have reduced vision (likewise, when farming, pay special attention to enemy ganks during the night).
You can push an undefended lane and
destroy the enemy tower solo, by using
God's Strength for damage, and
Warcry to make your creeps tank the tower damage. However,
do NOT spend the full 25 sec attacking the tower alone; the enemy might teleport in or try to gank you from a flank. After a few seconds get back to safety. Even in 10 seconds you can manage to bring down 50% of the tower HP alone, it is already worth using your ultimate.
Choosing the right build
Just like picking the right hero, choosing the right build is always situational. It depends on both teams compositions, and on your team's plan and playstyle. The 3 builds of this guide should give you enough options for a wide variety of situations.
Build 1 - Dominator is a slow hard-carry build that requires a lot of farm, but shines in the late-game by making Sven very durable, and deal huge amounts damage. It costs 14k gold to reach the core, and 30k gold to complete. Use Build 1 if:
- You're the hardest late-game carry in your team, and you have farm priority #1
- There's no other STR melee durable hero or no good initiator, and your team expects you to tank some damage
- Your team wants to follow a slow farming and defensive strategy
- You farm well with
 Hand of Midas +
  Helm of the Dominator, or consider that Mask of Madness is suicide
Build 2 - Madness is a
mid-game carry build that still requires a bit of farm, but makes
Sven a DPS monster much earlier in the game. It costs
10k gold to reach the core, and
20k gold to complete. Use Build 2 if:
- There is another hard-carry in your team, and you have farm priority #2-3
- There is another STR melee durable hero and a good initiator, and your team expects you to get huge DPS
- Your team wants to follow an early push and ganking strategy
- You're skilled enough with timings and positioning to cope with the risk/opportunity factor of Mask of Madness
Build 3 - Vladmir is a support build that requires less farm, and gives
Sven a
team-utility role by providing useful auras and buffs, but still be able to do some damage. It costs
6k gold to reach the core, and
15k gold to complete. Use Build 3 if:
- You're in a team with 3 or more carries, and you have farm priority #4-5 (or epic 5-carry pub)
- There's no other support, and your team expects you to support and get the courier/wards
- You are patient enough to sacrifice your own game for the good of the team
In my opinion,
Build 2 - Madness is the best build for
Sven. Given the right team and situation, it has the potential to turn the game in your favor before the enemy expects it. However, it requires some skill, because it is the most risky build (
Mask of Madness), and the most active-item intensive.
(All items presented by in-game buying order)
Build 1 - Dominator
This build solves Sven's biggest Cons: low mobility, low attack speed, and relying on life-steal, with mid-game items that build into very powerful late-game items. It focuses on early farm-boosting items, instead of building on gank potential. Also, to save gold for the farm-boosting items, this build only gives minimal start game items to improve lane sustainability. Therefore it is weaker in the early-mid game, and relies on your team knowing that you have farm priority #1, and supporting you.
Starting Items
You start with little gold but lots of inventory space (the opposite of late-game), so fill it with cheap items to get some starting leverage.
Sven has a weak early-game, so it is important to focus on last hitting, resisting harrass, and getting mana sustainability, because of the high MP cost of his spells.
 Magic Stick
Well-known instant-regen that can save your life, or give enough MP for a 2nd
Storm Hammer to get a kill. Useful versus 2-3 heroes on side-lanes because the wand accumulates many charges (not so good for free-farmers, junglers, or mid versus 1 hero). It helps solve the early
Con:
mana-dependency.
 Gauntlets of Strength
 - with a high starting armor (about 5), +3 STR increases starting EHP and helps last hit. Can be sold later.
 Iron Branch
 - cheapest stats upgrade that builds into
 Magic Wand
.
 Tango
Tango - 4-charges of
the most cost-effective healing. Slow but not interruptible - ideal for a melee under harass. Buy more if you need, or get a
 Healing Salve
 later; less cost-effective but heals much faster.
Alternatives
 Quelling Blade
 - great for last-hitting easier. However, it is
not recommended - it only works against creeps and does not increase HP, whereas strength also helps survive and deal damage to heroes to get early kills. Intermediate players should have no problem last hitting with
Sven + some starting STR. It could increase jungling performance, but
Sven is not a good jungler before mid-game DPS + lifesteal, at which point a
Quelling Blade is irrelevant.
Early Game
 Boots of Speed
 - crucial movement speed to run away. Get these quickly, otherwise your chances of surviving a life-or-death situation are very low.
Hand of Midas
Typical
farm-boosting item that also helps with the
Con:
low attack speed. Over time, the extra exp and reliable gold (not lost on death) compensate for the high price. It pays for itself after ~15mins, but gives exp advantage from the first use. The gold income is constant, so for the best exp income,
use it on melee lane creeps or the biggest neutral from large
neutral camps. (
An excel table of creeps and their Midas rewards)
The sooner you get
Hand of Midas, the better. Buy the recipe first and ship it with the courier, and then complete Midas at the side-shop, where you can immediately use it on a lane creep without waiting for the courier (which happens if you buy the recipe 2nd).
Try to get it before 15mins; if you get it at 10mins, by 25mins you should have the same gold and +2 levels advantage over most of your enemies. By 40mins you should be close to the late-game items and to level 20+. If you get killed or your farm is going slow, and you are not able to get them by 15mins, skip
Hand of Midas or switch to the cheaper
Build 2 - Madness instead. Can be sold in the late-game.
Magic Wand - cheap upgrade on
Magic Stick that uses the starting
Iron Branch for some more stats, to save inventory space and to store even more charges. Can be sold later.
 Belt of Strength
 - cheap strength increase to boost DPS and EHP early. Builds into
 Sange
Sange.
Core Items
 Phase Boots
A
burst of 16% movement speed, to run away or chase your enemies. It is not much, and only lasts 4 sec with an 8 sec cooldown, but it is the cheapest way to help with the
Con: low mobility until you have more gold.
Phase is canceled by any item or ability, so for the best movement speed
cast Warcry first, and use
Phase second.
Sange
The
16 strength boosts your EHP and DPS.
Lesser Maim reduces both movement and attack speed, so it helps
chasing and out-carrying your enemy. Builds into
 Sange and Yasha
.
Helm of the Dominator
Replace
Gauntlets of Strength to get another
farm-boosting item that allows to
stack ancients. The life-steal is only useful after some DPS, and stacking ancients is only useful after a few levels of
Great Cleave.
Helm of the Dominator solves the
Con:
relying on life-steal, increases EHP with the extra armor, and builds into
 Satanic
.
Some
neutral creeps are very useful in fights too, make them follow you into battle:
-
Centaur Conqueror's aura gives everyone +15 attack speed - the best DPS boost when
God's Strength is active. His
War Stomp is
another 2-second AOE stun, just like
Storm Hammer. If timed correctly, it can chain-stun multiple enemies.
-
Alpha Wolf's aura gives everyone
+30% damage - the best DPS boots when
God's Strength is on cooldown.
-
Wildwing Ripper's aura gives everyone +3 armor - a small EHP boost. Its long distance channeled
Tornado is a powerful nuke that can travel anywhere, push creep waves, and slow your enemies.
-
Ogre Frostmage is like a pocket
 Lich
Lich support, due to his low cooldown
Ice Armor, which can give
+8 armor - a
large EHP boost for you, your team, or even the creeps to help pushing lanes.
Sange and Yasha
Improves on
Sange to give a
permanent 16% movement speed (32% burst with
Phase Boots). They also give 2 armor, and an extra
31 attack speed (61 total with
Hand of Midas). They provide all the DPS and mobility that
Sven needs, while also increasing EHP.
 Black King Bar
Replace
Magic Wand to get magic immunity. After becoming a powerful carry threat, you will be target #1 on the enemy list. They will focus on bursting you down with nukes, stuns and disables.
Black King Bar is a key item on many carries because it
prevents most nukes, stuns and disables while you activate all skills and items to tear the enemies apart. Buy an early
 Ogre Club
 for +10 Strength if you have space.
Use it on
big team-fights only, because the duration gets shorter after each use. In the very-late-game, you may drop and destroy your old
Black King Bar (cannot be sold), and buy a fresh new one. With a short 4-10 sec duration and a long cool-down; using it at the right time of a fight is difficult to master (just like
Warcry). Too soon, and the enemy runs back to safety. Too late, and you're already stunned, focused and killed.
Use Black King Bar when you've become such a THREAT, that the enemy is just ABOUT TO FOCUS YOU. Cast
Warcry at the same time, to tank against right-click damage.
Do not get overconfident -
Black King Bar does NOT make you invincible. Experienced enemies will wait until magic immunity is over and focus you immediately afterwards. Also, some heroes have
nasty disables that go through magic immunity. These disables can stun you with your
4000 gold Black King Bar, which can turn out to be a bad investment. You should
SKIP Black King Bar if the enemy has
no stuns/disables, or has ultimate
nasty disables, such as:
You should NOT get Black King Bar against these heroes.
Alternatively, you can wait until the enemy nasty disable is used, and activate
Black King Bar afterwards, or replace it with another item that achieves a similar goal (see alternatives).
The following ultimates go through magic immunity, but are
purged by Black King Bar:
Activate Black King Bar after these skills.
 Naga Siren
's
 Song of the Siren
 does not go through magic immunity, but stops the rest of your team while you get
 Ensnare
d and right-clicked to death. Wait until the song is over, and activate
Black King Bar when the fight starts.
The following abilities go through magic immunity, but are not very effective against
Sven because they either force you to attack (or cleave), or require melee range:
Alternatives
 Linken's Sphere
 - Replace
Black King Bar if the enemy has strong
single-target nasty disables (
 Bane
Bane,
 Batrider
). It passively blocks any skill that targets you. It boosts all your stats to improve DPS and EHP, and gives some regen.
Heart of Tarrasque - Replace
Black King Bar if the enemy has
almost no nukes/disables or
AOE nasty disables (
Magnus,
Enigma). Get a
 Reaver
 first for a great early 25 STR. The full item gives 1000+ HP, and
increases base damage by +40, which becomes +120 with
God's Strength, and turns into +288 with critical damage (also improves
Great Cleave damage). The passive regen makes you
invincible versus towers, which increases your pushing power. However, it is a
poor pick against  Lifestealer
's
 Feast
Feast, because higher HP makes him more effective (armor or evasion is preferable).
End Game
 Crystalys
Fill your 6th slot after getting considerable attack speed. Even a small critical chance will take your
damage to absurd levels. Critical damage
scales with God's Strength, and
amplifies Great Cleave damage. It makes you a devastating threat to the enemy; if you get lucky with
Storm Hammer, you can kill 2+ enemies in 2-3 hit.
Satanic
A life-steal and STR improvement on
Helm of the Dominator that makes
Sven an even bigger tank, and also
increases base damage.
You lose the Dominate ability, but if you've farmed the
Satanic you shouldn't need to stack ancients anymore. The 200% life-steal ability has a short 3.5 sec duration, so
use it at the heat of the team fight, when God's Strength is active, if you've taken some damage but are also dealing good damage.
 Boots of Travel
 - Replace
Phase Boots once you have all 6 slots filled, and have no more inventory space for
 Town Portal Scroll
. In the late game, the inventory space, mobility, and free teleport are well worth the price. You can buyback and quickly rejoin your team in the battle front, or go farm somewhere and teleport back mid to defend. Also, the
high base movement speed helps running and
chasing enemies even easier, because percent boosts from
Warcry and
Sange and Yasha are even more effective.
 Daedalus
A powerful upgrade on
Crystalys for a higher critical chance with higher damage. The bonus damage is noticeable, but it is not multiplied by
God's Strength. Dota 2 engine uses
Pseudo-random distribution, which makes
the critical chance increase each time it does not trigger. Use this to your advantage by
charging the Daedalus before a team-fight: attack some creeps/neutrals until you get
3 normal consecutive hits. After that, you have more than 80% chance of getting a crit in the next 3 hits: reserve them to enemy heroes (also works with
Skull Basher).
Personal note:
I feel that this is an unfair exploit that those who learn about the game mechanics can abuse. I believe that having a uniform random distribution implemented (always 25%) in the game would be much more fair for everyone - even if the results would be more volatile. However, I do not make the rules nor any game development decisions; if you feel this is unfair too, don't do it in-game.
Assault Cuirass
Replace
Hand of Midas to improve the team's physical DPS and EHP. Although it is expensive, every team should have an
Assault Cuirass by late-game; it gives a huge advantage in team-fights. Ideally, the #2-3 heroes should get it, so you can benefit from the aura with a free inventory slot. However, if they could not farm one in time, you should get an
Assault Cuirass as the #1 carry. Remember that
Great Cleave damage is not affected by armor value, so the armor reduction only increases your damage for your primary target. However, the
armor reduction affects buildings too, so it helps pushing lanes, destroying towers and barracks.
Alternatives
 Butterfly
 - Replace
Assault Cuirass if someone else is making one. It is even more expensive, but it gives
60 attack speed, and greatly boosts your DPS with
God's Strength. It boosts EHP by giving 4 extra armor, and
35% evasion. It also deals with the late-game
Con:
weak against bash, because stuns like
Skull Basher have a reduced chance of triggering.
However, if there are evasion heroes on your team (
 Phantom Assassin
), or heroes that cause miss chance (
 Brewmaster
,
 Riki
Riki,
Troll Warlord), the enemy carries might build
Monkey King Bar to counter evasion.
Eye of Skadi - an alternative to
Sange and Yasha, to
out-carry the enemy carries. The slow greatly
reduces the enemy's attack speed on every hit.
The orb-slow unique attack modifier stacks with life-steal unique attack modifier. However, it
does not work with Great Cleave; it only prevents your primary target from outrunning you. It gives 725 HP, +25 base damage, +25 attack speed, 3 armor, but
no movement speed. Overall, it is an
expensive item with a bad build-up, that is not much better than
Sange and Yasha for the price.
Build 2 - Madness
This second build solves Sven's Cons with core/end-game items that are cheaper than Build 1. It focuses on the early/mid-game to make Sven get early kills in the lane, and a more useful ganker. However, it is a high-risk (high-reward) build because of Mask of Madness, which causes the user to take amplified damage. The Mask is the cheapest way to get extreme amounts of DPS in the mid-game. If used correctly, it can make you snowball with early kills and dominate the game without having to wait and farm.
Early Game
 Orb of Venom
A very cheap slow debuff that makes it much easier to
chase enemies and keep them in melee range. The unique attack modifiers
slow and life-steal stack (just like
Eye of Skadi).
Orb of Venom is useful in-lane; it helps with
Sven's most severe
Cons:
low mobility + melee range. You can get kills with stun from
Storm Hammer + speed from
Warcry + slow from
Orb of Venom (+ some help from your lane partner). Can be sold later.
 Poor Man's Shield
Ideal on melee heroes, it is the cheapest early-mid item to increase EHP and prevent most harrass and creep damage. It is good even for non-agility heroes: it gives +6 attack speed and about +1 armor. It blocks hero damage with 100% chance, so it
does not suffer the problems of Pseudo-random distribution that make
 Vanguard
 a bad item. With
Poor Man's Shield, 100% is always 100%, and
damage is blocked before amplification, so it is even more effective alongside
Mask of Madness. Can be sold later.
Alternatives
 Bottle
 - replace
Magic Wand if you're going mid, it is a better regen alternative.
Magic Wand will collect very few charges against 1 enemy, while the
Bottle gets recharged with runes and stores them for later use - useful through mid/late-game. Get the
Bottle as your first early-game item, even before
Boots of Speed.
Core Items
 Power Treads
The typical boot upgrade for carries that boosts EHP and DPS and remains useful into the late-game. You can skip the chasing power from
Phase Boots, because of
Mask of Madness.
Power Treads Switch to INT before casting to reduce the mana cost of
Storm Hammer and
God's Strength. Switch to AGI while using
Tango,
Healing Salve,
Magic Wand or
Bottle to get the highest HP+MP regen. The rest of the time keep the boost on STR for the best DPS and EHP.
Mask of Madness
Replace
Gauntlets of Strength. Get it first to help
farm and jungle faster. It makes you a
more aggressive ganker versus 1-2 enemies, and with some luck you can start snowballing into the late-game. Use the attack speed to
kill roshan faster,
push creep lines and
destroy undefended towers. Use the movement speed to
roam faster across the map, to catch up with your team mates, or to
run away from the enemy.
Sven's biggest
Cons:
low mobility, low attack speed, and relying on life-steal, are ALL solved with Mask of Madness. For less than 2k gold, you get more life-steal than
Helm of the Dominator, more movement speed than
Sange and Yasha, and more attack speed than
Assault Cuirass in 1 item slot. It is the best mid-game DPS item alongside
God's Strength, and with some skill, the insane risk-reward factor of
Mask of Madness can turn the game in your favor as soon as mid-game.
However, activating
Mask of Madness makes you take +30% physical and +30% magic damage. Do not use it to run away with low health if the enemy has powerful long range ultimates (
 Sniper
,
 Zeus
Zeus). Always use the element of surprise to your favor: activating
Mask of Madness makes a unique sound that your enemies can hear. Activate it in advance, from a safe position, and outside the view of the enemy - they will not hear it if they don't see you.
Match the ending of Mask of Madness with the enemy counter-attack. If you initiate with
Storm Hammer, wait until there are only 2-3 seconds left on
Mask of Madness. After the stun ends, you will take no amplified damage.
DO NOT activate Mask of Madness in team-fights until you get Black King Bar. The multiple enemies will stun and kill you before you get close to anyone. Magic immunity prevents the +30% magic damage. But
Mask of Madness has a 12 sec duration, while
Black King Bar only lasts 4-10 sec. If magic immunity ends 4 seconds before
Berserk, it can be enough for the enemy to kill you.
Match the ending of Mask of Madness with the ending of Black King Bar. With a 10 sec duration, activate
Berserk 2 seconds before magic immunity. If you only have 4 seconds left, wait 8 seconds instead (this can take some practice).
Warcry will reduce the +30% physical damage, and the life-steal should keep you alive. With this combo,
do NOT initiate - hide and
wait for a team-mate to initiate the fight. At that moment,
follow up by activating all items and skills, and kill as many enemies as possible.
Black King Bar - replace
Orb of Venom after the chasing power from
Mask of Madness to be able to use it in team fights.
 Armlet of Mordiggian
Replace
Magic Wand. The Armlet combines well with the berserk play-style of this build. Turn it on before battle for +5 armor, +25 attack speed, and +25 STR that greatly improve EHP and DPS, and make you
stronger against tanky melee carries.
Armlet Toggling takes some practice to master, but it can save your life.
Do NOT turn it OFF with Damage Over Time (DOT); wait until all DOT effects are over, or the Armlet reduces you to 1 HP and you die instantly. With
Heart of Tarrasque's passive regen you can have the Armlet always-on.
Alternatives
 Blade Mail
 - replace
Armlet of Mordiggian if the enemy has burst damage potential: strong nukes (
 Lina
Lina,
 Lion
Lion), huge physical crits (
Phantom Assassin,
Bounty Hunter), uncontrolled AOE nukes (
 Luna
Luna,
 Sand King
), or any quick-death situation (
 Legion Commander
,
 Faceless Void
). It is blocked by magic immunity and weak against
Lifestealer or enemies with
Black King Bar.
The permanent +6 armor improves EHP, and the active ability creates spikes that the enemy can see, so they will avoid attacking you (very useful during
Mask of Madness). Your
damage amplification multiplies reflected damage. Get +STR and +HP items (
Heart of Tarrasque) to increase the total damage to reflect. Do not get armor (
Assault Cuirass), which reduces the total damage to reflect.
Activate Blade Mail after Black King Bar and Warcry are over. Most enemies wait until magic immunity is over to nuke you. Even with a mid-game price, it is useful in late-game, because damage reflected scales with the enemy damage. When
Black King Bar is down to 4 seconds, it extends the
safe-duration to use
Mask of Madness by 4.5 seconds.
End Game
Crystalys - replace
Poor Man's Shield after the EHP boost from
Armlet of Mordiggian.
 Platemail
 - Fill your 6th slot in the late-game, when most heroes deal high physical damage. After
Black King Bar to prevent the +30% magic damage from
Mask of Madness, armor reduces the +30% physical damage.
Warcry helps, but it has a short duration. Builds into
Assault Cuirass.
Alternatives
Skull Basher,
 Abyssal Blade
 - Can replace
Crystalys /
Daedalus if your team needs disables more than damage. The bash and stun can lock your enemy who cannot run or fight back. They
do not work with Great Cleave, and only affect the main target. Also, the
damage boost is not multiplied by God's Strength. However, both
stuns go through magic immunity, and are a good counter to
Lifestealer or carries with
Black King Bar, especially if your team has
no nasty disables.
If the game lasts very long and you're already fully-farmed (and replaced your
Black King Bar), you can choose to transition to
Build 1 - Dominator. First replace
Armlet of Mordiggian with
Sange and Yasha, and then replace
Mask of Madness with
Satanic.
Build 3 - Vladmir
Use this last build when your team does not give you enough farm priority, and there already are farmers on every lane (it's not nice to steal someone else's farm). It focuses on Sven's support aspects, and builds on mana early to cast Storm Hammer and Warcry more often. It uses cheap team-utility items that are also good on Sven. If you start as a support but somehow get fed with kills, you can buy DPS items to transition into a semi-carry.
Always announce to your team the utility item that you are building next (alt+click on shop items), to avoid having repeated items on the team. Buy  Observer Wards when they are restocked, and place them wisely. Get
  Sentry Wards to counter slow enemies that use invisibility to initiate (
 Broodmother, Riki, Bounty Hunter), or Dust of Appearance to counter fast enemies that use invisibility to escape ( Weaver, Clinkz).
Early Game
 Sage's Mask
 - early mana regen to help cast more often. It gives very little MP regen, because it is percent-based, and
Sven's base intelligence is very low. Builds into
 Ring of Basilius
, which gives a fixed MP regen and does not have the same problem.
 Bracer
 - Cheap stats to improve EHP and DPS. Builds into a mid-game
 Drum of Endurance
.
Ring of Basilius
The cheapest way to deal with
Sven's
mana-dependence with a fixed MP regen, and an armor boost.
Deactivate the aura, otherwise it will give armor to your creeps and push the lane. Builds into a
 Vladmir's Offering
. Skip it if someone else is getting one to build a
Vladmir's Offering, or a
 Ring of Aquila
.
Core Items
 Arcane Boots
The typical support boots that help you and your team replenish mana and cast skills more often. They become less important in the late-game, but by then you will replace them with
Boots of Travel.
Drum of Endurance
The most cost effective all-stats upgrade on
Bracer that is ideal for the mid-game. It has only a few charges, so
activate it at the heat of a team fight, to help run and attack faster. Buy the recipe again to replenish the charges.
Vladmir's Offering
An upgrade on
Ring of Basilius that
helps the whole team with armor, damage, mana-regen, and life-steal for other melees. It is especially useful on teams with 2 or more melees without lifesteal. The percent damage boost stacks with
God's Strength.
Alternatives
Phase Boots - If your team already has 2 or more
Arcane Boots, replace them to work on your mobility.
 Urn of Shadows
 - replace
Drum of Endurance if someone is making one. A ganker alternative that has the same MP regen problem than
Sage's Mask. However, it improves EHP and DPS and the 950-range damage over time can help get kills from running enemies. The healing helps regen quickly after a battle, but it can be
interrupted by hero/tower damage, so use it on retreating allies to get them back into battle.
 Medallion of Courage
 - replace
Drum of Endurance if someone is making one. Another ganker alternative with the same MP regen problem. However, it improves EHP and
the -armor debuff gives a DPS boost that scales with God's Strength AND critical damage; useful even in late-game. Careful: losing +6 armor can get you killed; use it from a safe distance (1000 range) to improve your allies' DPS. Use it on
neutrals to jungle faster, and on
Roshan to kill him faster.
Helm of the Dominator - replace
Vladmir's Offering if someone is making one. A good source of life-steal + armor. It supports your team with
Dominate: stack ancients for your main carry, or to get important auras to help in fights (see
Build 1 - Dominator).
End Game
 Hyperstone
 - combined with
God's Strength, it makes you a significant threat, even though you started as a support. It also helps you
farm (if you get the chance),
push creep waves, and
destroy towers. Builds into
Assault Cuirass
 Pipe of Insight
Helps with health regen and reduces 30% magic damage.
Use the shield before entering a team fight to absorb a fixed amount of magic damage for the team.
Assault Cuirass - builds from the
Hyperstone to improve the team's
physical EHP and DPS thanks to the armor reduction, which
works against buildings too.
Alternatives
 Mekansm
 - replace
Pipe of Insight if someone is making one, or if the enemy is physical-damage based. It gives some stats, armor, and a team-heal to improve EHP.
Use it at the middle of a fight when your team mates have taken some damage (but before they die!). It heals and armors lane creeps to push against towers. Each team should only build 1
Mekansm, but in pub games not everyone is careful with their builds. With a 25 sec duration, and a 45 sec cooldown, if you find yourself in a team with 2
Mekansm's, use the 2nd one 25 secs after the first.
 Mjollnir
 - replace
Assault Cuirass if someone is making one. The
second best attack speed boost in the game gives you extreme DPS; especially useful if you're becoming a semi-carry. Each hit has a chance to deal magic damage to multiple targets.
Use the shield before entering a team-fight on the main carry (or yourself). It deals even more magic damage to attackers. The shield is visible, so it has a dissuasive mental effect on your enemies who avoid attacking you, which indirectly makes you more durable.
|
Daedalus - Fill your 6th slot after Boots of Travel to carry the late game. After the attack speed from Assault Cuirass / Mjollnir, you will deal ridiculous crits, even if you started as a support. |
 Gem of True Sight - Fill your 6th slot to support the late game if the enemy is invisible. Always travel with your team - be careful not to die and drop it to the enemy. Gem of True Sight - Fill your 6th slot to support the late game if the enemy is invisible. Always travel with your team - be careful not to die and drop it to the enemy.
|
Rejected Items
Each player has a different play style, item and skill preferences. You should adapt these builds to your liking, taking into account the alternatives provided, and the situation of each game. However, some items do no make sense for Sven, because they do not combine with his skills:
 Clarity - Sven is very mana-dependant in the early-game, but these potions are interrupted if you take damage, and they recover mana very slowly (30 secs). Sven's role in the early-game is to farm, staying back for 30 secs is too long, and it is impossible to get last hits at melee range without taking damage occasionally.
Maybe these potions can be used in an aggressive tri-lane, or when you spend a long time hiding / roaming in the woods, but even then it is better to get a Ring of Basilius which also tanks you up and helps your team.
 Javelin - Bonus damage is a waste of potential because it is not multiplied by God's Strength. Also, the passive Pierce damage does not work with Great Cleave, and only affects the primary target.
Desolator - The damage boost is not multiplied by God's Strength. The armor reduction unique attack modifier does not stack with the life-steal from Mask of Madness or Satanic, or the slow from Orb of Venom or Eye of Skadi. Also, it does not work with Great Cleave, which ignores armor value, and only reduces the armor of your primary target.
Gem of True Sight - A situational pick on support Build 3 - Vladmir to counter invisible enemies. Generally, it is not recommended because Sven is not very durable, and has no escape mechanism. The hard-carry playstyle of Build 1 - Dominator leaves no inventory room for a Gem. The berserk DPS play-style of Build 2 - Madness is too dangerous to carry a Gem, especially with one less inventory slot that could have an +EHP item.
Divine Rapier - Just like Gem of True Sight, the risk of dropping it to the enemy carry is too high on Sven. It is extremely hard to farm, and not very cost-effective even for late-game, because the damage boost is not multiplied by God's Strength.
Monkey King Bar - The damage boost is not multiplied by God's Strength. Bash damage is not multiplied by God's Strength, and does not work with Great Cleave, it only bashes the primary target. True Strike only works at the primary target, because Great Cleave ignores evasion. You don't need Monkey King Bar to hit enemies without evasion, and cleave the evasion enemies. Moreover, abilities that give you miss chance ( Troll Warlord's  Whirling Axes (Melee), Riki's
  Smoke Screen, Brewmaster's Drunken Haze) are blocked by Black King Bar, so there are no situations to justify a Monkey King Bar.
Battle Fury - As explained in Factors, Goals, Pros and Cons, this is a bad investment with a high price. If you were playing another hero and already had 2 Battle Fury, would you buy a 3rd one? It stacks with Great Cleave that goes from 65% to 100%, but the extra 35% cleave has a shorter range of 250 and not 300. The original 65% already deals HUGE damage to enemies, the extra 35% do not make much of a difference, or miss the enemies with the short range. Also, the extra damage is not multiplied by God's Strength. +Strength items are much better (+base damage, multiplied by God's Strength, works with Great Cleave). +Critical chance is even better (damage scales with God's Strength, works with Great Cleave).
 Manta Style - The stats and movement speed are good to increase EHP, DPS, and chasing power. However, it is more expensive and inferior to Sange and Yasha. The illusions will have the same problem as the real Sven: melee range. The collisions between you and the illusions will block you, and getting into close range is more difficult. Also, even if you activate God's Strength before Manta Style, the illusions do not get the bonus damage nor cleave. They are blue, but the real Sven is red, so the enemy can tell you apart.
Gameplay
When the game starts, look at both teams and decide which build to follow. Use Build 1 - Dominator if you're the hardest carry to go safe lane with 1-2 ranged supports that agree on giving you all the farm. Use Build 2 - Madness if you're farming mid or hard lane. Use Build 3 - Vladmir if every lane already has a farmer, and you need to support them. Avoid going hard-lane solo; it's dangerous to go up against 2 ranged harassers. Also, do not jungle from the start, Sven only becomes an efficient jungler after DPS + life-steal (mid-game).
Safe Lane - Farming and Early Kills
Your goal is to farm and get big for the late-game.
Focus on getting last hits for gold, your supports should deny and pull the lane. Ideal supports are aggressive ranged harrassers/nukers with a stun or slow, who can help you get kills. Before attacking communicate your intentions to your lane partners. Ask them to ward the jungle or river/rune location to prevent surprise ganks.
When you're in a fight, your priority is to
help getting kills with Storm Hammer but
never at the cost of your life. If you are low on health
GET BACK behind your allies. If you stay nearby, when you get the cooldown/mana, you can
cast a second Storm Hammer from a safe distance.
Mid Lane
Going mid
against a melee enemy is easy. You can out-perform nasty gankers like
 Pudge
Pudge if you bait, dodge his
 Meat Hook
, and counter-attack on his cooldown. Wait for an opportunity; when the enemy creeps/hero are outnumbered/out of position use your
Storm Hammer + Warcry with the right timing. You either get a kill, or force the enemy back to base.
However, going mid
against a ranged harrasser is difficult. Stay away from their attack range; if they move closer to harrass you they also take creep damage. Last hitting and denying can be hard, although
Storm Hammer +
Warcry at the right moment can still surprise them and get a kill.
Skip
Magic Wand and get a
Bottle first - it is very effective for regen and rune control. Look for runes when your creeps get close to the enemy tower and last hitting is risky. An early
Orb of Venom after
Bottle (even before
Boots of Speed) gives you a tremendous advantage to chase people and get kills. You will reach level 6 earlier than the side-lanes; once you get
God's Strength you should gank a lane that needs help. If the enemy mid leaves, use
God's Strength + Warcry to push against the undefended enemy tower.
Roshan and Runes
After some DPS items, you can kill Roshan with
God's Strength and the help of an ally to tank or heal you.
 Aegis of the Immortal
 is not good on
Sven, because when you die the ultimate is purged.
 Cheese is a good item
 however, because it prevents death after taking some damage, and does not interrupt
God's Strength.
Haste Rune -
The best rune for Sven. Max movement speed makes it
easy to chase your enemies and keep in melee range.
Invisibility Rune - A good rune for positioning,
if the enemy is not using detection. Use it to sneak into melee range and use
God's Strength +
Storm Hammer to surprise and kill an enemy.
Regeneration Rune - anyone with low HP/MP should take this.
Double Damage Rune - Gives +100% damage that stacks with
God's Strength, which already gives +200% (total +300%). In practice, your ultimate already gives you huge damage, and you will not notice much difference from the rune. If you're the only physical-DPS hero, take it. Otherwise, leave it to someone else.
Illusion Rune - illusions do not use
God's Strength, they do little damage, and have trouble getting in melee range. Leave it to someone else.
Farming into the mid-game
Keep farming into the mid-game, for longer than the rest of your team; that is your job as a
carry. Only enter ganks/fights when you're full on HP/MP and you see an opportunity. Avoid committing to big team-fights before farming the core, because you might die; you will only be 'farmed-enough to own' after the core. Always carry a
Town Portal Scroll while farming (
TP Scroll - What to know), and teleport back to defend a tower only if needed. Otherwise, don't waste time - keep farming.
Don't hesitate to go jungle, especially if you're moving from/to the fountain or between lanes; use every second to farm. The jungle is less farm-effective than the lane, but it is safer, because the enemy does not see you.
Alternate between lane and jungle to balance between the lane's high income, and the jungle's safety. Make sure the enemy does not see you alone for long, and cannot predict your movements.
Creeps have 850 sight range, but experience is gained in 1300 range (aprox. the top-bottom distance of the screen). If you stay back in 900-1300 range from the creeps, you remain invisible to enemies, and still soak in the experience safely while the creeps kill each other (works behind trees). However, you don't get any gold. This is a common tactic while soloing hard-lane against multiple enemies. You can also use this tactic after pushing; the enemies do not see you permanently in-lane, and are tricked into thinking you went back.
Team Fighting and Pushing
After farming the core you should be ready for team fights and tower pushes. Generally, when none of the teams has a big advantage,
the team that gets a good initiation first wins the fight, so avoid being initiated on by the enemy. Wait for someone else to initiate and then follow up; move in, stun and kill as many enemies as you can.
Choose your targets wisely; pay attention to:
- intelligence heroes with low HP/armor die faster
- evasion heroes get Great Cleave'd with 100% hit rate, target someone else
- distance to your enemies; how many targets are inside Great Cleave's 300 range
- distance to your allies; if you get focused, you may need to run back
If your team dominated the early game in kills and towers,
the fastest way to win is to push mid into the enemy towers, barracks and ancient. Use the early advantage to either win the game by 25mins, or keep the pressure on the enemy to force them to defend and get little farm, making it harder for them to recover.
If your team got behind or fed in the early game, you should
farm defensively, or split push the side-lanes to get more gold and experience before facing the enemy who got the early lead.
One of the most important decisions in a game, is what to do after winning a team-fight. If you just killed 3 enemies and sent 2 others back to base, you have a
small window of 30-60 seconds without opposition.
Do NOT go back to farm or to the fountain, even if you're low on HP / MP. Stick with your team, and before the enemy respawns, take the advantage to:
- immediately do roshan for more gold+xp advantage for the team
- immediately destroy towers / barracks from any pushed lanes nearby
Friends and Foes
(For fair comparison, this chapter assumes that Sven and his Friends/Foes are at the same level of experience+gold)
Friends
During the
lanning phase, any support/nuker with a strong harrass, nuke, slow or disable can help dominate the lane.
 Crystal Maiden
 has a slow and a disable that deal good damage, and can help get early kills with
Storm Hammer. She can also restore your MP (like
 Keeper of the Light
).
Lina and
 Leshrac
 have delayed stuns, which are easy to land if you cast
Storm Hammer first.
Bane,
Lion and
 Vengeful Spirit
 also have strong disables, but melee disablers like
Sand King or
 Tiny
Tiny (and his awesome
 Toss
Toss!) will do just fine.
In the
late game there are a few
killer combos that can win team-fights in seconds, with the right initiation.
Sven + Magnus and his  Reverse Polarity
 is the most famous. He can stun the entire enemy team (including magic immunes), and stick them very close together.
Storm Hammer can hit all enemies and increase the stun duration, and
Great Cleave should finish off the enemy team.
Sven + Enigma and his nasty  Black Hole
 is another combo that achieves similar results. With the right positioning,
Enigma can disable a handful of enemies, and draw them close together.
 Dark Seer
 also has
 Vacuum
 to bring enemies close, but he cannot stun them; combine it with
Storm Hammer.
 Axe
Axe's
 Berserker's Call
 can draw melee enemies together, but it is not very effective against ranged heroes.
 Omniknight can grant magic immunity
 much earlier than
Black King Bar.
Troll Warlord's
 Battle Trance
 gives you
immense DPS with God's Strength, and at the right time can kill the enemy team in a second.
Foes
Enemies with
nasty disables (listed in
Build 1 - Dominator) are trouble for
Sven and his
Black King Bar, or any hero that needs magic immunity or non-interrutibility.
Escape heroes (
 Windranger
,
Weaver,
 Mirana
) are hard to hunt down, and heroes with
powerful slows (
 Drow Ranger
,
 Viper
Viper,
 Venomancer
) are hard to run away from.
 Razor
Razor steals your damage if you stay close, forcing you to move away to break the
 Static Link
 quickly.
Omniknight's
 Guardian Angel
 makes the enemy team physical-immune, and you deal (and cleave) no damage.
Sven can out-carry most other late-game hard carries (especially illusion ones), if you initiate first. However, if the enemy carry initiates on you and takes the element of surprise to his advantage, you're in trouble.
Faceless Void is one of the few hard-carries that is almost impossible to out-carry in the late-game.
Lifestealer is also dangerous to face 1-on-1.
Sven has some
item foes too.
 Heaven's Halberd
 and
 Diffusal Blade
 can disarm and slow you, but they are prevented by magic immunity.
Blade Mail can reflect a
LOT of damage,
including cleave damage, but is also prevented by magic immunity.
Sange and Yasha,
 Shiva's Guard
 and
Eye of Skadi have dangerous slows that go through magic immunity.
Skull Basher and
Abyssal Blade's stun are the best counter against
Black King Bar, which can make fast melee attackers (
Lifestealer,
 Alchemist
) a real threat.
Good against
Sven and his
Great Cleave is a
good pick against illusions (
Phantom Lancer,
 Chaos Knight
,
 Meepo
Meepo), and
pushers that spawn many minions (
Nature's Prophet,
Broodmother). Nukers that silence you (
 Silencer
, Doom Bringer) cannot stop
God's Strength's damage. Heroes with slow damage-over-time ultimates (
 Death Prophet
) cannot survive your damage for long enough. Gankers that get
Sven in melee range (
Pudge,
 Clockwerk
) can be dangerous during the early game, but once you get farmed they will regret getting close...
In the late-game, in 1-on-1 against other carries (
Viper,
Sniper,
Legion Commander,
 Huskar
),
Sven can usually crush them with proper initiation. Most of them do not have a stun, so use
Storm Hammer with the right timing: during their moment of peak damage.
Conclusion
I hope this guide was useful to you, and could give some in-depth insight about such an awesome and versatile hero as Sven. Obviously, every player has different play-style and item/skill preferences, so feel free to adapt these builds to your liking.
If you find that there's missing info, or anything incorrect in this guide, feel free to leave a comment with some feedback; constructive criticism is always welcome!
Thanks for reading, and may your enemies share the fate of the Shattered Helm!
Sources
A list of material that I've read over the months, and where I got most of my information from:
Change Log
This guide is
updated with Dota 2 patch: 6.8
- 10/03/2014 - Published the first version


Quick Comment (1) View Comments
You need to log in before commenting.