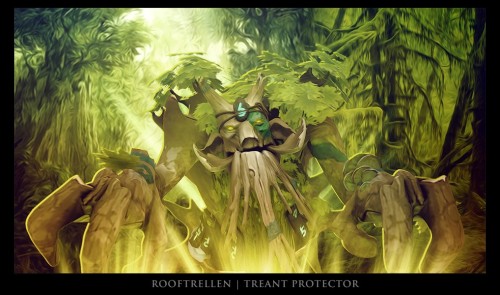
I'll Protect You - with various early game styles
deathkidkun
June 3, 2013
Introduction
 Treant Protector is a Strength hero who plays best in the Support role. By utilizing his skills well, he is capable of keeping his allies AND TOWERS alive regardless of how far they are from him and with proper planning, can easily lead a team-clash to victory and possibly sabotage the enemy's ganking plan.
In my opinion, Treant's skills allow him to carry out his plans even with the lack of high-tier items, and doesn't require much farming to excel in the game.
Although it is arguable that Treant Protector could play the carry role, it is not advisable as you do not have any passives that would help you to dish out a lot of damage with your physical attack. Yes, you have a ridiculously powerful base right-click damage, but that doesn't mean that you're a carry.
The thing that makes Treant a very interesting support is communication. With it, he's pretty much overpowered and your allies can do a lot of things that will catch the enemy off surprise.
PS : There are probably going to be a lot of unattractive wall of texts in this really basic-format guide, so hopefully you can all bear with it. I will attempt to upgrade it when I have enough resources (screenshots and stuff) but in the meantime, it will be mostly words.
Pros and Cons
Pros
[*] Not so item dependent
[*] Has 2 healing abilities
[*] Able to support heroes and towers globally
[*] Has a cheap invisible ability which can be utilized well, even with its limits
[*] Can be very durable
[*] Has a huge AOE disable which can ruin enemy teamfights
[*] Has a nightmarishly high base attack damage
[*] If properly utilized, towerdiving is not a problem
|
|
Cons
[*] Mana dependent
[*] Ally dependent
[*] Low BAT
[*] Highly underrated (He deserves more love than Sniper - the true garbage tier)
[*] People will probably flame you for picking him
|
When to pick and when not to pick
Pick Treant when
[*] You have great map awareness
[*] You don't mind having a bad score
[*] Your team has good communication (Most preferably a 5 man stack)
[*] You like denying
Do not pick Treant if
[*] Your team hasn't got a single carry
[*] You like farming
[*] You have zero map awareness
[*] Your team has zero communication
[*] You do not trust your ally carry
[*] If Timbersaw exists on either side
Nature's Guise
The Protectors don't often come into vision; their natural state being nestled within their leafy brethren.
Nature's Guise is your utility skill, which turns the target being you or an ally invisible, giving 10% movement speed and invisibility while near trees. It has a fade time of 2 seconds at all levels and lasts from a multiple of 15 x level of ability.
This is an extremely useful ability despite its limits of having a
long fade time and the requirements to be
near the trees. Being
cheap on mana and having a
fast cooldown with
quite a long duration (even at level 1), it has a lot of utility to it, and sadly is quite an underrated ability.
In my opinion, at least 1 level of it should be taken in the early game.
Even at level 1, this skill has a lot of utility if you take the 2 seconds fade time into account. What you can possibly do with it at this point is:
- Save lives if timed properly (which also requires you to tell allies to stick near trees beforehand)
- Prevent early roamers from ganking
- Attempt early ganking
- Slip through observer wards
This skill scales on manacost, cooldown and duration which makes it pretty useful even in the late game phase. Having a 60 seconds invisibility at only 60 mana and a 4 seconds cooldown makes it highly spammable because at this point enemies will probably be roaming the forests to gank on your unwary allies, so this skill allows you to scout the forests for ambushers, allowing you to sabotage their plans and at the same time helping your allies ambush by making them invisible as well. Oh, did I mention that
casting spells will not break the invisibility?

Image showing the maximum distance Treant can cast Nature's guise on his targets, and Luna's position shows the maximum distance from trees before the invisibility breaks.
__________________________________________________________________________________________
What to keep in mind when using it
-
2 seconds fade time: Which means if you're already in sight of the enemy, it'll require proper timing to escape or help and escaping ally.
-
Can be casted on allies: Don't be selfish please.
-
Will not break when casting spells: Which means one thing, unless you're facing Timbersaw, your team has the upper hand when fighting in the forest. Nobody will see an incoming Leech Seed that turns the duel around. Nobody will expect the sudden burst healing from your Mekansm. Nobody will expect to be suddenly disabled by vines. You can do a lot of things to help the team and still stay hidden.
-
You must be near trees
Leech Seed

Rooftrellen nurtures the beings under his stewardship, sustained by the lifeforce of trespassers into his sacred ground.
Leech Seed is your early gank or initiating tool which plants a debuff on an enemy, slowing them for 24% at all levels and draining their health points. Lasts 3 seconds at all levels.
This skill simply allows your allies to keep up with his target enemy hero, and at the same time works as a DoT nuke and a healing mechanism. This is one of Treant's weakest skills in my opinion (free true sight wards are so much better) however it sill is really good if used in conjunction with your other abilities.
At most times, it is better to go for maxing out Living Armor first. However if you're going for offensive trilane, this is the best ability you have to execute the trilane, as it is your only slow.

Image showing the maximum distance Leech Seed can be casted, and the radius of healing.
__________________________________________________________________________________________
What to keep in mind when using it
-
It heals nearby allies: While pulsing, it damages the target and heals nearby allies for the same amount of damage per pulse. You want to inform them that you're about to use it if they're engaging, and you can easily turn the tide of the duel. At level 4, you're somewhat exchanging 300 health for healing your ally.
-
Very mana intensive: It is best to use it only to secure kills in the early game. It is very mana intensive and can easily take out more than half your mana pool in the early game.
-
Healing can push lanes: Be careful as the heal can result in pushing lanes as your creeps are being healed for the same amount as well.
Living Armor
Living Armor is your primary support ability. Since the 6.75 update it has become more efficient than it used to be, although switching from a passive ability into an active ability, but has higher regeneration rate and a handy physical damage block.
This skill is what you should be maxing out first during the early phase most of the time, as its healing and damage block provides a good support to your carry and allows you to support other lane carries as well (being a global targeting type) as it provides healing and damage block, which at level 4, is higher than that of a vanguard and at 100% (although for 6 attacks only)
You will not be suffering mana problems while using this ability as it has a really low mana-cost and a decent cooldown of 20 seconds in which it can be constantly used to keep your allies in the lane and also towers at full health.
__________________________________________________________________________________________
What to keep in mind when using it
-Casting range is global: Which means you don't have to be in the same lane as the target you want to use it on.
-It has damage block: Which means you can actually encourage early game tower diving with good communication. With 7 instances of damage block, it is enough to secure a kill and keep your ally alive while doing so.
-Creep attacks dispels the instances: So be careful not to let all the instances be dispelled by creeps.
Overgrowth

Overgrowth is your primary initiating skill, which when used will disable all enemies within a large area for at least 3 seconds, scaling as it levels up.
This is far by your most important skill, and landing it is extremely important as the disable is pretty long and can potentially ruin the enemy team, which is why you should take a level of this skill whenever possible.
What you need to take into account while using this skill is your positioning and initiation. You don't want to get stunned first before being able to use it, so keep clear from AOE stuns and sight of enemy until you need to use it. Do NOT be the first to run in visible, for you will be the prime target as the enemy will know of your devastating ability. If you do not have a blink dagger, or there are no nearby trees in the team-clash area, try to run in while the enemy is distracted OR run in from their direction (back-door)
The AOE for this spell is 625 unit radius (Sorry for the lack of picture guides, I'll try to add them in the future) which is pretty big. You would want to wait for the enemies to gather within range and attempt to capture all of them at once, as even the one hero you fail to capture can possibly ruin your whole team.

Image showing the maximum distance of Overgrowth's radius
__________________________________________________________________________________________
What to keep in mind when using it
-Enemies cannot blink out of it: So it's fine to use it on enemies like  Anti-Mage or
  Blink Dagger carriers.
-It can be purged: So be wary of diffusal blade carriers.
-It has a low cooldown: For an initiator ultimate, the cooldown for this spell is ridiculously low. Don't be afraid to use it in sticky situations.
-It goes through BkB: Ditto.
Roles and Play-style
Treant Protector is best played at a support role as the nature of all 3 of his skills lies in supporting your allies. With Nature's Guise he can easily assist ganks from the forests, or scout around to help detect enemy ambush, at the same time help allies and himself escape from danger. Leech Seed is a great chaser ability, and also capable of turning the tides in a one-on-one carry clash as it both nukes the enemy and heal your ally at the same time. Living Armor heals and provides armor block, ditto.
Also, with your ridiculously high base damage, last hitting shouldn't be much of a problem in lane.
Treant Protector can transition from a lane support into a ganker with his Nature's Guise and Leech Seed. Living Armor can be used to help allies like  Slark or
  Storm Spirit to dive past tier 2-3 towers, or just block a lot of spell damage when running into ganks. Treant also can be a late game tank, because of his high strength gain.
In teamfights, Treant Protector can make a good initiator, as with your overgrowth, you can catch a lot of enemies easily by just walking in there with your Nature's Guise and pressing R.
Treant Protector does not make a good carry, although in pub matches you can try out a semi-carry build or so.
Early Game
Safe-Lane Support
Grab either an
 Animal Courier
 or
 Observer Ward
, depending on what the other support gets. Then grab the basic and essential regen items, the
 Tango
Tango,
 Healing Salve
 and also Clarity Potions as you are highly mana-dependent and need to have a good mana reserve for emergency escape, chase or providing physical block and healing. The grab some stats, either Ironwood Branches or
 Gauntlets of Strength
 if you feel like you want more a more compact item slot. (Although it is more advisable to take 3 Ironwood Branches, since it's only 9 more gold and gives a nifty addition to your mana pool, enough for one more
Living Armor : credits to Wisdomeyes)
Don't take the mid-lane. There are better mid-laners in the game than you, and your strength lies on having someone by your side to protect or help secure kills. Go for the safe-lane with your hard carry to help him control the lane and get last hits.
DO NOT F*CKING AUTOATTACK
With you ridiculously high base damage, it is really easy for you to get the lane pushed like crazy if you start autoattacking. Just aim for denying your creeps and giving last hits to the carry. If you wish to get last-hits, take just one or two per creep-wave, you carry needs it more than you do.
Also,
DO NOT BLOCK CREEPS
This will result in the tower taking most of the creep wave, unless your lane partner has really good last hitting skills.
Although it is not recommended, but at times if you can, it is possible to harass the enemy with your powerful attack damage by just walking into them and smacking them really hard.
If the lane is being pushed hard, learn to stack pull by pulling the neutral camps out at the 53rd second of every minute, and later on pulling creeps with the stacked camps. By doing so, you've denied a full wave of creeps unless they notice what you're doing and try to take advantage of it.
Nature's Guise is extremely helpful even at this stage, as some players will try to attempt first blood, and invisibility can help both prevent and cause first blood to happen. Take it at level 1. It helps detect if the enemy are doing a hard-trilane.
Only use
Leech Seed when you really need to as with your current mana pool you won't have enough to keep spamming it and you will need some reserve mana for your other skills.
You can also use
Living Armor to help give your carry some opportunity to farm when under heavy harass from the enemy, instead of just using it to heal. Also when you're stack pulling, you can use this skill to help your lane partner without being near him.
This is basically a very basic dual-lane babysitter play-style. Just make sure you don't steal most of the carry's last hits and try to deny as much as possible. I REPEAT, DO NOT AUTOATTACK. Your ridiculously high attack damage can get the lane pushed really quickly, and your carry will have a hard time to farm if you're under the enemy tower.
Offensive Trilane
Grab a
 Sentry Ward
 and also the basic regen items except this time with more clarity potions than usual. This is because you are going to abuse your
Leech Seed as much as possible to secure a kill.
One way to pull off an offensive trilane is to NOT let the enemy know you're going for an offensive trilane. Do not show yourself and let the safe-lane carry take most of the last hits and solo EXP. It's going to be a hard sacrifice, but you can always stack pull, or multiple camp pulling. Instead of maxing out
Living Armor, max out
Leech Seed instead as the heal from it can be really good when going on the enemy.
The reason for sentry wards is for dewardiing. If the neutral camps don't seem to spawn at all, check it for observer wards,
but make sure not to block the camp with your sentry wards. Place them outside the camp, just enough to spot the observer ward blocking the camp.
Take one level of Naature's Guise after taking Leech Seed, as you can pull off surprises with the third lane partner by using it. You can also make your lane carry bait the enemy, then rescue him/her with your Leech Seed, which at the same time can possibly secure a kill. Just make sure to be careful of other enemies transitioning into the your lane because the enemy is receiving heavy harass.
You can also opt to take more
Living Armor instead of
Nature's Guise so that you can dive the towers earlier on when chasing an enemy that is really low on health. At level two, using both Living armor and Leech seed will reduce up to 140 damage and turn around 148 damage to health, theoretically saving your ally by 288 HP.
Hard-Lane Support
This time, make sure to grab the
Observer Ward instead of the courier, and the basic regen items along with stats items. At the start, use
Nature's Guise to allow you go through their jungle without worrying about being ganked earlier on. Plant an observer ward on the neutral camp where they can pull, to stop them from stack pulling. It also lets you know whether they're running a trilane or not. And as because you're closer to the side-shop, you can always grab a
 Stout Shield
 afterwards if you're under heavy harass.
Once your
Overgrowth is ready, you can start roaming.
Middle Game
At this point, a lot of conflict (roaming and ganking) should be happening, an you shouldn't miss out on the fun! As you would want to quickly max out all your skills for some heavy DoT nuking and also for longer invisibility, and since enemy heroes provide a heck load of EXP, and since your presence could make it easier for carries to get kills, you would want to be part of a conflict.
HOWEVER, keep in mind to be very careful and do not be reckless. DO NOT ATTEMPT TO FIGHT ON YOUR OWN. Stick close to an ally OR if you're roaming alone, abuse your Nature's Guise ability to keep out of trouble, and try placing some Observer Wards as well since you can do it without being noticed with your invisibility skill
Where you should place wards, would be at rune spots and also parts of the enemy jungle to allow your safe-lane carry to farm properly.
When encountering lonely enemies in lanes, there is a 50% chance that an enemy ambush is waiting in the jungle (worse of all, mid-lane)
It is advisable that you do not rush into battle, but instead use
Nature's Guise and
Leech Seed the lonely enemy hero, and prepare to use
Overgrowth whenever the other enemy heroes try to ambush your allies.
Do not stay in the same lane all the time, and be aware of everything that's going on around the map. Always refer to the mini-map for hero locations (both allied and enemy) and for allied heroes who are in need of heal or damage block. If the situation allows it, repair damaged towers with your living armor (situation being the damaged doesn't look like it's going to be attacked any time sooner)
If you're low on gold, just grab a few creeps and run off into the jungle again, because exposing yourself on the mini-map can be very dangerous.
If ever you run into enemy ambush, try to escape with
Nature's Guise and
Living Armor to block some hits so that you can avoid death.
If there are nearby allies, you could always use
Overgrowth and quickly signal for help, and prepare to start a grand chase leading the enemies to their doom.
Prevention is better than escape, so use
Nature's Guise at all times to avoid being caught in enemy ambush. Always signal enemy presence in the jungle if you ever run into them. If you run into the whole team, signal their presence, wait for your allies and prepare to surprise them with
Overgrowth
As you're durable, playing bait could work too. But you must have good team communication. Make sure you can pull off the
Overgrowth when possible.
Always remember to let the carry (or carries) get the kill if he (she/they) can, for they need the gold more than you do.
And avoid being silenced or stunned at all costs!
Items you could and should be getting at this point includes :

|
|
This is a highly underrated item in pub games. It provides you with good stats and a neat aura of speed, which you will be needing because you want to get to the conflict zone as fast as possible. It also has a really good burst speed which can help you chase down enemies or help retreating allies escape. Remember that it only has 4 charges so use them wisely.
|

|
|
Words cannot express how useful this item is, because it is a huge difference in 250 from dying and being able to turn fights around. In my opinion, EVERY team needs one in their team, but ONLY ONE. If no one in the team is getting it, get one (although you would be the best candidate for it because of how durable you are, you can pop the heal before being burst down.)
|

|
|
If you're facing a team with a lot of nuking power, this item is a great item to get. It builds into a  Pipe of Insight which is a really great late-game item. Also, it gives a damn load of HP regeneration, probably the highest fixed HP regeneration from an item in the game. Grabbing this will increase your survivability by a lot. Pipe of Insight which is a really great late-game item. Also, it gives a damn load of HP regeneration, probably the highest fixed HP regeneration from an item in the game. Grabbing this will increase your survivability by a lot.
|
|
|
|
If you can get this at this point of the game, along with your other items, then it will be really good for teamfights. The 400 damage reduction from all spells is ridiculous and too good to pass on if playing against a lot of nukers and powerful initiators.
|

|
|
If you cannot afford a blink dagger, this item can help too. Because it is made up of different parts it can be easier to build up even if the total price is more than a blink dagger, plus it gives some great stats for your mana pool and HP regeneration.
|

|
|
If you cannot afford a Mekansm, this is the next best option to it.
|
The Boots Argument
As for the boots argument, the most viable (and only) boots for Treant is
 Arcane Boots
 as you constantly need a good mana reserve for your skills, so upgrade your boots into that. Do not take
 Power Treads
 or
 Phase Boots
 as the extra damage and attack speed are wasted on Treant. Mana replenishment is much more useful to you than attack speed and stats, and since
Nature's Guise also provides extra movement speed and invisibility, so Phase ability isn't really needed. As for
 Tranquil Boots
, sure the high base speed may be good, but since you've already got 2 other healing techniques, and mana is extremely important for you, you'll have to just go for
Arcane Boots instead of this.
As for
 Boots of Travel
, global presence might be good, but it's way to expensive to be farmed at this point and there are better items you should be getting. Save it for the Luxuries.
Also don't forget to replenish mana of allies who need it.
Late Game
Depends on what's going on, at the point the usability of both Leech Seed and Living Armor will have fallen greatly, although 80 damage block might still be a bit helpful.
If you're losing the game, you will have to try and pull off some really good Overgrowth and you'll have to ensure you can turn every teamfight around as much as possible. Do not try to go out on your own, you don't have the ability to take a whole team or a fed carry so just stay by your allies and be very cautious.
Try to keep the towers and barracks at full health at all times, because it's crucial to not let them have the creep advantage at that point.
In any other situation, you'll have to get the appropriate items in order to counter their carries.
Some items that you could get at this time that would help :

|
|
A really great item against physical DPS heroes, and also for your physical DPS heroes to dish out damage. It provides tons of armor and provides great armor aura to both help your allies and cripple your enemies. With the attack speed, you could do some decent right-click damage with your insane base damage.
|

|
|
Increases your survivability by tenfold, as it gives so much HP and really high HP regeneration. with this item, it can be safe to let you get focused by the enemy to take all the damage which would be disasterous to your other team members.
|

|
|
Another great items against physical DPS heroes. Although the attack speed reduction is quite mediocre, but the armor it gives is great, and also greatly increases your mana-pool to be able to cast more spells. Also, the active ability has a neat movement speed slow to it, which can help in many ways.
|

|
|
There's nothing more frustrating or scary than being turned into a helpless pig and watching everyone chip off your health slowly.
|
Situational Items and Rejected.

Blademail provides you with a hefty amount of armor and IQ points, as well as comes with a handy damage return ability. Quite useful as you are highly durable, and can punish those nasty carries for picking a fight with you. Although, if you're taking a lot of damage reduction items over HP items, this won't be so effective as they'll be only taking back the reduced damage. Build this depending on how you want to be durable.
 Vladmir's Offering
 It's cheap, and comes with a lot of great bonuses. However, getting more than one of this in the same team is a waste of 2050 gold, plus it's really cheap to build and can be obtained easily at any time of mid-game and forth. Remember that most of the bonuses are percentage based, and this shouldn't be rushed.

While not being cheap,
Eul's Scepter of Divinity provides a great addition to your Mana reserve as well as nice mana regeneration and some extra speed for mobility.

Since getting disabled while attempting to use Overgrowth isn't a nice thing,
Linken's Sphere helps you eat that disable and still be able to carry out your evil plan, while the enemy just wasted his precious ability for nothing.

One of the best weapon against really strong physical DPS heroes who only can rely on their right-click power like
 Drow Ranger
. Disarming them is as bad as having them hex-ed except with a better movement speed. Also, the
Heaven's Halberd provides evasion and good stats, for more survivability against physical DPS. (The maim is a bit wasted on Treant though, as his BAT is pretty bad)
 Refresher Orb
 allows you to quickly get
Overgrowth ready whenever needed (if in cooldown state) and a 9 seconds AOE stun will hurt the enemy a lot won't it? Also provides lovely mana regeneration.
Explained in the
Boots Argument section
HIGHLY REJECTED

I've seen people rushing
Radiance on Treant. My biggest advice is to NOT get it. IMO, it is one of the worst items in the game that is not worth being picked up by 90% of the hero pool. It's too expensive and what it gives is not much to make up for it's price. Plus, the aura from it will reveal you when you use
Nature's Guise on yourself and it's stupid to think that it will help in any way, because they will just know where to dust or place a sentry which will lead to your downfall. Plus if you argue about turning off your aura, it's pretty much a waste since you usually get that item for the aura anyway. Whatever argument you might come up with, I'll stubbornly say that
Radiance is a horrible item and should not be gotten on Treant at all.
REMINDER
All builds are fluid, they're mostly based on player preference. As of my preference, I prefer getting these selected items from above. You could argue that
Radiance does have its uses, and perhaps even [{Dagon]] could be a fun build on Treant as it has a wacky synergy with
Nature's Guise. Best way to decide the items that you need is by adapting to the situation of the match. I'm just listing out the items that could go well in most situations, but remember, you need to get what is NEEDED and not what you want to get.
Why can't Treant carry?
Many people have been saying lately about Treant protector's carry potential, with items such as Radiance,  Mask of Madness, Basher and Heart of Tarrasque coupled with other DPS items. The reason why Treant cannot carry the game simply is because other better carries out there WILL outcarry you. Here's a simple list of carries, or even just SEMI-carries that will outcarry Treant.
|
VS
|
|
Because of his primary attribute being Agility,  Butterfly will be a key choice of item on this guy. Also, Butterfly will be a key choice of item on this guy. Also,  Manta Style is the iconic core for Anti-Mage which signifies that he "has finished farming", in which will create 2 clones of him, to greatly increase his mana burning potential. Without mana, you will have to solely rely on your physical DPS to harm him, but the evasion he gets from Buttefly will give you even lower chances of getting a bash on him. With your Mask of Madness activated, you will take even more damage from all his clones, plus he is the fastest attacker in the game while you are the slowest because of your BAT. Even if you have Radiance, he has his Spell Shield which will reduce the damage of Radiance greatly, couple with his natural magical resistance. Even if you manage to catch him with Overgrowth, if you cannot kill him within 3 seconds or get a bash he can simply blink out and make a comeback once his Heart of Tarrasque has replenished his health. Even if you have Heaven's Halberd, he can simply blink away or you won't even have the mana to even cast disarm. Manta Style is the iconic core for Anti-Mage which signifies that he "has finished farming", in which will create 2 clones of him, to greatly increase his mana burning potential. Without mana, you will have to solely rely on your physical DPS to harm him, but the evasion he gets from Buttefly will give you even lower chances of getting a bash on him. With your Mask of Madness activated, you will take even more damage from all his clones, plus he is the fastest attacker in the game while you are the slowest because of your BAT. Even if you have Radiance, he has his Spell Shield which will reduce the damage of Radiance greatly, couple with his natural magical resistance. Even if you manage to catch him with Overgrowth, if you cannot kill him within 3 seconds or get a bash he can simply blink out and make a comeback once his Heart of Tarrasque has replenished his health. Even if you have Heaven's Halberd, he can simply blink away or you won't even have the mana to even cast disarm.
|
|
VS Skeleton King |
|
You have to kill this guy TWICE. He's a strength carry, and if he ever gets the farm he needs, it will be so hard to take him down without him having to reincarnate, what else trying to take him down the second time? He has a 2 seconds stun which can be used every 8 seconds, plus a powerful critical strike and in-built lifesteal. If he ever gets critical hits on you, it will hurt more than you bashing him and he can just gain back all that lost health because of his lifesteal aura. And even if you manage to get lucky the first time, there's no guarantee you will succeed the second time.
|
VS

|
|
This is an unfair fight. It's 2v1 and that bear is extremely tanky. The bear can just stop you from attacking Sylla himself, and their combined physical DPS can outcarry yours. Even if you manage to kill the bear, he can just resummon it again, and because you're melee, you're gonna have a hard time chasing after the real guy.
|
And this is just based on their skills, not even talking about items. I mean,
 Chaos Knight
 could always get
Heaven's Halberd and stop you from dishing out your physical damage.
Slark can get
Butterfly which adds to his survivability and evasion will give you such a hard time. Perhaps in any other pub game with stupid people running around, Treant might be able to pull off as a carry but against people who knows what's going on and know how the game works, he by no means can carry the game for his team.
Some Synergy
Treant Protector has a lot of synergy with a lot of heroes, but I'll list down some notable ones.
|
|
Necrolyte

|
|
AOE DoT heroes: An undetectable wave of destruction (in the forest). Heartstopper's Aura and  Pulse Nova while they're invisible is quite scary if they can't stop the source of damage. Pulse Nova while they're invisible is quite scary if they can't stop the source of damage.
|
Author's Words
This is my very first guide published, and I hope I won't be discredited for the massive wall of texts and unattractive presentation. As this guide is mostly based on my opinion and experience, I'm sure others would think otherwise and am happy to receive feedback and/or criticism to improve on this.
Remember, all item and skill builds are fluid. Dota is a game that is ever-changing and to be good at it, one must be able to adapt to the situation and do what is needed in that situation. Don't go for a static build, but be more flexible and look at the synergy with your team and the counters to enemies.
This is an improved version of the previous guide, comment and feedback would be welcomed.


Quick Comment (6) View Comments
You need to log in before commenting.