Help Support Our Growing Community

DOTAFire is a community that lives to help every Dota 2 player take their game to the next level by having open access to all our tools and resources. Please consider supporting us by whitelisting us in your ad blocker!

Want to support DOTAFire with an ad-free experience? You can support us ad-free for less than $1 a month!

Go Ad-Free
Smitefire logo

Join the leading DOTA 2 community.
Create and share Hero Guides and Builds.

Create an MFN Account


Or

11 Votes

6.81 Definitive No Non-sense Bounty Hunter / Semi-carry / Ganker Guide

May 6, 2014 by Ghraf
Comments: 9    |    Views: 46185    |   


Build 1
Build 2

Bounty Hunter / Early / Roamer

DotA2 Hero: Bounty Hunter


Hero Skills

Shuriken Toss

4 5 13 14

Jinada

2 7 9 12

Shadow Walk

1 3 8 10

Track

6 11 16

Talents

15 17 18

Introduction - Gondar - The Bounty Hunter


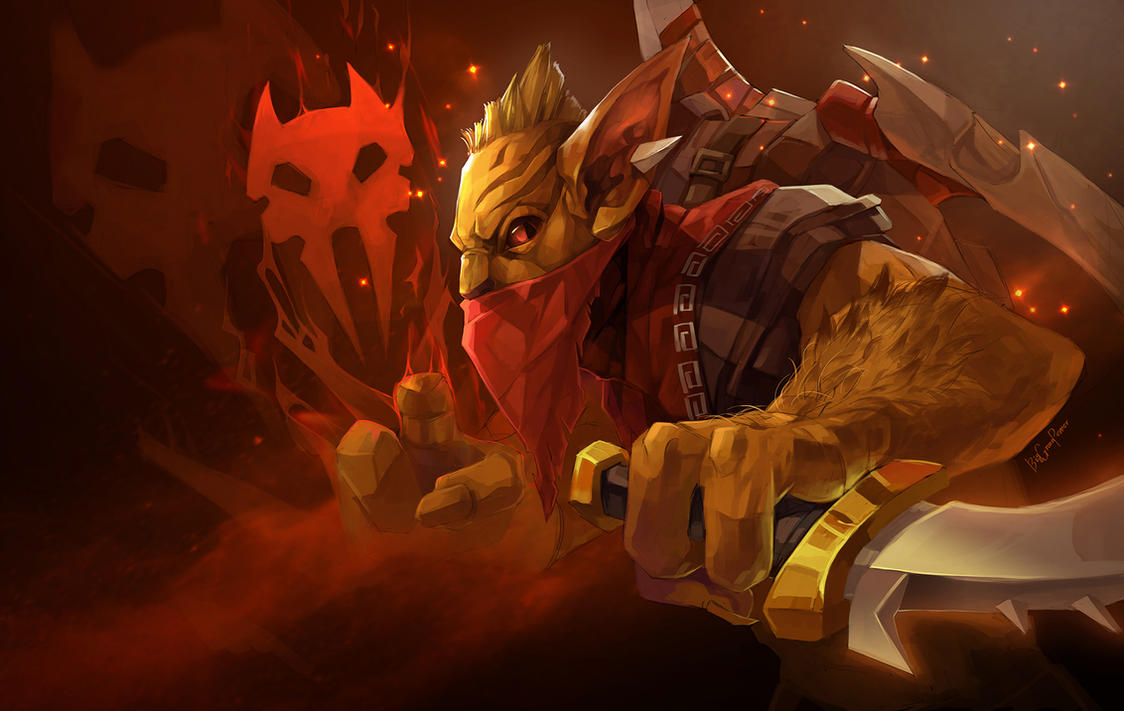
Bounty Hunter is a highly effective roamer/ganker in the early stages of any match, whether played from suicide, safe, or even mid lane. He is less dependent on his team than most semi-carries and carries to get early gold income, due to Track and his relatively high durability in the early and mid game. He is best played as a right-click type carry, with focus on maximizing the bonus of his guaranteed crit mechanic from Jinada and has good kill security with Shuriken Toss.

Primarily picked to counter such stealth heroes as Riki, Clinkz, Weaver, Bounty Hunter can also be used very effectively against other, squishier and farm-centric carries, especially Drow Ranger and Sniper.

Bounty Hunter is ultimately best-suited to players looking for an aggressive hero to ensure your team an early game gold lead and lane dominance, and can be picked against a variety of enemy heroes, as well as working effectively with nearly any composition of allies.

Pros / Cons

A self-explanatory list of the pros and cons of picking Bounty Hunter.

PROS
  • Very high early-game dominance potential
  • Very high gold income without needing to farm creeps due to Track
  • Very high right-click damage and guaranteed debuff with Jinada
  • High flexibility for increased team utility
  • High early-game durability and damage
  • Can safely dive and chase enemies fairly early
  • Provides global True Sight on enemies hit with Track
  • Near-permanent stealth with Shadow Walk

CONS
  • Needs to gank and get early kills or assists to be effective
  • Reliant on some form of farm, like any carry, and can fall behind if played passively
  • Can be hard-countered by heroes like Slardar or Bloodseeker
  • Loses durability in the mid and late game
  • Relatively ineffective in teamfights without a heavy gold or level advantage

OTHER
  • Requires awareness of enemy team's inventory at all times
  • Requires good observational ability to keep up with enemy counterwarding
  • Requires good map awareness and knowledge of hiding spots/LOS spots
  • Requires knowledge of enemy hero skills and capabilities to play safely

    Bounty Hunter is a carry by design and suffers from the inherit disadvantages they entail, such as a need to acquire items to be effective and potential to become a liability to his team if he doesn't come online early enough, or when picked against a team comp that counters him.

    With those things in mind, his potential weakness is also what makes him such a strong hero. Unlike most carries, on the other hand, he acquires his needed items very quickly and efficiently when played correctly and hard counters many heroes very early in the game, before they can get farm themselves. He has a capacity to be incredibly aggressive that few other heroes in the game can match and also can give his team and enormous gold advantage as soon as he hits level 6.

    For maximum effectiveness, Bounty Hunter must achieve early game kills for his team before the enemy carries can become a threat. If he dominates the early game, he will become a huge threat to nearly any hero in the late game and can easily lead his team to victory.

Abilities - What They Do - When to Use

Bounty Hunter has a variety of tools at his disposal that make him both a very powerful enemy to fight against solo and an incredibly difficult enemy to catch.

Shuriken Toss


Q, T


Range: 650
Damage: 100 / 200 / 250 / 325
Mana Cost: 90 / 115 / 135 / 155
Cooldown: 10 seconds
Damage Type: Magical; Cannot be used on Magic Immune enemies. Blocked by Linken's Sphere.

Shuriken Toss is Bounty Hunter's basic ranged nuke skill. Use it for securing kills, adding additional punch to a stealth attack after Jinada, ending channeled spells with its mini-stun (such as Black Hole, Fiend's Grip, or even a Town Portal Scroll), or to momentarily slow down a fleeing enemy to allow an ally to inflict a hard-CC.

Skill at levels: 4, 5, 13, 14
Can be picked up sooner if you're absolutely sure you can get a kill with it in lane. Pick up two levels at 4 and 5 to have it ready to use when ganking at level 6. The reason we only get two levels into it and stop is because the damage scaling from skilling it to 3 and 4 is too inefficient to be worth the large mana increase.

Do not: Use this as a harass in lane or to spam from stealth. It costs far too much mana to be used carelessly.


Jinada


Passive, W, J


Duration: 3
Movement Speed Slow: 25%
Attack Speed Slow: 25
Critical Damage: 150% / 175% / 200% / 225%
Cooldown: 12 / 10 / 8 / 6
Damage Type: Physical; Can be used on Magic Immune enemies for full effect. Debuff can be purged.

Jinada is Bounty Hunter's signature passive crit and debuff ability. It has a relatively short cooldown of 6 when maxed and allows you to inflict incredibly high burst damage on an enemy target from stealth or in open combat (however, Shadow Walk bonus damage is not factored into crit % bonus). Be aware of its cooldown when ganking or chasing, as a hit with Jinada can be the difference of a successful or unsuccessful gank, especially against heroes with strong escape abilities. Jinada's crit % factors in bonus attack damage from all sources and items, so getting high attack damage items is the best way to take full advantage of this passive.

Skill at levels: 2, 7, 9, 12
Although tempting to max out quickly, it's not as efficient of a utility as your other abilities until you get higher right-click damage. Put one point into at level 2 after Shadow Walk to get the debuff from it, since it offers the same debuff at all ranks, and the guaranteed crit every 12 seconds to help you farm creeps easier. Picking up a point when you hit level 7 to help you facilitate ganks easier is acceptable, because by then you should have Phase Boots and Urn of Shadows to augment your right-click damage.


Shadow Walk


E, W


Duration: 15 / 20 / 25 / 30
Bonus Damage: 30 / 60 / 90 / 120
Fade Time: 1 / 0.75 / 0.5 / 0.25 seconds
Cooldown: 15
Mana Cost: 50
Damage Type: Physical; Can be used on Magic Immune enemies for full effect

Shadow Walk is your bread-and-butter stealth ability that will be both keeping you alive and killing your enemies for most of the game. Its cooldown and mana cost stay the same at all ranks, as well as always being very useful, so it will be your first skill to max. With the bonus damage on attack from stealth and relatively high fade time, you can use this to help you farm creeps by getting two or even three from-stealth attack bonuses. The bonus damage doesn't stack with Jinada, as previously explained. Always keep the fade time in mind when going for ganks, because the enemy will hear the sound effect if you come into their LOS during the fade.

Skill at levels: 1, 3, 8, 10
Mana cost and cooldown always stay the same, ranks only increase duration and bonus damage, and decrease fade time. It's possible to stay in stealth indefinitely, as long as you have the mana, from even rank 1 if used as soon as it comes off cooldown.


Track


R, R


Duration: 30
Range: 1200
Speed Bonus Radius: 900
Bonus Move Speed: 20%
Bonus Gold for Self: 150 / 200 / 250
Bonus Gold for Allies: 50 / 100 / 150
Cooldown: 10 / 7 / 5
Mana Cost: 50
Damage Type: Magical; Can be used on Magic Immune units, but dispelled if unit gains Magic Immunity during its duration. Blocked by Linken's Sphere.

Track is your near-spammable ultimate ability that gives your team true sight of any enemies it's cast on along with a hefty gold bonus if they die. Cast this every time you possibly can, since the true sight is infinitely valuable to your team by allowing you to see your enemy's movements and immediate surroundings. The move speed bonus can be used for both chasing and escaping, so cast it on enemies near your teammates to help them out if they're in danger or trying to chase. You get more gold for kills under its effects than your teammates do, for extra incentive to keep it up as much as possible. If an enemy has Linken's Sphere this can be cast on them to negate its buff for a short time to allow your teammates to CC or attack them. Enemies can't see the animation or marker on them, but can see the debuff on their status bar.

Skill at levels: 6, 11, 16
Rank Track at every possible opportunity. The utility it offers you and your team is invaluable. Once you have this skill at 6, you can start ganking immediately, also.

Abilities - Advanced Tactics - How to Maximize Effects

This section will cover a few "tricks" and more in-depth use of Bounty Hunter's abilities. This isn't necessary information to play him, but it is very helpful to know and to be able to take advantage of to make your play better.

Shuriken Toss:
Jinada:
Shadow Walk:
  • Shadow Walk's long fade time at rank 1 and 2 can allow you to get up to two attacks in before fully stealthing, while still receiving the bonus damage. To perform this, begin approaching what you want to attack to ensure you are in melee right-click range, activate Shadow Walk, and immediately afterwards (during the fade to stealth) right-click to attack the enemy unit. Immediately click away or use your stop hot key after getting in your fade attack to ensure you stay in stealth and don't continue auto-attacking. You will gain full bonus damage on your next right-click when exiting stealth as well, allowing you to get up to 3 attacks with stealth bonus damage between fade time and exiting.
  • Shadow Walk disjoints most projectiles, including tower shots and ranged hero's right-click attacks. To perform a disjoint, wait for the projectile to be fired and on its way to you, then activate stealth quickly, allowing time for fade. This can be useful when used in conjunction with the Urn of Shadows heal when in desperate situations. Activate the Urn heal on yourself and disjoint the next projectile to be sure you get a full heal. Of course, if the enemy has true sight on you, you cannot disjoint.
  • Like most spells, Shadow Walk can be cast while channeling a Town Portal Scroll or when doing anything else that's considering a channeled ability. Use your Town Portal Scroll then immediately cast Shadow Walk while teleporting to arrive invisible.

Track:
  • Track has no limit on the number of heroes it can be cast on, so just cast it on everyone.
  • Throw quick Tracks on enemies that are in the process of being killed regardless of if it's necessary to secure it, since the bonus gold helps every in range.

Items - Ganking / Semi-Carry Build - All Lanes

While being a very flexible hero, Bounty Hunter should typically start out building towards certain items all the time. This section will show a few different ways to build him and things to give things to consider when picking items.


Starting Items - Suicide Lane - Harassed


Tangos are the essential passive-regen consumable that all heroes usually get when heading out to lane. In solo lane, you may need to pick up a second set of these at some point if you're getting harassed a lot. They're fairly cheap, so it shouldn't hurt your farm very much if it means staying alive longer.

Healing Salves should be saved to use after you've exhausted all your tangos, or if you're being ganked or attacked and need to quickly regen a lot of health. The most efficient way to accomplish a combat salve is to use the Healing Salve and immediately use Shadow Walk before anything can hit you. Running the enemy around trees and blocking the LOS can also help you achieve this.

Clarity is a very useful starting item as Bounty Hunter since his mana pool is somewhat limited early on. Popping a Clarity then Shadow Walking ensure maximum regen and will give you enough mana for two more Shadow Walks.

Stout Shield is almost a necessity when suicide laning, because you will invariably be under harassment, unless you get faced against a solo enemy, however unlikely. The 20 damage block might seem like nothing at first, but it adds up over the long term. For example, a Tango heals 115 health in total, so six melee blocks could be even more health than a Tango would restore.

Starting Items - Safe Lane - No Harass


Gauntlets of Strength are the only difference for this starting build. Two of them will get you well on your way to an Urn of Shadows before you even get any farm in lane, accelerating the time it takes for you to come online. They also offer extra strength, which will augment your already-strong armor value by giving you more health and regen, making you a more durable early hero.

Early Game - Core - Ganking


Phase Boots are the standard Bounty Hunter boots, offering both good movement speed and bonus right-click damage to maximize Jinada. Picking these over Power Treads is almost always the best way to go, because Power Treads offer little that Bounty Hunter needs, since he shouldn't be built with focus on attack speed or stats, but direct damage instead, and his health and armor is already sufficient for being a stealth ganking hero. Be aware that activating the move speed boost will break Shadow Walk.
Urn of Shadows is generally the best ganking item you can pick up on Bounty Hunter, since it builds very quickly and will be ready before level 6, and it offers decent mana regen, which you'll typically lack. The main reason to get it is the powerful heal or damage-over-time, however. If your first gank without charges is successful, you'll have little trouble securing the rest of your ganks. Apply the DoT as much as you think you can get kills with it. It does 150 damage in total, per charge. Don't be afraid to blow the heal on teammates, either. Don't forget, damage from towers, enemy heroes, or Roshan will cancel the heal.

Desolator is the one core item that will stick with you throughout the entire match. The +60 damage from it is great for Jinada's bonus, on top of the -7 Armor debuff it gives that almost guarantees true damage on most heroes early game, except the most tanky. The debuff works on buildings and your teammates will also benefit from the effect, so there's really no reason not to pick this up as early as possible. Remember that the debuff is a Unique Attack Modifier, so get Vladmir's Offering instead of Helm of the Dominator if you need lifesteal, because the aura will stack with it.

Vladmir's Offering is the only lifesteal item that works with Desolator, because it is an aura. The extra mana regen and armor is fantastic for Bounty Hunter, giving him the ability to stay out and gank even longer, on top of giving a bonus to his teammates, and being cheap to build on top of all that. Suffice to say, the lifesteal is incredibly helpful with Jinada, because it returns an even large amount.

Extension Items - Mid/Late Game - Carry


These items are generally things to look at if there are no outstanding items you absolutely need, such as an early Black King Bar.


Abyssal Blade has a strong bash stun passive that stacks on top of everything you already have, including Jinada, Desolator, and Vladmir's Aura, as well as an activated stun that goes through Magic Immunity, but is blocked by Linken's Sphere. It offers an incredibly high amount of damage on top of that, which works great with Jinada. If you have the gold to blow on it, this is definitely the item to get.

Butterfly is the quintessential agility carry item, offering evasion, attack speed, and damage. Bounty Hunter doesn't necessarily need attack speed, but it can't hurt him, and the evasion is fantastic for late game brawls where your health and armor might start to fall off, even with a hefty lead.

Monkey King Bar gives a large amount of damage, plus a bonus damage bash and true strike, allowing you to penetrate the defense of evasive heroes, like Templar Assassin or Phantom Assassin. Backtrack will still evade attacks, however. Regardless, the amount of damage this item gives make it a reasonable item to pick up at any time.

Assault Cuirass offers a powerful dual armor buff/debuff to your team and against the enemy that also stacks with Vladmir's Offering. No reason not to get this if you have the gold and the enemy team includes a lot of heavy physical attackers. The attack speed buff is great as well, especially in combination with lifesteal.

Optional - Mid/Late Game - Countering


These items are things you may need to grab in certain situations to keep yourself from getting countered, such as playing against a CC-heavy enemy team or a team with strong single-target nukes, like Laguna Blade.


Black King Bar will probably be picked up in most of your matches. Get it after you've finished Desolator to keep yourself from getting stun-locked when trying to gank or to protect yourself from AOE magic during teamfights. It is a highly useful item to have even if you don't really need it and can fit into any build, however.

Linken's Sphere is a very situational item. You probably won't ever buy this unless facing specific heroes, like Slardar, because it will block his Amplify Damage and keep you from losing your stealth advantage.

List of important Linken's Sphere counters:


Diffusal Blade is probably an item you'll never get, akin to Linken's Sphere, however, it does hold usefulness in that it's ability, Purge, can remove the Dust of Appearance debuff from you and allow you to go back into stealth. Simply use it on yourself when you get dusted and restealth. It can be a useful thing to do if the enemy team has a lot of dust.

Bottle is something to pick up while ganking, because it offers a lot of regen in the long run and can also help your mid control the runes. If anything, it can keep valuable runes out of the enemy's hands as well. It's an alternative to Urn of Shadows.


Optional Items - Situationals - Non-essential


These are a few items to keep in mind that you might benefit from at some point in the match, but are not essential in any way and will almost never be bought unless you particularly enjoy using them.


Orb of Venom is a very early game item to pick up from the side shop or secret shop that offers a small slow and a very weak 4 second damage over time, doing 3 damage per tick. The damage over time can cancel healing salves, clarity, and bottle charges. Get it if you feel like you want the little bit of a slow on top of your Jinada proc, otherwise just save your gold. Sell it when you get Desolator because it's a Unique Attack Modifier and will no longer work.

Medallion of Courage is part of the default Bounty Hunter build, because it offers 6 additional armor and has a -6 armor debuff that can be activated on enemies (and also effects yourself) to allow you to do more damage. It's a fairly cheap item and be picked up very early in place of Desolator, perhaps if you're having trouble with farm or just want a small damage boost sooner. Keep in mind that it doesn't directly increase your damage in any way other than reducing the enemy's armor when you use the active, however.

Gem of True Sight may seem like a bit of a redundant item to pick up with having Track, and this is more often than not true. But, it does have a special place of usefulness when facing certain enemies that are able to apply stealth to multiple teammates, such as Mirana or Treant Protector. It can also be a useful item to have against Riki because it allows you to see him at all times. Remember that you drop this item upon death, so be very careful with it, or it might be used against you.
Drum of Endurance is included as a core item in many Bounty Hunter builds, but I personally recommend Urn of Shadows over it for the simple reason that it has the dual purpose of adding additional range to yourself with the damage over time, being an incredibly melee-intensive hero, and gives you a lot of regen, similar to having a Bottle. Drum of Endurance is a great item in general, it offers increased move speed and some additional stats to help you survive, plus has an aura, but should probably be left to be bought by another teammate, since you'll be wanting to save up your gold for the important Desolator as soon as possible.


Items to Avoid - Bad Synergy


Don't, under any circumstances, get these items unless you intend to spend gold in a derogatory way to yourself or are messing around. There are a lot of other, more obvious items not to get, but I'm just going to focus on the things I sometimes see new players go for on Bounty Hunter.


Crystalys and Daedalus are two tempting items to get on any right-click hero, but there's something important to know about how critical hits and items in general function in Dota 2. When two sources of critical damage are activated at once, the last source you acquired will deal the damage. Jinada is, technically, an aura that is applied every time the cooldown for it is up. This means that if you have Crystalys or Daedalus, in order to get the benefit of their critical hits, you would have to drop them and pick them up after every Jinada proc, or else their critical hits would not actually work (despite seeing the critical damage numbers). Not only is this impractical, it is entirely unnecessary to spend the gold on Daedalus for a minor crit damage boost in the first place. Simply, don't buy crit items on Bounty Hunter.

Manta Style is another temping item, it looks great with all those stats and on top of that, illusions. As stated early, Bounty Hunter is not a stat-based hero. He doesn't need a lot of agility, strength, intelligence, and attack speed to be useful. As a matter of fact, focusing on those things solely is actually bad for Bounty Hunter. His primary form of attack is taking advantage of Jinada's effects, which are maximized by building bonus damage. Manta Style's illusions don't proc Jinada either, so, unlike a few other heroes with Unique Attack Modifiers that they pass on to illusions, Bounty Hunter does not benefit from illusions in any way other than them simply being there.

Battle Fury is a hardcore farmer's item in most cases, but at some point it has become popular for heroes with crit effects to start picking it up, which means a few Bounty Hunter builds suffer from it. Battle Fury is one of the least gold-efficient items in the game to buy early, it offers little-to-no benefit for practically any hero, with the exceptions of Anti-Mage and Ember Spirit. It's expensive, gives very little in the way of actual regen compared to a Bottle or Urn of Shadows for their costs, doesn't give much damage compared to the cheaper and more useful Desolator, and the cleave is only 250 units to begin with. The odds of you being able to cleave multiple enemy heroes with a Jinada is low to the point of being near-impossible, unless your team is comprised of something like Magnus, Enigma, and Dark Seer. Even then, it's a waste to pick up because Bounty Hunter is not a farming hero, which is who it suits best.

Sange and Yasha can be a point of some debate, considering that it's Greater Maim actually stacks with Jinada's debuff, making for a huge slow if they both happen to proc at once. The main problem with it, however, is that you're simply stacking on more of what you already have without getting any major benefit. The debuff only has a 16% chance, which doesn't make it reliable enough to be used to gank. The stat benefits are entirely unnecessary, and it's a fairly expensive item. You'll get more out of building something like Heaven's Halberd or Desolator for less than or the same price. Bounty Hunter is a hero that benefits more from utility than stats, so keep that in mind when picking items.

Hero Matchups - Hard Counters - Easy Kills

This section will detail enemy heroes to watch out for or be cautious around, and inversely, heroes that you have a steep advantage against.

Dangerous Enemies


Slardar
Sprint BashAmplify Damage
Slardar is easily one of your hardest counters. He's everything you don't want to deal with, a strength hero with true sight, armor reduction, powerful stuns, and a bash passive. There isn't a whole lot you can do against him at most points in the game, however getting an early Linken's Sphere will help you deal with Amplify Damage from tracking you and removing your armor.

Your best option is to simply stay away from him and let your other teammates with CCs deal with him. If you have to attack him, wait until he uses Sprint and take advantage of your Jinada crit getting 15% extra damage. You can also buy an Orchid Malevolence to keep him from casting Slithereen Crush and Amplify Damage and hope to nuke him down before he gets to stun you.


Omniknight
Omniknight counters everything that you are, with Repel able to block both Shuriken Toss and Track and Guardian Angel completely negating your right-click attacks. His presence in teamfights will make you absolutely null and useless if he lands his whole team in Guardian Angel. Not to mention Purification's AOE ring of damage that can severely injure you while trying to attack other enemies or himself, and his Degen Aura that will make him seem far more tanky than he is when fighting solo.

The best way to counter him is get an Orchid Malevolence to silence him and then nuke him down as quickly as possible to prevent him from blowing Guardian Angel. Fight him while he's alone whenever possible to force him to use his skills on himself rather than having them up to support his teammates.


Bloodseeker
Blood Bath
With Rupture and Thirst, Bloodseeker is a strong right-click carry counter to you, when played well. Thirst negates your stealth advantage when you have 25% or less health and provides sight of you at up to 50% health, which is bad for you when ganking early and taking damage. If he chases you down and hits you with Rupture, there's little you can do except stand still and stealth. If your health is high enough, that should be enough to counter him, but if you're under 25% by then you won't be able to escape.

Despite being a fairly strong counter to you, he is pretty easy to negate, with normal warding. If your support isn't placing wards around the map, then you might have to pick some up to see where he's at to be able to get away from him before he can take advantage of Thirst vision. Regen and then go kill him by fighting him man to man and not running so he can't Rupture you. Have teammates help you for a guaranteed kill to keep him down.


Enemies to be Careful of


Clinkz
Clinkz is a ranged hard carry whose main defense mechanism is stealth with a move speed buff. If possible, try to get a Track on him before he sees you, then return to stealth. Otherwise, approach as close as possible to him as you can get in stealth and attack him in melee, putting Track on him as quickly as possible. Urn of Shadows should be applied whenever possible to ensure you get the kill if he does escape somehow.

Generally, Clinkz will probably attempt to escape back to his teammates or simply away from you. However, your Track gives you a 20% move speed buff, on top of your Phase Boots, and with the slow from Jinada, you should easily be able to keep up with him and kill him. If he's ahead of you in level and farm, he may fight back with Orchid Malevolence and Strafe. Unless you're confident you can kill him with right-click attacks, activate Phase Boots and try to line-of-sight him until you can get out of the silence and Shadow Walk again, then go back and kill him when his Orchid Malevolence is on cooldown.


Meepo
Geostrike
A well played Meepo can be deadly to nearly everything it touches, especially Bounty Hunter. Take advantage of his early squishiness and nuke down a single Meepo before he can react and Poof in more Meepos. Don't mistake his early weakness for being an easy kill later on. His Earthbind will prevent you from stealthing to get away, so a solo Meepo can easily bait you in, Earthbind, and result in a whole crowd of Meepos falling on your head a few moments later with no hope of escape.

Counter him by hunting him down early and killing him as much as possible. There are more than likely going to be multiple Meepos around the map for you to find, so go for them in the jungle when possible for an easy solo kill. He's a farm-reliant hero, so keep him down until your team can get far enough ahead to make him null in teamfights.


AOE Nuking Heroes
All of these heroes have strong AOE or magical nukes that can be cast on you while you're in stealth. Lina's Dragon Slave and Light Strike Array can be cast over a fairly large radius to hit you, plus her heavy single-target nuke, Laguna Blade, could be used to instantly kill you if you momentarily leave stealth with low health. Death Prophet's Crypt Swarm and Silence function similarly to Lina's AOEs, and her ultimate, Exorcism will deal physical damage in a large AOE around her (this can be countered by teammates with Blade Mail). Lion has a strong line-AOE stun with Earth Spike and a heavy single-target nuke ultimate, Finger of Death. Timbersaw's Whirling Death, Timber Chain, and Chakram all have potential to kill you while in stealth, if he passes through you or casts them near you. All of Jakiro's abilities can hit you in stealth, including Ice Path's stun.

In the case of Zeus, Lightning Bolt is a ground-targetable nuke that also provides True Sight in the impact area, so he can land it on you and see you while you're invisible if you're careless. Thundergod's Wrath will not reveal you unless you're within 900 units of an ally and get hit with the AOE, however. Be careful around him, because he could potentially reveal you long enough for teammates to kill you or use Dust of Appearance on you.

Luckily, all of these heroes are fairly easy to nuke down with Jinada ambushes. If you have trouble with any sort of casting hero, Black King Bar and Orchid Malevolence are two fantastic items to pick up in order to counter them. Be aware that some ultimates and abilities go through Black King Bar, like Laguna Blade, so some caution is still necessary. Kill them when they're alone and keep them down. Use your high damage and escape ability to your advantage for hit-and-run attacks.


Hard Disabling Heroes
These heroes all mostly have very strong disables that can be used to stun-lock you and prevent you from escaping or taking any action during fights. Shadow Shaman is well-known for his Shackles/ Hex combo, which will leave you entirely defenseless for up to nearly 9 seconds at max rank, combined with Serpent Wards, which can be used to create a wall around you and box you in (killing one should allow you to escape). Enigma has a 6 second ministun disable with Malefice that will stun you up to three times for 1 second each at max rank, on top of his ultimate, Black Hole that hard disables anything caught in it, even with a Black King Bar. Stay out of the fight until he uses it and then use Shuriken Toss to end his channeling and save your teammates. Earthshaker is notorious for his powerful, high damage AOE stuns, try to stay out of the way of Fissure and don't let him get close to you, or he can chain stun with Aftershock procs and Enchant Totem, along with his ultimate, Echo Slam which does increasingly higher damage depending on how many teammates and creeps you have around you in the AOE.

Batrider and Pudge are both ganking type heroes with somewhat powerful disables that can't be stopped with Black King Bar. Batrider's Flaming Lasso requires him to get in close, generally accomplished with a Blink Dagger, and then he'll grab you and drag you back to his team by pulling you through terrain with Firefly, or even simply dragging you onto a cliff and leaving you out of the fight. Pudge is one of the most popular heroes in Dota 2, and he can be a difficult enemy to face if the player is skilled. Meathook will allow him to pull you close and then, combined with a strong nuke, and then Dismember you. Using a Black King Bar will prevent the damage on Meathook and Dismember, but not the pull or disable.

Similar to Enigma, Bane has a powerful single-target disable, Fiend's Grip, that has to be channeled and can be countered when used on a teammate with Shuriken Toss, plus his Nightmare which puts anyone who attacks someone afflicted with it to sleep for up to 7 seconds. Bane is especially deadly in the early game, due to Enfeeble, because it reduces your attack damage by up to 120 at max rank and 30 at lowest, which is understandably bad for Bounty Hunter's business.

The best way to counter many of these heroes is to buy an Orchid Malevolence and shut them down before they can disable you. A Black King Bar will also prevent some, but not all, of the effects many disables have.


Easy Enemies


Riki
BackstabPermanent Invisibility
Riki, the bane of pub players, is one of the heroes Bounty Hunter counters the hardest. Track will entirely negate his Permanent Invisibility. Wait for him to pop in to attack something, when he's farming creeps or attack a teammate, Track him, and then go in for the kill in stealth. He's quite squishy and should be easy to nuke down quickly.

He will more than likely panic-drop Smoke Screen, which silences anyone inside of it and gives a large miss chance. Stay out of it and wait until he leaves it to chase him. With your Urn of Shadows, Jinada, and Shuriken Toss, you have a heavy advantage against him, so the hardest part is catching up with him. If he has a Diffusal Blade he might purge himself and then enter stealth again, so it might not hurt to carry some Dust of Appearance with you.


Drow Ranger
Precision Aura
Drow Ranger is a relatively easy hero to kill, especially early on, since her only escape and defensive ability is Gust. Your Shadow Walk will allow you to approach her from stealth and then deal with her in the same method as Clinkz, except she can't run. Her only hope to kill you is to out-damage you, which is very unlikely, especially early in the match.

She will more than likely buy a Shadow Blade at some point, but that won't be an issue having Track.


Sniper
Sniper is the same situation as Drow Ranger, except with a weak damage-over-time he can stand and fight you in with Shrapnel, plus mini-stuns from Take Aim. These things are little issue if you have lifesteal, however. Drop your Urn of Shadows on him to keep constant damage up and fight him through the mini-stuns. If he tries to run, simply chase and kill him.

Snipers tend to buy Shadow Blades as well.

Summary - Bounty Hunter

Hopefully this guide will help you go into matches with a deeper understanding of Bounty Hunter and what he can do. As such an incredibly powerful hero, he can be learned fairly easily, while it takes many matches to master him and play him to his fullest. The best way to learn Bounty Hunter is to simply play him. Remember to be aggressive and take advantage of all his abilities as soon as possible and you're sure to be rolling in thousands of gold, as well as being a great asset to your team.

And never forget, for the right price, anything.

Change Log - Notes

5/3/2014 - Release v1.0

  • Gameplay Section WIP to be published later
  • Need to include more information on items and skill synergies
  • Need to create better formatting
  • Revise item section presentation
  • Outline more hero matchups
  • Figure out what the **** is going on with advanced skills section formatting

5/6/2014 - v1.1
  • Additional information added to Pros/Cons
  • New optional items added to item section
  • More in-depth counter/hero matchups section
  • Added items to avoid getting

Quick Comment (9) View Comments

You need to log in before commenting.

Similar Guides
Featured Heroes

Quick Comment (9) View Comments

You need to log in before commenting.

DOTAFire is the place to find the perfect build guide to take your game to the next level. Learn how to play a new hero, or fine tune your favorite DotA hero’s build and strategy.

Copyright © 2019 DOTAFire | All Rights Reserved