Sven | 6.87 | It's Rogue Knight, It's Not Rouge knight. Dammit!
IGBAN
May 13, 2016
So... About Me
I'm NOT interesting MOVE ON.
I'm not interesting but if you really want to know I'm just your average
2k mmr player who knows stuff by playing in the higher mmr bracket (5kmmr+) through my friend's account. I must say I'm pretty much doing fine playing in that bracket
surprisingly. I don't play
 Sven mainly
 but I know a thing or two about him. I found out that there is no up-to-date guide for
Sven so I just thought "
Why not make one?". I am from the
Philippines if ever you were wondering, but I'm not your average typical "
peenoise" since I play on EU/US servers and all I could say is it's definitely better playing there because there are supports (
that doesn't mean there are no supports in SEA servers though) but I must say it gets
pretty bad when one of your teammates are
raging at every mistake your team does. Everyone is just super-serious when in fact it's just a game and we are playing in pubs/ranked. Ranked is quite understandable though. In the end
it's just a game.
About the guide...
Okay so first of all this is my FIRST PROPER GUIDE I'D EVER MADE, a lot of mistakes will be made and you might not agree with something but I'd like you to tell me WHY in a CONSTRUCTIVE CRITICISM kind of way. Also I would add and update the guide often for every patch... Hopefully.. The guide at the mean time would be a WALL OF TEXT since I'm pretty much new with crafting a guide. I may have made mistakes so I'd like to ask a favor from you to help me point them out. If you have any comments or suggestions please leave a comment or something. Thank You! :D
I hope you'd learn a thing or two from this guide.
I'm not done with the guide as well, so I'd add information such as how to fix a bad lane and such to it time-to-time. I'll add more builds and playstyles.
I ****ed up somewhere here I'm very sure
Introduction
Sven is the bastard son of a Vigil Knight, born of a Pallid Meranth, raised in the Shadeshore Ruins. With his father executed for violating the Vigil Codex, and his mother shunned by her wild race, Sven believes that honor is to be found in no social order--but only in himself. After tending his mother through a lingering death, he offered himself as a novice to the Vigil Knights, never revealing his identity. For thirteen years he studied in his father's school, mastering the rigid code that declared his existence an abomination. Then, on the day that should have been his In-Swearing, he seized the Outcast Blade, shattered the Sacred Helm, and burned the Codex in the Vigil's Holy Flame. He strode from Vigil Keep, forever solitary, following his private code to the last strict rune. Still a knight, yes...but a Rogue Knight.
Now we are done with his story now let's move on!
Sven is a
strength hero who has a
very high potential of carrying the game, although that does not mean he cannot support as all heroes can in their own little ways. He does not excel as a damage dealer early on until 20 minutes in the game, much like
 Spectre
 but less passive. His skill
 Great Cleave
 lets him farm
EFFICIENTLY and
QUICKLY. So we have to make the most out of it and buy cost-efficient items.
This build
does not require you to
STRICTLY follow it, and you may adjust according to the situation. That's something you need to learn on
your own. The ability to adjust to the situation which differentiates you from the
GOOD PLAYERS and the
BAD PLAYERS.
Pros / Cons
Pros
- Can take hits and give out hits which are more powerful (Usually)
- Can push and counter-push effectively
- Cost-Efficient Item Progression
- Ability to dish out huge damage in a teamfight especially with Great Cleave
- Scales Well All Through-out the Game
- Able to Stack Ancients on Your Own
- Quickly Farms with Great Cleave
|
|
Cons
- Low Intelligence Gain
- Low Mana Pool with Huge Mana-Cost Skills
- Very Easy to Kite
|
Items (Quite Long)
The Items will be very similar to the other guides except I'd talk about each one of them and thoroughly explain when there is a need. This is going to be quite long so just a heads up.
Let the Reaper Reap! (Good Lane)
Let the Reaper Reap! (Pre-Midgame)


|
|


|
|


|
|

|
|
|
Cost: 6820 gold
Boots of Speed
-should be bought at the side-shop but be careful when there are enemy heroes are near you as they could kill you. It helps you get near the opponent after stunning them with 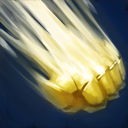 Storm Hammer and prevents you from being kited so much. Storm Hammer and prevents you from being kited so much.
Gloves of Haste
-should also be bought at the side-shop. It helps you get your last hits more which means more farm for you. The extra attack speed paired up with your ultimate 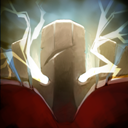 God's Strength is already a force to be reckoned with. Take note that in my build you do not upgrade your Boots of Speed into God's Strength is already a force to be reckoned with. Take note that in my build you do not upgrade your Boots of Speed into  Power Treads just because you bought Gloves of Haste instead we'll upgrade this into Armlet of Mordiggian afterwards. May somehow surprise enemies though, I guess... Power Treads just because you bought Gloves of Haste instead we'll upgrade this into Armlet of Mordiggian afterwards. May somehow surprise enemies though, I guess...
Morbid Mask
-this can be bought at the side shop and this is your hp regeneration item. Paired up with your base damage you'd heal around 15 per hit. You'll upgrade this into Helm of the Dominator later on. It's quite a good item I must say, it helps your farm by farming the jungle creeps when you messed up your lane equilibrium and their tower is being pushed early on, and you do not want that. Why? You are endangering yourself by going deeper into enemy territory while farming.
Helm of Iron Will
-this can also be bought at the side shop and increases your base health regeneration and armor. The extra armor paired up with your ability 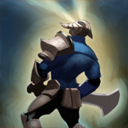 Warcry increases your armor by a whopping 25+ armor! Warcry increases your armor by a whopping 25+ armor!
Helm of the Dominator
-this is made when you have Morbid Mask and Helm of Iron Will in your inventory. This further increases your farm if you are an intermediate player by dominating a creep and stacking neutral camps every minute which also significantly increases your farm and showing efficiency with your time. The reason why you bough this would be the "stacking ability" but you can also ask your support to stack up for you but that time could be a gank in mid or other lanes so instead of your support, why not a creep?. You'll build this off into a  Satanic later on. Satanic later on.
Blades of Attack
-can be bought at the side shop and increases your damage which means you'll even be more dangerous for the enemy to gank with your high armor. You'll upgrade this to Armlet of Mordiggian later on and not  Phase Boots. Phase Boots.
Helm of Iron Will
-more hp regeneration and even more armor. What can you ask for next? Oh I know, an Armlet of Mordiggian. You'll just need a recipe and now you'll have the win-fail item called Armlet of Mordiggian which is quite great and synergies well with your abilities and hero!
Armlet of Mordiggian
-now this is what you needed all along. Passively increases your armor, hp regeneration, attack damage, and attack speed. Best part about it is that you can activate it to increase your armor, attack damage, attack speed, and health. Sounds OP right? It's all taken into account by the removal of 40 hp per second but you don't die from it AND it's all fixed with the life steal from your Helm of the Dominator. Only activate this when pushing or clashing with the enemies. Your farming is not over yet though, you still have to farm for one more item but that doesn't mean you can't be active and gank.
Blink Dagger
-can be bought at the side-shop. Blink Dagger gives you the mobility you need and allows you to initiate with 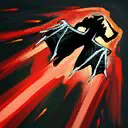 Blink- Storm Hammer- Warcry or something. By this time you should now start taking towers with your teammates and force up fights that your team can win. Blink- Storm Hammer- Warcry or something. By this time you should now start taking towers with your teammates and force up fights that your team can win.
|
Early Situational Items
 Wind Lace
-increases your movement speed by +20 for a price of 235 gold. Get this when you are running an offensive trilane. You can upgrade this into a [[Drum of Endurance].
 Urn of Shadows
-is great
when you can get kills off early on, but you wouldn't want to roam around early on and would just farm off to get your helm of dominator as soon as possible.
The extra mana regeneration is welcome though.
 Poor Man's Shield
-is an item you should get when you are harassed by the enemy so much. The extra
agility is welcome as well to further increase your attack speed by a small amount.
 Orb of Venom
-should only be gotten when you are playing aggressively with a teammate or alone. The slow is great for chasing early on.
 Drum of Endurance
-is a great item for
early push strats. You can build this off from your
Wind Lace. The stats are always nice to have and the extra movement speed is great. The active is also great when running away or chasing.
 Magic Stick
-is an item you'd usually get when laning against spellcasters such as
 Zeus
Zeus,
 Lion
Lion, or
 Skywrath Mage
. This way you can
atleast get off a small amount of hp from it but in my opinion an
 Infused Raindrops
 is better against situations like these, nevertheless it's a good item to have.
Don't forget about that 1 charge that saved your *** off from dying.
 Magic Wand
-is an okay item for
Sven it gives off a good amount of stats and could be built off from your
Magic Stick get this only when you are HEAVILY spammed with spells. The extra stats to boost your survivability is great and the active is good too.
 Medallion of Courage
-is a good item which can be built into a
 Solar Crest
 although it's more of a support-type item. Good item against heroes who have low armor,
high-five  Phoenix
!
 Bottle
-should only be bought
when you are laning mid or else it's just a waste of gold. Gives you a good edge in the game when used right.
Blight Stone
-is a good item in an aggressive trilane. Helps you off with last hitting but not as much as
 Quelling Blade
 I think. This is a usual pick-up for supports or heroes that are going for
Medallion of Courage or
 Desolator
 for carries. Get this when the enemy team will be able to out-carry you in the late game and you'll have to end by mid-game.
 Perseverance
-is a good item to fill your hp and mana needs. You can build this into a
 Battle Fury
 when you want to.
Infused Raindrops
-helps you survive in lane by mitigating that magic damage that
Sven is scared of. Get this against
 Lina
Lina or
Zeus or
something. Otherwise when laning against physical damage dealers get a
 Stout Shield
 instead and upgrade it into a
Poor Man's Shield.
 Mask of Madness
-is an okay item... I don't like it. I prefer
Helm of the Dominator for the stacking ability and the increase in hp regeneration and armor. Up to your preference but the active is okay I guess, the extra attack speed and movement speed is great when you aren't targeted. If the enemy team has a
Lina or a
Skywrath Mage or a
Zeus it's going to be a tough time getting bursted down.
Mid-Game Situationals
 Echo Sabre
-isn't really worth it that much except when you really need that quick burst down ability. The stats and the mana regeneration is great though. It's a cheap  Moon Shard-ish item that scales alright through the late-game but you'd really want to sell it afterwards. Otherwise it's a good item. Still a situational against highly-mobile heroes to burst them down.
Solar Crest
-is an okay item that gives off armor, mana regeneration, and a good active that reduces enemy armor. This is STILL a support pick-up though. That doesn't mean you can't get this when your team is full of physical damage attacks.
 Sange and Yasha
-is a GREAT item. It's a situational because you don't really need it so much when you have your
Armlet of Mordiggian +
Helm of the Dominator. This item should only be bought when you are having a hard time getting your next item or something. Great for pushing and ending early though.
Desolator
-is great paired up with your ultimate and high attack damage. I suggest you pair this up with
Echo Sabre to really burst down enemies. I suggest you buy this when you need to end the game early. It's a bad item when you can't end before the
40 minute mark since it doesn't scale since heroes would already have high armor other than the squishy supports.
 Heaven's Halberd
-is a great counter-carry item against heroes such as
 Phantom Assassin
,
 Anti-Mage
, or
 Lifestealer
. The Sange-Build-up helps a lot with the maim and the active disables the enemy carry from attacking you unless they activated
 Black King Bar
. Get this when you are being out-carried by the enemy team
as a counter.
 Vanguard
-is an okay-ish item build-up from your
Stout Shield since it further increases the block damage and hp. This can also be upgraded into an
 Abyssal Blade
 which is a great item in the late-game to stun those
Black King Bar-buffed Carries.
Late-Game Situationals
 Aegis of the Immortal
-is an item that can be gotten from Roshan. If no-one is a better hero to hold this item, you can always take it for yourself. If you are six-slotted then you might as well give this to your supports or offlaner.
 Cheese
-is an item that fills up your hp and mana.
Get this only when no one else is a better carrier and you are not six-slotted.
 Aghanim's Scepter
-is a good item when your team is full of physical damage heroes. Best if you have an
 Alchemist
 who used it on you to get the passive buff instead of taking a slot.
Get this only when your team is full of physical damage dealers.
 Assault Cuirass
-is great because of the attack speed and the armor-increase/armor-decrease. Get this when facing against heroes who melt armors such as
 Dazzle
 or
 Slardar
. This is situational since you already have an active ability called
Warcry which increases your armor and because of that armor-stacking wouldn't become very effective but not to the point where it's useless.
 Butterfly
-offers a good attack speed and
agility gain and the evasion passive which you can trade for with movement speed.
A good item nevertheless unless the enemy has a  Monkey King Bar
.
 Divine Rapier
-it's a flat huge amount of damage item. Get this when your rax are pushed and they have megacreeps and they got wiped and you need that instant straight-push mid. Downside of this is that when you die this will be dropped and you just threw the game.
 Eye of Skadi
-good all-round item. Passive slow pierces through
Black King Bar and gives off a nice amount of flat hp and mana increase. This also gives off a nice amount of each of your stats.
 Manta Style
-gives a good movement speed boost and the active breaks off silences and gives you illusions which you can fool your enemy around with or use it to split-push while you farm in their jungle or push the other lane.
 Scythe of Vyse
-gives a good amount of stat and mana regeneration. The reason why you'd buy this would be to disable their enemy carry and kill him before he kills you. This is great since this would nearly disable your target completely and disables him from using items. He wouldn't be able to pop that [black king bar] and he dies, you just ensured your victory right there.
 Linken's Sphere
-blocks off spells that pierce through
Black King Bar like
 Bane
Bane's skill
 Fiend's Grip
 or
Abyssal Blade. This is great when you just want to block off a few single-target spells,
Black King Bar is still your go-to item usually though.
Abyssal Blade
-is a good upgrade for your
Vanguard which gives off a nice active that pierces
Black King Bar although it still gets blocked off by
Linken's Sphere so you might want to use
Storm Hammer first and then use your
Abyssal Blade.
Monkey King Bar
-a counter to those evasive heroes such as
Phantom Assassin or natural-
Butterfly carriers. Gives off a flat amount of damage but you don't need more by now.
The Not-So-Useful Items
 Bloodthorn
-this gives off a nice mana regeneration but you don't need it since you don't spam spells. The active silence is great with the true strike but you really don't want to spend 7195 gold just for that right?
 Bloodstone
-the extra mana and hp flat amount increase is good, but it's not efficient. You don't need the increase in mana since, once again,
you don't spam spells. Just focus on surviving long enough to dish out damage in a fight. The active is bad too, if you miss-clicked it for
Blink Dagger you are dead.
 Heart of Tarrasque
 is a better item for you.
 Ethereal Blade
-The extra agility gain is good, but
Butterfly is just more worth it. The active is pretty good when you have teammates with magical damage but you just don't buy it since you won't be able to hurt your opponents. Plus the magic damage dealers probably bought a
 Veil of Discord
 or
Ethereal Blade already. This is probably a situational though, you can use it on the enemy carry while your team bursts him down, while you slay the supports down to the ground.
 Eul's Scepter of Divinity
-the intelligence and mana regeneration is good, but you don't need it because
you don't spam spells. You'd spend all that gold for that
50 magical damage cyclone?
lolz, just buy dagon and you are good to go.
 Dragon Lance
-the stats are nice, but you don't benefit from this so much. You just don't.
 Hurricane Pike
-the stats are nice as well, but you still don't benefit from it so much. The active is quite nice for running away but you just don't benefit from it so much.
Blink Dagger is a better choice. Even a small Teleportation Scroll is great.
 Orchid Malevolence
-see
Bloodthorn explanation without the true strike.
 Octarine Core
-you don't spam spells. The flat hp and mana increase isn't a good one either. Get a
Heart of Tarrasque instead.
 Radiance
-the damage increase is great and you'll farm faster with
Radiance but I'd like to say that
Battle Fury is far better. The cleave stacks with your ability
Great Cleave and gives off a good amount of mana and hp regeneration. Plus you need to have tons of amount of hp to survive long enough to burn your enemies to the ground.
 Rod of Atos
-this item isn't completely useless but the intelligence isn't so useful, but the slow is. This item is more of a support pick-up.
 Shiva's Guard
-the extra armor is great but you don't want to stack armor. The intelligence isn't useful either, and the active is an okay-ish ability to chase down supports or to deal magical damage in an aoe in teamfights. The passive aura is good but you aren't there for the crowd-control. You are there to dish out damage.
Veil of Discord
-it's good when your team has magical damage but it won't be so useful for you. Once again this is a support/caster pick-up. The armor and hp regeneration is negligible though, and the intelligence isn't useful again.
 Ghost Scepter
-this just ****s you up. You aren't able to hit, but you also won't be hit. Except for magical damage wherein you are very susceptible to and you are also further increasing it's damage.
Nice stats.
Buy-As-Needed
 Animal Courier
-buy this when you don't have a support or no one bought it because your supports are going carry. You should buy this before one of your teammates type in all-chat "GG no kurwa putangina cyka blyat idi nahui." and start to tilt and throw.
 Flying Courier
-buy this if no-one upgraded the "damn kurwa". You should be able to farm up the gold you lost for buying the courier but it benefited the whole team right? I find it funny everytime Russians (I think) type in all-chat "GG noone up ****ing kurwa cyka blyat" when they are playing support.
 Observer and Sentry Wards
-buy this for your team. To ensure your survival or your other carry's survival. This benefits the whole team and keeps them from saying "the map is invaded by black africans". Get sentry when there are heroes like
 Riki
Riki or
 Bounty Hunter
.
 Dust of Appearance
-buy it when you are ganking a hero with the capability of going invisible. Once again, when no one buys detection someone from your team would surely say "****ing n00b cyka blyat put tank in a mall, gago ka putangina bobo". Just...
 Smoke of Deceit
-this is a crucial item to get your team back on track or when you are going for Roshan. Make sure you are smoking in a place where they don't have sight of you guys smoking. Or else the police would come and **** you up.
 Gem of True Sight
-this is a good alternative to
Dust of Appearance or sentry wards but the downside is that when you die it would be dropped. Best to be held by tanky heroes such as
 Bristleback
 or
 Undying
 or
something.
Skills
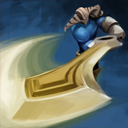
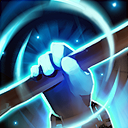
Storm Hammer
|
|
|
|
Type:
Targets:
|
|
|
Active
Enemy Units
|
|
|
Sven Unleashes his Magical Gauntlet that deals damage and stuns enemy units
|
Level
1
2
3
4
|
|
|
Mana
140
140
140
140
|
|
|
Cooldown
13
13
13
13
|
|
|
Range
600
600
600
600
|
|
|
AoE
255
255
255
255
|
|
|
Duration
2
2
2
2
|
|
|
Effect
100 damage, 2 seconds stun
175 damage, 2 seconds stun
250 damage, 2 seconds stun
325 damage, 2 seconds stun
|
Notes:
- The damage dealt is magical damage.
- Use the stun before engaging a teamfight. When you have Blink Dagger just Blink- Storm Hammer- Warcry.
- The cooldown usually allows you to use it twice in a teamfight.
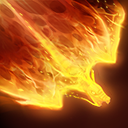
Great Cleave
|
|
|
|
Type:
Targets:
|
|
|
Passive
Enemy Units
|
|
|
Sven strikes with great force, cleaving all nearby enemy units with his attack.
|
Level
1
2
3
4
|
|
|
Mana
N/A
N/A
N/A
N/A
|
|
|
Cooldown
N/A
N/A
N/A
N/A
|
|
|
Range
N/A
N/A
N/A
N/A
|
|
|
AoE
300
300
300
300
|
|
|
Duration
N/A
N/A
N/A
N/A
|
|
|
Effect
30% cleave damage in a 300 radius
42% cleave damage in a 300 radius
54% cleave damage in a 300 radius
66% cleave damage in a 300 radius
|
Notes:
- The damage dealt is physical damage.
- Use this to clear out your stacked camps, hopefully you stacked the ancients. When you have this on level 3 try to clear the stacked camps with your ultimate on.
- This is great in a team-fight when you stunned 2 or more units and cleave them to death.
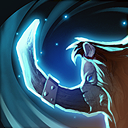
Warcry
|
|
|
|
Type:
Targets:
|
|
|
Active
Friendly Units
|
|
|
Sven's Warcry hearten's his allies for battle, increasing their movement speed and armor. Lasts 7 seconds.
|
Level
1
2
3
4
|
|
|
Mana
25
25
25
25
|
|
|
Cooldown
32
26
20
14
|
|
|
Range
N/A
N/A
N/A
N/A
|
|
|
AoE
900
900
900
900
|
|
|
Duration
7
7
7
7
|
|
|
Effect
5 bonus armor, 12% bonus movement speed
10 bonus armor, 12% bonus movement speed
15 bonus armor, 12% bonus movement speed
20 bonus armor, 12% bonus movement speed
|
Notes:
- The armor you gain from this is huge, so use it to defend yourself from enemies who gank you.
- The 12% bonus movement speed stacks with other movement speed bonuses to solve your problem with being kited.
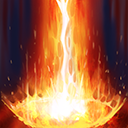
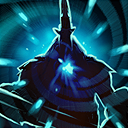
God's Strength
|
|
|
|
Type:
Targets:
|
|
|
Active
Caster/Friendly Units (With Agh's)
|
|
|
Sven channels his Rogue Strength, granting bonus damage for 25 seconds.
|
Level
1
2
3
|
|
|
Mana
100
150
200
|
|
|
Cooldown
80
80
80
|
|
|
Range
N/A
N/A
N/A
|
|
|
AoE
900 (with Agh's)
900 (with Agh's)
900 (with Agh's)
|
|
|
Duration
25
25
25
|
|
|
Effect
100% damage increase, 75% damage increase scepter aura
150% damage increase, 100% damage increase scepter aura
200% damage increase, 125% damage increase scepter aura
|
Notes:
- The increase in damage will be attributive which means only the damage you get from your strength attribute will be multiplied. (Strength you get from items will be multiplied like Satanic, Heart of Tarrasque, or even a
 Bracer
- The mana cost is very high so calculate the mana you'd have left after throwing out your skills.
Team Work (Friends-Enemies)
Friends
Sven is really great in solo-killing and in team-fighting.
In general these are your friends in lane:
Allows you to survive longer in lane and his (it?) skills synchronize well with you especially his
 Overcharge
, the lane would be quite scary to deal with.
Babysits you and with the two of you playing aggressively you surely can net kills for the team.
Storm Hammer +
 Light Strike Array
 +
 Dragon Slave
 +
Warcry combo is lethal.
Can leave you in lane to jungle and if you are hurt can always come and shout "
Come get healed!" with her
 Nature's Attendants
 and gank the lane for you. Her slow paired up with your stun is quite a formidable combo.
In my opinion
 Jakiro
 has always been scary, nerfed or not. In the laning phase he just rekts anyone who tries to hurt his carry. The
 Dual Breath
 +
Storm Hammer +
 Ice Path
 +
Warcry is definitely a force to be reckoned with.
A good
 Mirana
 player helps you a lot in netting kills. A 2 second stun followed by a 5 second stun is definitely lethal in any lane. Plus with her ult
 Moonlight Shadow
 the surprise stun will definitely catch them off guard.
The boar slow poison doesn't pierce through
Black King Bar anymore but who the hell has one before the 10 minute mark? The
Black King Bar-piercing ult is also quite good paired up with your storm hammer] the boar slows down the target after and you just [[Warcry and hit them.
Dis Raptor makes sure that your enemy would never get away with his
 Kinetic Field
 and
 Glimpse
 with your low cooldown skill
Storm Hammer you could definitely keep them at bay for a few seconds.
The extra cleave from his
 Empower
 is great with your
Great Cleave but be careful not to push the lane with it. You can
Warcry +
Storm Hammer the enemy to make sure
 Magnus
 is able to
 Skewer
 the enemy far from his safe area.
They have the slow to follow up your stun and your
Warcry makes sure that they won't get away.
He is definitely the
BANE of your enemy's existence. I'll stop with the pun (;~;). The combo
 Nightmare
 +
 Brain Sap
 into a
Storm Hammer is quite lethal.
In general these are your friends in a teamfight:
He keeps enemies for a short moment with his
 Reverse Polarity
 while you cleave them to death with the
Empower buff.
Makes sure that you'll be able to rekt the enemy carry with his
Black King Bar piercing ult.
Good
 Ravage
 + Good
Sven = GG
Try to run away from a
 Dream Coil
 then you'll get stunned and then followed by another stun with your
Storm Hammer.
Get a good
 Black Hole
. (while you are rekting them.)
Also good with his
Kinetic Field and
 Static Storm
Enemies
In general these are your enemies in lane/teamfights:
This bastard can keep you at bay for a long-long-long time.
 Hex
Hex and an
 Impale
 is going to be quite long.
Are also scary with their slows... You'll be kited forever.
This means that your friends are also your enemies.
He's also the
BANE of your existence. His
Fiend's Grip pierces through bkb so you'll be disabled for 5 seconds fully.
Thank You Message!
Thank you for putting up with this long-*** useless guide! Thank you for the different Sven guides found here in dotafire for helping me take note of some things that should never be forgotten. Thank you Dr.D for your guide formatting guide (lolz). Thank you dota 2 for ruining my life and wasting 364 hours of my life! It was fun though.
I hope you learned a thing or two from this guide though.
Good Luck, Have Fun!
Update Log!
May 13, 2016 (Patch 6.87c)
-guide was published! (woohoo!)


 Tango
Tango


Quick Comment (3) View Comments
You need to log in before commenting.