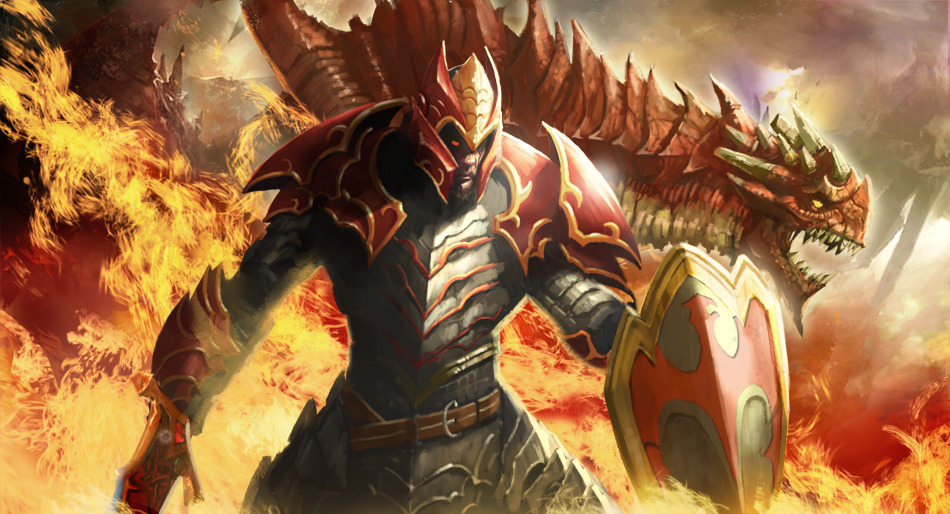
Face the Knight, Face the Dragon (6.81)
Xyrus
June 5, 2014
Introduction
![]() Hello and welcome to my 1st Guide! (still a Work in Progress ._. ) This guide is based more around playing in a 5-stack or a Team than Solo Matchmaking, but most of the advice in this guide should still apply. In it are tips, tricks and general info, like Skill and Item Builds and explanations to help you learn and eventually master
Hello and welcome to my 1st Guide! (still a Work in Progress ._. ) This guide is based more around playing in a 5-stack or a Team than Solo Matchmaking, but most of the advice in this guide should still apply. In it are tips, tricks and general info, like Skill and Item Builds and explanations to help you learn and eventually master  Dragon Knight. I'm by no means the best Dragon Knight player, but I definitely like to think and hear that I am. 8{D
Dragon Knight is a very Tanky Strength Carry, who is best suited to the Mid-Lane, since he benefits from  Bottle-Crowing. Note, he's Tanky, but not a Tank. He is a Carry and should be built like one, since he has good Burst Damage in the Mid-Game, and can Push down Towers quite quickly early on. With adequate Farm, he can be a force to be reckoned with in the Late-game, although, like most Carries, he can suffer if he is Ganked early on.
He's fairly straightforward to play and is a good 1st Hero for learning how to play in the Mid Lane, but mastering little techniques and having an encyclopedic knowledge on which Items to buy, and when, on him are essential to get the most out of him, i.e. no  Soul Rings pls -_-
Feel free to ask any questions, just make sure to read the entire guide 1st though in case I've already answered it a little further down the page. If you there's something you don't agree with, feel free to challenge me on it in the Comments section.
Shout out to Hades4u and Mowen for adding some icons that I bitc...asked "politely" for <}3
Starting Items and Skill Builds

The starting Items may look a little barren, but you'll rarely need much more than this, not to mention the less you start with, the faster you're 1st Item will come.
It's not a bad idea to get a 2nd
 Tango (Shared)
 from your Supports, but sometimes you'll have to buy your own
 Tango
Tangoes, unless you're confident, in which case, just go without Regen until you get your
Bottle.
You only really need 2
 Iron Branch
es for Stats, but if you're planning on upgrading your
 Magic Stick
 to a
 Magic Wand
, then go ahead and buy a 3rd
Iron Branch if you want.
The reason I suggest 2 as a guideline is because you only have 6 Inventory Slots. If you aren't upgrading to a
Magic Wand, more than 2
Iron Branches will take up too much space, forcing you to sell them early on anyway as you'll want to save space for your
Bottle,
Magic Stick,
 Power Treads
 and
 Town Portal Scroll
 or maybe even a spare
Tango (Shared).
You may be wondering why there's no
 Stout Shield
 in my Item Build.
Stout Shield provides you with roughly 10.6 Damage Block on Average and is great for Melee Heroes who want to Farm but will inevitably get Harrassed, so why wouldn't I want this?
First of all, the Damage Block is halved on Ranged units. Once you hit lvl6 you should be spending roughly half of your time in
 Elder Dragon Form
, cutting the Average Damage Block down to about 7.95.
Secondly, 2 points in
 Dragon Blood
 provides enough to sustain you in Lane.

Scary Maths
Stout Shield Damage Block on Melee Heroes == 53% * 20 == 10.6
Stout Shield Damage Block on Ranged Heroes == 53% * 10 == 5.3
Average Damage Block on DK (half Melee, half Ranged) == (10.6 + 5.3) / 2 == 7.95
Since I'll always take the 2nd point in Dragon Blood] between lvl3 and lvl 8 and the 1st Point between lvl2 and lvl 4, I'll calculate how effective 1 point is between lvls 2 and 7 (the earliest and latest point where I'll only have 1 point in [[Dragon Blood
Physical Damage Reduction ==
((0.06 armor) · (1 + 0.06 armor))
DK's Lvl2 Base Armour == 3.97 == 19.24%
DK's Lvl2 Armour with 1 point in
Dragon Blood == 6.97 == 29.49%
Damage Reduction from 1 point in
Dragon Blood == 29.49% - 19.24% == 10.15%
DK's Lvl7 Base Armour == 5.51 == 24.85%
DK's Lvl7 Armour with 1 point in
Dragon Blood == 8.51 == 33.80%
Damage Reduction from 1 point in
Dragon Blood == 33.80% - 24.85% == 8.95%
DK's Lvl3 Base Armour == 4.28 == 20.43%
DK's Lvl3 Armour with 2 points in
Dragon Blood == 10.28 == 38.14%
Damage Reduction from 2 points in
Dragon Blood == 38.14% - 20.43% == 17.71%
DK's Lvl8 Base Armour == 5.82 == 25.88%
DK's Lvl8 Armour with 2 points in
Dragon Blood == 11.82 == 41.49%
Damage Reduction from 2 points in
Dragon Blood == 41.49% - 25.88% == 15.61%
Therefore, the Damage needed to make 2 points in Dragon Blood as effective as a Stout Shield at lvl 3 is...
10.6 / 17.71% == 60 Damage
250 Gold isn't usually a problem with Starting Items, but when you rely on
Bottle Crowing to Farm under pressure, it's a big liability.
Laning Stage
The other benefit to only spending 100 - 150 Gold is that you can get your
Bottle after Farming the 1st Creep Wave. It's almost impossible for the other Mid to Zone you out completely if you take
 Breathe Fire
 at lvl1, since this guarantees you a Creep or 2 with good timing.
Just be careful when you bring it over on the Courier, there may be an Offlaner or Support Roaming around, waiting to Courier Snipe, at which point, you're left without a
Bottle or even a Courier for 3 minutes. If you're not sure about the Courier's safety, you may want to wait until the missing Hero can be found.
In higher skilled games, you may find that your Supports will try to Gank the other Mid Hero as soon as the Creep Wave arrives. If they're really high skilled, they may even use a
 Smoke of Deceit
 to avoid being detected.
First things first, don't level any skills yet, wait until you know your Supports are going to go onto the other guy before committing to it yourself. Your job here, is to Block the Creep Wave to lure the other Mid as far from their Tower as possible. Let your Supports Initiate the Gank, then go in and as soon as their Stuns have worn off, if needed, use Ctrl + W (or whichever button you have
 Dragon Tail
 set to) to instantly level it up, then use it to keep them locked down. Any Hero should die from this level of aggression.
Rather than leaving the Lane to grab Runes, it's best to leave them for your Supports and Offlaner. Leaving the Lane for a Rune every 2 minutes isn't a good idea, as you'll lose out on Last Hits and even Exp. You're not even likely to get the Rune if it Spawns near the Offlane, and the other Team's Supports are Camping the Runes to minimize Ganks on their Carry. If you're sure you can get that Rune
and use it to get a Kill, that's a different story. Remember...
When leaving your Lane you're always losing Farm, but aren't guaranteed to get something in return!
Bottle Crowing allows you to refill your
Bottle as often as needed, without you having to leave the Lane. It requires a bit of Micro-Management as well as watching out for Courier Snipes, but you'll get used to this with practice. The main downside to
Bottle Crowing is that your Team has less access to the Courier themselves, so try to let your Team get their Items if you aren't desperate to top up your HP and Mana.
When Last Hitting 1 vs 1, try to follow these tips:-
When an Allied Creep and an Enemy Creep are both low, always prioritize getting the Last Hit over the Deny!
This is because choosing to focus the Allied Creep will always cost you the Last Hit, but won't necessarily cost your opponent theirs, especially with DK's mediocre starting Damage.
Wait until the Creeps' HP are ow enough to Last Hit before going up to the Creep Wave against Ranged Heroes
Dragon Knight is Tanky and can eat a lot of Harrass with just a point or 2 in Dragon Blood, but why eat Harrass you don't have to? Play it safe and only come to the Wave when you can get something from it.
Be cautious about Denying, it's not worth losing your life to make sure the other Mid gets a little bit less Exp
You won't see a Dragon Knight get many Denies in most pr0fessional games. This is because there is only so much Harrass you can take before you risk getting Picked Off or Ganked and you'll take a lot against Ranged Heroes.
Scary Math
If you take an Auto-Attack to the face for every Creep that you try to Last Hit or Deny, you'll take 4 Attacks every Creepwave, if you assume an average of 55 Damage for the other Mid's Auto Attack, then the Damage you take Last Hitting alone is:-
55 Damage for 4 Creeps in a Wave
55 * 4 / 30 seconds == 7.33 Damage per second.
On Heroes with good Auto-Attack, e.g.  Queen of Pain,
  Mirana,
  Windranger, etc. they're more likely to manage getting 2 Auto-Attacks on you for each Creep, since they have a long Attack Range and good animations, even if they are focusing on their own Last Hits, but like you, they may have a Nuke or Passive that allows them to Last Hit + Harrass at the same time.
In the end you can easily take 14.67 Damage per second from them, and if you try to Deny all the Creeps, you double it again for 29.33. This does not include damage from their Nukes!
Simply put, you're going to take a beating against most Mids, since even Melee Mids like  Kunkka,
  Night Stalker, Lycanthrope, etc. have some means of Harrassing you, whether it be some sort of Auto-Attack, or a Nuke, e.g.
  Tidebringer,
  Void,
Void,  Summon Wolves, etc.
Even when you take Bottle-Crowing and Dragon Blood into account, you have to realise that you're going to be taking a lot of Damage during the Laning Phase against most Mids, so play it safe and only Deny when you can't get punished for it.
At the start of the game, there is more than a second in between your Auto-Attacks
In other words, plan your Last Hits carefully. It may be better to use lower another Creeps HP and Last Hit both of them with Breathe Fire at the same time, as you may not have enough time to Last Hit them both with Auto-Attacks (especially if your opponent is doing everything they can to make you miss Last Hits).
When it comes to getting Last Hits,
Breathe Fire is an extremely potent Flash Farming Skill. It has 900 Range so you can safely Farm from a Distance if you're being pressured, and since
Dragon Knight has no Cast Point for his Skills, it will activate as soon as you use it. Combining these 2 points, there's a few ways you can use
Breathe Fire to get ahead of
most other Mids in terms of Creep Score.
First of all, since it has no Cast Point, you can immediately chain an Auto Attack onto it. If you stand in front of a friendly Creep when its HP is low enough to Deny it, you can throw out a
Breathe Fire and cancel the Cast Backswing by Denying the friendly Creep. This can let you Flash Farm a Creep or 4, Push the Creep Wave, Harrass the other Mid AND Deny a Creep, almost instantaneously.
If you're feeling pressured, you can use
Breathe Fire to Last Hit Creeps from 900 units away, don't risk getting Killed if you can get picked off going to the Creep Wave. There are plenty of matchups where
Dragon Knight can easily be Zoned out without use of
Breathe Fire. Thankfully though, most of the time, you can be a lot more Aggressive once you get
Elder Dragon Form.
When Pushing the Creep Wave, try to bring down as many Creeps' HP as possible down so that a single
Breathe Fire will Flash Farm them all. This makes it almost impossible for them to be Denied and secures your Farm. Just make sure you can get the Ranged Creep straight after, since at higher levels of
Breathe Fire, it will be within easy Deny range for your Opponent.
Finally, always try to hit the other Mid with
Breathe Fire, it's not easy to get Kills 1 vs 1 as a
Dragon Knight in lane against a seasoned opponent, but bringing their HP down gradually may present an opportunity.
Since there are 33 Creeps in the 1st 9 Creep Waves, by around 5:00 you should aim to have at least 22 out of 33 Last Hits even in a tough Lane. 27 is a better target if you find the Lane "easy". This level of Farm will let you easily reach lvl6 and
Elder Dragon Form, as well as providing enough Gold for your
Bottle,
 Boots of Speed
 and
Magic Stick.
So...when should you level
Dragon Tail then? Whenever you're ready to get a Kill!
If your Supports use
Smoke of Deceit or grab an early
 Rune of Invisibility
, it can be quite easy for them to get into position to Gank the other Mid Laner as soon as the 1st Creep Wave arrives. At times like these, you want to level up
Dragon Tail and use it to lock your foe down for even longer. You might think that
Breathe Fire is better for getting a quick Kill, but bear in mind, that 2 or 3 people freely wailing on someone with Auto-Attacks out-classes 90 Magical Damage.
If there is no early First Blood attempt, then prioritise
Breathe Fire and
Dragon Blood until you're sure you're going to need it, however, I usually take it at lvl4 so that when I'm lvl6, I'm ready to Gank so I can Push a Tower.
If you took 2 Points in
Dragon Blood, you may want to put it off until lvl5, since a 2nd level in
Breathe Fire is useful for staying in a hard Lane.
Finally, if you're
absolutely you won't be Ganking anytime soon, e.g. if there's an Aggressive Tri-Lane, holding both Teams Supports in place for quite a while, then you can ignore
Dragon Tail until as late as lvl8 and focus on Farming and Pushing your Lane.
Getting a 2nd level early in
Dragon Blood at lvl 3 is just as effective against a hard hitter like
 Shadow Fiend
 or
 Puck
Puck as a
Stout Shield, not to mention, if you're having trouble in your Lane, you want a fast
Bottle even more so that you can use
Breathe Fire to Farm safely.
However, there isn't much benefit to delaying your other Skills if you're able to Farm comfortably without it.
Generally, you'll want to play Passively and ensure that you Farm well until you reach lvl6.
- You have a 2.5 second Stun, but it's Melee Range
- You have a Long Range Nuke with good Damage, but not much Mana.
- Your Auto Attack Damage is ok, but there are many Mids who'll hit harder than you
- You're quite Tanky and can get high levels of Armour quickly, but you're Slow and have no Gap Closer
To put it simply, you have very little potential to Kill your Lane opponent 1 vs 1 if they know what they're doing. You can always get Supports and or your Offlaner to come and Gank to get ahead of them, but they can do the same to you. Having said that there's always "The Xyrus Bait" 8{D
The Xyrus Bait
Coming soon to a Volvo near you...
Early Items

VS.
So, why is
Soul Ring bad when you play a Mid Hero? Simply put, you don't get nearly as much out of a
Soul Ring.
Granted, it provides a
Breathe Fire for every Creep Wave and has a Cooldown as opposed to having to be recharged, but a
Bottle won't leech your HP, instead it will keep it high.
Dragon Knight may get some extra HP Regen from
Dragon Blood +
Soul Ring, but this isn't going to help him much when he's taking 150 Damage every 30 seconds on top of Harrass.
Simply put, unless you're playing
Dragon Knight in the Safe Lane where Harrass isn't as much of an issue, please...please...stay away from
Soul Ring!
So why are these Items so good?
Burst Regen!
Early Game

So, you've got your Ult, and the 1st 3 Items you need? Good. It's time to start Pushing! First, you have to decide where to start...
Look at your Lanes, is there anywhere where you can Roam to, in order to get a Kill or 3 and use that momentum to take a Tower? Decide if it's possible to take the Offlane or Safe Lane Tier 1s. If you're not sure you can take either of them, there's nothing wrong with Pushing your own Lane, just make sure you don't Overextend and get yourself Ganked! D{8
If you're going to go to another Lane, make sure to pick up the next Rune if you can, i.e. the 6:00 Rune. A good tactic is have your Offlaner or a Support go to a Rune Spawn just before 6:00, while you head to the other, ensuring that your Team grabs the Rune. Hell, your Team can even sit there and wait for you to come collect the Rune if you picked the wrong spot! 8{D
Fairly straightforward, this doubles your Base Damage, letting you hit harder. A stronger Right-Click is always useful.
Activate this Rune when you're close to your unwitting victim, as you may not only need this to chase them down, but to escape any counter-Ganks afterwards. You can also use this after getting a Kill to rush to another Lane for a followup Gank.
Always use this while in
Elder Dragon Form as Illusions will remain in Ulti form even if
Dragon Knight himself reaches the end of the Duration. The Illusions gain Splash Damage from lvls 2 and 3 of
Elder Dragon Form, but not the Corrosive Breath or Frost Breath Debuffs.
A great Rune to have if you haven't got a
 Shadow Blade
, especially for an early First Blood. Against unsuspecting targets you can easily get within Melee Range to land
Dragon Tail. Just make sure you don't walk under any
 Sentry Ward
s as sometimes Supports will place them in the River on Mid Lane if their Mid has an Invisibility Spell, e.g.
 Templar Assassin
's
 Meld
Meld
Getting this Rune early on is great for Farming as you can Tank a lot of Damage, secure Last Hits and Harrass with
Breathe Fire, then return to full HP and Mana straight afterwards. It's also useful to use after Ganks when you'll likely take a bit of a beating and certainly use up a lot of Mana. If you've been Harrassed out of your Lane or desperately need mana for
Breathe Fire for Last Hits, this Rune can be a blessing.
Why Shadow Blade + Black King Bar as Core?

We all know that
Shadow Blade turns people Invisible, but there's a lot more to it than that. Consider what else it gives you when you activate it:-
- If you break the Invisibility with an Auto-Attack, it will give you 150 Bonus Physical Damage (not on Structures)
- While active you gain a 20% Movement Speed increase
- It will not break Channeled Spells or Town Portal Scrolls
150 Bonus damage doesn't sound like much, but what if you combine it into
Dragon Knight's natural combo....
If you break the Invisibility with an Auto-Attack, it will give you 150 Bonus Physical Damage (not on Structures)
Shadow Blade -> Attack ->
Dragon Tail -> Attack -> Flame Breath -> Attack, Attack, Attack, etc.
You can quickly deal an extra 150 Damage and instantly chain a
Dragon Tail onto the end for up to 250 Bonus Physical Damage, more Auto-Attacks and 300 Magical Damage from Flame Breath and the damage quickly adds up.
This is probably the biggest advantage a
Shadow Blade has over say, an
 Armlet of Mordiggian
 or a
 Maelstrom
 as it deals that extra Damage instantly, rather than over time, or based on RNG.
While active you gain a 20% Movement Speed increase
Whether closing in on a Gank or rushing to Defend against a Push, moving quickly across the map is important. Doing so while Invisible is even better.
Bear in mind however, that you only have 13.7 seconds of Invisibility to Roam with.
This applies to pretty much any Invisibility Ability as well as
 Shadow Amulet
, but there are 2 handy ways to use it to your advantage.
When juking, finding a good hiding spot, activating your Town Portal Scroll, then your Shadow Blade can allow you to escape. Most smart players will carry  Dust of Appearance to prevent you from using Shadow Blade as an escape, but what good is Dusting you if they already walked past you, or aren't even checking behind that tree?
When Teleporting in to a fight, Teleport to a Tower (or Creep if you have  Boots of Travel) that is outside of the other Team's Vision. Activate Shadow Blade 0.3 seconds before you finish Chanelling to use up the Fade Time, then sneak under your own Tower to, hopefully, catch them off-guard.


Isn't Invisibility a bad idea sometimes?
Don't be afraid to get a Shadow Blade] because there is "too much Invis" on your Team already. There is [b]never[/b] too much Invisibility, just overconfidence and a lack of awareness of counters such as [[Sentry Wards,
Dust of Appearance which can happen with even
1 Invis Hero or
Shadow Blade builder.
Remember, whether or not anyone else on your Team can go Invis, smart players will always buy Detection to counter you anyway, so it's better to learn to avoid it and bait it out.
Sentry Wards,
Dust of Appearance and Gem of Truesight cost Gold! Even better still, if you kill the Hero carrying their Gem,
Dragon Knight is an
excellent Gem holder. Bye bye enemy Wards! >8{D
Simply put, if you're aware of where
Sentry Wards are likely to be, as well as watching people's Inventories for
Dust of Appearance and Gem of Truesight and your own Status for things like
 Track
Track or Amplify Damage etc. you can get the most out of
Shadow Blade while the other Team's Supports crumble under the cost of Detection.
I recommend buying the
 Claymore
 1st, since it is the most expensive component. Buying the
Shadow Amulet 1st instead is ok, but the only benefit to it is being able to TP out while Invisible.
Unleash the Golden Dragon!

The undisputed, needed in 99% of all games (get it in the other 1% anyway! >8{D ), shiny glorious death item for
Dragon Knight.
Considering you want to be able to stay in a fight an dish out as much Damage as possible, Magic Immunity is a must for
Dragon Knight. Being immune to most Crowd Control and Burst Damage lets you sit there and pummel your enemies.
Usually I would take this after
Shadow Blade, but in some games *cough*Pubs*cough*, you'll find that after 15 minutes or less, the entire enemy Team will group up in Mid-Lane. It's times like these you need to prioritize
Black King Bar and get it
immediately after
Power Treads and
Magic Wand, especially when you can't get anywhere near the other Team with
Shadow Blade. 8{(
Luxury and Situational Items
This is usually the Item you want after
Shadow Blade +
Black King Bar. Static Charge allows you to punish anyone that Targets you, or a Hero of your choice, making it useful when you're getting Focused in Teamfights. Since
Dragon Knight is so Tanky, you can expect to get a lot of Lightning Procs off and with the 900 AoE, this can make Supports fear coming anywhere near you.
Don't forget this can be activated by any hostile Unit, including Creeps, Neutrals, Illusions etc. so Aggro them for a Lightning Proc every second! It can even be activated on Magic Immune units! 8{D
Between that and Chain Lightning activating constantly thanks to the Attack Speed Boost, this is one of the best Damage Items you can get for
Dragon Knight! <}3
If you have the Attack Speed from a
 Mjollnir
, you'll
love being able to consistently Pro Crits from a
 Daedalus
. Combine this with your Splash Damage from
Elder Dragon Form and you're a DPS monster!
Once you've bought 4 major Items (+
Power Treads) you'll find you've run out of room for your next Item without ditching your
Town Portal Scroll. You may also find yourself at the point where being able to TP to your Creep Wave can allow you to take a Barracks, or even win a Teamfight.
This s where
Boots of Travel come in. They free up an Item Slot now that you don't nee Town Portal Scrolls and they allow you to get to where the action is. This can mean the difference between winning and losing in the Late-Game.
What do you buy on the Dragon Knight who is already 6-slotted? A 2nd Black King Bar of course.
Having 10 seconds of Magic Immunity 60:00 in is literally game changing, their Hexes, their Stuns, almost everything is rendered useless for 10 seconds. During the longest of games, you'll most likely have enough Damage and HP to make those 10 seconds count.
Not an Item you need very often, but if there's a Carry whose Damage is rapidly getting beyond what you can Tank, you may need this to survive a little longer, or at least force them to build a
 Monkey King Bar
.
It provides some useful Attack Speed, but the main reason to get it is if you need to survive Right-Clicks that don't have some method of negating Evasion, e.g.
 Headshot
 and other forms of Bash and Mini-Bash ignore Evasion.
Some people prefer a
 Heaven's Halberd
 on
Dragon Knight, but since they will most likely use their
Black King Bar to focus you first, I find
 Butterfly
 to be much better, albeit harder to Farm. Make sure you get this
before you need it, otherwise, you may never get it in time. 8{(
The 40:00 Winstick! 8{D
...because it falls off greatly by 40:00. It's useful in Minus Armour Strategies, but in the Mid-Game when Armour only reaches around 11-16, -7 Armour is quite effective at increasing your entire Team's Damage, so consider this as an alternative to
Daedalus if you don't think the game is going Late.
It's also useful for taking down Towers faster. 8{)
Similar to a Heart, this will make you Tankier, but provides a Slow Orb that stacks with lvl3
Elder Dragon Form, not an Item you'll want often, but quite useful against Mana Burners like
Nyx Assassin or
 Invoker
.
Is there an annoying Invis Hero that keep Purging
Dust of Appearance and staying out of
Sentry Ward Range? Is there a
Mirana who keeps Initiating with
 Moonlight Shadow
 making you afraid to leave the safety of your Towers? Is there an
 Observer Ward
 you just can't find?!
...then Gem of Truesight (and a Warding Guide 8{D ) is perfect for you. Since you're so Tanky and are probably one of teh main Damage dealers on your Team, you're a good Gem holder, but try to let a Support buy this if possible.
Not a common Pick-up on
Dragon Knight, but a potentially useful one. The Active lets you remove annoying Debuffs (and
 Frostbite
 8{D ), and gives you Illusions to send off to do your bidding, just like loyal minions. Useful for Split-Pushing, especially when combined with
 Heart of Tarrasque
 and
Boots of Travel.
The Purge allows you to remove annoying Debuffs, e.g.
Frostbite,
 Overgrowth
,
 Orchid Malevolence
,
 Diffusal Blade
 (yes you can Purge dat Purge, as seen on Purge's stream 8{3 ). This can save having to pop your
Black King Bar when you're not quite ready to use it, or have already used it.
The Illusions produced aren't quite as Tanky as you, but with your HP Pool, they should be adequate enough to Split-Push lanes when it's too dangerous, but still necessary for you to do so yourself. You can even scout with the Illusions if you're looking for the other Team, but not looking to fight them.
The Stats and Movement Speed are just icing on the cake. <}3
You may think that this Item should be bought every time someone gets a
Butterfly, but stop and consider whether it's needed. It's not worth getting an MKB just to hit an
 Axe
Axe with a
Heaven's Halberd. You may even have others on your Team who can Burst down the offending nuisance, a
 Weaver
 with a
Butterfly isn't going to be any better off against
 Finger of Death
 provided you have enough Crowd Control to keep him down.
You can remove Evasion with
 Hex
Hex, so if someone on your Team has a
 Scythe of Vyse
, consider what you can do in those 3.5 seconds. It's also removed by
 Doom
Doom, but consider if there's another target that needs
Dooming more urgently.
An MKB is also useful for stopping Channels like
 Fiend's Grip
 or
Town Portal Scroll even if the target is Magic Immune
It's not likely that you'll need this in most games, but on a rare occasion, you'll wish you had more HP to Tank through the other Team's Damage just long enough to Rampage them.
I know there are many people who like this on
Dragon Knight and it is a viable option, but I would recommend against it.
It's a good source of Damage, Attack Speed, HP, Armour and HP Regen, but those last 2 are already filled by
Dragon Blood.
As for Damage and Attack Speed, most of your Mid-Game Damage should come from
Breathe Fire and Corrosive Breath. If you want an Item that hurts things, Chain Lightning Procs from a
Maelstrom will do much more Damage in 5 vs 5 than an Omlette.
As for the 475HP gained from toggling it, you're already quite Tanky as it is, you need to worry more about getting locked down early on, than you do about Burst Damage.
It doesn't particularly Scale well into the Late Game either, but if you want cheap Mid-Game Right-Click powa and some extra Tankiness, it's certainly a good Pick-up.
This is another good pickup on
Dragon Knight, but again, one I don't recommend.
Providing Armour and Attack Speed for your Team and taking Armour from your enemies is certainly good, but there are plenty of better Items for
Dragon Knight himself.
You don't need the Armour as you're already hard to Right-Click down, and you don't particularly benefit from the Minus Armour unless you're running a particular strategy or are having trouble Bursting down Towers.
Attack Speed is nice, but
Mjollnir provides much more and Chain Lightning will most likely deal more Damage than the minor Physical Damage Resistance Reduction from the Aura.
Updates
03/05/2014 - Started Guide
03/06/2014 - Published Guide, rearranged Skill descriptions, moved Drum and added Halberd to Situational
To Do List
Coming Soon
Add Butterfly vs Heaven's Halberd and  Assault Cuirass vs
  Desolator
Add why  Helm of the Dominator is kinda bad.
Play around with Icon sizes
Shadow Blade + BKB - add Maelstrom
Coming eventually
Base example builds off of actual matches and link to replays, and thus, add more example builds
Get upvoted 60 times (in yo face Sp12 >8{D )
Clean up formatting (Text Walls aren't pretty ._. )
MOAR videos and images?
Add sections:-
*Ganking
*Teamfighting
*Map of Rune Spot to avoid while Invis (Shadow Blade)
*Tricky Matchups - Invoker, Lycanthrope, Shadow Fiend, Templar Assassin,  Viper, Puck (stun while Orb - lvl1), etc.
*Videos and analyses of games - Pr0fessional, Amateur, me (+ other DOTAFire members?)


Quick Comment (33) View Comments
You need to log in before commenting.