FML - Face, Meet Lanaya
Dr.D
January 18, 2013
Introduction
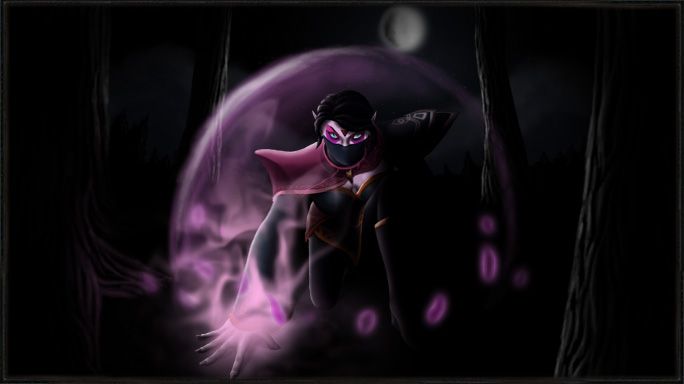
Welcome to Dr. D's guide on Lanaya, the
 Templar Assassin
. Lanaya is one of my favorite heroes, but at the same time, also one of the most underplayed heroes in the entire game. She is primarily a ganker that eats squishy nukers such as
 Shadow Fiend
,
 Tinker
, and
 Zeus
Zeus for breakfast, but she can also semi-carry if she gets enough of an advantage early on. When used properly, her
 Refraction
 and
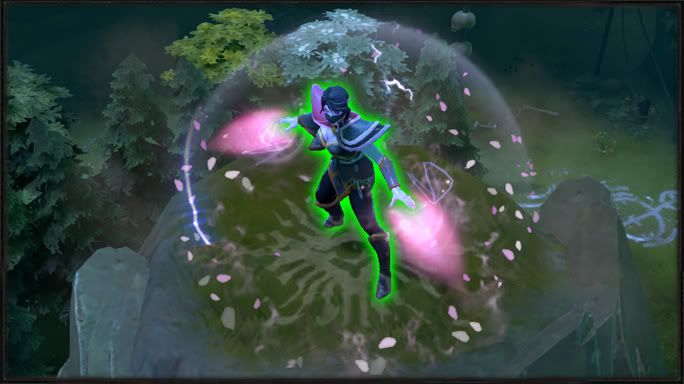
 Meld
Meld give her both great survivability and offense, while her
 Psionic Trap
 can slow entire teams at will and provide great map control. However, she has very little innate survivability, and therefore requires a great deal of skill and awareness in order to be played successfully. This is a
comprehensive guide, so walls of text may appear. You have been warned!
NOTE: This guide was designed to be viewed with the
 Opera
Opera web browser. When viewed on other web browsers, keep in mind that you may experience minor formatting and / or alignment errors.
Hero Information


Lore
Lanaya, the Templar Assassin, came to her calling by a path of curious inquiry. Possessed of a scientific bent, she spent her early years engaged in meticulous study of nature's laws - peering into grimoires of magic and alchemy, recreating experiments from charred fragments of the Violet Archives, and memorizing observations of the Keen recordkeepers. Already quiet and secretive by nature, the difficulty of acquiring these objects further reinforced her skills of stealth. Had she been less retiring, she might have become notorious among the guilds as a thief-scholar. Instead her investigations led her into far more obscure corners. As she devoted her furtive talents to unlocking the secrets of the universe, she instead unlocked a secret door that exists in nature itself: the entryway to the most Hidden Temple. The intelligences that waited beyond that portal, proved to be expecting her, and whatever mysteries they revealed in the moment of their discovery was nothing compared to the answers they held out to Lanaya should she continue in their service. She swore to protect the mysteries, but more to the point, in service to the Hidden Temple she satisfies her endless craving for understanding. In the eyes of each foe she expunges, a bit more of the mystery is revealed.
Pros / Cons / When to Pick
Pick Lanaya when...
- You want to 3-shot squishy heroes
- Your team is running an armor reduction strategy
- The enemy team is full of nukers / supports
- You like playing mind games with the enemy
- You want to take the term "rune-*****" to a new level
Do NOT pick Lanaya when...
Skills
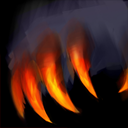
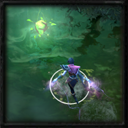
Refraction
|
|
|
|
Type:
Targets:
|
|
|
Active
Self
|
|
|
Manipulating her psionic veil, Templar Assassin becomes highly elusive, avoiding damage while gaining a bonus to her damage. These effects are separate, and have a limited number of instances.
|
Level
1
2
3
4
|
|
|
![]() Mana Mana
100
100
100
100
|
|
|
![]() Cooldown Cooldown
17
17
17
17
|
|
|
Range
N/A
N/A
N/A
N/A
|
|
|
AoE
N/A
N/A
N/A
N/A
|
|
|
Duration
17
17
17
17
|
|
|
Effect
Grants 3 instances of 20 bonus damage and damage block
Grants 4 instances of 40 bonus damage and damage block
Grants 5 instances of 60 bonus damage and damage block
Grants 6 instances of 80 bonus damage and damage block
|
Notes:
- Direct HP removal (such as
 Wave of Terror,
  Heartstopper Aura, or
  Sunder) does not trigger Refraction.
- Only damage greater than 5 (after all reductions) will remove an instance of Refraction.
Refraction is the skill that essentially defines Lanaya, and it is what makes her incredibly powerful and item-independent early to mid-game. As such, it is usually the first skill that many players max out. Its mana cost is not too bad either, but you won't be able to keep it on all the time without a
 Crystal Maiden
 on your team, so knowing when to use it is crucial to success with Lanaya.
Due to the massive utility that Refraction provides, you should primarily be using Refraction to control your lane. As the bonus damage from Refraction is very high (comparable to a fully charged
 Necromastery
), you can abuse it with your
 Psi Blades
 to harass the enemy hero quite hard. As long as you don't directly attack them, the enemy creeps won't target you, and the enemy hero likely won't be able to retaliate thanks to Refraction's defensive charges. That being said however, if you can't hit the enemy safely or can't do it consistently, it is perfectly acceptable to use Refraction for last hitting as well.
Keep in mind however that Refraction usage outside of laning is often very situational. For example, fighting
 Huskar
 directly with Refraction will probably cause you to lose all of your defensive Refraction charges to his
 Burning Spears
, so you will want to wait until he decides to
 Life Break
 you before activating it. Conversely, when fighting a nuke-heavy hero such as
Tinker, it's better to activate Refraction beforehand so you don't eat his
 Laser
Laser +
 Heat Seeking Missile
 combo.
Additionally, if you wait about 8-12 seconds after your first Refraction cast, you should be able to cast Refraction again almost immediately after the first one wears off. This essentially doubles the amount of charges that you would normally have in a given period of time. As with the double
 Overpower
 tactic used by
 Ursa
Ursa, you should aim to do this prior to engaging in any expected battle, if possible.
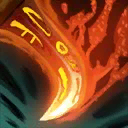
Meld
|
|
|
|
Type:
Targets:
|
|
|
Active
Self / Enemy Units
|
|
|
Templar Assassin conceals herself, gaining invisibility while remaining still. On the next attacked enemy unit, Lanaya will reduce its armor and deal bonus damage to it.
|
Level
1
2
3
4
|
|
|
Mana
50
50
50
50
|
|
|
Cooldown
7
7
7
7
|
|
|
Range
N/A
N/A
N/A
N/A
|
|
|
AoE
N/A
N/A
N/A
N/A
|
|
|
Duration
Indefinite (Invisibility) / 10 sec (Armor Reduction)
Indefinite (Invisibility) / 10 sec (Armor Reduction)
Indefinite (Invisibility) / 10 sec (Armor Reduction)
Indefinite (Invisibility) / 10 sec (Armor Reduction)
|
|
|
Effect
+50 damage,
-2 armor
+100 damage,
-4 armor
+150 damage,
-6 armor
+200 damage,
-8 armor
|
Notes:
- The bonus damage from Meld is considered Physical damage.
- Meld has a fade time of 0.001 sec.
- Any action taken will break Meld, but the effects will only apply when attacking an enemy unit.
- The negative armor debuff from Meld doesn't stack with itself.
Meld is an incredibly versatile skill, and arguably the only "nuke" that Lanaya has. However, too often is the case where I see a Lanaya player use it incorrectly. Despite the fact that it provides instant invisibility, Meld is primarily an
offensive skill, and should only be used defensively under certain circumstances. That is to say, most of the time, Meld should
not be used to hide.
Offensive Melds, or "Meld-taps" as I call them, are what you will be using most of the time. To do this, simply move next to an enemy (usually through
 Blink Dagger
), cast Meld, and then immediately break it with an auto-attack. When doing this, you should have your cursor hovering over your target so that you don't accidentally click the ground afterwards. This is because any action taken will break Meld, but only attacking an enemy will apply the bonus damage and debuff. If you managed to hit, you should try to follow up with at least one more auto-attack, if possible. Early to mid-game, this can easily take out half or more of a squishy hero's HP.
Like
Refraction, Meld also has a very short cooldown relative to the effect's duration. Therefore, if you can predict where the enemy will move, you can essentially pull off a double Meld-tap. This is done by activating Meld in a location that they are headed towards, which will place Meld on its 7 second cooldown. If and when they walk by, break your Meld with an auto-attack as usual. By this time, your next Meld should be almost, if not completely, off cooldown, allowing you to use it again almost immediately afterwards for
 Vendetta
-like burst damage.
Defensively, Meld cannot be used to escape in the same way that most other invisibility skills, such as
 Wind Walk
, are used. As I mentioned earlier, any action, including movement, will break Meld. This means you
cannot use a
 Town Portal Scroll
 in conjunction with Meld either, as you can with other "Wind Walk" skills (such as
 Shadow Blade
,
Doppelwalk, etc.). However, Meld has a near-instant fade time of 0.001 seconds, which means that you can effectively dodge most targeted projectiles such as
Hellfire Blast or
 Magic Missile
 by using Meld while they are still en route. When dodging projectiles this way, keep in mind that you do not need to remain invisible for the entire duration of the projectile unless it cannot be disjointed, such as
 Sven
Sven's
 Storm Hammer
. This also means that if the enemy has True Sight of you such as through
 Gem of True Sight
,
 Dust of Appearance
, or
 Track
Track, the projectile can and will still hit you. Additionally, abilities that don't target you specifically, such as
 Meat Hook
, will also hit you in Meld, regardless of whether or not the enemy can see you.
Once you get your Blink Dagger, Meld can also prove to be an effective escape mechanism. Simply blink into an area where the enemy can't see you, such as the forest or high ground, and activate Meld. Since both Blink Dagger and Meld have relatively short cooldowns, you can likely repeat this process until you get to safety. Without a Blink Dagger however, the enemy will have a good idea of where you are, allowing them to cast AoE spells such as
 Light Strike Array
 at you until you die.
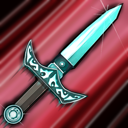
Psi Blades
|
|
|
|
Type:
Targets:
|
|
|
Passive
Enemy Units
|
|
|
Templar Assassin's psi blades slice through the attacked unit, splitting and damaging enemy units directly behind it, while gaining bonus attack range.
|
Level
1
2
3
4
|
|
|
Mana
N/A
N/A
N/A
N/A
|
|
|
Cooldown
N/A
N/A
N/A
N/A
|
|
|
Range
N/A
N/A
N/A
N/A
|
|
|
AoE
80 (Width) / 615 (Length)
80 (Width) / 655 (Length)
80 (Width) / 695 (Length)
80 (Width) / 735 (Length)
|
|
|
Duration
N/A
N/A
N/A
N/A
|
|
|
Effect
+60 range, 590 spill range
+120 range, 630 spill range
+180 range, 670 spill range
+240 range, 710 spill range
|
Notes:
- The spill damage from Psi Blades is considered Pure damage.
- Spill damage will hit invisible units in range.
- Only the first instance of damage dealt after Lanaya attacks a target will be spilled.
- Attack modifiers, such as those from
 Desolator or
  Eye of Skadi, will only be applied to the original target.
Psi Blades is a powerful lane-controlling and farming skill that functions a bit like
 Tidebringer
. Whenever you attack any target, friend or foe, Psi Blades creates a rectangle behind your target with a certain width and length. Any enemies caught within the rectangle suffer 100% of the damage that your original target took as
Pure damage. Plus, it also gives you a nice boost to your range, which is helpful mid to late-game.
Like Tidebringer however, the main appeal to Psi Blades is the lane control aspect, and
not the increase in attack range. Whenever you go up for a last hit / deny, simply try to position yourself such that your opponent is behind your target. While you should not expect to hit them every single time, you should easily be able to harass most enemy heroes without much issue.
Keep in mind that the damage from Psi Blades is based on the damage that your original target took, which means that using
Refraction before hitting a target will increase the spill damage dealt, as will effects such as the Critical Strike from
 Daedalus
. This does not apply to illusions however; if you attack an illusion, you will not spill any damage.
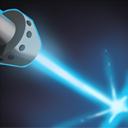
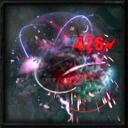
Psionic Trap
|
|
|
|
Type:
Targets:
|
|
|
Active
Point
|
|
|
Templar Assassin places mystical traps that invisibly monitor enemy movement. When sprung, at her command, they exert a slowing influence of 30% increasing by 5% per second until it reaches 50% in the area.
|
Level
1
2
3
|
|
|
Mana
15
15
15
|
|
|
Cooldown
11
9
7
|
|
|
Range
2000
2000
2000
|
|
|
AoE
375
375
375
|
|
|
Duration
Indefinite (Trap) / 5 sec (Slow)
Indefinite (Trap) / 5 sec (Slow)
Indefinite (Trap) / 5 sec (Slow)
|
|
|
Effect
Places a Psionic Trap that slows the movement speed of nearby enemies by 30% when sprung, increasing by 5% each second. Max 5 Traps.
Places a Psionic Trap that slows the movement speed of nearby enemies by 50% when sprung, increasing by 5% each second. Max 8 Traps.
Places a Psionic Trap that slows the movement speed of nearby enemies by 50% when sprung, increasing by 5% each second. Max 11 Traps.
|
Notes:
- Psionic Traps have 100 HP, magic immunity, 400/400 day/night vision, and permanent invisibility with a 2 second fade time at all levels.
- Psionic Traps will not prevent neutral creeps from spawning.
- When you place a Psionic Trap above your limit, the earliest Psionic Trap placed that still exists is destroyed.
- Upon learning Psionic Trap, Lanaya gains the following abilities:
Trap

|
|
|
Type:
Targets:
|
|
|
Active
Enemy Units
|
|
|
Springs the nearest trap, slowing nearby enemies.
|
Mana
0
|
|
|
Cooldown
0.5
|
|
|
Range
N/A
|
|
|
AoE
375
|
|
|
Duration
5
|
|
|
Effect
Slows the movement speed of nearby enemies by 30%, increasing by 5% each second.
|
- Psionic Traps have the following abilities:
Trap
 |
|
|
Type:
Targets:
|
|
|
Active
Self / Enemy Units
|
|
|
Springs a previously set trap, slowing nearby enemies.
|
Mana
0
|
|
|
Cooldown
0.5
|
|
|
Range
N/A
|
|
|
AoE
375
|
|
|
Duration
5
|
|
|
Effect
Slows the movement speed of nearby enemies by 30%, increasing by 5% each second.
|
Psionic Trap might seem like a rather underwhelming and out of place ultimate at first, considering the rest of Lanaya's abilities. However, the sheer utility that the traps provide, especially when considering their mana cost and cooldown, is unparalleled. As such, proper management of these traps is crucial to Lanaya's success.
The most obvious use for Psionic Trap is to chase / slow down enemy units, and you should have at most 1-2 traps dedicated for this purpose. Keep in mind that the slow itself is still very powerful - at full strength, it slows as much as a maxed out
 Enchant
 in an area that is nearly as large as
 Nether Blast
. In conjunction with its short cooldown, it is very possible to keep an enemy almost "perma-slowed" with Psionic Trap, much like with
 Stifling Dagger
.
To do this properly, you will first want to place the trap slightly ahead of their current position with its
ridiculous 2000 casting range. Afterwards, switch your selection to the newly created trap and trigger it manually via its own
 Trap
Trap subskill ensure that you are activating the correct trap. If you activate it automatically via Lanaya's
Trap subskill, it is very possible that another, closer trap may be activated instead.
In addition to their slowing effect, Psionic Traps can also serve as ward substitutes. Although their sight range is not very good (400/400 compared to 1600/1600 from an
 Observer Ward
), they last indefinitely, and can be placed almost anywhere. As such, the remainder (which should be all but 1-2) of your Psionic Traps should be used for this purpose.
Skill Builds
Unlike many heroes who are completely reliant on a single key skill, Lanaya requires all of her abilities in order to be successful, and is therefore
very level-dependent. As such, there is also no "right" way to build her, though I will list and explain the most common ones below. Keep in mind that these builds are merely guidelines, and that at times you may need to be flexible with your skill order (such as when doing an early Roshan, or avoiding first blood).
Traditional ( Refraction-first) Build

|
|
This is the standard build that most players choose to follow. By maxing Refraction first, Lanaya can usually dominate her lane, and subsequently other lanes, with her high attack damage and immunity to enemy nukes. Against most mid heroes, particularly those with heavy nukes such as Tinker or Zeus, this is the build to go.
Since Lanaya starts out at roughly melee range, having one early level in Psi Blades will allow her to last hit and deny without walking around the creep wave. Plus, it also lets her harass the opponent, despite her low attack range. If necessary, Meld or Refraction can also be taken at level one, especially if you think you are going to get ganked early. One point in Psi Blades before level 6 is pretty much essential, however.
Refraction is then maxed out first for the reasons stated above. Meld is taken at level four primarily for the ability to dodge projectiles, and then maxed second for its burst damage and armor reduction. Psionic Trap, as with most ultimates, should be taken whenever possible. Not only does it provide great map control, but it also allows her to gank reliably and efficiently with its massive area slowing effect.
|
Meld-first Build
|
|
Since we don't max Refraction first, this build sacrifices a bit of Lanaya's early-game lane control and safety. However, come level 6 or 7, you will be able to absolutely demolish the side lanes with your ganks. This build should also be considered if your opponent has a very cheap damage over time effect, such as  Viper's Viper's  Poison Attack or Poison Attack or  Pudge's Pudge's 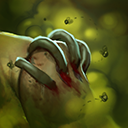 Rot, that can negate the defensive aspect of Refraction. Rot, that can negate the defensive aspect of Refraction.
Like before, we will take Psi Blades at level one for the extended range and lane control potential. At level two, we will take one level in Refraction primarily to block damage, although if you find yourself in need of dodging enemy projectiles, Meld can be taken instead.
Afterwards, we will continue to level up Meld, which will be maxed out by level seven. At this point, you should be ganking the other lanes consistently and successfully. Max out Refraction next for the bonus damage and damage block. As with the previous build, level up Psionic Trap whenever possible, and then finally max out Psi Blades before moving onto Stats.
|
The "Oh ****, it's  Batrider!" / Hard Lane Build
|
|
|
Some heroes can easily take advantage of Lanaya's pitiful attack range. Usually these heroes have a much higher attack range (such as  Sniper) or powerful zoning abilities (such as Batrider), and Lanaya cannot effectively counter them with Refraction / Meld. Against a lane such as this, Lanaya will usually need to take additional levels of Psi Blades and play cautiously. Sniper) or powerful zoning abilities (such as Batrider), and Lanaya cannot effectively counter them with Refraction / Meld. Against a lane such as this, Lanaya will usually need to take additional levels of Psi Blades and play cautiously.
Psi Blades are taken at levels one, three, and five in order to survive the lane with at least some farm. At level two, take either Refraction or Meld for defense, and take the remaining skill at level four. Since we will be mostly ganking during the mid-game, maxing Psi Blades is not required. Instead, we will focus on getting Meld / Refraction online as fast as we can. Either one can be maxed first, although I would recommend Meld for the ganking power. Afterwards, pick up Psionic Trap and the remaining levels of Psi Blades when you can, as usual.
|
Interlude: Understanding Armor
In order to utilize Lanaya's armor-shredding abilities to their fullest, we must first understand how armor works in DotA, as defined by the following formulas. Keep in mind that damage reduction only applies when armor is greater than zero, and damage increase only applies when armor is less than zero.
Damage Reduction = |
|
(0.06 x Armor)
(1 + (0.06 x Armor))
|
|
|
Damage Increase = 1 - 0.94 (-1 x Armor)
|
Above is a graph that demonstrates this relationship. The red line indicates the amount of physical damage dealt as a function of armor, whereas the green line is the plot of the corresponding
EHP (Effective Hit Points) factor versus physical damage. Looking at this, we can make some conclusions about how armor works in DotA (2):
1. An increase in armor provides a linear increase in EHP
Suppose for example, we have a hero with 1000 HP and no armor, giving it an EHP against physical attacks of exactly 1000.
Suppose then that this hero buys a
 Platemail
. Now its armor is 10, giving it a physical damage reduction of 37.5%. This translates to an EHP against physical attacks of 1600 (1600 x (100% - 37.5%) = 1000).
If the hero buys another Platemail, its armor becomes 20. Now it has a physical damage reduction of roughly 54.5%, which gives it an EHP of 2200. As you can see, each point in armor has increased the EHP of our hero by a fixed amount (about 6% of its maximum HP, to be precise).
2. Increasing armor reduction beyond zero does NOT provide a linear decrease in EHP
Once again, we return to the imaginary hero with 1000 HP and 0 armor as an example. We know that, in its current state, it has an EHP of 1000 against physical attacks.
If it got hit by the
Meld debuff, then it would lose 8 armor, causing all physical damage dealt against it to be increased by 39%. Now, it would only take about 719 points of physical damage to kill our hero. This is roughly a 4.875% damage increase per
AR (point of armor reduction), or an average EHP loss of 35 EHP/AR.
What if our hero also got targeted by the
 Medallion of Courage
 debuff? That's a good -6 armor right there, bringing the net total to -14 armor, or a roughly 58% increase in physical damage. The new EHP of our hero is about 633. Calculating averages once again, we get a 4.14% damage increase per AR, and an average EHP loss of 26 EHP/AR. As you can see, armor reduction beyond zero suffers from diminishing returns.
3. Armor reduction is most effective at 0 armor
If the same hero with 1000 HP goes from 0 to -1 armor, we can calculate the net (and average) damage increase per point of armor reduction as being 6% per AR. This results in an EHP of about 943, which equals a net and average EHP loss of about 57 EHP/AR.
Going from 0 to -20 armor, on the other hand, yields a net damage increase of about 71% and an average increase per AR of about 3.55%. The same hero now has 585 EHP, which results in an average EHP loss of about 21 EHP/AR.
On the other side of a spectrum, going from 30 to 10 armor yields a net damage increase of about 26.8%, giving us an average damage increase per AR of 1.34%. The EHP of the hero however, drops from 2800 to 1600, which results in an average EHP loss of 60 EHP/AR like we would expect.
Items


|
|

|
|
|
|
|
Cost: 402/349 gold
These are my preferred starting items when I play Lanaya. It provides good regen through the Healing Salve and Tango, while also providing a decent amount of stats. The primary point of this build is to rush a  Bottle around the 2 minute mark so that you can rune-***** and start ganking as soon as possible. Note that the last Iron Branch is not necessary, but I usually buy it anyways. Bottle around the 2 minute mark so that you can rune-***** and start ganking as soon as possible. Note that the last Iron Branch is not necessary, but I usually buy it anyways.
|

|
|
|
|
|
|
|
Cost: 596 gold
Many Lanaya players often opt for this build because of the extra attack damage that the Slippers of Agility provide. Personally, I don't like it, since it delays your Bottle by a fair amount. Plus, while the Slippers of Agility can be built into  Wraith Bands which are decent early-game, Lanaya gets so much bonus damage from her skills that it hardly matters anyways. Wraith Bands which are decent early-game, Lanaya gets so much bonus damage from her skills that it hardly matters anyways.
|
|
|
|
|

|
|
|
Cost: 549 gold
I would not recommend this build unless you have a major spell spammer in your lane such as Batrider with his  Sticky Napalm or Zeus with his Sticky Napalm or Zeus with his  Arc Lightning. Magic Stick is pretty expensive for an early game item, so make sure you that you can make use of it in your lane. Other than that, this build provides solid regen and stats, and also allows you to get your Arc Lightning. Magic Stick is pretty expensive for an early game item, so make sure you that you can make use of it in your lane. Other than that, this build provides solid regen and stats, and also allows you to get your  Magic Wand much faster. Magic Wand much faster.
|
|
|
|
|
|
|
|
|
|
|
|
|
|
|
|
Cost: 600 gold
Please don't do this, ok? While Bottle is an excellent item for Lanaya, starting out Bottle-first provides no stats and leaves you very vulnerable in lane if you cannot maintain rune control.
|

|
|
|
|
|
|
|
|
|
|
|
|
|
|
|
Cost: 170+ gold
If your team doesn't buy an Animal Courier and you have enough money left over, well, it's up to you then. Yes, it will hurt your ganks and rune-whoring, but having a courier is vital to any serious game and it will be better for your team in the long run if you buy it.
|
Early Game Items
|
|
|
|
|
|
|
|
|
|
|
|
|
|
|
Cost: 600 gold
Having a Bottle gives you rune control and mana regen, which in turn allows for easier and more successful ganks. Lanaya is one of the best rune-*****s out there thanks to Psionic Trap.
|

|
|
|
|

|
|
|
Cost: 485-525 gold
Cheap stat items such as Null Talisman, Wraith Band, and Bracer may be very good at boosting your stats, but they tend to delay your core unnecessarily. Also, Lanaya has very good damage already through her Refraction and Meld. Only get these items if your early game hasn't been going so well.
|

|
|
|
|
|
|
|
|
|
|
|
|
|
|
|
Cost: 550 gold
No matter how small your range is, you will always be a ranged hero. Therefore, you will always get the weaker version of Poor Man's Shield when you buy it. Unless you are getting absolutely destroyed by physical harassment, I would not recommend buying this item.
|
Core Items
|
|
|
|
|
|
|
|
|
|
|
|
|
|
|
|
Cost: 135x gold
Don't ever leave your base without one.
|
|
|
|
|
|
|
|
|
|
|
|
|
|
|
|
Cost: 1075 gold
Lanaya requires at least one armor reduction item in her core, and Medallion of Courage is by far the cheaper choice; the difference in costs between Medallion and Desolator is slightly more than 3000 gold. Plus, Medallion also has a nice cast range of 800, and adds some armor and mana regeneration. On the downside however, the effect from Medallion is an active ability, thus making your ganks more micro-intensive. If you want to go out and gank as soon as possible, Medallion of Courage is recommended over Desolator.
|
Luxury Items

|
|
|
|
|
|
|
|
|
|
|
|
|
|
|
Cost: 6000 gold
If you manage to farm it up, Butterfly is an excellent item for Lanaya. It gives everything she could ever want in the offense department, from damage to attack speed, and adds some nice survivability too. The evasion, in particular, is especially good on Lanaya, as dodged attacks don't remove Refraction charges.
|
Situational Items

|
|

|
|

|
|
|
Cost: 3850-5400 gold
Lanaya doesn't scale as well into late-game as some of the other carries, so if you find that they are becoming too difficult, consider buying some of these items. Monkey King Bar is an effective item against Butterfly users and dodge-carries like  Phantom Assassin. Manta Style, in addition to the nice stat bonuses, can boost your damage output significantly against a single target when used in conjunction with your armor reducing abilities. And last but not least, Heaven's Halberd shuts down an enemy carry completely for 3(or 4.5 for ranged heroes) seconds, giving you ample time to run away or kill your target. Phantom Assassin. Manta Style, in addition to the nice stat bonuses, can boost your damage output significantly against a single target when used in conjunction with your armor reducing abilities. And last but not least, Heaven's Halberd shuts down an enemy carry completely for 3(or 4.5 for ranged heroes) seconds, giving you ample time to run away or kill your target.
|

|
|
|
|
|
|
|
|
|
|
|
|
|
|
|
Cost: 875 gold
Urn of Shadows is a very nice item for many mid ganking heroes such as  Night Stalker, Pudge, and of course, Lanaya. The extra health and mana regeneration is very useful early-game, while the Night Stalker, Pudge, and of course, Lanaya. The extra health and mana regeneration is very useful early-game, while the  Shadow Word-esque active that it provides can secure an otherwise lost kill, or heal wounded allies after a gank / teamfight. However, it also delays important items, such as Blink Dagger or Shadow Word-esque active that it provides can secure an otherwise lost kill, or heal wounded allies after a gank / teamfight. However, it also delays important items, such as Blink Dagger or  Black King Bar, that Lanaya requires in order to be effective. If you are planning to buy it, be sure to check with your teammates beforehand, as only one Urn of Shadows can gain charges at a time. Black King Bar, that Lanaya requires in order to be effective. If you are planning to buy it, be sure to check with your teammates beforehand, as only one Urn of Shadows can gain charges at a time.
|
Rejected Items

|
|
|
|
|
|
|
|
|
|
|
|
|
|
|
Cost: 1900 gold
Lanaya is already an extremely squishy hero. Making her even more so with Mask of Madness is just plain dumb.
|

|
|
|
|
|
|
|
|
|
|
|
|
|
|
|
Cost: 2200 gold
You don't have enough HP to utilize Blade Mail effectively. Also, Blade Mail doesn't stack with your Refraction, and you really shouldn't be tanking hits without Refraction anyways. Or tanking at all for that matter.
|
General Gameplay
Lanaya is a ganker first and a (semi-)carry second, so don't think you can farm your way to victory with her. Because of her extreme level dependency and rune control abilities, Lanaya should almost always take mid lane; while she
can function in a side/trilane as well, it is not nearly as beneficial to her. Basic mechanics such as last hitting will also not be covered here. For more information on some of theses techniques and concepts, check out
this guide by
BoredomIsFun.
Pre-Game
When playing Lanaya, one must keep in mind that her skill build is very flexible. Therefore, I would recommend
not picking a skill until you reach your lane. While in most pub games you can get away with going
Psi Blades first,
Meld can save you from early first blood attempts. If extra last-hitting power is also needed,
Refraction can be taken instead.
If, for whatever reason, nobody else will buy
Animal Courier, then you should also be the one to do so. While you may be delaying your
Bottle, spending 150 gold now is far better than losing 2-3 creep waves from running back and forth to your base later. If at all possible however, I would strongly recommend having somebody else upgrade it into a
 Flying Courier
.
Once the game begins and creeps start spawning, be sure to creep block the wave. This is particularly important to Lanaya, as her attack range is so pitifully low. With the high-ground advantage, you can farm in relative safety from harassment thanks to the fog of war that it provides. Plus, your opponent will also miss 25% of their attacks on high-ground targets, which should theoretically put you ahead in terms of last-hits and denies.
Laning
Lanaya is a very aggressive laner, but at the same time, also a ganker, semi-carry, and rune-*****. Often times, newer players have trouble deciding how to spend their limited laning time between these roles. As a general rule, Lanaya's priorities, in order, are as follows:
 |
|
|
|
|
Maintain rune control. The moment you have 600 gold, ferry over your Bottle via your Animal Courier or Flying Courier. In addition to the great bonus effects that the runes provide, maintaining rune control is crucial to your mid-lane dominance. Not only does it give you adequate health and mana regeneration for using Refraction, but it also denies the enemy health and mana regeneration as well if they went for a Bottle. Even if they didn't, you should still aim to take as many runes as possible. They have very powerful effects, and can easily allow you to kill your lane opponent or gank the side lanes.
|
 |
|
|
|
|
Gank other lanes. This only applies after you have your Psionic Trap available, of course, although earlier ganks can be pulled off with certain runes. Ganking other lanes is one of the best ways to retain Lanaya's map control, while also giving you and your other lanes an advantage. As Lanaya is a fairly strong ganker, most of your ganks should be successful if you have somewhat competent allies. However, you should only gank a lane if the opportunity presents itself. Don't go around camping lanes in hopes of a gank; it's simply a waste of potential gold and experience that you could've gotten from farming mid-lane.
|
 |
|
|
|
|
Survive. This might sound stupid at first, but some heroes, such as Batrider or Viper, will make your life a living hell, and there's not much you can do about it. If you aren't careful, you could even end up as first blood. Remember that since Lanaya is more level-dependent than item-dependent, you should not be risking your life for last hits or denies. While you might end up slightly underleveled and underfarmed, it is far better than dying and giving your opponent an even larger advantage. In the case that it is too dangerous to last hit or deny creeps, simply sit back within experience range and wait for the creep line to push closer to your own tower. You can also call for ganks from your side lanes, if needed.
|
 |
|
|
|
|
Last hit and deny. Depending on your team's composition, Lanaya will probably be the 2nd or 3rd highest priority farmer. This means that while you should be ganking fairly often after level 6 or 7, you should also try to get some last hits in between. Items such as Blink Dagger, Desolator, and Black King Bar are almost universally required for Lanaya to function mid-late game, and she makes great use of DPS items such as Daedalus as well thanks to her armor reduction. Plus, her Psi Blades makes clearing creep waves incredibly easy, allowing you to farm up faster than most other gankers.
|
 |
|
|
|
|
Harass. Lanaya is one of the best harassers in the game thanks to her Psi Blades, especially against melee heroes like  Tiny and Doom Bringer. Simply position yourself before each attack such that your opponent is directly behind your attack target, and they will get hit for the full damage taken by your original target. If done enough times, you can easily force your opponent to use consumables or retreat this way. Also, make sure to do this when a rune is about to spawn, as you will both push your lane towards their tower and weaken your opponent, thereby discouraging them from contesting your rune. Tiny and Doom Bringer. Simply position yourself before each attack such that your opponent is directly behind your attack target, and they will get hit for the full damage taken by your original target. If done enough times, you can easily force your opponent to use consumables or retreat this way. Also, make sure to do this when a rune is about to spawn, as you will both push your lane towards their tower and weaken your opponent, thereby discouraging them from contesting your rune.
|
Ganking
Lanaya is a very potent ganker, but it is usually best to avoid ganking until after you hit level 6 or 7, when you have
Psionic Trap and either
Refraction or
Meld maxed out. If you have runes and / or competent allies, it is also possible to successfully pull off ganks before this point, though you will have to rely on others for crowd control.
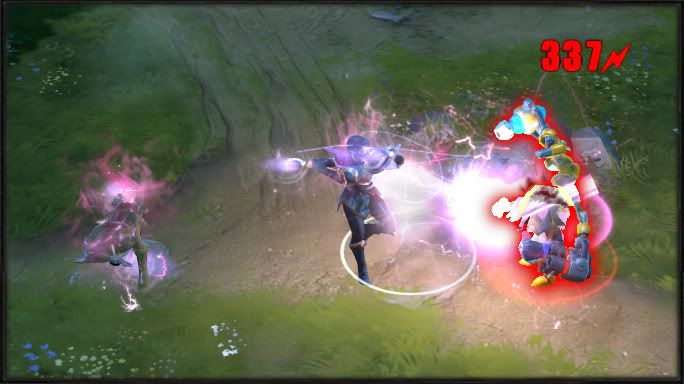
Here's Lanaya's basic ganking / killing combo. While it's not particularly complex, it requires fast fingers and practice to pull off successfully. A detailed explanation is provided below.
1.
|
|
Activate Refraction before engaging. Be sure to time your Refraction so that it will be available again during the gank. Usually, this will be about 8-12 seconds before engaging.
|
2.
|
|
Set your Psionic Trap. Your Psionic Trap can also be set before the gank begins, which will cut down on the number of actions required. Just keep in mind that it has a 2 second fade time, so your opponents will be able to see it for a short amount of time if you placed it in an area where they have vision.
|
3.
|
|
Once you have your Psionic Trap set, and the enemy is within the area of effect radius, activate it. If you placed it right on top of them, then you will need to do so immediately. Switch your selection to your Psionic Trap, and use the Trap subskill to trigger it properly. Note that you can also toggle shared unit control with your allies, which will allow them to detonate your traps as well.
|
4.
|
|
Move slightly ahead of their position (with Blink Dagger preferably). Don't use your  Phase Boots right now if you have them; save them for chasing. Phase Boots right now if you have them; save them for chasing.
|
5.
|
|
If you have a Medallion of Courage, you must use it now before doing anything else to maximize the damage dealt to your target.
|
6.
|
|
Start off with a Meld-tap on your target. If possible, avoid doing this near creeps as this will waste your Refraction charges unnecessarily.
|
7.
|
|
Auto-attack your target for massive damage, thanks to your armor reduction. Be sure to try and cancel the backswing of each attack animation for more overall hits. If you have competent allies or illusions, you can also try to block your target from escaping in a similar fashion to creep blocking.
|
8.
|
|
At this point, continue to auto-attack and chase using your Blink Dagger / Phase Boots / Psionic Trap until your target either dies or runs to safety. If you wish, you may tower-dive thanks to Refraction, but you should still exercise caution when enemies use Town Portal Scrolls or have stuns, such as  Vengeful Spirit or Sven. Vengeful Spirit or Sven.
|
Teamfighting
Because of her frailty and primarily single-target damage, Lanaya is not a very good teamfight hero. If one happens to break out however, your job is to burst down a single, important target on the opposing team. Squishy support heroes with disables, nukes, or teamfight spells such as
 Lion
Lion,
 Lich
Lich, and
 Witch Doctor
 are your primary targets, as they can damage or disrupt your team significantly if left unchecked. Teamfight heroes or low-armor carries such as
 Earthshaker
 or
 Alchemist
 are also valid possibilities.
Ideally, you will want to stay behind until your initiator goes in, but if you have your
Black King Bar and enough of a level advantage, you can also initiate the fight by taking advantage of the nigh invulnerability provided by
Refraction + BKB. You should avoid doing this however, if the enemy team has ultimates that can bypass BKB, such as
 Flaming Lasso
 or
 Dismember
. Once you enter the fight, try to kill your target as fast as possible; if you picked a good target, usually it will not be too difficult. Though you should not expect your enemies to line up for you, with proper positioning you can hit at least 1-2 other enemy heroes with the spill damage from your
Psi Blades as well. Afterwards, if you have enough HP / BKB time remaining, you can proceed to kill the other enemy heroes. Otherwise, just run back to safety.
Also, remember that
Psionic Trap has a cast range of 2000, and provides a massive area slow. Once your initiator has gone in, trigger your Psionic Trap to prevent enemies from running away, much like
 Upheaval
 would. If your team has an initiator with a small area of effect radius like
Earthshaker or
 Axe
Axe, your Psionic Trap will also allow them to use their abilities more effectively.
Bestest Buddies

|
|
Gondar, the Bounty Hunter
A fellow ganker / semi-carry, Bounty Hunter is a great ally for Lanaya. His Track is like a weaker Amplify Damage, but it also gives you bonus movement speed when you are close to the tracked target, making it easier for you to chase enemies. Your burst damage combined with his burst damage from  Shuriken Toss, Shuriken Toss,  Shadow Walk, and Shadow Walk, and  Jinada should easily net you a kill, which then gives you 50 / 100 / 150 bonus gold from Track. Plus, unlike most gankers, Bounty Hunter almost never takes mid lane, which frees it up for you to use. Jinada should easily net you a kill, which then gives you 50 / 100 / 150 bonus gold from Track. Plus, unlike most gankers, Bounty Hunter almost never takes mid lane, which frees it up for you to use.
|

|
|
Dazzle, the Shadow Priest
A very strong and aggressive support or semi-carry, Dazzle has a somewhat cheap and spammable ultimate,  Weave, which synergizes well with your armor reducing abilities. Ganking his lane is also easier than most, thanks to his Weave, which synergizes well with your armor reducing abilities. Ganking his lane is also easier than most, thanks to his  Poison Touch which slows and eventually stuns an enemy. If you are getting focused down in a team fight, his Poison Touch which slows and eventually stuns an enemy. If you are getting focused down in a team fight, his  Shallow Grave combined with his Shallow Grave combined with his  Shadow Wave can also help keep you alive, or at least give you enough time to run away. Plus, since all of his spells deal Physical damage, your armor reduction increases his damage output significantly, especially if he is going a semi-carry build. Shadow Wave can also help keep you alive, or at least give you enough time to run away. Plus, since all of his spells deal Physical damage, your armor reduction increases his damage output significantly, especially if he is going a semi-carry build.
|

|
|
Rigwarl, the Blower of Snots Bristleback
Another forgotten hero in the DotA pool, Bristleback has amazing synergy with Lanaya.  Viscous Nasal Goo has everything Lanaya could want in a spell, from a movement speed slow to armor reduction, all with a 1.5 second cooldown. Combined with your Psionic Trap, and your target will be hard pressed to move anywhere at all. Your armor reduction also helps him tremendously, as his mainstay damage spell, Viscous Nasal Goo has everything Lanaya could want in a spell, from a movement speed slow to armor reduction, all with a 1.5 second cooldown. Combined with your Psionic Trap, and your target will be hard pressed to move anywhere at all. Your armor reduction also helps him tremendously, as his mainstay damage spell,  Quill Spray, inflicts stacking Physical damage. Plus, he is a great chaser thanks to Quill Spray, inflicts stacking Physical damage. Plus, he is a great chaser thanks to  Warpath, allowing the two of you to catch up and beat the holy snot (no pun intended) out of your target with all of that bonus damage. Warpath, allowing the two of you to catch up and beat the holy snot (no pun intended) out of your target with all of that bonus damage.
|
Insensitive Jerks
In general, Lanaya wants to avoid heroes with damage over time skills such as
 Shadow Strike
 and
 Acid Spray
 or skills that inflict very rapid damage, such as
 Diabolic Edict
 and
 Rocket Barrage
. However, there are too many of them to list here, so I will just be listing the main enemies that Lanaya should watch out for.
|
|
Jin'zakk, the Batrider
Prepare yourself, you've just been countered. If the enemy team has a Batrider, I would STRONGLY recommend not picking Lanaya. If he's smart, he'll use Sticky Napalm on you every chance he gets, making you extremely slow and vulnerable to his attacks. And since your range is pitiful, there's not much you can do about it unless you take early levels of Psi Blades. If you still picked Lanaya, play it safe and try to avoid getting hit by Sticky Napalm while still getting some last hits and denies. Since he is rather squishy as well, you can try to burst him down once you get some levels in Meld, which will likely be delayed due to the extra levels in Psi Blades. In teamfights, he can use Blink Dagger to get up into your face, and then drag you right back into his team with his Flaming Lasso /  Firefly combination that will completely destroy your Refraction charges. You'll likely be dead before his lasso even ends. His Firefly also destroys trees and provides flying vision, making it very difficult to juke him if he has Dust of Appearance / Gem of True Sight. Avoid at all costs. Firefly combination that will completely destroy your Refraction charges. You'll likely be dead before his lasso even ends. His Firefly also destroys trees and provides flying vision, making it very difficult to juke him if he has Dust of Appearance / Gem of True Sight. Avoid at all costs.
|

|
|
Meepo, the Geomancer
Mid-game, Meepo and his best friends Meepo, Meepo, Meepo, and Meepo will absolutely destroy you. Geostrike from even a single Meepo screws up your Refraction, but chances are, you won't be fighting a single Meepo. More likely than not, they'll all  Poof to your location and begin bashing you in with their tiny shovels. The Poof to your location and begin bashing you in with their tiny shovels. The  Earthbind cycle will keep you permanently snared, and you can't even use Meld while under the effects of Earthbind. Note that if you were invisible before Earthbind actually hit however, you will not be ensnared. Basically, if you get caught by him, your best hope is to burst down a single Meepo before he can react. Otherwise, you are as good as dead. Alternatively, you can try and gank him before he hits level 6, as he has almost no damage or lane control before he gets his Earthbind cycle will keep you permanently snared, and you can't even use Meld while under the effects of Earthbind. Note that if you were invisible before Earthbind actually hit however, you will not be ensnared. Basically, if you get caught by him, your best hope is to burst down a single Meepo before he can react. Otherwise, you are as good as dead. Alternatively, you can try and gank him before he hits level 6, as he has almost no damage or lane control before he gets his  Divided We Stand. Divided We Stand.
|
|
|
Viper, the Netherdrake
Viper didn't come to mid lane to farm creeps, he came to farm YOU. A single Poison Attack burns through most of your Refraction charges, leaving you very vulnerable whenever you go up for a last hit / deny. Once Viper reaches level 5, the cooldown on his Poison Attack becomes 0, which makes the damage block from your Refraction close to worthless. If he has  Corrosive Skin, attacking him directly will also burn off your Refraction charges. Keep in mind that you can dodge his auto-attacks and Corrosive Skin, attacking him directly will also burn off your Refraction charges. Keep in mind that you can dodge his auto-attacks and  Viper Strike with your Meld, so it is unlikely that he will actually be able to kill you. That doesn't mean that he won't be constantly harassing you, however. If you find his harass to be too difficult, call out for a gank - he is very squishy early-game and has no escape mechanism. Late-game, he is just another semi-carry just like you, but you should have no problems taking him out if he doesn't Viper Strike you. Viper Strike with your Meld, so it is unlikely that he will actually be able to kill you. That doesn't mean that he won't be constantly harassing you, however. If you find his harass to be too difficult, call out for a gank - he is very squishy early-game and has no escape mechanism. Late-game, he is just another semi-carry just like you, but you should have no problems taking him out if he doesn't Viper Strike you.
|

|
|
Ish'kafel, the Dark Seer
When it comes to popping Refraction, nobody does it better than Dark Seer. His  Ion Shell inflicts damage every 0.1 seconds, which means that your maxed out Refraction won't even last for a full second. However, his other skills are just as frustrating to deal with. Not only is Ion Shell inflicts damage every 0.1 seconds, which means that your maxed out Refraction won't even last for a full second. However, his other skills are just as frustrating to deal with. Not only is  Vacuum a nightmare for heroes like Lanaya, who rely heavily on positioning, but it also pulls you out of your Meld. If you catch him or his ally with a Psionic Trap, he can just use Vacuum a nightmare for heroes like Lanaya, who rely heavily on positioning, but it also pulls you out of your Meld. If you catch him or his ally with a Psionic Trap, he can just use  Surge to negate the slow completely. And even if you start to hit hard, his Surge to negate the slow completely. And even if you start to hit hard, his  Wall of Replica will turn that damage against you and your team. If all this wasn't bad enough, he also starts with one of the highest base armor values in the game, at 5.68, and tends to build survivability items, making him much harder to kill than most heroes. Wall of Replica will turn that damage against you and your team. If all this wasn't bad enough, he also starts with one of the highest base armor values in the game, at 5.68, and tends to build survivability items, making him much harder to kill than most heroes.
|
Conclusion & Credits
Well, that about sums up everything I wanted to say about Lanaya. Hopefully, you will walk (or Alt-Tab) out of this guide a better understanding of how to play Lanaya. Just keep in mind that this is my first guide, and still a work in progress, so (constructive) criticism is welcome.
About Me
First of all, I'm a college student, and not a professional DotA player by any means. Therefore, this is only a guide for inhouses / pubs, and NOT a competitive guide to Lanaya. I originally started playing DotA a few years back when an old friend introduced it to me, and it was absolutely great. I played inhouses and the occasional pub for around a year and a half, nothing professional, but then more important stuff (such as college) took priority. Nowadays, I have taken to occasionally playing DotA2 with some friends.
Lanaya has long since been one of my favorite heroes. Throughout my DotA history, I've probably played her at least 100-150 times, through feed and stomp. However, I've always been rather disappointed with how underplayed she is, and the fact that half of the people I've met have no clue what she does or how powerful she can be. By making this guide, I hope to change that situation, or at the very least, stop people from telling me that
 Morphling
 is a better solo mid than Lanaya because of its longer attack range.
Credits
Credits go to
jhoijhoi from MOBAFire for
her guide on making guides and
Matt for
his post on the custom BBCode system.
Thanks to everybody here at DOTAFire who provided feedback on this guide.
And of course, thanks to you, the reader, for parting with your valuable time to look through this guide. Now it's all mine. <insert evil laugh here>
~Dr. D
Changelog
|
02/10/12 |
|
- |
|
First draft published, Changelog section created.
|
03/17/12
|
|
-
|
|
Minor formatting and content changes all around. Rewrote the Skills section to be more concise.
|
07/06/12
|
|
-
|
|
Updates. Updates everywhere. Pretty much every section has received at least some type of change / update / improvement in content and / or appearance. Also added Hero Information and Skill Builds sections. I had originally planned to save this update for when Lanaya was released, but I decided to post it early and see what you guys think about it.
|
07/11/12
|
|
-
|
|
Lanaya has been added to the Dota 2 Test Client. Screenshots, lore, and skill descriptions have been updated to reflect this change.
|
07/12/12
|
|
-
|
|
Minor content / formatting fixes. Expanded a few sections.
|
08/21/12
|
|
-
|
|
The Trap skill and all references to it now links to DOTAFire's database.
|
|
10/15/12 |
|
- |
|
Updated for v6.75b
|
|
11/01/12 |
|
- |
|
Updated for v6.76c
|
|
11/01/12 |
|
- |
|
Updated for v6.77b
|


 Good all-around stat gains
 Less starting range than Doom Bringer
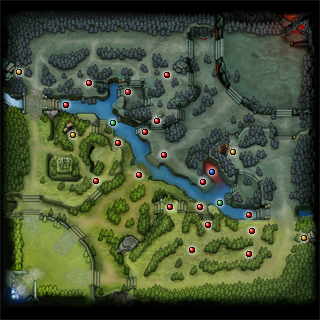
 Roshan's Lair - You almost always want to have this covered. Psionic Traps last forever and can grant vision of Roshan, unlike normal wards.
 Rune Spots - Have at least one covered during the laning phase. Not only will this allow you to maintain rune control, but it will also spot any potential ganks coming from the river.
 Shops - Cover as needed, especially late game. If you can catch a non-carry or a courier alone at a shop, chances are you can jump on them for an easy kill.
 Other - Cover as needed. These spots represent points that people often travel through, allowing you to avoid enemy ganks or scout out your opponent.


Quick Comment (78) View Comments
You need to log in before commenting.