Skills - Description
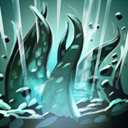
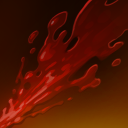
This is why enemies will hate you in the first part of the match: the Shuriken allows you to deal a great damage from a quite high range.
Despite a relatively low cooldown, it's not a spell you can spam or use brainlessly.
I hate when people start launching shurikens like they are grenades.
As I said, Bounty hasn't a big mana pool, so you'll use the Shuriken Toss to finish your foes.
There are only 2 exceptions to this rule: during chases your Shuriken can help your team reaching the peasky enemy and as an harassment tool once you're level 6, in combination with
 Track
Track (read further)
Tips: Shuriken Toss
ministuns the target: this mean that you can stop any channeled spell.
That poor
 Zeus
Zeus is using a
 Town Portal Scroll
 to get out of there? Shuriken Toss!
 Sand King
 is trying to
 Epicenter
 the **** out of you? Shuriken Toss!
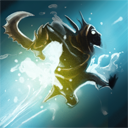
If the Shuriken is your way to be a real nuissance in the early game, Jinada is the reason while the enemies will hate you later.
It's one of the few 100% sure crit hit in the game, which means that you can always deal one massive blow at your enemies.
The real reason we're gonna pick an early level of this skill though, it's its slow, a necessary tool during chases

Invisiblity + bonus damage.
Nothing more to say about this, just remember to always give a look at the cooldown.

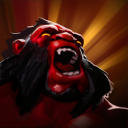
This is why your team mates will love you even if you're not able to do a single kill.
Track grants to you and your allies a gold bonus, and will make defenseless poor guys like
 Riki
Riki and
 Nyx Assassin
, or will make ganks impossible to people like
 Pudge
Pudge, who loves hiding in the shadows before attacking.
This is the only spell you'll have to cast all the time, always giving the priority to invisible heroes or to the heroes who have items like
 Shadow Blade
 as core items.
The other thing that makes Track a valuable spell is that your Shurikens will bounce on every tracked target.
This is the only other case where spamming your Shuriken Toss can actually be a good thing: assuming you're dealing with a dual or tri lane, you may want to track your foes and then throw your nice shuriken at them all in one hit, harrassing them.
Finally, don't forget the speed buff you get near a tracked enemy.
Builds
The basic idea of every Bounty Hunter's build is to max your damage in order to strike one powerful blow with  Jinada.
This means that you should avoid items that improve your overall stats (except in the early game) or attack speed, focusing on those that can push your critical hits to the roof.
That said, there are exceptions
I can handle my bounties (Offlaner)
When you should use it
You're doing the basic BH's job: you're the sololaner
Explanation
This is a rather standard BH's build and shares many items you're getting following the roamer build.
Being solo in the hard lane, you'll focus your attention on your survival, waiting to reach level 6.
 Vladmir's Offering
 is the perfect tool for you: improves your general stats, grants a good aura for your team mates and your critical hits will greatly heal you thanks to the lifesteal.
The
 Medallion of Courage
 is a nice pickup, since the armor reduction is your way to progress to the midgame.
Bounty after bounty (again, remember to always track the enemies) you'll definetely want the best BH's weapon: the
 Desolator
.
At this point you're pretty much ok: your critical hits should be extremely efficient.
Moving on to the late game you'll want to upgrade your medallion into a
 Solar Crest
 or getting some new weaponry like a
 Monkey King Bar
.
 Drum of Endurance
 are a viable pickup in case you're getting harassed way too much and you want to improve your stats until you get a
Desolator and the same goes for the
 Tranquil Boots
 which are also a good way to chase your foes, at the cost of no extra damage inflicted.
Don't
overestimate the importance of
 Black King Bar
: you're not a hard carry and when you get to the late game you're not supposed to fight upfront the enemy team so you may want to get it only when there are massive AoE spells that can blow you up like
 Ravage
.
Silent, effective, in motion (Roamer/Mid)
When you should use it
You're gonna play mid (VERY situational) or your team already has an offlaner while the hard carry can safely farm without a trilane (
 Dazzle
 +
 Weaver
 for instance) which leaves you the possibility of moving freely from one lane to another, constantly ganking.
Explanation
Since you're gonna use your spells a lot, you'll need a
 Bottle
 ASAP, while the
 Orb of Venom
 and the Blight Stone are necessary to slow and deal more damage to your foes.
Getting a
 Yasha
Yasha first is perfect to become even faster during ganks to the point you may even prefer to get it before the
Desolator
In the late game, upgrading your blade into
 Sange and Yasha
 will make sure that chases go in your favor thanks to the slow.
Should you get a lot of gold you may want to improve your damage with a
 Daedalus
 (because everybody loves a double crit) or again a
Monkey King Bar
Silenced Bounties (Anti-Caster)
When you should use it
If you're gonna face a team full of nukers or even a particularly peasky one (as
 Puck
Puck) the anti-caster build is your way in.
Explanation
This time you'll want a
Black King Bar to avoid being killed by a combination of 4 different spells in an instant so that you can strike the enemy with your
 Orchid Malevolence
.
This item not only solves your mana problem, but also synergizes well with your skills since it will make sure your
 Shuriken Toss
 strikes even harder.
Of course you may have to dispel a
 Linken's Sphere
 using Track first.
That said, a Dagon will further improve the extra damage you're dealing thanks to the Orchid, and upgrading said Orchid into a
 Bloodthorn
 makes sure that every not-tank hero dies within 5 seconds with the combination of Jinada-Shuriken-Dagon.
 Diffusal Blade
 is a rather nice pickup, more for his debuff than for the mana burn, which you won't be able to use at its full power
Desolator, once again, is a good item in every situation AFTER the Orchid.
Rabid Rabbit (a team with no carries)
When you should use it
DON'T USE THIS BUILD
Ok now you'll ask me what's the point of explaning this build at all, and here it is: in a scenario where you carry is sucking hard or your team (God forbids) didn't pick a single hard carry, this is your only way to try to overcome the odds.
That said, you're probably gonna lose anyway but it's always worth giving a chance now, isn't it?
Explanation
All I said before now is meaningless: if you want to become a hard carry Bounty Hunter, you have to become hard to kill and a hard hitter which means improving your overall stats and attack speed.
Still: DO NOT BUY BATTLE FURY.
Track makes sure you get tons of gold even without actually getting a kill so there's no point into buying a farming item.
Core items now include a no longer situational
Black King Bar, a
 Helm of the Dominator
 and
 Manta Style
.
While the first 2 are self-explanatory (the Helm is a carrish "deviation" from the Vlads) Manta Style can become your personal Holy Grail: improved stats, attack speed, damage and speed. It's basically all Bounty Hunter wants, except he can't use this item at its best.
In order to do that you'll need some extra items in the late game, in particular a
Diffusal Blade - whose mana burn can now be something to be feared - and a
 Butterfly
, to make your illusions more powerful and to add the sweet sweet evasion you'll need. Finally, upgrade the Helm into a
 Satanic
 to mantain the lead in a 1v1 fight.
Daedalus/
Monkey King Bar are once again useful to get a poweful Jinada crit
How To Play - Early Game
We won't cover the option where you're in the safelane: that's limited to case you're following the hard carry build and the simple idea is that you should farm as much as you can to get ready for the midgame.
For the early game I'll make the proper distinctions between the Offlaning Bounty and the Roaming Bounty
Offlaner
Your primary goal is not dying and not last hitting if not completely safe.
That means you're probably gonna spend some gold on
 Sentry Ward
 to avoid being harassed.
BH is very squishy so you can't hope to engage a trilane without being killed.
That said, you can still be a nuissance for your enemies by using what I call the "Bee Sting" (read further for details)
Once you get to level 6, start tracking every single foe and hit them hard with your bouncing shuriken.
With the help of your midlaner, ganks should be pretty simple: Jinada your target, hit him during the slow, end him with the shuriken if he should get too far.
Ez gold ez life.
Roamer/Midlaner
A midlaning Gondar can easily win the lane against many enemy heroes (more in general, any hero who can't counter invisible heroes or more specifically can't cast AoE spells to harass you)
As a roamer, on the other hand, you may have some issues.
Your
 Boots of Speed
, in conjunction with
Orb of Venom, will make you travel fast and chase down opponents.
Join the lane where there's a team mate with a good spell to set up your gank (
 Pounce
,
 Berserker's Call
,
 Dragon Tail
 are notable example) and start hitting as hard as you can.
A roaming Bounty Hunter won't be able to level up fast, but will assure your team's lead in the early stages of the game.
Your real targets though, are the enemy junglers: wait for them to get low hp and strike the final blow.
Beware that you may want to wait to get at least 2 levels of
Shuriken Toss before doing this: heroes like
 Legion Commander
 can turn on you quickly while a
 Lifestealer
 may use
 Rage
Rage to stop your Shuriken and counterattack.
That said, if you can't kill them, deny their jungle: some
Sentry Ward will do the trick and delaying an
 Enigma
's farm is always a good thing
Friends (Good Team-mates)
This guys are the best companions for Bounty Hunter.
Disablers-Stunners
These are people who can slow, disable or prevent other heroes to move, allowing you to reach them faster and finish them.
The followings are just exemples.
His
 Rupture
 will force the enemy to decide between standing still (and so dying under Gondar and Bloodseeker's attacks) and running away, losing enough hp to give you a chance to throw succesfully your
Shuriken Toss
Also,
Track and
 Thirst
 in conjunction can provide immense vision over the enemy heroes
One word:
 Frostbite
.
 Malefice
 and
 Black Hole
 will stop enemy heroes, giving you time to track or even kill them
Scouts
Gondar should be the scout of the team, going through the jungle to find enemy heroes. Anyway, people who can scout from the distance can be extremely usefull, since they'll give you the location of your foes, and so a chance to run for them and use
Track.
Windrunner
Her
 Powershot
 is a good way to check the map, offering vision on every place through which it passes.
You've lost that
Riki?
 Thundergod's Wrath
's true sight will do the job.
Other heroes
Your
Track will greatly help
Pudge when he'll have to hook enemy heroes who are trying to hide in the jungle.
As I already say in "Skill - Description", if these 2 tough guys cast on you respectively
 Ion Shell
 or
 Aphotic Shield
, you'll can inflict damage to your enemies simply running near them while invisible
Abaddon will also get increased speed with the combination of Track and his passive Curse of the avernus
Should an enemy escape from a gank, your
Track will help Ancient Apparition finishing him off with
 Ice Blast
Foes (Counters)
This are the heroes who will be able to smash your head with no difficulties.
True-sighters and (good) supporters
People who grants true vision on heroes to their team mates will always try to make your
 Shadow Walk
 useless.
In the same way, supporters (if they're not dumb) will always buy
Sentry Ward etc to counter you.
Yes, I said his ulti can help you when he's one of your ally, but in the same way, as an enemy, it can reveal your presence even if you're invisible and the same goes for Lightning Strike. Having
Zeus as an enemy, will make you impossible to use Bee Sting if you're not absolutely sure that he's waiting for the end of the cooldown.
An Anti-Caster build will do the trick
COUNTERING LEVEL:
4/5
Slardar is your nemesis: his Amplify Damage has a low cooldown, so you can be sure he will always be ready to cast it on you, also tremendously reducing your armor. At this point, even running could be useless: with Sprint he'll reach you in no time, and his Bash won't let you go.
Did you pick Gondar against a Slardar? Congratulations, you can now uninstall Dota 2.
COUNTERING LEVEL:
5/5
Illusioners
This heroes are not actually your counters. Anyway, if they attack you after they have summoned their illusions you won't be able to know who you have to
Track, and meanwhile you may be killed by them.
On the contrary, if you can use
Track before they can use their illusions, they won't escape.
COUNTERING LEVEL:
1/5
Silencers
Anyone who can prevent you from using
Shadow Walk will significantely lower your survival chances.
Surprised to see him in a section called "Silencers"?
His
 Last Word
 and mostly
 Global Silence
 will be your nightmare.
COUNTERING LEVEL:
4/5
 Crippling Fear
 is a good way to say "goodnight" to Gondar.
COUNTERING LEVEL:
3/5
Doom Bringer
His ultimate
 Doom
Doom is not just a perfect way to avoid you to cast
Shadow Walk, but is also a damn good way to kill you
COUNTERING LEVEL:
5/5
Big Bad Motherf*ckers
I said that
Desolator is the weapon which'll give you the power to attack tanky heroes. Anyway, some of them have skills which can easily overcome you.
Simple: don't provoke a 1vs1 fight with him. If you can, try a Bee Sting (in the first minutes of the game), but do never spend more than a second visible (and that could still be risky). His ultimate
 Life Break
 will literaly destroy you in no time.
COUNTERING LEVEL:
4/5
He's far less a big deal as Huskar is, but
 Greater Bash
 will make you defenseless for long time, while
 Charge of Darkness
 will place a gigantic target on your head. In other words: if Bara is in the enemy team, be sure to eliminate your foes in few time.
COUNTERING LEVEL:
4/5
Preys (Countered Heroes)
You should pick Bounty Hunter when someone in the enemy team picks one of the following heroes.
Actually, you should pick Gondar in every match just because he is damn cool.
Invisibles
Well, of course every invisible enemy will have a bad time with Gondar, but they are not the only ones: you should pick BH even when there are enemies who have
Shadow Blade as a core item.
Some exemples:
Riki
Nyx Assassin
 Sniper
 Invoker
 (if he decides to use a lot
 Ghost Walk
)
 Templar Assassin
 Shadow Fiend
This doesn't apply to
 Slark
Slark whose
 Dark Pact
 can debuff your track
Squishy heroes
As I said many times,
Jinada wil destroy people with few hp.
Examples are
 Pugna
Pugna
 Crystal Maiden
Zeus
Crystal Maiden
Zeus (but remember that he can counter you as well)
 Lina
Lina
Evasive heroes
Any hero with an evasive spell like
 Blink
Blink has lower chances to escape whenever tracked.
This works particularly well against
 Spectre
's
 Spectral Dagger
 which is commonly used to escape in the middle of the woods.
Once she's tracked, there'll be no place to hide
Wrong Picks (Bad Allies)
Ending chapter, and probably one of the most important.
Here are the heroes who have a BAD synergy with Gondar, which means they'll mostly be a problem for you.
EVERY-DAMN-INVISIBLE HERO
This makes me seriously mad. DON'T PICK MORE THAN ONE INVISIBLE IN THE TEAM. It's just stupid.
Why?
Well, if the enemy team tries to counter one invisible hero with sentries, gems etc, your team mates will technically play in 4 vs 5, until they get rid of these counter-invisible items.
BUT, if your team consists of more than 1 invisible heroes, you're going to play 3vs5 or even 2vs5!
So no, Gondar and Riki are not a nice couple.
Gankers
A good team needs different heroes. Don't pick Bounty at any cost. It's dumb.
You can't hope to win with a team made up by
 Bounty Hunter
,
 Viper
Viper,
 Bloodseeker
,
Sniper and
 Clockwerk
!!
Be smart, pick a damn support for god's sake!


 Iron Branch


Quick Comment (9) View Comments
You need to log in before commenting.