Prepare for Trouble - an Arc Warden overview
NDenizen
December 15, 2015
Introduction
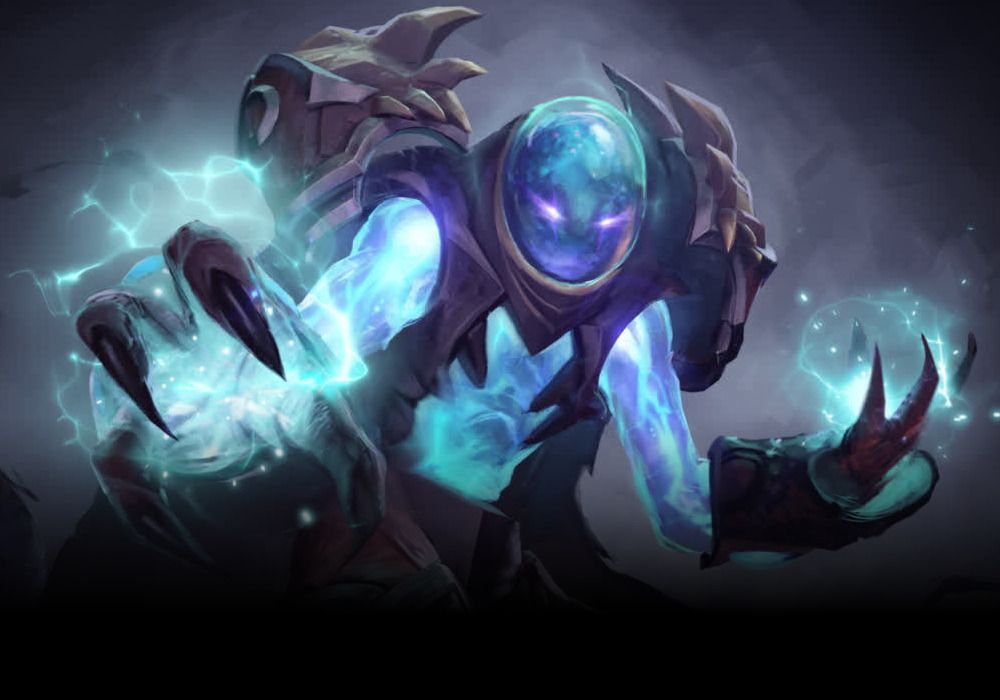
 Arc Warden is an agility carry or utility hero that excels in taking objectives, whether it is fighting with your team or taking towers alone. Arc Warden is characterised by his ultimate
  Tempest Double, which creates a complete clone of your main hero similar to a Meepo clone, but with access to not only your skills, but your items too.
With his zoning and buffing abilities, he is very versatile in how he can be built and played, but how well he performs is very reliant on player skill.
Pros / Cons
Positives
+ Is an Agility hero, so scales well with items.
+ Decent starting strength and int makes him very survivable at a time other agility heroes are weak.
+ Excellent attack range of 625, and low cast points on his spells.
+ Massive range on his spells.
+
 Flux
Flux is a good slow and DoT that punishes players on their own.
+
 Magnetic Field
 is a great defensive ability and even works on your buildings.
+ Has excellent damage, zoning and area control with
 Spark Wraith
's 2000 cast range and decent cooldown.
+ Can abuse items to their highest potential
+ Can farm safely whilst a Double joins fights, making him a hero who really can be two places at once.
+
Tempest Double's potential is only limited by player ingenuity.
Negatives
- Reliant on both levels and gold to start getting active.
- No flash farming capability until he has items.
- Poor starting Agility and Agi gain means he really needs those items if he wants to be a right-click carry.
- Stat gains are passable but don't completely make up for his low agility, meaning a low stat gain hero overall.
- Poor turn rate, and has slightly below average movement speed
- Low base damage
- Not the most forgiving mana costs
- All his spells can be wasted if not used correctly
- His high skill ceiling includes a low skill floor, making it very easy to use this hero badly and have low impact
Skills
Arc Warden has a nice selection of abilities, which make him constantly able to adjust his playstyle offensively or defensively, and flexibly respond to different situations. Flux provides a strong single target slow, Magnetic Field provides evasion and attack speed to your team, and Spark wraith provides area control.
The important part of course is Tempest Double, which creates a clone of Zet and therefore makes all your regular abilities available more often. The ability to use Magnetic Field twice in a battle or increase the amount of Spark Wraiths on the map is very strong, and it makes understanding their various benefits (and weaknesses) quite important.
Flux
Applies a debuff to an enemy unit that slows and deals damage, but only when the target is alone. Flux deals up to 60 damage (360 damage in total) per second and slows for 50% at all levels, but neither the slow nor damage will take effect if your target is within 225 range of one of its allied units.
Debuff duration: 6 seconds
Move Speed Slow: 50%
Damage per Second: 15 / 30 / 45 / 60 magical
Cast Range: 600 / 700 / 800 / 900
Radius which checks for other units: 225
Mana Cost: 75
Cooldown: 20
+ Great single-target slow with a good range and cheap mana cost
+ Excellent value point - the strong slow is the same at all levels
+ Decent damage for an already decent slow
+ Can influence enemy behaviour allowing you to punish their positioning
- Is completely wasted if used poorly
This ability gives you a strong 50% slow that can last for up to 6 seconds. It also does damage over time, which adds up to a good amount of damage if it is able to persist for the full duration of the debuff. As a DoT it will also block items like
 Blink Dagger
 or
 Bottle
. It is pretty strong, but neither the slow or the damage will be applied if the targeted unit is next to another of its allied units (within a radius of 225), making it designed to be used on enemies when they're away from creeps or allied heroes. Keep in mind that if the enemy isn't alone, the debuff won't be removed, it will still continue and can be re-applied if your target moves away from its ally again. This allows you to cast it pre-emptively and force the opponent to react early.
You can use it in early ganks against mid or solo offlane heroes, and it can help in first blood attempts. Enemies affected by this ability have to choose whether to stay near their creep wave or try and get away, making it something typically used to kill other heroes and not something you can really spam in lane. It's also not particularly useful against heroes like
 Phantom Lancer
 or [[Meepo] which are never alone. It's a great value point as you get the full slow with one stage. Also a general tip for the more perceptive players out there - if you use it on a hero in the middle of nowhere and the Flux doesn't apply, there may be an invisible enemy lurking nearby.
Outside of the laning phase, you can use it to deal with solo roaming heroes and either get away or fight back, or use it in your own kill attempts. In clashes, using this ability can punish heroes too far away from their allies, and if they get close to an ally to remove the slow then it opens up opportunities for your allies to jump in and initiate with AoE abilities. It doesn't cost very much mana which is nice, but has a 20 second cooldown so you need to use it wisely if you don't have your Tempest Double available.
In general this ability is used situationally, but it can be helpful in a variety of situations for saving your life or helping with kills. At Level 1 it provides the full slow, making it a great value point, but your other abilities will usually take precedence unless you expect to be ganking alot.
Magnetic Field

Creates an Area of Effect that provides positive effects to any allied heroes and buildings inside it. Units within Magnetic Field gain 100% evasion and increased attack speed. The radius of Magnetic Field is 275 and lasts up to 5 seconds. Magnetic Field affects Heroes: it doesn't work on creeps, but it will work on structures including your Towers.
Field duration: 3.5 / 4 / 4.5 / 5 seconds
Field radius: 275
Attack Speed bonus: 50 / 60 / 70 / 80
Evasion: 100%
Cast Range: 900
Mana Cost: 110
Cooldown: 50 seconds
+ Really nice AS steroid for your team
+ Really good against right clickers
+ Forces out MKBs from enemy carries that might not want to buy them
+ The evasion works on towers! Amazing for defense
- Doesn't work on creeps, so it's not that great for pushing
- Can be exploited by enemy initiators if your team clumps up in the AoE
- A very high cooldown, even with Tempest Double
This is an excellent ability you can use in lots of ways, essentially buffing your team to make them immune to physical right-clicks as well as adding extra attack speed on top of it, provided they are inside the AoE. It is good in fights to let your allies stand your ground, protect low health allies from stray attacks, and makes you and your team's pushing power much better. What's more, the buff actually works on your towers, causing them to be immune to the majority of damage whilst
Magnetic Field is active, and they even attack faster, making it an incredibly good defensive skill against enemy pushes. Keep in mind it doesn't affect creeps, so you need to have heroes or illusions if you want to use it to push enemy towers.
Outside of pushes this is also good in solo situations, and you can afford to use it selfishly if you need it. You can use it to win manfights against enemies or at least force them to back of, or if they lack disables you can just stand in it and teleport away from danger. You can use it whilst split pushing, but you may consider keeping it ready in case you suddenly need to teleport to a fight elsewhere and use it there.
Magnetic Field's strengths are obvious, but it is balanced by its lengthy cooldown of 50 seconds and needs to be upgraded for it to last for a good duration.
Tempest Double will allow you to use
Magnetic Field quite frequently or essentially double its duration to about 10 seconds, depending on how you choose to look at it, so you can really abuse it. With a 110 mana cost it's not the cheapest, but has a respectable cast radius.
The 275 field radius is good enough to fit a few allies in, but it's not that large so you're often forced to clump up if your allied heroes want the benefit, in which case you end up leaving yourself open to enemy initiations. You may decide in some situations for you and your Double to use this ability at the same time, and place them down in different locations so your team can spread out but still use the buff. The evasion and attack speed is quite tempting but you don't want your allies to get greedy and serve themselves up to an enemy
 Magnus
 or
 Earthshaker
.
Evasion is countered by
 Monkey King Bar
, and abilities such as
 Walrus Punch
 and physical nukes such as
 Omnislash
 are going to hit right through it, so this ability can fall off as games go later - that being said, True Strike does not work on buildings, so your
Magnetic Field will always give your towers the benefits of full evasion.
This combined with Arc Warden's other abilities provides great area control, and is what contributes to his deadly pushing power with his Double as well as making him valid as a right click carry.
Spark Wraith
Create a lingering unit that remains in the place it is summoned for 50 seconds. If an enemy unit comes within a 375 radius of the Spark Wraith, the wraith will fly towards that unit, dealing up to 300 damage when it collides (and will then dissapear). Spark Wraiths are fully visible units. Spark Wraiths need 3 seconds to activate after being cast before they can search for enemies.
Wraith Duration: 50 seconds
Damage: 120 / 160 / 200 / 240 magical
Search Radius: 375
Activation time: 3 seconds
Cast Range: 2000 range
Mana Cost: 100 / 110 / 120 / 130
Cooldown: 7 seconds
+ Great for area control and establishing map awareness
+ Can be decent nukes
+ Can be stacked on the same spot for potentially huge damage
+ Spammable at a low cooldown
+ Huge range and nothing can kill them so you can put them in crazy spots
- Temporary
- Pretty expensive on mana
- Large activation range means enemies can play around it
Spark Wraith is one of Arc Warden's more fun abilities, similar in function to
 Techies
' Land Mines. Wraiths are casted on a location, and after a 3 second delay, will become active. When active, they will linger in the area you casted - if an enemy unit comes within a 375 radius of the wraith, the wraith flies towards them and deals burst damage and then disappears. They can be stacked on top of eachother, allowing you to do a ton of damage if an enemy makes a wrong step.
Like mines they are basically lingering nukes, but have a few differences. Wraiths will deal single target damage to the first unit that comes close, and last only around 50 seconds. They are fully visible, but cannot be destroyed, so if you want to surprise an enemy you can leave them in trees or uphill - they also work on invisible units, making them effective as an early warning system. Although they take time to activate, they have an impressive 2000 cast range, meaning you can really spread them out and establish control of an area with them, restricting your enemy's ability to move freely.
As nukes in lane or in fights, they are pretty mediocre due to their high activation time, and instead they shine in the laning stage or when you're farming and want to be fully aware of enemy movements near your location.
Due to their nature as similar to Mines, they provide a ton of strategic options for getting surprise kills on fleeing or approaching enemies, so having mana regeneration early on can go a long way. Unlike their previous and far more spammable iteration from older patches, they are a bit less abusable so you either have to spread them out to take advantage of their vision, or commit a "Wraith Trap" to one point only, i.e. you can mine the top rune spot in mid and basically guarantee it for yourself later. They also are decent to secure one rune spot at the 0:00 mark, whilst your team camps the other, but you'll need alot of mana regeneration for it to be possible.
These can still be used offensively as nukes, provided you are aware of their radius and timing, and some quick thinking can allow you to suddenly cut off an area and force an enemy to move around them or take damage. In the midlane you can wait for creeps to meet in the middle then spam wraiths behind them where your enemy will be, then use Field to harass them safely as they glue themselves to creeps. You can place Wraiths behind an enemy in anticipation of an allied gank, closing off their available options faster than they realise. Area control and convincing enemy heroes to move unfavourably is their main strength, almost more than the damage of the ability itself, so smart usage can go a long way.
Tempest Double

Arc Warden creates a "double" of himself. The double is nearly identical to Arc Warden himself, possessing his skills, items, and mana and health pool. The double can use not only the same basic skills as the original hero, but also fully make use of its items and their active effects (with some restrictions).
The Double has the exact same stats as the original hero, and deals and recieves damage in the same way as the main hero. The Double lasts for 20 seconds, and is visibly different to the original hero so is identifiable as a double. Casting Tempest Double costs the original hero a certain percentage of its health and mana, and the double will spawn with the reduced amounts.
Duration of the Tempest Double: 20 seconds
Health Cost: 30% / 15% / No health cost
Mana Cost: 30% / 15% / No mana cost
Cooldown: 65 / 60 / 55 seconds
+ Massively increases the value of all your items and skills..
+ Can do most of the things a hero can without the risk of dying attached
+ Can always be used due to percentage costs
- However these costs can be pretty hefty in the early game
- 20 seconds is a long time but it's not THAT long. Proper use of the duration is crucial
- Isn't a perfect copy and has some restrictions
- Some heroes can exploit your Double (i.e. Pudge, Legion Commander)
The defining ultimate of Arc Warden, this makes his skills all the more powerful, and is what makes him one of best scaling carries in the game because he can essentially double his networth for 20 seconds. Items on Zet go a long way, most notoriously the
 Hand of Midas
 which gains a new kind of significance with this ability.
The important thing to note about Zet's Double is that it is not consistent with other units in the game. It is not an illusion, it will take and deal the same damage as Zet himself and abilities like
 Hex
Hex or
 Mana Drain
 won't kill it prematurely. Unlike
 Meepo
Meepo's clones, its death will not affect the main hero and its item usage is not restricted to only boots. It's not a creep either, so will be considered a hero for abilities such as
 Frostbite
 or Entangling Roots. It will fully benefit from all stats, raw attack or armor items, damage block, it will both carry and benefit from auras, deal and take hero damage, and so on. The Tempest Double has no bounty, and when it spawns it will have all its cooldowns on items and abilities reset.
But it is also NOT the hero himself, so it does have certain restrictions Arc himself doesn't have - it cannot buy or sell items, it cannot copy items that have an in-game timer, it cannot use
 Sentry Ward
s, it cannot pick up Runes.
 Bloodstone
 won't have any affect when the clone dies. The clone cannot use
 Refresher Orb
. The clone of course, cannot use Tempest Double. But also the Clone has some unique benefits, it can carry a cloned version of a
 Gem of True Sight
 or a
 Divine Rapier
 and benefit fully from the effects, but will not drop them if it dies since as we know, it's not the main hero.
When you create a Tempest Double, you will burn a percentage of your health and mana. The double will then spawn with the health and mana values from after you used the skill, basically meaning you both have the same vitality. This means you will always be able to use it, but it puts you at some risk. That being said, your double can use consumables on itself or other heroes so provided you have the item slot for them, your double can just heal you back up with a
 Healing Salve
 and
 Enchanted Mango
 after being created. At level 3 this ability can be used without any mana or health cost, making it truly a perfect double.
There's really not much more to say about Tempest Double, as bar a few restrictions it has the same features as your main hero has, just remember it only lasts 20 seconds and has a downtime of half a minute. What it provides is the ability to two things at once, instead of being a carry that can only farm/push/fight and not anything else. Do you want to push an exposed tower, but a teamfight's about to happen on the other side of the map? Well by creating a clone and teleporting it to the fight, you can contribute fully to a fight with your abilities and items, whilst your more valuable main hero farms safely somewhere else.
You can be very creative with Tempest Double and it allows the perfect level of control for players that want to play both defensively or offensively without sacrificing the effectiveness of either approach in the process. The potential for Tempest Double is enormous and whether you're versed in micro heroes and want to completely take over the map with it, or simply take it everywhere with you for double the power, both approaches can be right at any given time.
Items
Arc Warden's ability to clone himself and get an extra use out of all his items and actives means there really aren't many bad ways to build him. He has enough Intelligence to make use of most item actives, but is also an Agility hero with great range so you can build him as a core with no real drawbacks. As long as your items make sense in the context of your team composition (i.e. are you a farming carry, or is your team looking to push and end early?) and you've taken your enemy heroes into account, Zet can thrive with most items.
That being said, there are some important things to remember regarding certain items:
- You cannot sell or drop any items your Double possesses. Your Double also cannot pick up any items.
- Healing consumables can be used by your Double! This makes items like Healing Salve and Enchanted Mango worthwhile to buy early, as if you don't need to use them, your Double can still use their cloned versions on you or allies later on. An obvious use of these items to is to use Tempest Double, then have your double restore the health and mana your main hero lost from using the ability. Don't spend the early game with empty item slots, when you can fully take advantage of the cost effectiveness of cheap consumables.
- Your Tempest Double cannot use
 Observer Ward, Sentry Ward, or
  Smoke of Deceit. This is kind of self-explanatory as to why.
  Dust of Appearance and
  Town Portal Scroll can still be cloned normally. (
 Cheese will also be cloned).
- Your tempest double can use Hand of Midas. Hand of Midas is an item that boosts your experience, and pays for itself reliably, then continues to give you gold and experience after paying for itself. Arc Warden can appreciate the earlier levels, and gains the gold you invested in Midas back much faster since he can use it much more often. The only limit is that your clone cannot gain the extra experience from Transmute, so remember to use it on creeps with the least experience value. In the majority of cases, Midas is a worthy pick-up on Arc Warden because the risk of having it slow down the progression of your next item is far less than on other heroes, it makes up for his inability to flash farm, and it still continues to bring steady income afterwards.
- Your Tempest Double cannot use Refresher Orb. That doesn't make it a bad item, though. All your skills are still refreshable as normal on your main hero, so it is entirely possible to have three Tempest Doubles at one time and three casts of your spells in play at once. This is very strong for the purposes of splitpushing or fighting, so don't ignore it.
- Bloodstone's passive will not work for your Tempest Double, so you cannot use its death to heal allies. All other features of Bloodstone including it's bonuses and Pocket Suicide active should still function as normal.
- Your Tempest Double gets full benefits from Gem of True Sight, but will not drop it when killed.
- Tempest Double gets the full benefits of Divine Rapier, but cannot drop it when it dies. Yes, really. In a late-game scenario, you can abuse this quirk with new rapiers to make super strong clones then stash the rapiers afterwards, and make super dangerous doubles to throw at objectives with almost no risk, or just double your damage output in fights.
Pusher Build
Probably the most bread and butter Arc Warden, this relies on abusing your ability to spawn multiple units and grind down towers, whilst you hit another lane or fight elsewhere. It allows you to split-push or defend whilst still being present in fights, or simply throw your entire force at once place on the map.
+ Brutally effective, keeps you farm up, punishes bad enemy organistion and map control.
- Requires good micro-management, requires some time to farm items, fairly one-dimensional
Starting Items


Arc Warden's starting items will vary. Arc Warden's base damage is averaged at 45, so if you want to start getting last hits immediately you will probably need a
 Wraith Band
 or other early stats. You'll also need [[Tango]s if you aren't getting any other source of regen.
You'll also need standard consumable pick-ups - but remember that once you get
Tempest Double your clone will have your consumable items too, so you can afford to buy an extra
Healing Salve or
Enchanted Mango if you want to. If you're going to the mid-lane, consider a
Bottle as you have amazing rune control and you need the regen.
If you want to establish rune control, get some stats to boost your Intelligence and some
 Clarity
 Potions and head to a rune spot at 0:50 and mine it up, let your team secure the other one. Even with mana regen you might struggle to get enough wraiths to instakill somebody, but scaring people off and getting the rune is more valuable.
Core Items
 Hand of Midas
 is amazing on Arc Warden, so in the majority of games you should try and get it. That said, you should not obsess too much about rushing it if that would involve skipping cheaper and more useful items you can get early, as Arc Warden is one of the few heroes who can get a "late" Midas and make full use of it. If you aren't getting something like a
 Maelstrom
 then there's no real other way to secure farm, so most of the time it's going to be a Core pickup no matter how the game goes or what role you're playing.


When it comes to boots, it's feasible to just go straight for
 Boots of Travel
. You want to push so you need the global presence, and for the sake of farming the ability to just move you and your double around the map quickly increases your income more than you might realise. The ability to send your Tempest Double to a complete other side of the map means a lot in terms of contributing to fights or securing a large creep wave without endangering yourself, and the ability to be in two places at once is something no other hero can do, even if they come close. If you didn't have the best start you can play it safe and get
 Arcane Boots
, which will give you lots of mana for you and your team, they're cheap, and can be disassembled into two useful components for later items. Just keep a TP scroll on you at all times.


Another thing to remember is that earlier point - your Clones can use your consumables. This means in early and mid-game it's actually entirely cost-effective and normal to still have basic regen items like
Healing Salve and
Enchanted Mango on Arc Warden. At this point you won't have any big items, so it's better to fill those empty item slots with regen items and hang on to them, then you can let your Clone use them on your main hero or your allies for some extra sustain. Don't hang on to them for too long, once you get to mid-game they won't be much use.

When you're sorted for your Midas and Boots, it's up to you how to progress. In most cases I recommend just going straight for
 Necronomicon
, as it's what makes you such a formidable pusher and provides huge amounts of utility outside of that, especially with the Level 3 True Sight aura. The stats will also boost your HP and Mana Pool which could be becoming a problem at this point. What's better than one Necronomicon? Two Necrobooks! Tempest Doubles can use
Necronomicon, so you have access to four of these guys at once. This is also where having Boots of Travel is important as you can send you, your clone, or both of you to push lanes with their own pair of demons. You will want to learn and make use of control groups so you can order your trios around, and proper Micro will also stop you just feeding mass amounts of the enemy gold to the enemy team - that is the one downside of mass Necro units, in that if you aren't careful you will just make the enemy team rich.
Late Game
 Refresher Orb
 is strong on Arc Warden as if gives you a third Tempest Double as well as an extra
Magnetic Field which is the lengthiest CD of your basic skills. Keep in mind that discussion of Refresher Orb only applies to the main Arc Warden, as his doubles cannot use it. This can also mean more Necronomicon warriors - what's better than than two
Necronomicons? Four Necronomicons! An extra Necronomicon is pretty gimmicky but when combined with Refresher Orb it gives you a fourth Necronomicon pair to make use of on your main hero. You cannot refresh one Necronomicon as it simply resummons its current demons, put a completely different Necronomicon has its own units and you can summon those. But again, remember not to feed them.

 Octarine Core
 doesn't provide any noticeable stat benefits except some health, regen and a ton of mana, which are useful no doubt. It is however a worthy luxury purchase for its Cooldown Reduction which works on both your skills and items. Having an Octarine Core overall increases your map control and the frequency of which you can push and fight, so always consider it because it just makes you so much more of a problem to the enemy team.
Situational

Some Arc Wardens might choose to delay the first Necronomicon and get a casual
Maelstrom instead, as it gives him much better farming speed and lets either him or his double clear waves pretty quickly, especially with the AS buff from
Magnetic Field. It's not a dead end purchase either, as it can be upgraded into
 Mjollnir
 which has its own item active you can take full advantage of with Tempest Double.


You dont have great agility and illusions do reduced damage to towers, so
 Manta Style
 isn't that brilliant a pick-up on Arc Warden. If you just want more units then it is fine, and provides a handy dispel which you may need in certain games.
 Diffusal Blade
 also provides similar benefits with extra agility and a way of dealing with debuffs, and you can have your clone use all the charges so they're always available.


In general you'll be starved for slots, but you can also consider other items that are good for pushing and fighting. Vladmirs Offering and
 Guardian Greaves
 increase the offensive and defensive strength of your creeps including Necronomicon units, and
 Assault Cuirass
 makes towers drop faster. All will help your allied heroes in fights too, so you can simply send your doubles to fights and help out. Don't be too greedy, sometimes you'll just need to fight.
Utility Build
If you don't feel comfortable hitting creeps and towers forever, you can build Arc Warden in a more supportive role. Arc Warden has decent starting Intelligence and Strength and passable stat growths, long range, and low agility. With three different active abilities to control enemy positioning, damage, disable, and help your team, he can thrive in a less core role. A support Arc Warden should focus on exploiting the ability to have two item actives in most fights, to control multiple targets or provide double the lockdown on troublesome single targets.
+ Provides lots of flexibility, all your regular abilities are good, you should never be too poor
- Hard to pull off without multiple items, requires support experience, you are bound by cooldowns
Starting Items


Standard stuff, get some regen and anything your team needs like courier or wards. Consumables are well worth it due to how they work with
Tempest Double, but hold off from turning all your starting gold into regen items as you won't have Tempest Double until later.
Core Items
A utility Zet's first items are heavily reliant on the team compostion as there are lots of options, but even a supportive Zet will probably want to get a
Hand of Midas as it pays for itself far too well to pass up. This will give you the steady income you require to actually get those utility items you're meant to be making use of.
You should probably get
Arcane Boots as you get to use them twice anyway, value for you and your team.


Nice and affordable early utility items are
 Medallion of Courage
,
 Glimmer Cape
 and
 Force Staff
. Glimmer Cape and Medallion are just decent items and the ability to use their actives twice can turn early skirmishes in your favour. Force Staff is a more situational item, good against lots of slows and heroes like
 Riki
Riki, but you can get it as a general purchase to do things like push units away from each other and ensure
Flux takes effect, or push your disabled allies into
Magnetic Field to protect them.


If you just want to use your regular skills more often and you're not too pressured, you can consider investing a bit more in a
 Eul's Scepter of Divinity
, which will make you faster, give you more mana regen and of course has the Active to use defensively or offensively. If you want to be dealing with squishy heroes that rely on spells you can work on
 Orchid Malevolence
, a really nice item for dealing with spellcasters or locking down heroes - even if they get a
Manta Style or Eul's Scepter to purge the debuff you can just silence them again afterwards with your Double.
Luxury


What you get in the late-game is pretty much entirely situational as you may be trying to become more of a core, or you may just be looking to get some specific actives.
Necronomicon is the core of the pusher build but that doesn't mean you can't grab it as a support. It has amazing utility, and the aura and true sight are excellent.


Offensively
 Scythe of Vyse
 is a nice pick-up, more mana and a Hex to use often.
 Abyssal Blade
 performs a similar role with its BKB piercing stun, and won't synergise that badly with Arc Warden's skills despite him being ranged.
Diffusal Blade provides a valuable purge and provided you have charges left on your main hero, your double gets to use this item infinitely.
 Silver Edge
 can be awkward to use but the Break active can be invaluable against certain heroes where it's the only true counter to their skills.
 Heaven's Halberd
 provides two disarms when you're against multiple right clickers.
There are a ton of possible item combinations on Zet, some more effective than others. It really depends on the game, but the ones described above are probably the most able to be abused, and what defines why Zet in a supportive role requires good knowledge, timing and positioning to properly execute.
Carry Build
Arc Warden is also perfectly decent as a more traditional right-click carry. Even if he has low agility, he is still an agility hero, and that does ensure he scales with stat items well. With good farming speed and the ability to effectively double your damage output with your ultimate, you can easily build Zet as more of a teamfighter who goes after hero kills.
+ You farm fast, can double your item worth, Zet scales extremely well
- No real innate carry abilities, no hard escape, low overall agility
Sustain
Stock up on consumables, or save up for a Bottle if you're going to the midlane. You will need a
Wraith Band or some kind of early damage item to compensate for low starting base damage.
Core Items
You're a core, so you want that
Hand of Midas. When it comes to boots,
 Power Treads
 will give you tankiness and will add up to lots of attack speed, but
 Phase Boots
 are fine too. In most cases you want to get a
Maelstrom since it is a good DPS and farming item for pushing or fighting, and with your Double and
Magnetic Field it adds up to lots of Chain Lightning procs.
Luxury

Ideally as Arc Warden you would get good carry items that also possess actives you can abuse. There's no reason not to just turn your
Maelstrom into
Mjollnir for the extra attack speed, but also so you have two Static Shields when you want them.
Manta Style is a good item, giving you extra agility you sorely lack, extra units for whatever use you want, a dispel if you need it, and the ability to cause lots of confusion in fights.
Abyssal Blade might seem like a very strange item to get on a ranged hero, but 10% x 2 is a 20% chance to bash which isn't bad, combined with Magnetic Field's attack speed buff so it is more likely to proc. Abyssal Blade is also very slot-efficient damage, and can be be disassembled and turned into a
Divine Rapier which is infamously strong on Arc Warden. Of course the real reason for Abyssal Blade on Arc Warden is of course, the active - with Tempest Double you get two BKB-piercing stuns on demand to lock down troublesome opponents or simply punish anyone who gets too close.


DPS isn't everything and you will need both you and your double to have some bulk, in which case an
 Eye of Skadi
 is fairly worthwhile - even if you already have an Orb, I would still recommend it.
 Daedalus
 with its superior DPS can fill a decent sixth slot, but don't like it take the place of a
Monkey King Bar if you need one. Speaking of which, avoid purchasing
 Butterfly
 on Arc Warden, it is tempting on any agility carry but Arc Warden already has evasion in the form of Magnetic Field and smart enemy carries will buy MKB to deal with it.
Situational
Another nice item on Arc Warden is
Diffusal Blade, giving you very a cost-effective agility item and a very good active in any situation which you can use twice as often - and provided you keep charges left on your main hero, your double will always have a purge available. Very good to build against
 Omniknight
, and the Mana Burn from Diffusal Blade does work with Ranged Illusions so it combos nicely with
Manta Style. 10 mana burn per hit doesn't seem like much but with your illusions, your double and its own illusions, it can add up to a decent amount of mana removed on a single target.


Get
Monkey King Bar and
 Black King Bar
 if you need them. In a super-late game scenario, consider
Refresher Orb and
Octarine Core, as well as staples such as
Boots of Travel, as having reduced cooldowns might be more important than an extra damage item. Similarly you can abuse the ability to have
Necronomicon hiding on couriers, or buy a bunch of Helms of the Dominators to power up your pushes.
Rolling in piles of money

Tempest Doubles cannot drop
Divine Rapiers. Have fun.
Rule #2 of Zombieland

Starting Dagons / Core Dagons
The premier Zet build coming soon to a pub game near you!
This is a complete waste of Zet's high potential and versatility, but it only takes getting two-shot by lasers once for everyone to try it. If you can't beat em, join em! Pew Pew!
Match-ups
Friends


Arc Warden needs some time to get off the ground and will appreciate any help he can get in securing farm, so a good standard support is going to be just right. Defensive babysitters like
 Dazzle
 will be great if his lane isn't easy, or heroes like
 Crystal Maiden
 who can make space for him whilst providing mana to use his abilities more often. If he's on the midlane, some rotations to gank mid will help him greatly and midlane opponents are very vulnerable to
Flux making these ganks pay off most of the time. Arc Warden is better than most at securing farm but if he has greedy allies he may never recover from a bad start.


Heroes that are good at defending or stalling pushes are good, as they let him farm early or combine with his skills to make great defensive allies.
Omniknight with an Aghs upgraded
 Guardian Angel
 and your own
Magnetic Field can make pushing unfeasible. Heroes like
 Warlock
,
 Undying
 or
 Keeper of the Light
 with strong siege defense abilities work great and synergise in various other ways too.
Techies and Arc Warden make for a brutal combo defensively, as
Spark Wraiths and
 Remote Mines
 make for some powerful area control at all stages of the game.


Arc Warden often goes for a pushy build, so heroes that enhance his pushing power or can provide their own splitpushing power on another part of the map are great partners. Heroes like
 Broodmother
 and
 Lycan
Lycan apply, but also
 Drow Ranger
's
 Precision Aura
 can prove useful too.
 Io
Io also makes a good combo for his general global presence and to provide safe initiations with your double whilst your main hero can farm or push elsewhere.
Foes


Arc Warden when played as a core has massive potential, but needs some time to get the ball rolling. Early and mid-game deathball push line-ups are therefore a pretty standard counter, especially those that don't need to right click towers to do their damage and thus you can't even delay them with
Magnetic Field.
 Pugna
Pugna,
 Leshrac
,
 Jakiro
, and
Techies are highly dangerous, especially if backed up by a
 Witch Doctor
 or
Undying who have a nigh unbeatable early push.


Arc Warden doesn't have the best strength gain and doesn't tend to build particularly tanky items. Whilst Magnetic Field gives him an option against high physical burst, he will suffer against nukers.
 Skywrath Mage
,
 Lion
Lion,
 Queen of Pain
 and etc. are your standard way of dealing with a squishy agility hero like Arc Warden.


In the case you are playing a supportive Arc Warden, you aren't going to be much use against a bunch of tanky heroes and your squishiness can mean you suffer against strong initiations. You either have to itemise weirdly or you need to just transition into a carry and hope to counter strong teamfight with splitpush, or hope the game goes late enough that you can get six-slotted.
Food


Generally Zet's best matchups are other carries, as he stands a good chance of just outfarming them and securing map control before they can really get online. If they are reliant on right clicks to do most of their damage, you have
Magnetic Field to deal with them or at least force out a
Monkey King Bar purhcase.


Most farming carries will fear solo roamers, but Zet doesn't really care. He can set up an early warning system against invis heroes with
Spark Wraith, slow solo enemies with
Flux, and against heroes like
 Clinkz
 and
Riki he can pop a
Magnetic Field and fight back - or just teleport away. Ganks with two or more heroes are another story but if they dont have many ways to interrupt a teleport scroll then you can get out of seemingly hopeless situations with the Magnetic Field evasion.


If you are playing Zet in a more utility or supportive role, his ability to have double the item actives in a fight make him very good against those slippery squishy heroes that are heavily countered by
Scythe of Vyse or
Orchid Malevolence. If they buy items to dispel effects such as silence, you can just hit them with the same disable again from your double. Other features like being able to use
Dust of Appearance twice in a fight can prove strong against invis heroes that would otherwise purge it off.
Tips and Tricks
- Start with a bang! ...kinda..
It's common for
Techies to teleport to lane the moment the game starts so he can get down an early mine stack, and Arc Warden can do a similar thing with
Spark Wraith. With the more spammable Spark Wraiths this was easy to do, but recent nerfs upon his introduction to Dota 2 make this much more of a niche strat.
Where you put them is up to you, and unlike Land Mines they can be placed from a gigantic 2000 range so you can stick them in really unexpected areas. Keep in mind however they will attack the first thing that comes in contact with them, and are fully visible. They're also pretty expensive at 100 mana which is one third of your mana pool, so you will need a Clarity or two to get more than three wraiths down, or at least so you don't turn up to lane out of mana. With a 7 second CD and 100 mana cost, you get a max of 6 Spark Wraiths on one spot, costing you 600 mana and dealing 720 damage, which will kill heroes with 20 strength and below but heroes with 21 strength and above will survive.
With this in mind it's probably best to avoid trying to get First Blood unless you have a
Keeper of the Light to give you mana and some teammates to mop up the victim, in which case you could just use
Flux once on a solo hero and get First Blood with way less effort. Instead you can just leave base normally and stick some Spark Wraiths at one of the rune spots whilst your team gets the other one, guaranteeing your team early rune control. Leave the mine traps to Techies.
You can hold on to your consumables, wait for level 6, then your Clone will be able to use them on you or allies. With Tempest Double costing a percentage of both your health and mana, this is actually a pretty standard thing to do. In the early and mid game you can expect to have empty slots, but don't leave them empty - fill them with some
Healing Salves or
Enchanted Mangos, and your clone will be able to keep either you and your allies supplied with some nice sustain for essentially no cost. Especially Mango is pretty nice as you can keep multiple on your hero for the passive health regen, then have your clone provide the mana. When you're done with these cheap items, use them for good or sell them.
Necronomicon is a standard purchase for Zet, but it's possible to go further than that.
Refresher Orb will give you another
Tempest Double, and that means another use of Necronomicon. What people don't know is that you can use two Necronomicons, and whilst using one Necrobook twice will simply resummon any demons specific to that book, using a different Necronomicon after refreshing will have its own different demons (you cannot use two Necronomicons together as they share cooldowns, hence why you need Refresher Orb). This means that with Tempest Double you can have up to four pairs of Necronomicon demons at once. In terms of pushing power this is extremely strong.
Divine Rapiers can be fully used by
Tempest Doubles, and they won't drop them upon dying. This is incredible as you can basically place a Rapier (or indeed, multiple rapiers) in your inventory, create a Tempest Double, then send it to kill enemies or take structures for a brief 17-second warpath.
If you need to use your main hero, you can simply stash your rapiers again and it makes you able to essentially use the item with none of the risks attached to it. Keep in mind that this trick only works with Original rapiers Arc Warden buys himself, free Rapiers that were picked up from an enemy are permanently tied to Arc Warden - but that is fine too since you are still doubling the damage of Divine Rapier on your clones.
Conclusion
Arc Warden is not as strong as he initially might seem, as he needs some time to really become a problem and his low stats can be an issue if he doesn't take care of them or if he plays too aggressively.
However he can still be a strong presence in good hands, providing massive pushing power, a solid contribution to teamfights, nice ganking skills, and becomes one of the best scaling carries in the entire game if games go late enough.
V1: General outline


Quick Comment (8) View Comments
You need to log in before commenting.