Please verify that you are not a bot to cast your vote.
Help SupportOur Growing Community
DOTAFire is a community that lives to help every Dota 2 player take their game to the next level by having open access to all our tools and resources. Please consider supporting us by whitelisting us in your ad blocker!
Want to support DOTAFire with an ad-free experience? You can support us ad-free for less than $1 a month!
Hello and welcome to my guide for the mighty Earthshaker!
Earthshaker is my favourite support hero in Dota 2. He is very commonly picked and banned in tournaments, because of his ability to turn teamfights around. He is fun to play, even when your team is losing. Also, he is one of the best stunners in the game.
But just because he's a great stunner, it doesn't mean he is easy to play. He has two very important roles to play - a support and an initiator. A team just can't do without a support and initiator. So as Earthshaker, you have a huge responsibility.
Shaking the earth is not easy, so I hope this guide will help you understand and play Earthshaker better. Let's begin!
Lore
Like a golem or gargoyle, Earthshaker was one with the earth but now walks freely upon it. Unlike those other entities, he created himself through an act of will, and serves no other master. In restless slumbers, encased in a deep seam of stone, he became aware of the life drifting freely above him. He grew curious. During a season of tremors, the peaks of Nishai shook themselves loose of avalanches, shifting the course of rivers and turning shallow valleys into bottomless chasms. When the land finally ceased quaking, Earthshaker stepped from the settling dust, tossing aside massive boulders as if throwing off a light blanket. He had shaped himself in the image of a mortal beast, and named himself Raigor Stonehoof. He bleeds now, and breathes, and therefore he can die. But his spirit is still that of the earth; he carries its power in the magical totem that never leaves him. And on the day he returns to dust, the earth will greet him as a prodigal son.
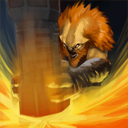
This is Earthshaker's first ability, Fissure. It creates a line of rocks in front of Earthshaker which cannot be passed through just by walking. Units with free paving, like Spectre's Spectral Dagger, can pass through the Fissure.
When the Fissure hits enemy units, they will be shoved aside, take damage and stunned.
Since it cannot be passed through, you can use this ability to block the enemy's escape routes, and secure your team the kill. This skill has a very long casting animation, so timing is key. More on this later :)
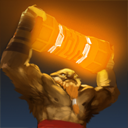
Enchant Totem
Ability:
Affects:
No target
Self
Empowers Earthshaker's totem, causing it to deal extra damage on the next attack.
Level
1
2
3
4
Mana Cost
50
50
50
50
Damage Bonus
100%
200%
300%
400%
Damage Bonus Duration
14
14
14
14
Cooldown
5
5
5
5
Notes:
Only increases base damage and additional damage given by the primary attribute.
Bonus damage buff is used on successful landed attack.
Here is Earthshaker's second ability, Enchant Totem. It will make Earthshaker smash his totem on the ground and he will deal bonus damage on his next attack.
Aftershock
Ability:
Damage:
Passive
Magical
Causes the earth to shake underfoot, adding additional damage and stuns to nearby enemy units when Earthshaker casts his abilities.
The stun does not stack with the stun of Fissure. The longer stun will override the shorter one.
What's an earthquake without a little Aftershock! This skill is what makes Earthshaker a such a powerful nuker, and such a good stunner. Every time you cast a spell, this skill will be triggered.
Echo Slam
Ability:
Damage:
No target
Magical
Shockwaves travel through the ground, damaging enemy units. Each enemy hit causes an echo to damage nearby units. Upgradable by Aghanim's Scepter.
Magic immune units still count for the echo effect.
Ahh, Earthshaker's ultimate ability, Echo Slam! This skill can deal HUGE damage if there are enough enemy units clumped together. Many people underestimate this skill and take it lightly. Here is why you shouldn't underestimate this skill:
I've done the math, and here is the total damage a hero will take if there are a certain number of heroes near him:
1 Hero
200/265/340
2 Heroes
240/320/410
3 Heroes
280/375/480
4 Heroes
320/430/550
5 Heroes
360/485/620
So yes, as you can see, if your Echo Slam is maxed out and you manage to catch a whole team in it, each hero will take 620 damage! Maybe it doesn't seem like much, but think about it. In a teamfight, your team has a 620 health advantage. So your team has a much higher chance, if not a guarantee, to win the teamfight.
So that's why as Earthshaker, it is important that you pull off a good initiation. More on that later :)
And by the way, please please PLEASE don't use Echo Slam on just 1 person! That is a complete waste! Preferably at least 3 heroes, and a bunch of creeps.
Earthshaker is very reliant on his skills to be effective, so of course there must be different skill builds for him. The skill builds depend on the situation you are facing.
This is the standard build for Earthshaker. It is important that you get 1 level of Enchant Totem before you hit level 6, so you can use Aftershock to its fullest.
Yes, the point of getting Enchant Totem here is not to give you the bonus attack damage, but to use Aftershock as much as possible.
You want to max out Fissure first, because it's your best early game nuke. Max Aftershock after Fissure, followed by Enchant Totem. Get Echo Slam whenever you can, at levels 6, 11 and 16.
The point of this build is to play aggressively and harass the enemy during the laning stages. You might want to pick up a few more Claritys for your starting items, because you are going to use your abilities a lot.
For the first 4 levels, you want to get Fissure and Enchant Totem. Here, the point of getting Enchant Totem here is to give you the bonus damage, so you can harass the enemy.
You MUST get at least 1 level of Aftershock before you hit level 6, so you can supplement Echo Slam and Enchant Totem. The stuns from Fissure and Aftershock do not stack.
Again, max Fissure first, followed by Aftershock, then Enchant Totem.
By level 8, everyone should already have left their lanes to gank, and the laning stages are over. So after level 8 you can just follow the Standard Build, because this build is for letting you harass during the laning stages.
Earthshaker is not an item dependent hero. The most essential item for Earthshaker would be a Blink Dagger, because he needs it to initiate properly.
Now, here comes the hard part. You need to save up your gold for a Blink Dagger. But you are a support, so your team needs wards. But if you buy wards, it will delay your Blink Dagger, so which should you buy first?
This is a problem I for one always face. But it really depends on the situation. If you already have another support on your team who can buy wards, then go ahead and get your Blink Dagger. If your team already has a good initiator, like Tidehunter or Sand King, then get the wards.
Starting Items
Total Cost: 575 Gold
Okay. First of all, I want to say that you must buy Observer Wards as starting items. They can give rune control and you can see incoming ganks, and so you can avoid them. So, be sure to buy Observer Wards, unless someone else already bought them.
If someone else already bought the wards, then spend your money on an Animal Courier. Your team will need this, especially the mid hero. Buying the courier means your allies don't have to make a long trip back to base just to collect their items. So yes, you will be doing your team a big favour.
You can even buy both the wards and the courier, and still have some money to buy other items for yourself.
Start with basic regeneration items, in this case, Tango and Clarity. Especially Clarity, because your skills cost a lot of mana. You want to get at least 2 Claritys. Get 2 Iron Branches to improve your stats, mainly your intelligence. Because you need mana. Every point of intelligence can give you 13 MANA. So get those Iron Branches.
Early Game
Total Cost: 1325 Gold
Keep buying Observer Wards. When one ward expires, buy another one and replace it. You can pick up a Bracer to increase your stats, and survivability. Magic Stick if you are getting harassed by nukers, like Lina for example.
The Boots of Speed here is to be turned into Arcane Boots, once you have enough gold.
Early to Mid Game
Total Cost: 3200 Gold
Arcane Boots
This item can be considered a core item for Earthshaker. It gives you an additional 250 mana, which you really need. It allows you to instantly regenerate 135 mana, not only to you but to your allies as well. A good support item.
I cannot stress the importance of Observer Wards, really. Map vision is really important. But don't buy too many of them! Because you need to save up for your Blink Dagger.
You can craft your Magic Stick into a Magic Wand, if you like.
For more survivability, you can pick up a Vitality Booster. Into the late game, you can even craft this into a Heart of Tarrasque, if you have the gold.
Remember, if you don't think you need these items, just don't buy them. You still need to save up for Blink Dagger, and buying these items will interrupt it.
Mid Game
Total Cost: 2400
Blink Dagger
Oh, yeah! Blink Dagger! Yes, now you are an initiating machine! Hopefully you can get this before mid game.
Alright, your Blink Dagger is settled, and you have your Arcane Boots. From here onwards, everything else is just luxury items, really.
Late Game
Total Cost: 16625 Gold
Boots of Travel
Once you enter late game, you probably already have 1000+ mana, so Arcane Boots don't really come in handy anymore. You can disassemble your Arcane Boots and change it into a Boots of Travel. This item will give you good global presence, so that you don't miss any teamfights.
Black King Bar
Being an initiator, you will often be targeted first in teamfights. Black King Bar will ensure that you don't die. Just turn it on, then blink in and initiate.
Heart of Tarrasque
This item can give you a huge boost in your health, allowing you to take more hits in teamfights. It also gives good hp regeneration. So, this is not a bad pickup for Earthshaker.
Shiva's Guard
Pretty nice pickup. Gives you an additional 30 intelligence, which is great because Earthshaker is always so mana starved. An additional 15 armor, greatly increases the number of hits you can take. The active ability, Arctic Blast, will slow ALL enemies within a 900 AoE around you! Yes, I would recommend this item.
Luxury Items
Total Cost: 9425 Gold
Aghanim's Scepter
This item will make all enemy units echo twice when you cast Echo Slam. Don't underestimate the damage it can deal. If you catch a whole team in your Echo Slam while you have Aghanim's Scepter, Congratulations.
I don't usually pick this up though. I prefer Refresher Orb.
Refresher Orb
I always pick this up before Aghanim's Scepter. The reason is simple. It can also make enemies echo twice, if you know what I mean :)
Yes, that's right. A DOUBLE Echo Slam. DOUBLE ECHO, DOUBLE SLAM . Isn't that better than just double echo?
So if you combine this with Aghanim's Scepter, it will be a QUADRUPLE ECHO. Wow.
Other Intiation Items
Total Cost: 5250 Gold
If you think you are never going to save up enough gold for Blink Dagger, then get one of these. Yes, i know, they are both more expensive than Blink Dagger, but they can be crafted using several items. So you can buy the items one by one, instead of saving all that gold for one item. This way, you won't lose so much gold if you die.
But still, Blink Dagger is better than these two. So only get these if you really don't have a choice.
Force Staff Force Staff is like, half of a Blink Dagger. It can push you forward, so you can push yourself into the enemy team and initiate. But the enemies have time to counter you, unlike Blink Dagger because you can blink in an instant. So when the enemies see you flying towards them, they can just stun you. So I would still prefer Blink Dagger. Only get this if you have no other choice.
Here are some other great pickups for Earthshaker.
Mekansm
This item is commonly picked up by supports. It heals all allies around you by 250 health and gives them an additional 2 armor. Also, the aura increases the hp regen of allies around you. Great support item.
Urn of Shadows
When there are teamfights, people die. Your enemies die. When they die, their souls are released. So what do you do with those souls? You collect them in this container and use them to heal your allies :D
You can also use it to damage enemy heroes. Another great pickup.
Veil of Discord
Yes, this item gives nice stat boosts. But what I really like about this item is the active ability. It increases the magic damage that enemies around you take. So you can just blink in, activate this item, and start shaking.
Special Mention Town Portal Scroll
Now, as Earthshaker, you should always carry a Town Portal Scroll with you. First of all, it will ensure that you don't miss any teamfights. Second, it can save your life. If you want me to write down the number of times Town Portal Scroll saved my life, it will be longer than this guide.
So yes, always carry a Town Portal Scroll.
Now, I will teach you how to initiate with Earthshaker! As an initiator, positioning is really important if you want to pull off a good initiation. So, hopefully you've gotten your Blink Dagger.
Initiation Combo
Here is your skill combo for initiation.
Once you're ready, blink into the middle of the enemy team and Echo Slam! Then, use Enchant Totem, just so you can trigger Aftershock. Then split the earth with a Fissure! You still have the bonus damage buff from Enchant Totem, so just whack someone with low health.
So the combo goes like this: -->-->-->
By the time you cast Enchant Totem, your team should already be joining the fight. This is why an initiator is an important role. Someone has to start the fight.
If you manage to pull the combo off, your team will most probably win the teamfight. After all:
"No one sees and earthquake coming."
-Earthshaker
Blocking Enemies with Fissure
Fissure can be used to block the escape paths of enemies, and also block enemies who are chasing your allies. Fissure has a very long cast time, approximately 0.7 seconds. So, timing is important. If you get the timing wrong, you could end up getting your teammate killed!
Blocking Enemy Escape
Blocking your enemies' escape is pretty easy. Because Fissure has a long cast time, don't click directly on the enemy. This will guarantee the hit, yes, but it will push him in front of the Fissure, while your allies are blocked by it! This way, he can easily escape. That would be your fault!
So, aim on the ground in front of the enemy. Not too far in front, because you want to block him, but you also want to stun and damage him, so it will be easier for your allies to kill him.
Saving Allies from Enemies
This block will be a bit harder to execute. When you see your ally with low health, and an enemy is chasing him, it's up to you to save him.
Where to aim depends on the distance between the enemy and your ally. You have to look at the enemy's movement speed and judge the right place to aim your Fissure.
If the enemy is very close to your ally, then you should aim at the ground next to your ally. This way, your ally will get shoved in front of the Fissure, while the enemy will be blocked, stunned and damaged. If you manage to save your ally like this, pat yourself on the back :)
But really, when it comes to blocking with Fissure, it takes time and practice to get it right. You have to trust your own judgement. This is a job that few heroes can do, so you have to do it well. The wrong move could spell disaster!
You can stun, make use of it
You are a stunner. So BE a stunner.
What's the one thing you know about stuns? It cancels channeling abilities. So what do you do if your teammate is getting Dismembered by Pudge? STUN!
You can use Fissure to stun, or you can walk up to them and use Enchant Totem, so it will trigger Aftershock and stun the enemy. You should use Fissure, because by the time you walk up to the enemy your teammate may already be dead.
So here are some scenarios:
The preferred lane for Earthshaker would be the Safe Lane. That's the Bottom Lane if you are Radiant, and the Top Lane if you are Dire. This is because you can pull creeps, and the side shop is on your side, so you have easy access to it. DON'T GO MID. You are not a mid hero. You are a support. Supports don't go mid. It would be a nightmare if you go mid against mid heroes like Sniper. They can harass the **** out of you, and you can't fight back because you're a melee hero.
Make sure your lane partner is a carry or a semi-carry. If you have 2 supports in 1 lane, you will get trashed, because you don't have the fighting skills of a carry.
The Hard Laner
If the Safe Lane already has a support, then you have to go to the Hard Lane, also known as the Suicide Lane. This is because you are vulnerable to getting ganked, and it is hard for you to retreat back to your tower.
So if you go to the Hard Lane, you must, and I mean MUST, always carry a Town Portal Scroll. As I've said before, it can save your life.
If your carry is near death, and you can't use your skills because you've run out of mana, then you must save your carry by sacrificing yourself.
Why should you die for your carry? Because your carry NEEDS early farm. You, not really. So you dying means your carry won't waste precious farming time. But only do this as a last resort! Being a support doesn't mean you can be a suicidal feeding machine!
As a support, your job during the laning stages is to protect your carry, deny the enemy experience, maintain lane equilibrium and let your carry have the farm. Also known as "Babysitting" your carry.
Creep Pulling/Maintaining Lane Equilibrium
The point of creep pulling is to Maintain lane equilibrium and deny the enemy experience.
When your creeps are at the enemy's tower, pull the next wave of creeps, or else you will be giving them free experience.
Note: For a support, Creep pulling only works in the Safe Lane. That's the Bottom Lane for the Radiant, and the Top Lane for the Dire. So if you want to pull creeps, go to these lanes.
How to Pull Creeps
For those who already know how to pull creeps, you can skip this part. For those who don't, you might want to read this.
Go inside the jungle and go to the neutral creep camp that is nearest to your tower.
At the X:35 or X:15 mark, go to the camp and attack the creeps once. Then, run back to your tower, and the creeps will chase you.
The creeps will chase you all the way to your lane, and your own lane creeps will attack them, and follow them into the jungle, to their camp. Back at the camp, your creeps and the neutral creeps will fight. You, just stay near them and last hit the neutral creeps, so you can get the gold and experience.
This way, you are denying your enemies experience, and also giving your carry a little more farm.
Here's a video on creep pulling: Denying Creeps
What is denying creeps? It is killing your own allied creeps so that the enemy earns less experience and no gold, therefore they get less farm.
You can deny a creep by pressing "A" and left clicking on the creep.
Creeps can be denied once they fall below 50% health. But remember, don't just try to deny them once they have less than 50% health. First, look at your damage. Is your damage high enough to deny that creep?
If not, wait for its health to fall lower. When the creep's health falls low enough that you can deny it with 1 hit, then deny it.
This way, your opponents will gain only half the experience, and NO gold!
Let's do the math then.
So, killing a normal melee creep will grant 62 experience. You are in a duo lane, so the experience is shared among 2 heroes. So,
62·2=31
Each hero will get 31 experience for each melee creep killed. But if you deny the melee creep, it only grants half experience, so,
31·2=16 (Rounded up)
If you deny a melee creep, each hero will only get 16 experience from that creep! So, denying creeps is a great way to ensure your enemies get less farm.
Denying is not that hard. Just think of it as, last hitting your own creeps :)
Harassing Enemies Earthshaker is a melee hero, so harassing with normal attacks is very hard for him. So to harass, you make use of Fissure!
You want to get a few extra Claritys if you want to harass with Fissure. Harassing with Fissure is VERY mana costly.
But if it keeps enemies away to let your carry farm, then it's pretty worth it. But DON'T spam your Fissure! In case things get bad, you need to use Fissure to save your carry's life. So DON'T spam Fissure too much.
Enchant Totem can also be used to harass. It doesn't cost much mana, and it has a short cooldown. Just Enchant Totem, then whack the enemy.
Warding is the job of all support heroes, including Earthshaker. It is essential to have map vision, as it allows you to avoid ganks, track enemy movements, and have rune control.
I won't go too much into warding. I'm just going to show you some popular warding spots, so you know where to ward.
For a good guide on warding, Click here.
The following screenshots are my own, by the way. I didn't copy anyone's.
This is a very popular warding spot. Very contested and counter warded. It gives vision of the rune spot, and you can see if anyone is going to gank the bottom lane. Also, gives vision of the Roshan entrance, so you can see if anyone is going to fight Roshan.
Another good spot near the Radiant's secret shop. It gives a wide field of view, and can see the rune spot. It can also catch anyone trying to gank top from the river.
Mostly used by the Dire as a defensive ward, because you can catch anyone going to gank top. Gives sight of the rune spot.
Another spot used by the Dire. It gives vision of the Roshan entrance, and you can catch anyone trying to gank the bottom lane from the river.
Another popular spot on the Radiant's side. It gives a wide field of view, and you can catch any enemies jungling, such as Ursa or Enchantress. Very contested and counter warded.
This spot is used to avoid ganks from the bottom lane. You can see the rune spot, and also any enemies sneaking through the jungle to gank.
This spot near the Dire's secret shop can give a wide view of the rune area and gives vision of the Roshan entrance. You can see any enemies trying to go into the Dire secret shop.
You can catch any enemies trying to gank mid, on both the Radiant and Dire sides. Useful for countering mid gankers like Pudge.
As Earthshaker, you are a big help in ganks because your Fissure can block fleeing enemies, making them easier to chase down. But remember, Fissure will also block your allies if not landed correctly, so if your allies get blocked and the gank fails, it's pretty much your fault.
So when your ally is coming to your lane to gank, you want to head into the jungle. But don't let the enemies see you heading into the jungle. Make it seem like you are going back to your base.
The reason going into the jungle is so that when you land Fissure, it will be perpendicular to the enemy, so you can block their escape.
If anything goes wrong during the gank, just run out and help your teammates. Don't just sit there and watch your allies die.
Roaming
Once you hit level 6, you can start roaming to other lanes to gank. Remember, you initiate the gank, but let the carry have the kill. Your carry needs early farm, so don't killsteal him. Block enemies with Fissure if they run away.
Ganking is a good way to slow down the enemy's farm, and quicken your team's farm. So, gank before the enemy does, and you will have the advantage.
In this chapter, I will talk about Earthshaker's best friends, worst enemies, and favourite targets. These heroes can completely change the way you play Earthshaker, in both good and bad ways.
Friends
The Mana Givers
Outworld Devourer
Earthshaker really needs mana to be effective. These heroes can help with that. Keeper of the Light can restore your mana with his Chakra Magic. Crystal Maiden's Arcane Aura gives you passive mana regeneration. Outworld Devourer is special - his Essence Aura gives you a chance to replenish some mana whenever you cast a spell! So, when he's around, you can spam your spells without worrying about running out of mana.
The Gatherers
What do these heroes have in common? Their abilities can group enemy units together, making it easier for you to Echo Slam. Dark Seer's Vacuum will suck enemy units into a vortex, so they will be clumped together. Magnus's Reverse Polarity does about the same thing.
And finally, Enigma's infamous Black Hole, which sucks enemy units into a, well, black hole.
With these heroes, you can maximise the effectiveness of Echo Slam.
The Stunners and Disables
Fissure and Enchant Totem have very long cast times, so they require good timing and precision to land. These heroes will make your life easier. Their stuns will make it easier for you to aim your Fissure. So, any hero with a good stun or disable is your friend :)
Foes
The Silencers
You don't want these heroes as your enemies, because getting silenced really sucks. When you are silenced, you are completely useless! So you should try to avoid these heroes. Silencer, I don't have to say more. Doom is the worst counter to Earthshaker. Riki silences with his Smoke Screen, Bloodseeker with his Blood Rite.
Don't mess with Night Stalker at night. He is called Night Stalker for a reason. Death Prophet will use Silence.
These are just a few heroes. Many other heroes can silence you, and you don't like that. If you get silenced, just run for your life. Seriously.
The Mana Burners
Ok, these heroes are a little better than those silencers, but still, it sucks when they are your enemies, especially Anti-Mage, who burns your mana with every attack.
We have Silencer again! Keeper of the Light can burn a lot of mana with Mana Leak. Nyx Assassin burns your mana with, well, Mana Burn.
Favorites
Ah, yes. These heroes are Earthshaker's favourite targets. When you see these heroes on the enemy team, you should be smiling :)
The Illusionists
What do these heroes have in common? They can summon illusions. Echo Slam counts these illusions as heroes, so the illusions will also echo. So what does that mean? Your Echo Slam will deal more damage!
So, if you see a team filled with Phantom Lancer illusions, then it's YOUR job to initiate!
The Summoners
These are not illusionists, these are summoners. They can summon units. Note that creeps and summoned units do echo from Echo Slam. So, if you see them in their team with a bunch of creeps and stuff, then you know what to do.
Yes, these heroes are Earthshaker's favourite targets. Once, there was a Phantom Lancer and Terrorblade on the enemy team, and I got my first Rampage as Earthshaker! These heroes will only make your job easier, so take advantage of that.
So to sum it all up, Earthshaker is a support hero who is also an initiator. He needs Blink Dagger to be able to initiate well, but other than that he is not item dependent. Silences completely shut him down, so you want to avoid that.
He is a very good teamfight hero, even able to take on a teamfight by himself! Earthshaker is fun to play, especially during teamfights :)
That's all Folks!
Well, that's it for now! I've tried my best to make this guide more readable, I know there are walls of text in some parts, but some things really have to be explained through words. I hope now you understand Earthshaker better.
This is only my second guide, so would appreciate your feedback so I can improve in the future!
So, I'd like to end off with a quote:
"There may be many earths, but there's only one Earth Shaker. "
DOTAFire is the place to find the perfect build guide to take your game to the next level. Learn how to play a new hero, or fine tune your favorite DotA hero’s build and strategy.


 Tango
Tango


Quick Comment (10) View Comments
You need to log in before commenting.