Enigma - more than just an Ultimate
Sando
January 16, 2014
Introduction
 Enigma is a very flexible hero, able to support, push, solo or jungle as required. His legendary ultimate:
  Black Hole - is one of the strongest team fight powers in the game - able to disable the entire enemy team for 4 seconds if used correctly.
However he is more than just his ultimate - Enigma is a capable stunner, and is able to farm extremely quickly thanks to his minions. This is very helpful as he requires more items than most support heroes in order to be truly effective.
Pros / Cons
+ Extremely versatile
+ Incredible Ultimate
+ Good starting stats and gain
+ Very high intelligence growth
+ Fast attack and casting animations
+ Good farming speed
+ Good pusher
- Spells have high mana cost
- Needs a lot of farm for a non-carry hero
- Very long cooldown on Ultimate (> 3 mins)
- Often focused in team fights
- Much better in jungle than lane
- No escape mechanism until you get a blink dagger
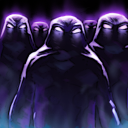
Demonic Conversion
Demonic Conversion
One of Enigma's signature spells, and also one of the most underrated. It gives him a lot of options in the early game, and boosts farming throughout. It can be targeted on any non-magic immune, non-hero unit - including most neutrals and siege creeps.
The unit is instantly destroyed and replaced with 3 Eidolons (mini-Enigmas) who last for 35 seconds - this has many potential uses:
- Farming. You instantly receive the gold for the unit destroyed, and units last hit by your minions.
- Denying. You can instantly kill one of your own creeps, pulling back the lane and denying the gold to the enemy.
- Pushing. Eidolons split, heal and double their numbers every 6 attacks, allowing you to quickly push back a lane and take down towers. You dont even have to be there if it looks dangerous!
- Bodyguards. In the early game Eidolons are quite powerful relative to enemy heroes, giving you a lot of lane presence and potential damage.
- Jungling. Eidolons can be used to allow Enigma to farm the jungle from the start, with a little micromanagement. Generally you just need to rotate your Eidolons to share the damage and stop them being killed outright.
Bear in mind that Eidolons are not magic immune (they have 50% resistance), and return a reasonable bounty (~30 gold) to enemy heroes who last hit them. Eidolons will also auto-attack, so you need to manage them carefully when laning. Eidolons will split every 6 attacks against enemy/neutral units, doubling their numbers and restoring their health.
Black Hole
Enigmas ultimate is one of the most well known and feared in Dota - capable of turning the game with a single spell. When activated, all enemy units around Enigma will be completely disabled and sucked towards him, inflicting a small amount of damage. Black holes stun bypasses any magical immunity - BKB, Linkens, etc will have no effect.
Because of this, any team worth their salt will be gunning for you in a team fight, and trying to keep their distance from each other. Black Hole is a channelling spell, so you can do nothing else while casting it, and any stuns that hit you will break it. Getting your position right, and timing your ultimate are key - this takes practice and experience.
To make it easier to get your position right,  Blink Dagger is a very popular item on Enigma, and also gives you an escape. Generally you want to remain hidden before a team fight, waiting for your moment to appear in the middle of the enemy team and trap them all.
One important thing to note here is that its useless to capture the entire enemy team in a perfect Black Hole, if there are no allies present to take advantage of it. Be sure to communicate with your team, and pick the right moment to go in.
Black hole has an extremely long cooldown (200/190/180 seconds), so you have to be extremely careful about when to use it - as you wont have the option again for a while and the enemy team will know it. In the early game its acceptable to use Black Hole in ganks, as big team fights are relatively unlikely, and you probably havent got a Blink Dagger yet to help with positioning. Later on its for special occasions only.
Starting Items
Enigma's starting items will depend greatly on whether you are supporting, soloing or jungling. You need a lot of mana regeneration in the jungle, more health regeneration in the lanes. As a good farmer, you should have plenty of chance to buy some luxury or utility items for your team later on. See the builds at the top of the guide.
Jungling:

 Ring of Basilius
. Bonus mana regen and an armour aura for your minions - this makes a big difference to your Eidolons ability to tank damage for you, especially early on in the jungle and when pushing.
Two
Clarity potions should be enough to keep you going until you can fly out a
 Soul Ring
, be careful not to take any damage when using them or you could end up short of mana and have your farming speed considerably reduced.
Laning:


It's pretty unusual to see
Enigma in lanes these days, but he's still quite a capable solo and can really dominate some heroes 1v1. The difficulty is that against dangerous dual and trilanes he's kinda squishy and is forced to play very passively, even with Eidolons to help out.
This setup is designed to give you plenty of regeneration and bulk out your stats with some branches. You could consider replacing them with a
 Ring of Protection
 if you still want to get a
Ring of Basilius, or go straight for a
Soul Ring.
Luxury Items
 Refresher Orb
While very expensive, the refresher is almost perfect for your needs. While it does offer stats and regen boosts, the main bonus is that it can instantly reset all your skill cooldowns, including Black Hole. This means that you can use it much more frequently, or even create two black holes, one straight after the other.
It can be worth not skilling Black Hole to level 3 if you think you can get a refresher, as the substantial mana cost makes it difficult to double cast. Remember that using your Refresher Orb will also allow you to use your  Arcane Boots.
 Scythe of Vyse
Always a useful item on Intelligence heroes, it adds a lot of damage, mana regeneration and the hex ability. You re not the ideal carrier as you have to channel your ultimate, but it works well in combination with blink for ganking, and your farming speed is much better than most support heroes.
 Boots of Travel
A very useful late game item, it boosts your movement speed substantially, frees up a slot from  Town Portal Scroll and allows you to teleport to any friendly creep or building on the map.
Generally avoid Orb and DPS items as you have relatively poor agility, and channelling prevents you from right clicking.
Situational Items
Most intel based items are well worth looking at on Enigma, and he generally has the farm to be able to help out in this area.
 Ghost Scepter - useful if the enemy team is packing some serious right click power, especially
  Juggernaut with his ultimate. Can buy you vital time in late game fights.
 Orchid Malevolence - usually more of a ganking tool, it's still very useful for silencing very mobile heroes like
  Anti-Mage or
  Storm Spirit, or quickly focusing down squishy supports who are reliant on their abilities.
 Necronomicon - simply a great item, it offers useful stats and additional pushing power. Aside from being generally useful, the level 3 minions also give you true sight, making it a great counter to invisible heroes.
 Shiva's Guard - adds intelligence and armour to Enigma, as well as a powerful AOE nuke that damages and slows surrounding enemies. Works well with Black Hole as your positioning will be ideal for both. Be sure not to use it while channelling!
 Blade Mail - a cheaper item compared to the ones above, but still very useful for Enigma. It provides some intelligence and armour gain, but more importantly, makes you unpleasant to focus. The active ability causes any damage applied to you to also be applied to the person who caused it. This can often buy you time and make the enemy think twice about focusing you.
 Aghanim's Scepter - I'm still not massively sold on this item as although it can make your ultimate more damaging (especially against tanky heroes), the problem is cost and the comparison with Refresher Orb. I'd much rather have the double disable time/shorter cooldown than damage. You could consider it afterwards, but Blink Dagger ->
  Black King Bar -> Refresher Orb -> Aghanim's Scepter is a huge amount of farm.
Good Allies


 Outworld Devourer


Most heroes can take advantage of Enigmas ultimate to some degree, but certain ones synergise extremely well with it.
Other Initiating Heroes - e.g. Dark Seer,  Tidehunter,
  Faceless Void,
  Warlock. If they can initiate the fight, it makes it much easier for you to follow in with a good Black Hole, as the opposition are stunned, grouped or otherwise distracted.
Heroes with big AOE damage spells - e.g.  Venomancer, Sand King, Earthshaker, Shadow Fiend. These guys can inflict an awful lot of damage to groups of undefended players, and combining your two ultimates successfully can sometimes completely wipe out the opposition.
DPS Heroes - such as  Huskar,
  Viper,
  Outworld Destroyer, most other carries. These guys can inflict massive damage given the chance, and you need them to finish off as many enemies as possible before Black Hole runs out.
Enigma also works well early on with other good pushing heroes.
Bad Enemies
 Doom Bringer


Enigma is a reasonably good all rounder, but there are certain heroes who can counter his abilities. Generally heroes with a silence can be problematic, as they WILL try and pick you out of the group.
Vengeful Spirit - Her swap ability will break the channelling on your Black Hole, and can even go through BKB. A smart Veng will stay well clear of the rest of her team, waiting for you to initiate and then stop you. Linkens Sphere can help in this situation.
Beastmaster - Generally easier to catch in a teamfight than Veng, but his Roar also goes through BKB, and Linkens wont necessarily help here.
Warlock- again, his Ultimate goes through BKB, so you either have to catch him in your Black Hole or wait for him to use Rain of Chaos first.
Silencer - can break your combo as you try to blink in and Black Hole. His ultimate also makes it difficult to get the timing right.
Doom Bringer - Doom is extremely unpleasant, causing a large amount of damage, and completely disabling all your abilities for a long time.
Bane - his disabling powers can make it difficult for you to land your ultimate unless you can blink in and surprise them. Even then, ensure Bane is trapped or his ultimate  Fiend's Grip can disable you, even through BKB.
Rubick - is there anything more embarassing than having your own ultimate turned against you? You have a potential problem here - if you get off a successful ultimate your team is likely grouped nearby and there's a long window of opportunity while you're channeling for him to steal it unless you catch him in it. The best solution I can offer is to make sure  Malefice is off cooldown when you go in - immediately cast it on him after Black Hole to either prevent him stealing it, or at least stop him casting it for the next 6 seconds.
Faceless Void - his ultimate also goes straight through any magic immunity and will stop you from channeling yours. You've either go to make sure you catch him in it, or wait until he's used his ultimate.
When to pick Enigma
Generally you only want to pick Enigma when there is a solo or jungle spot available. While he can work ok as a lane support, he needs farm to be effective and cannot afford to spend too long babysitting.
He is a good pick when your team is in need of stuns, initiation and/or team fight ability. He synergies well with other pushers, strong DPS heroes and big AOE powers.
When not to pick Enigma
If your team has too many carries you will struggle to get the necessary farm to be effective without taking it away from them. Same applies when you do not have sufficient support heroes to ward, etc. Be careful about choosing him with a team that lacks damage as you will struggle to win fights, even with Black Hole.
Finally, be cautious about picking him if the opposition has picked some of his direct counters - while most of them can be neutralised by good play, they can still make life a lot more difficult for you.
Jungling
In the jungle we want to get Demonic Conversion levelled up as quickly as possible, as they are our main farming tool and form of protection. Higher level Eidolons have far more armour and damage, making it faster and easier to get through the creeps.
As a Jungler you should still be paying attention to both the middle and safe lanes. Enigma is a dangerous ganker in the early game, turning up with a double stun, black hole and a bunch of Eidolons can easily be enough to get a kill or two, and if nothing else will make the enemy players in those lanes more cautious.
You can also help out by pulling either of those lanes if required, or filling in if a hero is killed or has to drop back to base.
Enigma is NOT a carry, he's a good pusher and a reasonable ganker. You should not stay in the Jungle for too long - just get your core items and then hit the lanes. You will help the team a lot more than staying in trying to farm up your blink dagger.
How to Jungle
My usual equipment for jungling is a Ring of Basilius (mana regen and +2 armour for minions) and 2 Clarity potions. This is usually enough to have a Soul Ring arriving just at the point that I would run out of mana to keep farming. There are other equally valid starting items though.
As a jungling Enigma, start by denying a creep from your mid or long lane, then quickly drop back to your fountain to recharge. You should still reach the easy creep camp just after the 30 second mark.
The jungle creeps spawn initially on 30 seconds, and then on every minute mark (00) - provided neither team has line of sight on the creep camp. You can stack creep camps by attacking them on approx 53 seconds (in the minute) and drawing them away from the camp. Provided they're absent and you cannot see it, a fresh batch of neutrals will spawn.
Your conversions can last up to 35 seconds, and will heal, double and regain some time every 6 attacks. It's very important to keep your starting ones alive, or you'll lack firepower later on. Do this by picking the right creeps to engage, and by rotating the badly hurt ones out of combat. 35 seconds is usually enough to take out 2 camps (sometimes 3), depending on your level and the creeps present.
If you do arrive at a camp with your conversions about to expire, pick out the biggest non-convertable creep to do as much damage as possible to. This should give you enough of a headstart to finish the job. If you definitely cannot take a particular camp, it can still be worth stacking it for later on.
Take note of the various types of neutral creep present in each camp - there are certain ones you want to avoid until later, or are easier to deal with in different ways. For details see here
Easy Creeps
Kobolds / Forest Trolls / Ghosts / Harpies / Gnolls
You can take any of these camps easily, even with level 1 conversions. Convert the creep that looks the biggest or most different from the others - this is usually the strongest. Try to share the damage between your conversions, and make sure one does not take all the damage and die.
Medium Creeps:
These are the most common type of neutral camp, and may require a more careful, tailored approach.
Ogre Camp (2 orange, 1 blue): Fairly straightforward, convert one of the orange ones (they have more HP), then focused down the blue one quickly. Rotate your conversions to avoid losing one.
Satyr Camp (2 medium, 2 small): Again straightforward, convert one of the bigger ones, then focus down the little ones.
Wolf Camp: Convert the larger Alpha Wolf, as he has the most HP and a damage aura. The two other wolves should be easy after this.
Centaur Camp: Unfortunately, you can't convert the larger centaur, so have to settle for the smaller one. The big centaur will then use his stomp to stun your minions, and can make life difficult with low level conversions. Early on, the best way of dealing with these camps is to move to it with existing conversions from another camp - put one out front as bait so he doesn't use his stun.
Golem Camp: These guys are immune to conversion due to their spell immunity. The only way to kill them is with a creep pull or conversions from another camp.
Hard Creeps:
This can include Centaur Camps, see above.
Large Satyr Camp: These are different from the Satyr camp, as they contain a large purple Satyr who can't be converted. Convert the medium one instead, then take out the small Satyr before taking on the large one. Can be worth leaving until you reach a slightly higher level, or weakening the large Satyr with conversions from another camp first.
Furbolg Camp: Be very careful about when to take on these guys, the large red one is immune to conversion, and his thunder clap will instantly knock most of the health out of your conversions. Only attempt with higher level conversions from a different camp.
Wildkin Camp: You can't convert the large Wildkin bird into Eidolons, and he's pretty tough. It's possible to take this camp by focusing the smaller birds first, then carefully rotating against the large one, even tanking a little damage yourself.
Troll Camp: Another tough camp early on, as the Troll Shaman (guess what - you can't convert him) can summon skeletons. They don't have much life, but inflict a lot of damage. Be careful about trying to take these guys on too early.
Soloing
The solo build is much more situational than when jungling - essentially all your skills are more useful here. You may want to look seriously at a single level early on in Midnight Pulse - this is only to destroy the side lane trees and open up the sight lines if you feel threatened by ganks.
You Malefice stun is useful for escaping, and you may even find that combining black hole with Eidolons is enough to get you a kill against weaker opponents. You can certainly give solo melee heroes a hard time. However, against dual line ups play conservatively and use your Eidolons to control the lane by denying or pushing as appropriate.
If you have a very ganking orientated team, it can be worth maxing out Malefice asap (by level 7) to get the 3rd stun.
Support
As a support I like to get Malefice up to level 2 quickly, for a much more effective stun. Your choice of whether to max Conversion or Malefice first will depend very much on your lane - higher level conversions offer more damage and armour, while level 3 Malefice is an excellent ganking spell.
Take every opportunity to stack up neutral creeps if you are on the safe lane, as you can farm them up easily while pulling to get some extra gold in. This goes double if you and your partner are against a solo hero. Be sure to use your Eidolons aggressively against a lone hero too.
When babysitting, concentrate on using Eidolons to deny; you will need to keep them out of range or constantly moving to stop them auto-attacking though. They also won't split or heal as they're not attacking, so avoid feeding them to the enemy heroes.
As mentioned earlier, I dont think Enigma is especially well suited to this role, and you re going to have to get some farm at some point, but if needs must...
Levelling Black Hole
This is probably the most controversial part of this guide - but I'm not always a fan of levelling up Black Hole as soon as it's available.
What the *&S*# You said Black Hole was awesome!!!
It is - the thing is that it starts off awesome already. The only differences as you level are:
+ Slightly increased damage (+20-40 DPS per level)
+ Slightly lower cooldown time (-10 seconds per level, so it s 200/190/180 seconds)
- Increased mana cost (200/300/400)
As you can see, the advantages are somewhat minimal. Whether you skill up or not is dependent mostly on your farm, and the flow of the game - if you ve got a big enough mana pool to be using your spells fairly frequently, with enough always left over for a Black Hole, then go ahead and level it up. If not, or you're not sure, take a level of stats instead. Skill it up when you're comfortable for mana - there's nothing worse than blinking in and not being able to cast it!
The game situation also matters - if your team is generally on top, and you can choose when to have a team fight, 10 seconds here or there doesn't matter so much. It might matter if the game is very unpredictable or going against you though.
The other issue is the likelihood of getting a refresher orb - even with a big mana pool, the chances of having enough for various skills, then two 400 mana spells, with a refresh inbetween is minimal. The orb also makes the cooldown less of an issue.
A lot of people may disagree strongly with these points, but what I want to emphasise more than anything is that you should think about when and whether to upgrade your ultimate rather than just do it automatically every chance you get.
Sample Game:
Had a dig through some replays and found a few that might be worth watching:
Game No #72659257
The Black Holes are a bit of a mixed bag, but it gives you an idea of his ridiculous farming potential, and some tips and tricks on using Enigma.
Game 1
Game 2
Game 3


Quick Comment (23) View Comments
You need to log in before commenting.