[Full/Dense] Goo's Guide To Shadow Fiend (With Graphs & Pictures)
TheGooGaming
June 10, 2015
Preface
Welcome! So... this was supposed to be a  Viper guide, then I got asked to to
  Skywrath Mage and on top of that I had some ideas in mind, all in all, I didnt get around doing anything, and had to just leave on hold all that other stuff and focus. So...
Here it is!
Goo's Guide To Shadow Fiend
Lately I have been playing a lot of  Shadow Fiend
, and its for a couple of reasons, the first one being he is kinda indirectly strong this patch (people are buying more
 Black King Bar
s and the meta has shifted a bunch, he fits fairly well, even compared to last patch Euls Sf wombo crazy combo everyone was abusing until the Euls got nerfed). The second reason its because I usually play a lot of Intelligence heroes, that it be
 Tinker
,
 Techies
,
 Queen of Pain
 or sometimes
 Necrophos
, and that Int core playstyle I take on is kind of weak-er this patch, with more focus in teamfights.
I was just messing around with different mid heroes
and I got stuck on Shadow Fiend been using it to climb a bunch lately
along with  Ember Spirit
 (notice how both are agility midders with some sort of magical output), and that combination has made me noticed how strong these heroes are right now, even more
Shadow Fiend than
Ember Spirit.
Anyway I ended up winning 19 out of 23 matches with Shadow Fiend doing a very simple build and process of play, its very simple and with just general mid lane knowledge and practicing CS and
 Shadowraze
, along knowing the difference between fight and flight; you can have fun winning like I have been lately.
This guide will also be available on my own blog, over here. And the guide link, this here.
1. Introduction
Play this in a different tab
So our buddy
Shadow Fiend here got quite a boost in playrate due to pros picking him up, he got buffed a bit and so on.
He is a mid hero that excells in winning his lane and maxing farm rate using his high damage and Shadowrazes.
It can be considered a hard hero to play to its basics, because his nukes are unreliable and you have to aim them precisely, and his first passive
 Necromastery
 requires him to last hit and deny every creep he can.
Because of this I think he can be a hero a tad challenging for very new players, that on top that he is a rather squishy hero, especially early game; be sure to get last hitting down and practice your
Shadowrazes as much as you can.
But thats only early game, later on he becomes a right click hero mostly, and the things you have to watch out for, like positioning, are more universal concepts.
So anyway, if you didn't know,
Shadow Fiend is an
agility hero that, similar to
 Luna
Luna,
 Gyrocopter
 and
Ember Spirit has a nice mix of hard right click ability and magic damage spells to get them through the early game. The difference between these heroes and
Shadow Fiend is that he has much more focus on dps, he does not have a spell to make him attack AOE, but he will beat the **** out of you single-targetedly.
Also
Shadowraze isnt much of a laning nuke like for instance
 Rocket Barrage
 or
 Lucent Beam
;
Shadowraze is a laning nuke for creeps and farming, and unmatched wave clearing (this doesnt mean you cant land sick triple razes and get a bunch of kills early game though).
His stats arent so great (
15+2, 20+2.9, 18+2), but that is very well compensated with the damage you get from
Necromastery, and the low intelligence can be compasated with
 Bottle
 crowing (or
 Eul's Scepter of Divinity
 if you are doing that build).
1.1. Shadowraze
Shadow Fiend is a very well self-contained hero, in the sense that he has everything he needs within his skillset. And in that sense, you are trading having a stun or a slow to being full on farming and nuking power, and that comes with his first (or first three) spells, Shadowraze.
 Shadowraze
Listen up:
On paper, Shadowraze sounds like the most overpowered spell in the game.
-325 Damage Nuke
-75 Mana at all levels
-10 Second cooldown at all levels
-And having three of these all in independent cooldowns
The downsides are that
they are unreliable, as you have to land them, and the cast time is rather noticeable (
0.67).
So first I'll show you what's the deal with razes and how they interact, learning this will help you make better sense of use later in matches.
Remember:
- All three
Shadowraze spells are considered the same one in leveling, so leveling up one of them levels up the rest as well.
- The casting is instant, they are used in whatever direction you were facing at the moment of cast.
-
Shadowraze is 325 magical damage.
- This means two level 4
Shadowrazes kill a melee creep, and one kills a ranged creep.
- Razes have 250 radius of effect making the animation misleading. (I will go into detail in a second).
This is the first raze, default key "Q" and its the one that is used closer to Shadow Fiend.
The first raze has a 200 casting range, and a 250 radius, this means it can hit 50 units behind Shadow Fiend and up to 450 units in front of him.
-
Line 0 is 50 units behind
Shadow Fiend that is the first point you can hit with
Shadowraze
-
Line 1 is a middle point between the closer raze and the middle raze, meaning that you can hit someone that is standing in
Line 1 with both razes (Q & W) without moving.
The first raze is the one you use the least, mainly because its generally dangerous getting up close with people, and enemies tend to move out of the first raze effective zone quite quickly, giving you no time to cast in the first place. You are going to see yourself using this pretty much only on disabled enemies, creeps and when blinking initiating (or
 Shadow Blade
 initiation).
This is the second raze, default key "W", and its the one that you are going to be using a lot in lane, along the last (longer) raze.
The second raze has a casting range of 450 (and a 250 radius as well) this means it can hit enemies from 200 units in front of Shadow Fiend and up to 700 units.
- Units standing in
Line 1 can be hit with Q and W razes.
- Units standing in
Line 2 can be hit with W and E razes.
Remember Line 2 and keep it in mind all the time. Using both the middle and the long
Shadowraze at max level, clears a creepwave. This is the wave push you are going to be using the most to push the lane and do whatever you need to do (check the runes, stack yourself some camps, etc) it is key that you master the
Line 2 ranging.
An easy way to learn this is by using your attack range as a reference. Shadow Fiend's attack range is 500, and that is just past the start of line 2.. So basically, anything withing your attack range is going to be hit by both raze W and raze E.

This is the last Shadowraze, it has a 700 casting range; that means it can hit enemies from 450 units to 950 units in front of Shadow Fiend.

- You already know the deal with
Line 2.
-
Line 3 is the furthest point you can hit with
Shadowraze.
- This means you can hit from 50 units behind
Shadow Fiend to 950 units in front.
The long raze has a special use that comes with it having such a long reach, and that is being a stacking tool. I will go into this later on the guide.
1.2. Necromastery & Presence Of The Dark Lord
 Necromastery
Necromastery is Shadow Fiend's first passive, default key "D", and it is his signature mechanic.
- Upon leveling it, you permanently get a
Necromastery buff above your health bar.
- Said buff gives you
2 extra damage to your regular attacks for each soul you hold.
- Souls are gained through killing units, any kind of unit (creeps, wards, summons, mines, traps) will yield a soul towards your counter, you also gain souls from denying your own friendly units.
- Killing a hero gives you 12 souls.
- You can only hold a maximum of 36 souls at once, meaning you sit at 72 extra damage.
-
On death you lose half of the souls you hold.
- If you only have 1 soul you keep it on death.
- If on death you had an odd number of souls they are rounded up lower (so if you died and you had 11, you are left with 5)
- You can see how many souls you currently hold in the buff icon.
When killing a unit you can actually see the particle effect of the soul coming out and going into Shadow Fiend, this effect however doesn't affect the spell itself, like for example  Spell Steal. You get the soul instantly, despite the particle effect.
So this is what makes Shadow Fiend the strong laner he is, you start getting souls and damage up and then you win your lane, on top of the control you have from Shadowraze.
Its a pretty straight forward spell, try to last hit and deny as best as you can during the laning stage to start building that damage. Try keeping your souls at max at all times, not only for the damage you get, but also because of the interaction with
 Requiem of Souls
, I'll go into that in the next section.
By the way, this is one of the few passives that is not disabled by  Silver Edge's break. You still get the damage through it.
Shadow Fiend
Silver Edge's break. You still get the damage through it.
Shadow Fiend's illusions have both of his passives, however, even if they can last hit and get souls, they do not gain any damage from the buff (since it the soul extra damage goes into the
+dmg green numbers), and they will start at 0 souls; so basically it has no effect.
Remember you get souls from everything, even buildings, even
 Tombstone
; literally everything BUT
 Power Cogs
.
 Presence Of The Dark Lord
Pretty sure  Presence of the Dark Lord is the longest spell name ingame, isn't it?
 Anyway,
we'll call it presence to simplify things, m'kay? Default Key "F".
Presence is a passive aura ability that reduces armor of everything around Shadow Fiend (this includes towers, creeps and heroes) in a 900 radius.
- This aura is carried by illusions.
- It is disabled by
Silver Edge break.
- Presence only works if enemies have vision of you (hence, they are spooked).
- The debuff lingers for half a second when people lose vision of you or get out of the radius of effect.
At max level, Presence will take away 6 armor, which is a just balanced amount.
It is a simple aura, we will talk more about it in the building section.
1.3. Requiem Of Souls
 Requiem Of Souls
Requiem of Souls is Shadow Fiend's ultimate and its a rather confusing spell, in a tooltip sense, kinda like  Magnetize but makes sense once you read it several times or somebody explains it to you, so here I am.
So listen up:
Magnetize but makes sense once you read it several times or somebody explains it to you, so here I am.
So listen up:
After a casting time of 1.67 seconds,
Shadow Fiend creates an explosion of souls around him, releasing a damaging and debuffing line for each two souls he holds; he does not lose souls in the process. These lines are distributed evenly in a circle around
Shadow Fiend, if you happen to hold an odd number of souls it is rounded up to an even number. If you hold two or less souls, the line will always be fired east.
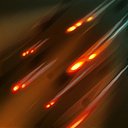
 Looks like this with full (36) souls, 18 lines:
So we have, yet again, a misleading animation.
Despite the effects, the lines start in the very center of
Shadow Fiend's collision box, this means that if
hipotetically Shadow Fiend would be inside someone else, they would be hit by all 18 lines of
Requiem of Souls.
Info:
- The
Requiem of Souls lines are slightly conic to the end, this width is greater on higher levels of
Requiem of Souls.
- At max level the lines start at 125 and end at 450.
- The lines also have a travel distance that grows with higher levels, 1025 at max level.
- Lines travel at 700 Units per second.
-
While casting Requiem of Souls, Shadow Fiend gains phased movement, this allows for the max damage comboes like Euls.
-
When hit by a line at max level, enemies take 160 magical damage and are affected with a Requiem of Souls debuff that lasts 5 seconds.
- Said debuff reduces the enemy movement speed by 25% and their attack damage by 50%.
- However, this can be purged.
-
On death,
Shadow Fiend automatically releases
Requiem of Souls, the effects are the same and the spell is always casted, regardless of its cooldown.
This post-mortem Requiem of Souls takes place after the loss of 50% of your necromastery souls.
- This means you can have up to 9 lines (from 18 souls) on a death
Requiem of Souls.
There are two scenarios where you will be using this ultimate:
- On a focused hero to attempt a guaranteed kill, that be in a gank or teamfight, via disable, invisibility or euls.
- On a general direction of a teamfight, a safer aproach that dishes damage in the area and focuses on the debuff part of
Requiem of Souls.
In the builds you will see core items are those that allow you a setup for Requiem of Souls, more importantly for the mid game, that it be Shadow Blade or Eul's Scepter of Divinity. These items allow you cut the distance between you and your foe, giving you time to cast
Requiem of Souls to its max potential.
Shadow Blade initiation:
The
Shadow Blade Requiem of Souls has lost a bit of popularity with the rise of the euls last patch, that doesnt mean it's not good, but it does have some downsides.
Basically the concept of the
Shadow Blade initiation consists on going invisible inside fog of war and scouting for unsuspecting heroes busy with other stuff, for example someone farming. For example going inside of the enemy jungle or searching heroes along the lanes; excluding orb walking these heroes tend to stand still a lot and what you do is, with the phased movement that
Shadow Blade provides, fuse your hero with theirs and cast
Requiem of Souls, if they did not move that should be the kill guaranteed, if they did move and you only hit with say, half of the lines, that is still a big chunch of damage on top of the slow from the debuff, with that you can land auto attacks and/or medium and long
Shadowrazes.
Shadow Blade initiation is more unpredictable that euls and discards the possibility of a second enemy interrupting your casting, however it becomes completely useless if they have any sort of preventive detection, like sentry wards or a
 Gem of True Sight
, at that point coming in alone invis to get your
Requiem of Souls off can be dangerous to yourself as you have also used your only escape ability in your way in, so be mindful of sentry wards and enemy inventories.
Eul's Scepter of Divinity's hug of death:
The Euls combo initiation on the other hand is more reliable as prevents the enemy from moving completely, and allows you to land a perfect 18 line
Requiem of Souls any time it's off cooldown (and there is nobody to help them by stunning you, etc).
Also euls has a bit more upsides than Shadow Blade, extra movement speed and mana regen, we will talk about that later on.
2. The Builds
Alright, so as you may have noticed in your games Shadow Fiend is a hero that can build a bunch of different things, we could say he is relatively flexible in terms of itemization. In order to simplify things I will divide the building in to phases, and each phase in smaller parts, these parts will respond to different match situations and you can just craft your item build with these smaller groups of options.
Sounds good?
So look at this graph:
This graph contains the general guideline for the rest that is coming in a bit. It is merely referencial, keep that in mind.
I will go into what the graph means in the next sections where I talk about the three builds (they are also up there in the dotafire display)
2.1. X-Rated Annihilation (Full On Dps)
The first build I got here is the most dps focused build, also known as a glass cannon Shadow Fiend by the pub popularity. It focuses on a core Shadow Blade and building right click damage fast, puts focus on just output of damage via right clicks, scales great until min 40 and then starts to fall off due to your low defensive capability.
It doesnt draw much importance to Requiem of Souls as a damage dealer, it just limits it to a gank tool during the early game and as a last resort output in a fight, can also be used to give you an upper hand on initiation on mid game fights, also due to its secondary debuffs.
The early game is similar to any Shadow Fiend's early game. Get souls and farm the lane, get some jungle stacks and attempt the earliest
Shadow Blade you can get.
After Bottle and  Power Treads
.
The starting items are the ones you can see up there in the display; you can mix and match those as you see fit.
-
 Tango
Tango and
 Wraith Band
 for extra stats and starting damage.
- 2 Shared
Tangoes and a
Wraith Band for a little bit faster
Bottle.
-
 Iron Branch
es instead of
Wraith Band, useful for mek build-up
- 2 Shared
Tangoes,
Wraith Band for
 Ring of Aquila
, two
Iron Branches for
 Mekansm
 components, a
 Healing Salve
 if you want.
- Get creative.
Shadow Blade timings go:
- Fast around 10 minutes
- Average around 14 minutes
- Meh around 16 and up.
Getting
Shadow Blade really changes your zones, this means a lot of places become safer for you to navigate and you can approach fights much more freely, e
specially that first fight where you reveal it with a nasty requiem out of nowhere.
So you get to use
Shadow Blade as an escape early on, and your main way to land requiem on people, you can roam around their lanes looking for people solo farming and get free kills in between farming times.
Just do it when you see a clear opportunity, your main focus is still farming for bigger items, don't be distracted by fighting.
The second item varies, depending on the enemy heroes and the match tempo, it can be either
 Desolator
 or
Black King Bar.
Of course Bkb is a must if you start going into fights and getting erased as soon as you break invis, or just getting stunned for long enough for them to take out someone important or yourself (
if you are the main priority).
If this isn't the case then you are going for Desolator.
Desolator is the first item that is going to let you see a difference in the damage you can deal from right clicks, hitting
Desolator and max
Presence of the Dark Lord, on top of 175
Shadow Blade invisibility break damage, plus
Shadowrazes,
you are set.
Timings for Desolator tend to stretch quite a lot because it happens right in the middle point between the end of the early game and the beginning of the mid game, so depending on how many towers your team has taken, how many kills versus deaths you have under your belt and the farming space left, your deso will come sooner of later. These timings are for a
Desolator straight after shadow blade, implying that you did not buy Bkb at this point because you didnt need it.
- Fast can be anything under 15 minutes.
- Average is around 17 minutes.
- Around 20 minutes and up you are falling into slow territory.
Please remember Bkb, if you didn't need it before
Desolator you may need it now, after
Desolator,
more fights are going to happen from that point onwards.
This is when the build starts to split. After
Shadow Blade and
Desolator there are multiple items for you to opt for,
and this is also when situational pickups appear.
If your team is winning and you are
not the main focused hero on fights, you can consider purchasing your
 Daedalus
 at this point.
Note to keep in mind, just the
 Crystalys
 has considerable force only by itself, think through if you need the whole
Daedalus or if you can get the
Crystalys and
after another item in the middle finish the rest of the
Daedalus.
These "other items" you can get are the following:
-  Butterfly
: Attack speed and survivability vis evasion. On top of that you got flutter, that along shadow walk you hit high movement speeds and get out of pretty much any bad situation.
I strongly recommend you get at least the small crit ( Crystalys) to make something out of the attack speed.
- Silver Edge:
this is more situational, but if you need a bit more hp and there is at least one important passive to break, get this.
Into late game this build deviates into a little bit more sustained dps, you already have the raw power, now you need a way to keep it that way,
and the way to do this is attack speed and survivability.
The first source of attack speed is
Butterfly, if you didnt have it before, consider it now.
The other source for attack speed available is [moon shard. Now
 Moon Shard goes along great with armor reduction and crit
, but
it is nothing but raw attack speed. If you are crazy enough to purchase right after
Daedalus, completely skipping
Butterfly; its really greedy for lack of a better term, but it can be doable.
Oh and remember, with
Desolator and crit, plus some attack speed you can just be able to solo a min 35-40 roshan, he is going to take most of your hp though so br careful,
it is better to have people tank it for you.
My recomendation is to get both Butterfly and Moon Shard if you plan building so carelessly into dps and attack speed.
Dont forget  Boots of Travel, make room for another item by getting rid of your town portal scroll slot.
Get a second Moon Shard if at that point you ceased to give a ****.
Boots of Travel, make room for another item by getting rid of your town portal scroll slot.
Get a second Moon Shard if at that point you ceased to give a ****.
 Monkey King Bar
 is self explanatory, just get it to deal with evasion, it does hinder your building a bit,
but still, it is damage that goes towards the crit and gives you a way to stop chanelling, something you really cant do without euls.
But dont be discouraged, if you are decently farmed nobody should be able to tp out in your face because if they stand still they are basically a
free kill in two right clicks.
2.2. Hugs 4 Everyone (Core Euls)
This second build has recieved some serious nerfs as of 6.84, I've tried it since, it can still work but its not nearly as sustainable as before.
It focuses on having  Blink Dagger as mobility and Eul's Scepter of Divinity as a tool for Requiem of Souls on top of the stats, regen and movement speed it provides.
Just as the last build, you want to aim for a good laning stage and pick up the
Blink Dagger after finishing the items for the early game.
Timings for
Blink Dagger are similar to
Shadow Blade's, a little bit earlier but then again, it is common for people to get set back with a single death, as
Blink Dagger doesnt build up, but its a single item.
-
Fast goes around 10 Mins
-
Average is 12 Mins.
-
Relatively slow is anything around 15 Mins.
One thing to keep in mind about the
Blink Dagger pickup, it's true that is comboes with Euls, but this doesnt mean you cant pick it up with the dps build instead of
Shadow Blade, you can see the upsides and downsides of each and make your decision.
Some people just prefer Blink Dagger because it focuses much more on mobility, and they build it along anything, Mushi does this for example. I personally like my
Shadow Blade with the dps build because the little extra damage and attack speed, and the invis break damage synergize a little bit better with the rest of the build than
Blink Dagger. But when I do get my hands on
Blink Dagger you can see a considerable gpm increase due to mobility for flash farming, and its common for a
Shadow Fiend with
Blink Dagger to get more kills in the early stages, as it gives you a better way to position yourself for
Requiem of Souls and also
Shadowrazes, especially the short one.
Eul's Scepter of Divinity is the other part of the equation, people defend Euls not only because of the
Requiem of Souls possibility, they say the mana regen and extra intelligence you wouldn't otherwise build on
Shadow Fiend complement your ability of flash farming with
Blink Dagger as you have more mana to spare. And the movement speed is a nice extra.
2.3. Classic Mekansm (Defensive Build+Mek)
The third and last build is one that is considered the more reliable, safe approach. Focuses on keeping Shadow Fiend alive so he can dish out damage; even if you are not going to be one shotting people like with the dps focused build. The main big thing of this build is a sturdy farming Shadow Fiend mid, who gets more small and medium items instead of skipping up to big ones, also it lacks a mobility/escape since you are supposed to stick in fights and play like a proper classic carry.
I dont recommend this build unless you are playing against opponents who know very well what they are doing, in lower level pubbing for example you will find that even if you go full dps with no bkb sometimes opponents wont punish you for it.
First thing you are going to buy is
Bottle,
as always, the reason
Bottle is so key for
Shadow Fiend is because it allows you to start using razes as much as you need, to farm the jungle, to push the lane, to attempt kills, etc.
Right after
Bottle, you get
 Boots of Speed
 and then you finish the
Wraith Band into
Ring of Aquila. From there you just have to stack and farm non-stop, towards
Mekansm.
Build becomes rather intuitive from there, build what you need, Black King Bar, whatever.
3. The Stages Of The Match & Your Role In Them (How To Behave)
One of the most common problems when learning a new hero is not knowing what to do in each part of the game. So here we go...
The next three sections talk about each stage of the match and your role in them, how to be as efficient and as helpful to your team as possible.
3.1. Laning Stage & Early Game (Be Efficient)
Early Game, so early game is divided into two parts, the laning stage (from the first spawn to the first big rotations) and the second early stage, which consists of small tower pushes, constant rotations and the start of big items coming into play, for example their  Magnus got the Blink Dagger up, you are getting those core items rolling yourself, etc.
The true start of the game,
the beginning of the laning stage is one of Shadow Fiend's breaking points, the other one being ultra late game. As I told a guy from learndota the other day,
Shadow Fiend is a hero of momentum; this does not mean
snowball however, but momentum, implying that in order to play a successful
Shadow Fiend you must start and maintain momentum, also known as keeping yourself relevant to the match by farming, getting items to scale, killing enemies to set them back and rolling objectives with your team, like establishing map control, take towers or force teamfights.
During this laning stage you have two main objectives, those are
getting your early game items,
Bottle,
Power Treads,
Ring of Aquila, whatever you are building; and the other one,
getting at the very least level 7, 8 even better. With this you are going to be able to max razes and get on farming the jungle and keeping your lane control really easily,
level 8 is just the difference between 29 and 36 souls.
Level one is necromastery 99% of the time (at least you consider razes are needed at level 1 for an encounter or a really diffecult lane), you got to start building damage or else you are going to get swatted mid effortlessly. Try getting at least 2 cs (
last hit or deny) in the first wave, you will find that the opposing mid will be paying more attention to their own cs, and so giving you a bit better chance at building souls at last hits rather than denies at first,
which tends to happen.
Now,
if the enemy hero is truly a dominator in his lane or a bully like hero, like
Queen of Pain for instance,
so meta, it can happen that you do not get a single soul, and you have to wait until level 2 to get your first last hit with a raze, that does about twice your right click damage at level 1.
Do not worry if you have to resort to this, to clarify: You are not ****, they are just doing their job of shutting down a 40 damage shadow fiend; this will not lose you the game either, you just have to play it out cool and avoid death at all costs. As a person pointed out in /r/learndota2, in hugh mmr this is much more common, so you will be getting shut down harder early on the game, and
Shadowraze level 1 is more useable.
Which takes us to the next point, the second half of the early game. Here, if you get killed, its going to be really hard for you to recover your souls and so your farming rate, and it is not your death that causes it, but
whatever caused your death in the first place is going to keep pressuring you and your team in the same direction,
and this is what leads you to your fall. These causes are various, it can be for instance your safelane losing, your mid tower being destroyed, they plant aggresive wards and start roaming your jungle leaving you utterly isolated in your farming spaces, etc.
To prevent this from happening the best you can do is do your job properly, at mid, dont die, farm, and get items going; try to help sidelanes if you can but avoid it if its not completely necessary, otherwise you are timing out your farm, risk getting killed, letting other enemy cores farm uncontested.
This is the sidelanes job, if they dont get completely ravaged in their respective lanes,
nothing too crazy should happen.
During this period you should be looking towards farming your core items, transitioning mostly to the jungle and building the level advantage.
Even though you take stacks and jungle before this point,
this is where you do it the most, and the most important moment to do it, since here you get your
Shadow Blade or
Blink Dagger and truly start giving use
Requiem of Souls, at this point you not only have that mobility/initiation item, but also have the full 36 souls and level 2 requiem of souls. Now you got to really focus and think through what fights you wanna take and what hero you want to focus,
focusing the wrong target can cost you the fight, talking from personal experience.
3.1.1. Offtime Stacking & Jungling
A very important part of Shadow Fiend's early game is farming, and the jungle is huge for him.
For those unfamiliar, offtime is any point in the laning stage where you can go missing mid for farming with no real consequences. With most heroes, offtime means the opportunity to get a rune or go for a gank, for Shadow Fiend however, is the chance to farm the hell out of the jungle.
You can go stack whenever you feel you have the time to do it and not give the opposing mid too much free time.
For the sake of making this easier, I made more trademark Goo graphs.
Attack the large camp normally, 53-54 secs is fine. Then...
This gets both camps stacked, this is the double stack you are going to be using the most on radiant side.
This is the version for dire side, due to the angle its a little bit easier to land. If you happen to have a Blink Dagger, you can stack the other mid camp as well.
Attack the large camp at 53, blink towards the western mid camp, mid raze, then go back east and long raze the central mid camp.
These are not the only stacks possible. These are just the ones you are going to be using the most in games, but you can pretty much double stack anything that is near other camps, you can get creative with that.
To the jungling itself: After creating the stacks you are going to be taking them down with razes, its actually easy, just remember to put your
Power Treads on intelligence and
back to agility to use your
Bottle, dropping
Wraith Band is optional.
Put the neutrals inside Line 2, then take them down;
simple as pie. For big creeps that take 3 razes they will walk towards you, then you use the last raze (short raze).
Bigger Creeps (More than 3 Razes): For these neutrals you have to use all 3
Shadowrazes and a couple of autoattacks to take them down. Remember all these are for maxed out razes.
- Satyr Tormenter.
- Red Hellbear
- Big Troll Berserker
- Big Centaur
- Pink Wildwing
Big Creeps (3 Razes):
- Yellow Hellbear
- Ogre Bruiser
Medium Creeps (2 Razes):
- Satyr Mindstealer
- Alpha Wolf
- Small Wolf
- Ogre Frostmage
- Small camp's big creeps
- Small Trolls (from the large camp)
- Small Wildwings (This is one raze and 1 autoattack)
Small Creeps (1 Raze):
- Skeletons
- Satyr Banisher
- Most creeps from small camps
3.2. Mid Game & Big Teamfights/Pushes (Be Threatening)
A Shadow Fiend's mid game is everchaning, you have to adapt for whatever is happening in the match.
The first big thing that defines the mid game is towers, and the teamfights that come with them. Now the key thing in them is what fights you take part of and what fights you skip for farming.
The fights themselves are fairly straight forward, initiate with Requiem of Souls, focus the right heroes, use razes and be careful where you stand, a single stun with 2 or 3 heroes can get you killed right off, and set your back in gold and souls too. Can't stress it enough, do not get killed.
Goo pls i dunno what fites to fite!
Glad you asked reader, I crafted this simple flowchart.
3.3. Late Game & End Game (Be Decisive)
Late game is horrible as Shadow Fiend, and Im talking true late game, where a single bad death or having no buyback can cost your team the game; this is the time where you begin to feel truly powerless compared to your complete destruction 20 minutes ago, feels like a different game.
There are various reasons for this, but I can sum it up in a single explanation, why Shadow Fiend scales the way he does.
So basically what happens is that Shadow Fiend is a rather puny hero without his spells, and his spells do one thing only, nuke. This is useful for fighting early and for a short period of time, the main use you will be giving to Shadowraze is that of farming. So its a curve that doesnt end as it begins, it changes towards the late game.
Right clicks get stronger with farm and time, and spells fall off at the same time.
-Early game: Weak right clicks, strong spells.
-Mid game: Strong right clicks, average spells.
-Mid to late game: Average right clicks, weak spells.
-Very late game: Weak right clicks, weak spells.
Is not that your right clicks fall off like spells, but usually you are slotted by the end of the mid game and the rest of heroes are still catching up, so big items start to appear on the enemy team and your slotted Shadow Fiend isnt as scary anymore, and there isnt much you can do,  Eye of Skadi
  Satanic
  Manta Style builds suffer less into the very late game than the deso crit build, as its more reliable damage output, and armor reduction becomes insignificant in that scenario, so you can build like that but its not going to be that great either, it will be alright, but remember you dont have the power you had before.
In a nutshell, you farm like crazy and get items fast, that makes you stronger than the rest. Then they farm up and you are in equal terms, and in equal terms Shadow Fiend gets kicked around. And you dont have the option of farming more, you are already slotted, basically dont let them catch up if possible, or you are in trouble.
 Divine Rapier helps, but shadow fiend is far from an ideal rapier holder, he can be killed off very easily even before he has the chance to use it significantly.
Anyway, if they do have a proper position 1 carry, they will beat you. This is why I support the idea of a farming shadow fiend that transitions into a position 2 later on, for a stronger, more sturdy carry to take the wheel.
4. Problematic Matchups
To be perfectly honest Shadow Fiend is an exceptional laner mid and its tough to find heroes that give him a bad time, but ill list some anyway with the why are they problematic to your play.
Queen of Pain is the hero of the meta and she is one of the few heroes that can make
Shadow Fiend sweat his early game a little bit.
She has pretty much all the upper hands at the start of the game, higher attack damage, better mobility, more reliable nuking,
 Shadow Strike
 is awful to lane against specially as a hero that must get last hits to start rolling and you cant come close because its so easy for her to right click you a few times, blink up and kill you in a second.
Your best bet for laning against
Queen of Pain is using your razes to get last hits and stack as much as possible, so you can get back on your feet after she starts rotating.
Contesting runes against her is suicide, dont race runes against her because you will always lose, and running all the way to the other rune isn't particularly efficient either, just call your missings, ping the runes, etc.
This applies not only for
Queen of Pain but for any strong pos 2 nuker that pushes you out of the lane, like
 Storm Spirit
 for instance.
He isnt as strong as Queen of Pain though.
Windrunner is a very annoying hero not in terms of laning
(even if she also has a higher attack damage than you) but in terms of fighting, she has the evasion and high movement speed of
 Windrun
 on top of
 Powershot
 that will wear you down if she lands a couple on you,
and she can do it from outside of your vision range, so its unpredictable and it will destroy your bottle charges. And on top of that,
 Shackleshot
 can bind you to your ranged creep and you are rest in peace.
Even though she isnt technically a mid, she tends to go mid, and stay there forever. Yes, talking about
 Mirana
. She isnt that bad in terms of making the laning stage hard for you, but she does have the tools to gank you consistently, not only
 Sacred Arrow
, but
 Moonlight Shadow
 as well if they think is necessary.
 Spirit Breaker
 for the exact same reason.
From there laning stage is easy, dont make dumb mistakes and stick to the plan. Everything should work out fine until later on.
Overall counters to
Shadow Fiend are those that can disable him through Magic immunity, those with a lot of physical damage. Bashes too, all that will rip you apart.
-
 Axe
Axe
-
 Legion Commander
-
 Juggernaut
-
 Troll Warlord
-
 Slardar
 is especially awful because he will amplify physical damage and destroy you, a also, if you have shadow blade that is also out the window.
-
 Clockwerk
-
 Lifestealer
 sometimes, not that often
You get the idea.
5. Update Section
Nothing here yet, this is where a changelog would be if there was one.
6. End Note
Anyway, thats it for Shadow Fiend, I could go into more detail but I think it is not really necessary, is it?
I actually didnt realize how much work I put into this guide until I was about halfway through it, I really hope everyone finds it any useful, and even if you dont play shadow fiend hope is was a good read.
Comments welcome \o/ as always.
Not completely sure but I think next guide is going to be
Techies, updated version that is, since my last guide was from when they were released, and things have changed, and for the good.
I was thinking of making a replay analysis of myself on a video, but I haven't done it ever before and my spoken english is not as fluent, so wasnt sure, may do it anyway just to see how it would turn out, If not for shadow fiend I will do it for Techies, maybe Ill do it for both who knows.
-Goo signs


Quick Comment (15) View Comments
You need to log in before commenting.