Please verify that you are not a bot to cast your vote.
Help SupportOur Growing Community
DOTAFire is a community that lives to help every Dota 2 player take their game to the next level by having open access to all our tools and resources. Please consider supporting us by whitelisting us in your ad blocker!
Want to support DOTAFire with an ad-free experience? You can support us ad-free for less than $1 a month!
General Purchase Order (Keep In Mind Your Items And Order You Buy Them In May Change Match To Match)
Ring of Basilius
Boots of Speed
Vladmir's Offering
Power Treads
Orchid Malevolence
Blade Mail
Skull Basher
Abyssal Blade
Late Game Item Build (Your Games Should End Before Basher, Any Later Is Very Rare)
Boots of Travel
Black King Bar
Blink Dagger
Divine Rapier
Divine Rapier
Divine Rapier
Very Important Situational Item Choices To Think About
Power Treads
Arcane Boots
Phase Boots
Boots of Travel
Boots of Speed
Ring of Aquila
Soul Ring
Ring of Basilius
Butterfly
Sentry Ward
Gem of True Sight
Bottle
Observer Ward
Also Important Situational Item Choices To Think About
Black King Bar
Blink Dagger
Divine Rapier
Armlet of Mordiggian
Assault Cuirass
Daedalus
Heart of Tarrasque
Manta Style
Mjollnir
Monkey King Bar
Necronomicon
Radiance
Scythe of Vyse
Shiva's Guard
Urn of Shadows
If You're Playing With Assholes, Then You Probably Need To Buy The First 3 Items And Possibly Even Some Of The Other Items Too Depending On Your Situation
Animal Courier
Flying Courier
Sentry Ward
Observer Ward
Gem of True Sight
Dust of Appearance
Smoke of Deceit
Hero Skills
Insatiable Hunger
3
4
7
8
Spin Web
1
5
9
10
Silken Bola
1
5
9
10
Spawn Spiderlings
6
11
16
Talents
15
17
18
Kyotosomo's Ultimate Broodmother Guide (Made By Someone With 250+ Wins As Broodmother)
Hello I'm Kyotosomo and this is my first guide on DOTAFire. I was playing All Random one day and stumbled upon Broodmother whom I would soon fall in love with. Broodmother had one of the lowest win rates of any hero in the game and almost every Broodmother I had personally seen sucked. I went ahead and played her anyway though and to my pleasant little surprise all I had found with her was great success. I started to play with Broodmother more and more and now whenever I play with her I win nearly all my matches and they usually end around 22 minutes. I now have realized Broodmother is actually pretty OP and one of the best heroes in the game. So Broodmother is now my favorite hero and I hope she becomes YOURS too after you read this guide and play with her a bit. I will try to keep this guide in-depth, but also simple and easy to understand. If you really want to you can just quickly breeze through this guide and you will improve by a lot, but keep in mind I spent days working on this guide so that if you can take the time to read through it and then play a few matches you will become highly skilled with Broodmother and enjoy winning almost all of your matches in a short amount of time all while having.....*gasp*.....FUN! In all seriousness if you do like this guide though then feel free to give it a good rating as I would really appreciate it. And if you don't like this guide and disagree with me on something, rather than giving it a bad rating I would prefer you instead help me and the players who read this guide improve ourselves by leaving a comment below explaining why you don't like it and what should be changed, it's much appreciate and you'd be helping a lot of players by doing so. But if you do decide you're still a big enough of a **** to give it a bad rating, well then:
I hope you enjoy!
Step closer my apprentice.YOU have been chosen to learn how to control the most terrifying incarnation of evil to ever exist. Her name, is BROODMOTHER. But don't be scared, I have great faith that you can master her limitless power and laugh as you watch everything in your path be decimated before you. But before we do anything else you really should get to know who, or what your new partner really is.
Black Arachnia the Broodmother is a melee agility hero who is a ridiculously powerful pusher and ganker. She does awesome in the side lanes and is most often played there, but she truly shines in the MIDDLE LANE. Now let me get this straight that she is a GREAT side lane hero too, but when she gets in that middle lane she can just snowball so far out of control that you will be able to almost single-handedly win the match for your team. I will say it one more time so you hopefully understand; PLEASE PLAY HER IN THE MIDDLE LANE WHERE SHE IS TRULY MEANT TO BE PLAYED. Anyway, moving on. Her trademark spiderlings, as both an asset and a liability, are one of the aspects that define her play style. While a possible additional source of income and experience for the opposing heroes if fed to them due to bad micro skills, spiderlings multiply at an absolutely amazing rate and then procede to help Broodmother just unbelievably mow down creeps, towers, and even heroes in the blink of an eye. Broodmother's abilities also allow her to conceal herself and her spiderlings in an area while also gaining a massive speed and health regeneration boost. Her abilities also allow her to slow and kill enemy heroes with relative ease and reward if caught off guard; all while staying as elusive as possible with her webs, items, and passive ability. She spends the entire game pushing lanes and ganking enemy heroes with little concern, due to her speed, slowing capabilities, invisibility, and added HP regeneration; but she can also transition into beast of a melee carry, whom of which can easily pop up on and rapidly kill lone targets to ENTIRE FREAKING TEAMS with the right items. She is truly an intimidating and powerful being who is an asset to ANY team. And by the time you finish reading this guide and playing several matches with her, I hope you love playing her so much that you want to play with her until you grow old and die!
I think I shall also read you a small passage from an ancient scroll I have that tells the tales of Broodmother and her story:"For centuries, Black Arachnia the Broodmother lurked in the dark lava tubes beneath the smoldering caldera of Mount Pyrotheos, raising millions of spiderlings in safety before sending them to find prey in the wide world above. In a later age, the Vizier of Greed, Ptholopthales, erected his lodestone ziggurat on the slopes of the dead volcano, knowing that any looters who sought his magnetic wealth must survive the spider-haunted passages. After millennia of maternal peace, Black Arachnia found herself beset by a steady trickle of furfeet and cutpurses, bold knights and noble youths--all of them delicious, certainly, and yet tending to create a less than nurturing environment for her innocent offspring. Tiring of the intrusions, she paid a visit to Ptholopthales; and when he proved unwilling to discuss a compromise, she wrapped the Vizier in silk and set him aside to be the centerpiece of a special birthday feast. Unfortunately, the absence of the Magnetic Ziggurat's master merely emboldened a new generation of intruders. When one of her newborns was trodden underfoot by a clumsy adventurer, she reached the end of her silken rope. Broodmother headed for the surface, declaring her intent to rid the world of each and every possible invader, down to the last Hero if necessary, until she could ensure her nursery might once more be a safe and wholesome environment for her precious spiderspawn."
Here is a short video overview of the hero that may or may not be fully correct and up to date at the time you watch it, but none the less gives you an idea of what the hero is like and I highly recommend you watch it. Here is the video:
I just wanted to share a little bit of lore with you so that you could get to know her a little better. Now that you have, I would like to talk about just some of her seemingly infinite strengths and also a few of her rumored "weaknesses".
PROS:
+You Get Instant Invisibility While On Your Webs
+You Can Move Faster Than Sonic The Hedgehog While On Your Webs
+You Can Heal Back To Full Health Relatively Quickly While On Your Webs
+Your Spiderlings Get All The Above Perks You Do
+You Can Move Over ANY Terrain While On Your Webs
+Your Webs Provide Vision Even When You're Not On Them
+You Have Great Stats And A Great Attack Animation
+If You're Struggling Your Abilities Allow You To Jungle Fast And Without Losing Health
+You're A Super Annoying Harasser
+You Can "Hit And Run" Very Well
+You Are An Amazing Ganker Who Can Take Down Most Single Targets Easily
+With The Right Items And Levels You Can Take Down Whole Teams On Your Own
+You're An Amazing Pusher Who Can Destroy Any Tower In Around 5 Seconds If Left Unattended
+Your Games Will Start To End Around 25 Minutes
+You Can Carry The Whole Team
+Your Team And Enemies Will Praise You
+Broodmother Is Just A Flat Out Fun And Powerful Hero
CONS:
-You May Often Make People Rage Quit
-Your Opponents May Report You Out Of Anger
-Your Games May End Up Being Pretty Darn Short Sometimes
-You Will Often End Up Literally Having The Whole Enemy Team Come To Your Lane To Gank You And Push
-More Challenging To Play Than Your Average Hero Due To Micro-Management And Needed Skill
-You Can Cause Enemy Heroes To Snowball If You Feed Them Your Spiderlings
-You Aren't As Powerful Outside Your Webs
-If The Enemy Team Counters Your Invisibility You Aren't As Powerful
-You May Run Into A Lack Of Mana
-You May Find The Attack Animation To Be A Tittle Meh
Now that you have a bit of an idea why she is so good, let's take a look at my skill build and see why I built it the way I did. After that, we'll take a good look at each of her deadly skills and I'll show you the potential each one of them holds. Hopefully this in-depth look will allow you to use the skills to their maximum potential, but keep in mind practice makes perfect and THAT is what is going to allow you to truly make good use of her skills. Well anyway here is my general skill build that I usually follow:
THE SKILL BUILD:
Level 1: Spin Web Put a point here so you that can setup your webs before the match starts. You should work quickly so you can get out both webs in time, and then be able to still grab a rune or stall creeps.
Level 2: Incapacitating Bite A point here will allow you to gank without your prey being able to escape.
Level 3-4: Spawn Spiderlings Put points here so you aren't sitting around with a full pool of mana. Make sure to use this skill often so you have an army of spiderlings to push (or gank) early on.
Level 5: Spin Web Put another point here for more speed and much needed health regen.
Level 6: Insatiable Hunger If you want you can now gank your opponent if you haven't already. You can also use the skill while attacking creeps to regenerate even faster. Also use this while attacking towers for bonus damage.
Level 7-8: Spawn Spiderlings Now that you maxed this skill out, watch as you mow down towers and enemies.
Level 9-10: Spin Web Max this out for a total of 8 webs and awesome speed/health regen.
Level 11: Insatiable Hunger This really is a good skill that let's you out DPS other heroes while healing.
Level 12-14: Incapacitating Bite Your prey becomes almost half as fast and over half their attacks miss.
Level 15: Stats *Impatiently waiting to max out ultimate skill*
Level 16: Insatiable Hunger Now that you have maxed out your skills you can start gaining more stats.
Level 17-25: Stats You will have won before you can spend any large amount of points here.
Note: This is what I find most effective and what I usually end up doing because when I play Broodmother I am a VERY aggressive pusher and ganker which usually lets me have several kills and have pushed two towers by the 12 minute mark. You may want to change things up depending on the match and your playstyle. For example, if you are struggling to live then you should actually be maxing out your Spin Web first instead of your Spawn Spiderlings, so that you have far more survivability. Also, you may want to skip the early point in Incapacitating Bite if you think you are going to need to focus more on pushing or surviving instead of ganking. And if you are playing this hero in the side lane you will want to put two points into Spin Web as soon as you can since you have to cover more ground with your webs. But remember as you play more and more with Broodmother you will figure out what you like to do with her. I would now like to talk about each of these skills separately and provide you with some tips on how to get the most out of them.
I will now go over each of Broodmother's skills. Remember to roll your mouse over each skill so that you can learn the basic info about each one. Now I guess let's dive into this.
Spawn Spiderlings>As mentioned in the skill description, units killed by spiderlings will then give birth to spiderites, smaller and less powerful versions of the spiderlings. This makes the skill even deadlier because on a regular creep wave you can get up to 8 spiders!
>Will work on allied creeps and units when denying. Friendly sacrifice anyone?
>It should also be used to gank as it deals 300 solid points of damage and spiderlings can still spawn from fallen heroes.
>Be patient! Don't just shoot it at any creep, make sure to shoot it at a creep with low health because after two seconds the spiderlings won't spawn off the affected enemy.
>I beg of you to micro with care! It's not too big of deal to lose some spiderlings to enemies. But don't feed them an endless amount of gold and experience. Your teammates will hate you for it.
>When you're dead, have your spiderlings either attack somewhere with no enemy heroes around, or sit around and wait for you to respawn.
>If you have a huge group of Spiderlings (maybe 16 or more) and you attack an unattended tower you can bring it down in a matter of seconds, even if it has full health. If you see a tower with no enemy heroes guarding it and you have a large group of spiderlings, PLEASE leave the comfort of your webs to go attack the tower. Your teammates will thank you for it.
>When in a big group your spiderlings not only slow the enemy heroes by a lot, but will also group around them in a circle when auto attacking so that they can't even run away properly because they are blocked my such a huge cluster **** of spiders.
>I recommend against jungling unless you are struggling, but if you do jungle know that your spiders will let you jungle quickly and without losing any health (and don't forget they spawn more spiderlings too)!
Spin Web>All the bonuses you gain from your web, your spiders do too!
>Has an invisibility fade time of 2 seconds, but invisibility is instantly lost outside the web.
>All other bonuses such as movement speed and health regeneration are instantly granted and lost when moving in or out of the web.
>If more webs are spawned than allowed, the oldest one will disappear.
>Webs are marked by little green icons on the minimap.
>Broodmother has completely unobstructed movement when under the web (can walk over cliffs, trees, etc) with no collision box. This is GREAT for escaping or stealing a Roshan kill.
>Spiderlings and Spiderites do not get unobstructed movement, however, they get their collision box removed.
>You will start out very conservative with webs, but you may get a little bit more liberal as you play more with Broodmother. Don't be afraid to place a web down quickly by a friendly or enemy tower for offensive/defensive purposes, or where you're standing if you need a quick escape.
>The space in between towers can be covered by 2 webs in the middle lane, and 2-3 in a side lane. Make sure to space them so they are barely touching eachother.
>Your webs allow you to harass/gank really well. Because of this people will often do one of two things. The first is be a noob and get ganked/or hurt and have to go back to base all the time leaving you the lane. The second is people will be very intimidated and not want to ever enter the spiderwebs, once again leaving the lane to you.
>Before the match starts I would run to your lane as fast as you can so that you can lay down both of your webs in time so you start with an advantage. Then you can go back and stall the creeps or check for runes.
>Enemy players can use a Sentry Ward or Gem of True Sight to render you visible even when on your webs, so MAKE SURE that you or an ally either uses Sentry Wards or a Gem Of True Sight to make all their Sentry Wards visible so that you they can be destroyed. And if an enemy has gem of true sight it is important to kill them and steal the gem from them You may need to work with a teammate to get this done.
>This is obvious but be careful when you're not on your webs, and keep time you spend off of them to a minimum.
Incapacitating Bite>The affected enemies' miss chance stacks with evasion and terrain dodge chance, so if you have items that provide you evasion or that slow your enemy they will stack with this skill.
>Magic Immune targets aren't affected by this passive skill, sorry.
Insatiable Hunger>Fully stacks with all items providing lifesteal (both Unique Attack Modifiers and auras). So even though I generally don't use lifesteal items on Broodmother, they are very viable choices for her that you may like better depending on your playstyle.
>Can only be removed by Purge (from Diffusal Blade, Stone Gaze, Demonic Purge, Unstable Current, or the Satyr Trickster).
>This ability not only increases your damage against heroes and creeps, but buildings as well. So keep this is mind when pushing.
>If you are low on health you can use this skill while attacking a wave of creeps to get most of your health back.
>You may want to actually save your soul ring's charge instead of using it whenever the cooldown runs out in case you are ever in trouble and out of the mana needed to use this skill and quickly heal up.
>This skill is awesome and will let you out damage and out heal even the beefiest of heroes.
As I mentioned earlier once you play a few matches you will understand how Broodmother's skills work and how to use them. Experience is what will let you truly use her skills to their maximum potential. Before we move on I would like to talk about Spin Web and how you should be placing your webs.
If you can't place your webs well while playing as Broodmother, you will have a hard time using her. You should learn pretty quickly how to place her webs well, but I created a marked up image of the map that should help you put down webs correctly during your first few matches with her. I also included a key below the map so that you can, well, understand why I threw all those different colored dots there. I also took the liberty to do not just the middle lane but the side lanes too. I'm sorry if it's a little hard to read but I spent a while on it and these dots are approximations of where the webs should go. Well, here's map:
For the Radiant:
1. White dots are where you should be laying your webs when your on the offensive.
2. Grey dots are where you may or may not decide to lay webs if any towers are destroyed.
3. Black dots are where you should be laying your webs when you are on the defensive.
For the Dire:
1. Yellow dots are where you should be laying your webs when your on the offensive.
2. Orange dots are where you may or may not decide to lay webs if any towers are destroyed.
3. Red dots are where you should be laying your webs when you are on the defensive.
You may also decide to lay down webs in the river, Roshan's nest, creep camps, or by secret shops; but I personally never do that. Don't be afraid to strategically throw down webs however you want, or even just on the fly below you if you catch yourself in trouble. You want to balance out how conservative you are with your webs and how liberal you are with them. Don't start laying them down willy-nilly, but also don't be afraid to throw one down when you need it. There isn't too much to say except for what I'm going to keep repeating over an over; "Practice makes perfect"!
Now that we are finished talking about skills, we can move on to probably the most important part of every guide on DOTAFire (or at least the part people care about the most). I will now discuss the controversial topic of items.
Alright, I'm about to go over my item build for Broodmother and other items that one may want to buy for her. To be honest, I think the majority of the other guides on DOTAFire and Youtube have somewhat lame item builds and often with very poor choices. I will explain the items I put below to the best of my abilities so that you understand why I like them. Keep in mind even though I have played over 200 matches with Broodmother, I STILL have a constantly changing opinion about all the items and you will too. Maybe some of these won't fit your playstyle, maybe some will. It's up to you to decide, and that's what I am here to help you do. I will now go over my general item build, very important items to think about using, and somewhat important items to think about using. If you see an item that isn't on here but you think would be great on Broodmother then go ahead and experiment with it! Just because I have never found success with it doesn't mean you can't! And feel free to comment and tell me about it (or anything else you would like me to know about your experiences with Broodmother)! With all that said and out of the way, here we go.
The General Item Build
First I will go over the items that I get in my average game. First, I ALWAYS start off each game buying a Ring of Basilius, as you NEED that mana regen. And after I buy that item I run to the middle lane as fast as I can so that I can set up my first two webs before the match starts and still have time to go back and stall the creeps or grab a rune. I then buy Boots of Speed as that added speed helps in many different ways, although mainly I get it so it is easier for me to get an early gank (as said I play very aggressively, I almost always get first blood with Broodmother). I then try to build a Vladmir's Offering as fast as I can. I used to build my Ring of Basilius into a Ring of Aquila instead or just skip both of those items and start with a Soul Ring (and I still sometimes do this on occasions with these items) because I thought Vladmir's Offering was a REALLY dumb item to put on Broodmother due to the fact she can already steal life and also already has great health regeneration due to her Spiderwebs. But one must realize that Vladmir's Offering offers a lifesteal, damage bonus, and armor bonus to ALL your SPIDERLINGS and you will notice the difference in how lethal they become. Plus that lifesteal, bonus health regeneration, and bonus mana regeneration is still really helpful. I then turn my Boots of Speed into Power Treads, which I actually will often do before I make Vladmir's Offering, but I make Power Treads second more often than I make them first since rushing Vladmir's Offering can be very important in a match. And the reason I pick Power Treads is the bonus to Broodmother's stats is generally more helpful then what the other boots can offer to you at this point in the game.
Next I build the item that EVERY Broodmother MUST BUY! That is an Orchid Malovence. This item takes away ANY possible mana problems you can run into, gives you better DPS, and gives you the ability to silence and amplify the damage an enemy takes for five seconds, which is easily enough time for you to kill any hero 1v1. After that I get Blade Mail, which although is generally a very situational item and a little unconventional on Broodmother, I almost always have to get it. This is because if you play Broodmother well (this is more so true if you play her in the middle lane) you will snowball every match and be able to take down both towers in your lane before your allies can take down even one. I take down both towers around 11 minutes into the game. If you play this well then this WILL cause the enemy team to always focus down on you and all try to team up on you, the majority of the time ALL coming into your lane. When you get in a fight against multiple enemies the Blade Mail lets you send ALL damage they do RIGHT BACK AT THEM causing crippling damage to your enemies which will allow for you to easily take them down, so getting this item and some point becomes very important for me. This item will often allow me to obliterate the whole enemy team all by myself (at which point the enemy team may rage quit and you will win the game). Also when you activate Blade Mail sometimes enemies will stop attacking you and you can even use it as an escape mechanism since once you stop taking damage you turn invisible again on your webs. Usually the game is won before I can get my next item or shortly after, so the next item I pick is a Skull Basher. This item will give you added DPS and give you the ability to stun enemies with your auto attacks making sure they won't be able to escape alive if they run into you.
As said my matches end around the time I get Basher and this is a somewhat cheap item near the end of the game and I can get the last out of my gold by grabbing an actual item and not just the materials for one. If the game doesn't end around the time I get Skull Basher then I upgrade it to an Abyssal Blade for yet another disable that allows me to easily kill enemies and even more DPS. Probably no more than 5% of my matches last longer than this so this is where my general item build ends. Oh and also if you are new to the game and haven't realized this yet, always buy a Teleport Scroll or two so that you can get right back to the action if you die or so that you can immediately come to the aid of your team if something happens.
Very Important Situational Item Choices
There are items that I will have to think about getting fairly often and I would like to inform you about these items so that you will consider them every match too. First of all is something every hero has to consider, and that is their choice in boots. Power Treads I generally get because they are a very solid choice that simply boost your basic stats, but you may not want that. You may want to pick Arcane Boots since when playing Broodmother you very well may end up having mana problems and Arcane Boots will help solve that problem, although I don't really pick these since I manage my mana well and get other items to solve my mana issues. But if you were to get Arcane Boots I don't believe you would need to buy any items meant to boost mana regeneration (with the exception of your Orchid Malevolence that is). Phase Boots are also very good boots I like to get on a ton of heroes because they offer added DPS and allow you to have an easier time chasing down enemies. But for Broodmother, I don't really pick these since Broodmother doesn't have any problems chasing down enemies on her webs. But hey, the extra speed and DPS is always appreciated and it will help you survive better if you aren't on your webs ever. Now Boots of Travel are boots that may play a VERY important role in your match. Being able to teleport around the map to your creeps is very useful for a Pusher like Broodmother and can even be CRUCIAL to you winning a match! Now I wouldn't ever buy these at the beginning of a match, but if a game is going on for a long while, I often buy these boots so that I can quickly aid my team in any situation on the map or so that I can quickly teleport to the enemy's base and destroy their structures (especially if my team is losing). Also, **** it. Maybe you don't want to buy ANY boots or you just want to buy Boots of Speed, that may be a good option in your situation, that is your decision to make.
Now for the early game mana regeneration items every Broodmother must decide between. Before I started buying Vladmir's Offering (My favorite choice for picking an early game mana regeneration item), I would always buy Ring of Aquila as soon as I could for the mana regeneration and added stats. If you don't want to build Vladmir's Offering then I highly recommend you get this. In addition to Ring of Aquila or maybe just instead of it, you might want to consider buying a Soul Ring. This is another item that offers improved mana regeneration. But it also gives added health regeneration and the ability to exchange health for some much needed mana. This item works well on Broodmother because she heals health really fast with her webs and her ultimate. So consider this item too as it is a very standard item on Broodmother. And then of course you could also always just buy a Ring of Basilius or buy it in addition to your Soul Ring.
Next is an item that is REALLY good on Broodmother and that I get in a lot of my matches after I complete my Orchid Malevolence and that is Butterfly. Butterfly works very well with many of the unique factors of Broodmother and makes her a KILLING MACHINE. DEFINITELY consider it! Your opponent (if they are smart) will try to counter your invisibility with a Sentry Ward or [Gem Of True Sight]]. If they decide to go with the Sentry Ward and your teammates refuse to help you with this, then you will need to buy one of these two items yourself so that you can see and take down the wards. Gem of True Sight may also help you against other invisible heroes, not that you really need the help in my opinion. And finally if you are in fact playing in the middle lane, it's not that out of the ordinary for a mid lane hero to buy themselves a Bottle. And it's up to you whether or not you want to use Observer Ward to make your rune hunting easier.
Important Situational Item Choices
The following items aren't items that I consider getting EVERY match like the items I just mentioned previously, but I still consider getting these items in some matches for very good reasons and you too should consider getting them too. They are:
Black King Bar/ Blink Dagger/ Divine Rapier - I have had a few matches last well over an hour and a half where the match came down to every player having a Black King Bar (For protection against everything) and multiple Divine Rapiers to almost instantaneously kill everything. And the matches came down to which team could use Blink Dagger the best to teleport in and kill the enemies. This is a situation to consider. These of course are all items to consider during conventional play as well since Black King Bar can make it very easy for to go in and tear **** up without having to worry about any spells or items. Divine Rapier obviously gives you insane attack damage, although be careful not to die and drop the item. And finally Blink Dagger let's you initiate well, although I don't recommend this item on Broodmother at all, unless you are in the situation I mentioned at the start of this paragraph.
Armlet of Mordiggian - This item for a great price gives you good additional DPS, the ability to get away from deadly situations and live by toggling it on and off, and works well with Broodmother due to her great health regeneration abilities.
Assault Cuirass - This item not only makes you and your allies way stronger, but all your SPIDERLNGS too!
Daedalus - The added DPS this item gives to heroes is always welcome.
Heart of Tarrasque - You may feel that you want to make Broodmother even bulkier and this item is surly a good way to go about that.
Manta Style - Now this is a REALLY good item on Broodmother. This can give you some REALLY good DPS.
Mjollnir - This item lets you deal out more damage but also helps you kill groups of creeps faster and is good for farming.
Monkey King Bar - This item gives really nice added DPS but also helps you dominate evasion energy plus gives your auto attacks a very useful mini-bash.
Necronomicon - If you are one of the few people who can actually use this item well and knows how to use it to its maximum potential, then this is a GREAT item on Broodmother.
Radiance - Another REALLY good item on Broodmother. Great for killing groups of creeps. Great for killing enemy heroes (especially grouped up), and works very well with your invisibility.
Scythe of Vyse - I wouldn't personally buy this, but this is an undeniably great item. It does give added stats, but the main draw is its AMAZING disable that is an asset to ANY team.
Shiva's Guard - This item is another item I personally would not buy on Broodmother, but is an undeniably great item that is an asset to any team due to its amazing active effect.
Urn of Shadows - This item is good on heroes who help gank the enemy a lot. I don't really buy this since Broodmother already has great survivability, but it could be a good idea to buy this depending on how you play her.
That's it for all the items I think one would ever want to put on a Broodmother. As said before if there are other items I didn't mention that you want to try out don't let that stop you, just know that as someone with over 200 wins as Broodmother under my belt these are the items I think can work well with Broodmother and why they work well with Broodmother. Now that we are done talking about items there is one last thing to cover; who is going to be making your life a breeze and who is going to be a pain in your thorax!
For allies of Broodmother there isn't particularly anybody that is too amazing. I mean all you really want is just good teammates who play well and listen to your requests and that's what will actually help you do better; but I added some heroes I think would make good allies anyway. Also to be honest with you guys, personally for me there aren't any heroes I would really consider absolutely hardcore counters to Broodmother that I just can't handle; but there are definitely***** heroes that can be annoying to deal with for various reasons. You should also be weary of teams of enemy heroes that have good synergy. Keep in mind though you can still easily deal with these heroes just as long as you play smart and don't make stupid mistakes. I think for many, Broodmother's best friends and worst enemies may really just be items. Also at the end of this section I placed two heroes that can cause really weird "WTF" moments for you. We're nearing the end of our guide, but let's dive into this one last important section.
Allies
Once again, what you want is good teammates that listen to your requests. You also want a well balanced team, but it can be nice to have heroes on your team that fill certain niches. It's good to have a hero on your team with a global presence since you may be all alone often and possibly could run into a tough situation. A hero on your team that can power up you and your spiderlings or use them to their advantage is nice too. A hero that can heal others is a helpful addition to any team. And hero if for some unthinkable reason you may not be able to chase all enemy heroes properly, a stunner/disabler as an ally could be useful. Any hero can be of help to you when played correctly. I will chose examples for each of the previously mentioned niches of heroes, but it is definitely not limited to only them.
Io, Nature's Prophet, Spirit Breaker, Treant Protector, and Zeus
These are the representatives for all the heroes who can no matter wherever they are, still help you whether it is to help you offensively, defensively, or escape a situation. These are just some heroes I specifically enjoy having around who can fill this role.
Lycanthrope and Sven
If there are more allies who can take advantage of your spiderlings feel free to tell me, but this is what comes to mind for me. Lycanthrope and Sven both have abilities that power up your spiderlings that provide you with even greater pushing power.
Chen, Dazzle, Io, Omniknight, and Witch Doctor
These are the representatives for all heroes who can heal because although you have great healing already, there are moments when a hero who can heal you will help you get right back into the action or live through a deadly ability. These aren't necessarily the best healers or even all that important, but just a few heroes that come to mind when I think "healer".
Bane, Lion, Nyx Assassin, Pudge, and Shadow Shaman
These are the representatives for all heroes who can stun or disable a target so that you can have an even easier time of being able to gank them. It never hurts to have a teammate who is able to do this. Of course there are way more than just these guys, but the above heroes were just some that came to mind.
Every hero can assist you in some kind of way but I just wanted to go over the main ways you may want to get assistance. So think about who you are, who your allies are, who you want them to be, and how you can synergize with them.
Enemies
In reality every hero can make a match turn into a living hell, some more than others, but these are the heroes that your will truly have to watch out for. You will still be an unstoppable force if you learn how to deal with these kinds of heroes, but you should never underestimate them. These are heroes you need to watch out for.
Bane, Lion, Nyx Assassin, Pudge, and Shadow Shaman
These are the representatives for stunners. Yep, these heroes aren't just at your arsenal but the enemy team's as well! While not really that big of a problem alone or even with a partner, these guys can initiate a group attack that will just completely and utterly destroy you. You will have never even had a chance. Be careful too because not only will you often singlehandedly win games for your team, you will also singlehandedly lose them for your team as well if you aren't careful! What you can end up doing is after you snowball way ahead of everyone else on your team, if you let the other team gang up on you and keep killing you and your spiderlings over and over then you will give them A TON of experience and suddenly the whole enemy team will have way more levels than the rest of your team. Be careful of this.
Batrider, Invoker, Puck, Weaver, and Windranger
These are the representatives for heroes with good escape mechanisms. Once again not too big of a problem if you play your cards right, just be weary that if you don't do a good job of ganking you will never be able to kill these heroes and you will just end up wasting your health, mana, and time.
Axe, Death Prophet, Keeper of the Light, Sand King, and Dark Seer
Okay now this is something VERY IMPORTANT that you actually HAVE TO WORRY ABOUT. These are the representatives for heroes with any sort of devastating AOE skill. You need to be SUPER careful around these heroes other wise god forbid they will kill ALL your spiderlings OVER AND OVER AND OVER and you will just be feeding them an insane amount of gold an experience you can't afford to give away. Not to mention your spiderlings sometimes take skills that deal average damage and turn them into skills that will just OBLITERATE you! Just learn how to deal with these heroes and no one will ever be able to hard counter you ever again!
WTF
These two will **** with your precious spiderlings in really weird ways that will not only make you stare at your computer screen and think WTF, but may also be a huge burden to you as well, due to the immense lag and large doses of cluster **** they cause. Here's how:
Undying
This zombie thing, this ***********er, will plop a Tombstone on the ground from time to time. You want to know what this Tombstone does? It raises a zombie from the ground for each unit near it. This includes your spiderlings. Yes, ALL OF THEM. Which may end up being like 20+ zombies. You think that's bad? In addition to this, these zombiescontinue to rise EVERY 3 SECONDS. You should also know each of these zombies deal around 25 damage per second. This may not seem like much but after 10 seconds when there are 100+zombies ****ing up your game with even more to come you will realize the potential this spell has. And nope, you can't spawn spiderlings from theses annoying things.
Rubick
Rubick can also **** with your spiderlings and although not as amazingly as Undying can, if Rubick does do so successfully it is probably the most embarrassing thing that can happen to you as a Broodmother player. Rubick can steal your Spawn Spiderlings ability and amass a spiderling army larger than yours. He may then choose to wage a spiderling war and if he wins he will have twice the spiderlings and you will have lost a PUSHING WAR to a ****ING RUBICK.
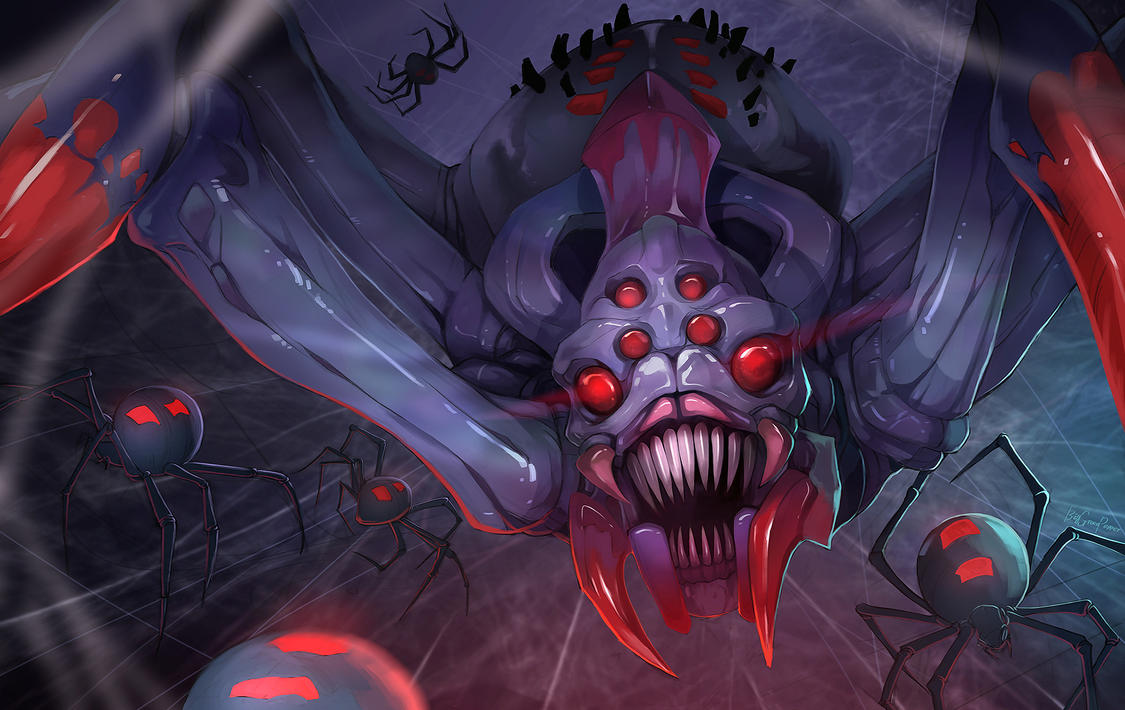
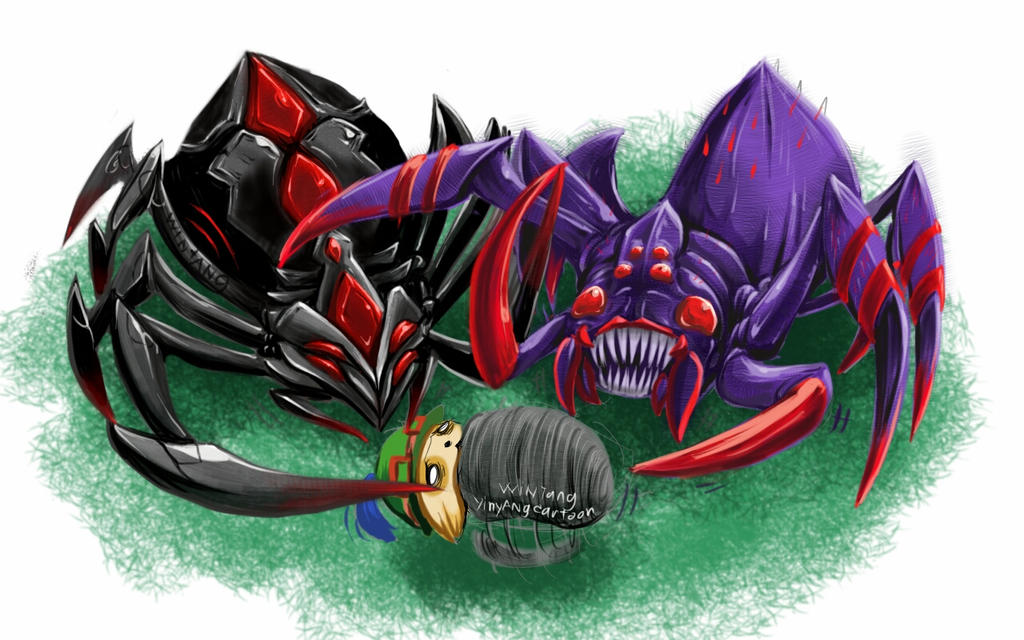
- I Will Add More And More Stuff Here In The Future Once This Guide Has Been Out Longer, But For Now Here Is Some Fan Art People Sent Me That You Sick Freaks (I Mean Wonderful Readers Who Should Totally Up-Vote My Guide) Can Fap To -
Now that you're done...doing your...thing...you can continue on to the last part of this guide!
Thanks you so much for reading this guide. I would love if you could tell me how I can improve on this guide like for example what errors I should fix or what I can add to each section! I would also love to hear your opinions on this guide too! I will read all your comments and if you end up helping me I'll even mention you/plug you in the guide's "Community" section! Leaving a good rating would also make me really happy since it would allow more people to see this guide and learn how to play Broodmother. It would also motivate me to make even more awesome guides and more things for the community.
If you want to hit me up on Youtube then follow this link: http://www.youtube.com/user/kyotosomo
I plan on posting DOTA 2 videos soon, including Broodmother gameplay and guides which I will add to this giant guide.
If you want to contact me on Steam, trade, or play matches with me then you should know that I am now using my old account because my newer one got partially taken down in a weird way for a really stupid reason. The name of the account I am currently using is kyotosomo. You can view my account by clicking the following link: http://steamcommunity.com/id/kyotosomo/
If you want to support me or just be up to date when a new guide or some other project gets released then make sure to subscribe to my Youtube channel where I will soon be keeping you updated on what I am doing. Or feel free to donate to me through Patreon if you want to thank me for spending so much of my time gracing the internet with my wonderful presence! You can check out my Patreon here: http://www.patreon.com/user?u=156911
I am planning lots of things right now and I am sure that I can bring you awesome content in the future.
Thanks again and have a nice day, because you guys sure have allowed me to have one!
DOTAFire is the place to find the perfect build guide to take your game to the next level. Learn how to play a new hero, or fine tune your favorite DotA hero’s build and strategy.


 Ring of Basilius


Quick Comment (20) View Comments
You need to log in before commenting.