Sando's Guide to Broodmother
Sando
November 9, 2015
Introduction
 Broodmother
 has a unique playstyle, building a network of nests around a single lane and gradually dominating the area with her horde of spider minions. She can be almost impossible to lane against, and can push down towers with ease. She can almost win the game on her own given the right situation and plays.
However, for a "carry" she doesn't scale brilliantly into the late game, or play well from behind. Snowballing successfully is very important to her, and helps explain her awful 43% pub winrate and 99th most popular hero status.
So, how do you play her successfully? Read on...
Strengths and Weaknesses
+ Excellent pusher
+ Fantastic health sustain
+ Partial invisibility and impassable terrain movement
+ Incredible lifesteal potential
+ Huge horde of minions
+ Great solo hero
- Poor base damage
- Poor stat gains
- Vulnerable outside webs
- Static playstyle
- Level and item dependent
- Countered heavily by some heroes
Spawn Spiderlings
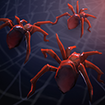
 Spawn Spiderlings is one of your key spells, acting as both a nuke and a way of spawning minions. The nuke itself is fairly standard, but any target killed by it or within 2 seconds of it hitting will burst into 1/2/3/4 spiderlings, which you then control.
Once you have at least 2 points in it, and some decent mana regeneration, you can start spamming it last hit creeps and build up your horde. You can also start harassing heroes with it once you have a  Soul Ring.
Spiderlings are key to your playstyle, they're quite tough with 450 hp (a melee creep has 550), and faster than most heroes if they haven't got boots yet. They will also spawn a "spiderite" (a small, weaker version of themselves) from any unit that they kill. All types of minion last for 60 seconds.
Spiderlings give opponents less bounty, but more experience, while the reverse is true of spiderites. It's REALLY important not to feed your minions to enemies. Both types do equal damage to buildings, but spiderlings are much better against creeps and heroes due to their movement slow and poison (worth about 16 damage against heroes).
Spiderlings have a number of uses:

Pushing towers and enemy creeps
Your minions can easily brute force their way through enemy creep waves and take down undefended towers due to their sheer numbers. With 450 hp they'll soak up considerable damage while units like you and siege creeps inflict the real damage.

Interrupting enemy pulls and blocking neutral camps
You only need one unit present to block a pull, and once you have webs in the area it's almost impossible for enemy supports and junglers to stop you blocking their camps.

Farming neutral camps
You can also send your spiderlings off to farm neutrals if you don't need them at present, while you have to avoid units like the Hellbears, your numbers will usually get the job done fairly easily and bring in some extra gold.

Scouting for incoming enemies
You should have a network of eyes within your webs providing vision of paths to your lane. A good
 Broodmother
 shouldn't be caught out unless enemies are using invisibility to avoid detection.

Attacking and blocking heroes
Spiderlings are actually pretty dangerous early on, with their slow and movement speed allowing them to completely surround and block in enemy heroes. Enemies with poor base armour/no damage block/escape are particularly vulnerable.

Providing cover for dives
Towers don't present the same fears for a
 Broodmother
 as for most heroes - spiderlings will easily soak up the tower attacks while you land the killing blows.
Spin Web

 Spin Web is your other signature ability - allowing you to cover a large area with a semi-permanent web that gives you a series of powerful bonuses. Webs are a really key part of your playstyle, giving you invisibility, unrestricted movement (unless recently attacked), a movement speed boost, and health regeneration.
Basically  Broodmother is not the same hero without her webs - and this is one of the key reasons we tend to stay in one area of the map instead of moving around like most heroes do. We're somewhat overpowered while in webs, and distinctly underpowered outside them.
 Spin Web's health regeneration gives us great sustain right from the start, and also allows us to spam our
  Soul Ring whenever it's off cooldown. The movement speed makes us difficult to gank, and relatively easy to chase down heroes in our zone of control.
As with any invisibility hero, it's vital that you don't RELY on the invisibility too much. Sure, it's very useful, but you need to be super-aware of enemies' inventories and when they have  Sentry Ward,
  Dust of Appearance etc. A good way of scouting for
  Sentry Wards is to have a spiderling or two near the enemy creep wave while you have no creeps present - if they're attacked, a
  Sentry Ward is present.
You should buy your own  Sentry Wards and attempt to take out enemy ones whenever possible and safe to do so. A
  Quelling Blade can be pretty useful here, and try to place your own
  Sentry Ward in an area where the enemy have no vision (you only need the true sight radius).
You'll also lose your bonuses immediately on leaving a web, so try to make sure they all join up (the radius is slightly bigger than the actual web graphic), and that you can move between them easily, with good escape routes.
Placing your webs well is also important, you should start by making sure you have them completely covering the lane between the two opposing towers, and also ideally have them extending to cover some impassable terrain or trees. If you're in the side lanes, extend them into the jungle as soon as you have 4 available. This allows you to contest pulls easily, and gives you more escape options.
Role
 Broodmother has a very clearly defined role - she's a #3, although farming priority is somewhat moot for her as she'll rarely be moving around too much, and people will only generally come to her lane to push or fight.
She can be played as either a mid or solo (generally offlane, but safelane too if you run an aggressive trilane), and it's really important to find the right matchup for her (more on this later).
Her primary job is to put tremendous pressure on the lane she's against - the heroes, the towers, and the jungle around it if offlane. This fits into her two main plans for winning the game:
1) Push/Snowball so hard you roll over the enemy team and take rax before 20 minutes.
2) Put lots of pressure on a particular lane, punishing the opposition if they leave it unattended, and creating space for a harder carry to farm.
 Broodmother also specialises in dealing with greedy picks - for example a hard carry and an AFK jungler on the opposition. From the offlane she can exert considerable pressure on the entire area, making the enemy jungle a no-go area.
She is generally referred to as a Carry, and while there is some truth to this, I think it gives a very wrong idea of how to play her. Yes she wants farm, yes she wants levels, but she's definitely a midgame carry, and a snowball one at that.
Brood falls off pretty hard as the game progresses for a variety of reasons:
- Poor primary stat gain (2.2 agility growth isn't great)
- Most skills don't scale particularly well
- Detection equipment becomes much more affordable for the opposition
This doesn't mean you're useless late game, but that you should know your limitations and the best timeframe for you to be effective.
Picking Broodmother
One of the key skills to being a good  Broodmother is knowing when to pick her, and when not to. Against the right opponents she can easily dominate or at least occupy multiple heroes and causes severe pressure on opponents. Against the wrong opponents she's just a squishy pest who you can shake down for extra gold.
So what causes Brood problems? CHEAP AREA OF EFFECT DAMAGE. Basically, any hero who has a spammable AOE damage spell, or *hell of hells* a SCALING AOE damage spell.
If enemy heroes can reliably blast your spiderlings without running out of mana any time soon, you've as good as lost the lane, and you're certainly going to struggle to push their tower down.
Without a good snowballing start, you'll probably remain a minor footnote to the game. Be aware that potent enemy heroes may even change lanes specifically to go against you, and may even follow you round the map to farm your spiderlings.
By AOE damage I specifically mean spells that hit an unlimited number of enemies in a given area, such as:
 Kunkka's
  Tidebringer
 Jakiro's
  Liquid Fire
 Tidehunter's
  Anchor Smash
 Sand King's
  Sand Storm
 Axe's
Axe's  Counter Helix
 Timbersaw's well, everything.
Even worse, those abilities that scale up when more targets are present:
 Legion Commander's
  Overwhelming Odds
 Earthshaker's
  Echo Slam
 Undying's
  Tombstone and
  Soul Rip (near enough)
Generally, I'd seriously consider a repick if these kinds of heroes are present in the game, or at least try to throw the enemy a curveball with an unexpected laning choice. The difficulty is that it's tough for you to change your playstyle - you need a good start, to be aggressive early on, and to sit in one lane pushing. You can't go too far outside that remit without being ineffective.
Good lanes for you are ones where the opposition heroes lack cheap AOE, armour and escape abilities. For example:
Carries:


 Soul Keeper
 Outworld DevourerLycanthrope


Supports and Misc:


These heroes you can consider "safe", everything else I would try to avoid, as although their standard build may not include much AOE, they will have abilities they can skill early on that will let them counter you (e.g.  Moon Glaives or
  Great Cleave).
Playstyle
Lurking under your network of webs with a vast army of minions at your command, you strike unseen against anyone who dares enter your domain.
Brood's standard play is to setup camp in the offlane and basically spend the entire game there. You arrive and get your webs setup early and are almost impossible to shift away from the lane without considerable enemy manpower being used.
There are two key things that Broods need early on - levels in  Spawn Spiderlings, and mana regeneration equipment. Once you have both, you should be actively building your army of spiderlings and also trying to pick off enemy heroes whenever possible.
You have decisions to make regarding harassment with  Spawn Spiderlings versus using it to last hit and get more of them - see how many consumables enemies have and if you can wear them down to the point they have to leave or you can go on them. Remember that you can even just kill them with spiderlings if they can't get away, and that the tower offs them minimal protection. You can even sit in the trees near the tower and pick them off with your nuke.
If you make a kill, or enemy heroes leave the lane, push their tower hard. If you take it, immediately move forward and start applying pressure on the next. You want to either get cheap towers, or force the opposition to come and defend it and leave themselves short elsewhere.
During this time, you should expand your webs to include as much of enemy jungle as possible. You want to both farm it, and deny it as a resource for the enemy team. You want them either too scared to risk venturing in there, or for you to have already picked off all the choicest creeps and left tiny amounts of farm in the camps.
Be aware that your strongest part of the match is from 5-20 minutes, and that you really need to have some impact during this time if you're going to give your team the best chance of winning. Generally, you want the game over as soon as possible.
Brood tends to be a very solitary hero who doesn't interact with her team anything like as much as most others, but still be aware that you're not playing a separate game, and that you can still carry a TP scroll and turn up at fights if you have  Spin Web available. Generally you'll tend to use fights as a time to split push enemy towers, but be aware of your options.
Items
Starting:


These are my usual sets of starting equipment, and depend a lot on who I think I'll be laning against, and what kind of setup their running. Against a standard trilane or a lane that's going to be a bit tough, I'll usually pick the first set of equipment.
Despite the sustain from  Spin Web, you still need
  Tangoes to get you off to a good start - you will get some harassment when last hitting, they may make a serious gank attempt on you, and you'll probably chew through some health using your
  Soul Ring until you get your webs to a high level. Not having
  Tangoes may leave you sat there regen'ing at 2-3hp second and unable to last hit, very bad.
The  Quelling Blade is an interesting one, but works with this particular build. Basically you hardly use
  Spawn Spiderlings at all to start with, saving your mana for when you can build an army quickly and do serious damage. Your base damage is utterly awful, and you'll struggle for last hits against any decent opposition, so the
  Quelling Blade solves a fairly serious problem for us.
The  Ring of Protection gives us a little more armour protection, and forms the basis for a
  Ring of Basilius which gives us more damage and mana regeneration, plus providing ~10% more protection for spiderlings once they start arriving.
Finally, we bulk out our stats a bit with some  Iron Branches. We'll sell them later on, but they're useful to "rent" in the short term.
The second build is basically a  Soul Ring rush (make sure you pickup the receipe so you can finish it with a Ring of Regeneration from the sideshop). It's for when you think you'll have an easy 1v1 or 1v2 and want to be able to start spamming spiderlings ASAP.
You can even consider a  Stout Shield if you think you'll have a particularly nasty lane, but this does tend to slow your mana regeneration items somewhat.
Core:


A nice well rounded core with lots of mana regeneration. The
 Soul Ring
 is an integral part of your kit, and you really want it by level 5 if possible. This means you can start spamming 225 damage nukes that spawn spiderlings as often as possible, while your health sustains well.
 Ring of Basilius
 gives us damage, basic mana regeneration and an armour aura that helps with our pushing considerably. Spiderlings have no base armour, so get considerable benefits.
 Power Treads
 should always be our boots of choice - providing attack speed and the stat of our choice (we can alternate between all 3 depending on what we need at the time).
Extensions:


Now we start to get to the really interesting items. Hopefully by this point you've taken down at least one tower and have become a real thorn in the enemy's side. All of these items are useful for you, but ideally you may even want the game over with before you get them all. Farming for luxuries is not in the plan.
 Orchid Malevolence
 is generally you first extension pickup - considerably improving your damage output and ganking potential. Everyone who counters you does so through their abilities -
 Silence
 them and you've got 5 seconds to tear them a new one and teach them some respect.
 Black King Bar
 is your escape and teamfighting item. You're very reliant on your lifesteal from
 Insatiable Hunger
 to keep you alive, so if you get disabled you're really in trouble. BKB lets you get involved and may be necessary to take barracks unless your team can split push effectively.
 Vladmir's Offering
 gives you some general lifesteal to help your sustain, and some extra damage. But really this pickup is all about the +5 armour aura it gives to your minions and team mates.
Luxuries:


As I've already mentioned, luxuries aren't something you especially want to build - because ideally the game will already be over. However, if you're snowballing hard and want that extra edge, these are the items you're looking for.
 Boots of Travel
 come into their own late in the game, but are generally useful for
 Broodmother
 anyway, allowing you to effectively run multiple nests across the map, and split push effectively.
 Assault Cuirass
 although your late game damage is nothing to write home about, combined with
 Insatiable Hunger
 it gives good damage output midgame, while providing another strong aura that stacks with
 Vladmir's Offering
.
 Butterfly
 gives evasion and considerably more agility, making you both harder to kill and more damaging.
 Monkey King Bar
 is a good counter to enemy evasion, and lets you hit much harder than people are expecting.
 Manta Style
 allows you to debuff effects like
 Dust of Appearance
, while boosting your movement speed and stats. The illusions can be an effective way of fooling enemies and split pushing.
 Necronomicon
 gives strong additional pushing power and true sight for
 Sentry Ward
 detection at higher levels.
Sample Build:


 Tango
Tango




 Pushing towers and enemy creeps


Quick Comment (19) View Comments
You need to log in before commenting.