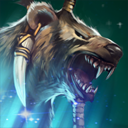
Lone Druid - Sylla and His Bear
kkoopman3
June 4, 2014
Purpose of this Guide
This guide is aimed at providing detailed information on how to effectively use Lone Druid. This guide will focus on laning, despite his categorization as a Carry/Durable/Pusher/Jungler. We will, of course, be focusing on the pusher and carry part of that categorization. Please rate and I hope you find this helpful!
Bio
Long before the first words of the first histories there rose the druidic Bear Clan. Wise and just they were, and focused in their ways to seek an understanding of the natural order. The arch forces of nature saw this, and so sought the most learned among them. Wise old Sylla, clan justiciar and seer, stepped forward for his kin, and to him was given the Seed with these words: 'When all of the world has dimmed, when civilization has left these lands, when the world is slain and wracked by the endless deserts at the end of ages, plant the Seed.' As he grasped his trust, Sylla felt his years recede and his vitality returned. Vast knowledge burst into his mind. He found himself able to project his very will into reality and, with some concentration, alter his own physical form as well. Yet subtle whispers and cruel ears brought word of the Seed and its power to other peoples, and a terrible war crashed upon the Bear Clan. As his ancestral home burned, Sylla took his burden and fled to the wild places. Ages passed, and time and myth forgot the Bear Clan, forgot Sylla and the Seed, forgot wondrous civilizations that rose and fell in Bear Clans wake. For millenia, Sylla has waited, waited for word from his deities, waited for peace to come to the ever warring realms, waited in exile and in secret for the end of all things and for the conclusion of his sacred commitment, preparing himself always to face and destroy whatever would dare threaten his purpose.
Why Choose Lone Druid?
Lone Druid represents a team within one hero. The uniquity surrounding him is his "Summon Spirit Bear" ability, which allows him to summon a permanent (until death) Spirit Bear companion that can carry items and levels up as the Druid does. All of Lone Druid's other abilities, with the exception of his ultimate, revolve around his interaction with his bear. Lone Druid is relatively weak by himself (health wise), but with his bear he can really pack a punch. His bear produces money for the Druid, as well, making farming and money production a very easy process. Most people don't choose Lone Druid, due to the difficulty of controlling two characters at once, but if he is used correctly, he can make for a fun and easy game.
Pros/Cons
Two characters in one
Low mana cost on all abilities
Superior last hits
Good lane control
His effectiveness peaks earlier than most heroes
There is a loss of HP upon the Bear's death
Useless without his bear
Quite fragile
Fairly item dependent
Harder to control two characters at once (NOT a newbie hero)
Overly dependent on gold intake
When not to choose Lone Druid
This is a list of characters that are effective counters to the Lone Druid. If you see them being chosen, I wouldn't suggest using the Druid.
Tidehunter
Pudge
Wraith King
Jakiro
Phantom Lancer
Luna
Lifestealer
Build Items
Note: To give an item to your Spirit Bear, simply click and drag the item from your inventory to the bear.

Healing Salve
This item is rather self explanatory. We can't have the Druid or the Bear dying, so it's smart to always keep about two of these on hand (one for you, one for use on the bear). These become less necessary later on, when you obtain the Tranquil Boots for yourself, and the bear gets the Hood of Defiance. A healing salve may be used on the Bear by activating the Salve's hotkey and clicking on the bear.

Iron Branch
The Iron Branch is a commonly used item early game for an early boost in your stats. You will be buying two of these to start out. Although most people will upgrade them to a Headdress or Buckler later, we will be keeping these throughout the game. You may discard them if you plan on buying something that isn't in the build above.

Orb of Venom
The Orb of Venom will be given to the Bear. The Orb of Venom is simply an early boost to the amount of damage the Spirit Bear can inflict. Later on, the Bear will be your primary source of damage and income, so starting early never hurts. The Orb of Venom is primarily helpful in farming creeps.

Boots of Speed
Throughout the course of the early game, you will be buying to Boots of Speed. They will be given to the Bear and yourself, respectively. The reason the first one is given to your Spirit Bear, is that the Bear is the mele© side of yourself. As such, he will need to move faster than the Druid in order to reach his target. Since the Druid is ranged, it is less important that he moves as fast (the Bear also has slower speed to start with so the Boots help to balance the two). Later, your own boots will be upgraded to Tranquil Boots and the Bear's will become Phase Boots.

Quelling Blade
The Quelling Blade will be given to your Spirit Bear. This is the second of a few items to turn your bear into a damage factory, the first being the Orb of Venom. The stats of the Quelling Blade should speak for themselves, as it will grant the bear 32% more damage on every attack. If the bear is attacking a non-hero unit, it will be even more. You will not be needing the active often. Although the Lone Druid is categorized as a jungler, this guide is focused more on laning and pushing.

Stout Shield
The Stout Shield will also be given to the Bear. The less damage he takes, the better. Although in his later levels he has a surplus of health, his upfront nature of attack makes him vulnerable at first. The shield will help to minimize his risk of death and keep him punching for as long as possible.

Tranquil Boots
These will be kept for yourself. At this point during the game, the Bear should have enough health to hold his own for a time. However, the Druid is always short of health and susceptible to enemy attacks (even creeps may kill him). The +4 armor and 12 HP/sec Regeneration is the key part of this purchase. Although the movement speed will help later with chasing heroes through the woods (see "Basic Strategy"), right now we will focus on the health benefits. 12 HP/sec is more than it sounds like. Watching your health meter fill up is like watching a supersonic airplane fly. Keep in mind, however, that when you attack or are attacked, the boots will "break" for 13 seconds, nullifying the health regen and reducing the movement speed.

Quarterstaff
The Quarterstaff is purely aimed at a future upgrade to an Oblivion Staff. Better to have the increased damge now than to wait for more cash.

Javelin
You will be buying two javelins. They're significant damage bonus is what makes these so important to have. They're later upgrade to a Monkey King Bar only increases their importance to your character. The possession of the two Javelins will make you almost as powerful as you Spirit Bear, which just perpetuates the cycle. More power = more gold = more power, and so on.

Phase Boots
The Phase Boots are for your Spirit Bear. They will be made from his Boots of Speed. At this point in the game, it is important to maximize the speed of your bear. Although the extra damage doesn't hurt, the speed is important in felling enemy heroes before they can escape to the cover of a tower. As long as you can keep up your hits and keep up with the foe, any kill is made easy. It's just a matter of patience.

Oblivion Staff
The Oblivion Staff is the final step in establishing yourself as a powerhouse carry. Although the Monkey King Bar and Hood of Defiance will come later, the Oblivion Staff will set you up for future success. The extra mana regeneration will allow you to spam Rabid. In other words? The Oblivion Staff is a DIY hero kill waiting to happen. The extra damage and attack speed are no small thing either, only increasing the effectiveness of your ranged attack.

Monkey King Bar
This item puts the "pain" in "druid". (wait what?) The additional 88 damage is the key to your late game power. The constantly increasing power of the bear coupled with your 170 damage per hit (presumably with the addition of "Rabid" versus heroes) will make you impossible to beat. This final gem in your crown of pain (I'm getting increasingly morbid today) is the final boost you need to wreak havoc on your enemies and their base. In a one on one situation, you could win anyday.

Hood of Defiance
The Hood of Defiance will be given to your bear. This is the item that will keep your bear alive for basically forever. Not that he needs it with his insane surplus of health, but this hood provides 8 HP/sec Regeneration. In addition, it provides +30% Magic Resistance, which is exceedingly helpful late game when magical enemies will have more items.

Hyperstone
This item is, of course, optional and probably not needed, but if you have the cash, why not? The Hyperstone is usually best for utterly annihilating any enemy towers and buildings in you path. If you haven't gotten down to 1 or less tower on each enemy lane by now, then you probably aren't going to and I wouldn't bother buying the Hyperstone. However, if you have faith that you will win (for example if the enemy has only destroyed two of your towers), then do it! This attack speed plus the additional damage and attack speed from previous items is an unrivalled combination (not to mention your everpresent companion, the Bear, adding extra hits).
Basic Strategy
Early Game:
You'll want to summon the bear immediately and farm like crazy. Although the Bear is strong no matter what, the Druid needs to get those items in to really make a difference. You need to keep back from the main fight, throwing in a thingy (not sure what it is) every now and then. Let your bear do most of the work. It's more OK if he dies. You can always resummone him. By level 10, you should have two Iron Branches, Boots of Speed, and some Salves. The Bear should have an Orb of Venom, Quelling Blade, Stout Shield, and Boots of Speed. Focus your energies on the Bear. You are really there to support him.
Mid Game:
By now you should be more in on the action. If a hero strays behind your lines, you need to be there. Get the Bear on top of him and through your things (till don't know what they are). The enemy usually runs into the woods or down the lane. Activate "Rabid immediately. Your job is to chase them, with the help of your boots, and slowly wear them down and take 'em out. By level 15, you should own Tranquil Boots, a Quarterstaff, and one or two Javelins (plus the early game stuff) and the Bear should have Phase Boots (plus the early game stuff). Now is the time to strike. This is when your effectiveness starts and you need to push your lane before the enemy can catch up.
Late Game:
If all goes well, the enemy will be down to one tower now. Basically, your goal is to maintain your forward position. DO NOT push into the enemy base without the help of your teammates. Although, you should be tanked on damage and health regen, two or three enemies can still overpower you. Don't do anything rash. We cannot have you dying at this late stage. You should purchase the Oblivion Staff and Monkey King Bar (and have the above). The Bear should have a Hood of Defiance (plus the above).
Attacking the Opposing Base:
Once your team is in the base, you may solo buildings as you wish. However, never go farther than your farthest teammate. If three or more of the enemies are dead, than this is fine, but the key to Lone Druid is to not overextend. You need to be spamming "Rabid" and probably using your True Form to take out enemies and towers.
Advanced Strategy: Laning
I always choose to lane. Generally speaking, your shortest lane is ideal, as it acts like the last 10 yards in American Football. For those of you who don't watch American Football, I will explain. In the last 10 yards before the end zone, the defense becomes more compressed and it is harder for the offensive team to get through this wall of men. Similarly, in DotA, the short lane is more compressed. The towers are the same distance apart, but there is more protection on your side of the river since you are within the range of your tower. The push may be harder, but the defensive payoff is enormous. It also makes levelling an easier process.
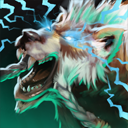
When engaging an enemy hero or tower, always activate "Rabid." This ability nearly doubles the damage done by Sylla and his Bear. If you get an enemy's health low enough, he will usually run down the lane or in the woods. Always opt for a pursuit. It may seem trivial, but getting early kills is imperative to Lone Druid's strategy. It will help with gold and experience, further increasing the raw power of Syllabear the Druid.
While laning, push whenever possible. Getting an early advantage help Sylla in the long run. Get down the lane as quickly as possible. DO NOT advance to the enemy's base without aid from your team. You're doing great so far but don't get overconfident and die. If you feel threatened, use your ultimate to discourage any attacks from enemy heroes.
Advanced Strategy: Jungling
Sylla is categorized as a Pusher and a Jungler. Most players advise jungling in the early game, while I suggest laning with a support. However, if you're on a lane with a hero that will soak up all the cash, jungling is a great alternative. Taking out two camps should get you to level two, and "Rabid." Proceed to harder and harder neutral camps to make more gold and earn more XP. Most people suggest doing this until around level 6 or 7, when you get your ultimate. You may then revert to laning, described in detail above.
Additional Tips
Due to the bear's very high health, he can be used to tank neutrals and jungle early game, or provide good lane control with harassment and last hitting, with very little risk of dying.
With two or more levels of Synergy, Rabid can be continually used, since the cooldown does not exceed the duration.
Spirit Bear can attack enemies up to 1100 units away from Sylla. If his distance exceeds this, the attack will stop.


 Healing Salve


Quick Comment (6) View Comments
You need to log in before commenting.