Earth Carrier 2.0 - By: Codykoko
Codykoko
February 18, 2012
Earth Shaker 101
'Q' Fissure - Slams the ground with a mighty totem, fissuring the earth while stunning and damaging baddie units in a line. creating an impassible ridge of stone.
Fissure Duration - 6 Seconds
Stun Duration - 1/1.25/1.5/1.75
Damage - 125/175/225/275
Cooldown - 15 Seconds
Mana - 125/140/155/170
-- This ability is extremely important with positioning. With correct judgment you can isolate a baddie from their team for a great kill or save you ally from the baddie team chasing after him/her.
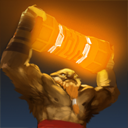
'W' Enchant Totem - Empowers Earthsakers totem, causing it to deal extra damage on his next attack.
Bonus 75%/150%/225%/300%
Duration - 14 Seconds
Cooldown - 7 Seconds
Mana - 50
-- This ability is a great way to last hit creeps for a good gold supply. But above all its a great spell to use for pounding a baddies face in.
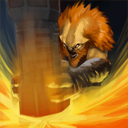
'E' Aftershock - Causes the earth to shake underfoot, adding additional damage and stun to nearby baddie units when earthshaker casts his abilities.
Radius - 300
Duration - .3/.7/1.2/1.5
Damage - 25/45/75/115
-- This ability works great with keeping baddies on lock down for atleast 4.5 seconds or more!
'R' Echo Slam - Shockwaves travels through the ground, damaging baddie units. Each baddie hit causes an echo to damage a near buy unit.
Scepter Upgradable - Causes each initial hero hit to echo twice.
Radius - 500
Echo Damage - 40/55/70
Damage - 200/265/340
Cooldown - 150/130/110
Mana - 145/205/265
-- It is best to cast this when around allot of baddie units or baddie heroes. The damage output is far greater this way.
Farming and Laining
A great way to Last hit creeps is to wait for them to get low on hp and use your Enchant Totem to proq Aftershock for the kill. Then follow it up with a hit for %+ damage to a creep for another last hit.
IF on the longer lain don't forget to train the neutral creeps into your wave to kill them and to keep that lain from being pushed to far. Do not keep doing this if your partner cant hold the lain without you. Or if you have a jungler killing creeps
Reasons for my items
the reason i get Shadow blade and blink dagger is for multiple get away or initiations.
Blink Dagger - is a great way to start a fight. You can blink in and ult causing the baddie team to get stunned and have a chunk of their hp taken away.
Shadow blade With Blink Dagger - You can blink in attack in whatever way is needed and keep fighting. But if it gets to harry then you can shadow blade away. Or shadow blade in attack in what manner you want and if i hero does not hit you within the time they are stunned you can blink away.
The heart is mainly because it gives 40 strength... now that 40 strength to give 40 more base damage per hit.. and when enchant totem is used with the heart on that's 40 damage + an extra 120 damage to a an outstanding 160 extra damage per enchanted totem hit. On top of the fact it gives the effect of health regain and a massive amount of HP.
The Orchids is for more damage output within the damage speck. As well as keep some champs from stunning you and or killing you.
The Daedalus is mainly for its damage and the criting effect. on heroes with 15 armor or more i can get 1k crits easy with just a Enchant totem effect active, shadow blade, heart, orchid's silence, and of course boots.
The Vanguard is obvious for survival
Shiva's Guard is for The armor and intelligence. In the tank speck its mainly for its armor but has a big role in the support speck.
The Refresher Orb is to keep the baddies on lock down while you and/or your allis mess them up.
The Sheep stick is to keep people from stunning you who can stun you or from messing your allies up.
I get mana boots so that i can stay in my lane for as long as i can and farm regardless if i am going support, tank, or Damage.
Fighting
USE CONTROLLING THE FIELD LOGIC
Sheep stick anyone that is outside the stun of any of the combo's you are doing.
USE SITUATION LOGIC
Mainly just use logic in the situation you are in. If you are running low on health cast shadow blade, or just run away to get into a safe place. If not dieing then proceed to do what you think would be best.
INITIATION
Cast shadow blade or Blink to start the fight.
BASIC COMBO
Echo Slam -> Hit -> Enchant totem -> Hit -> Fissure -> Hit
-- Keep in mind that you can alternate the ability casting to your own personal preferences but its basically the same.
GENERIC COMBO
Cast Enchant Totem -> Wait for a few seconds(4-5) -> INITIATION -> BASIC COMBO -> USE SITUATION LOGIC
-- This combo is the best way to start the fight with Earth Shaker. Also its best to predict a fights by pre-casting enchant totem, so that you can have your enchant totem ready for the BASIC COMBO when starting or participating in the fight.
I will type all the hit rotations out from here so that it can be a little more understood.
DAMAGE: EARTHSHAKER
-- Keep in mind this build is meant for dealing out a lot of damage.
DAMAGE: PERSONAL COMBO 1
Cast Enchant Totem pause for a second or 2-> Cast shadow blade's effect -> Run in and apply Orchid's silencing effect to a target -> Echo Slam -> Basic hit with the Enchant Totem effect on -> Enchant totem -> Hit -> Fissure -> Basic hit -> USE SITUATION LOGIC
-- This is a great combo to give plenty of time make sure a group of champions are near each other or near the creep wave.
DAMAGE: PERSONAL COMBO 2
Cast Enchant Totem pause for a second or 2-> Blink Dagger on the target -> Echo Slam -> Apply Orchid's silencing effect to a target -> Basic hit with the Enchant Totem effect on -> Enchant Totem -> Hit -> Fissure -> Basic hit -> Cast Shadow Blade -> Predict their moments -> Enchant Totem -> Hit -> USE SITUATION LOGIC
-- This is a great combo for getting around wards and gem users.
Note 1: Obviously Do not do my DAMAGE: PERSONAL COMBO 1 if knowing they have it warded or has a gem, DAMAGE: PERSONAL COMBO 2 is far better for getting around them.
Note 2: Obviously the last 3 steps in DAMAGE: PERSONAL COMBO 2 will not work as well if they can see you trying to position yourself in front of them but do the best that you can.
Note 3: That if they have a long distance to run and you well know where their allies are feel free to keep chasing them to eventually blink ahead of them and cast Enchant Totem. Once again hit the target and by now fissure should be off CoolDown or be rather close, so cast it if needed.
Note 4: If everything is done like listed a sub note to Note 3: Is that blink dagger and Fissure have relativity similar CoolDown. I personally cast Fissure on the target if they are a about 1/2 the length of Fissure's distance and if i am not sure ill land my enchant totem after blinking. Casting Fissure will give ample time to land Enchant Totem after Blinking onto the target to kill the target if hes not already dead.
TANK: EARTHSHAKER
-- Keep your core items because they are still needed to start the fight and for a get away if needed.
TANK: PERSONAL COMBO
Cast Enchant Totem -> Wait for a few seconds(4-5) -> INITIATION -> BASIC COMBO -> AOE effect of Shiva's Guard -> USE SITUATION LOGIC
-- Nothing to special about this Build mainly because your not suppose to do much but start the fight and not die.
SUPPORT: EARTHSHAKER
-- More or less a little more complicated because now you have to pay attention to mana and other situation factors.
SUPPORT: PERSONAL COMBO 1
Cast Enchant Totem pause for a second or 2-> INITIATION -> BASIC COMBO -> Cast Mana Boots -> Refresher Orb -> Fissure -> Cast Mana Boots -> Hit -> Enchant Totem -> Hit -> USE SITUATION LOGIC
-- This is a really mana costing combo so i avoid using Echo Slam the second time. Also the creeps and/or other allies should or might be dead by now so Echo Slam would not be able to be used to its fullest. Almost full mana is needed but this combo can be pulled off with just the core items and a refresher orb.
SUPPORT: PERSONAL COMBO 2
Cast Enchant Totem pause for a second or 2 -> INITIATION -> Echo Slam -> USE CONTROLLING THE FIELD LOGIC -> Basic hit with the Enchant Totem effect on -> Fissure -> Hit -> Enchant Totem -> Hit -> Cast Mana Boots -> Refresher Orb -> Fissure -> USE CONTROLLING THE FIELD LOGIC -> Cast Mana Boots -> Hit -> Enchant Totem -> Hit -> USE SITUATION LOGIC
-- This combo is to show the pride and joy of earth shaker and his ability to control the battles. Combo 2 is able to be done with Sheep Stick and Refresher orb. Once again i did not Echo Slam again for the same reasons of it being not needed and far to mana consuming.
SUPPORT: PERSONAL COMBO 3
Cast Enchant Totem pause for a second or 2 -> INITIATION -> Echo Slam -> USE CONTROLLING THE FIELD LOGIC -> Basic hit with the Enchant Totem effect on -> Shiva's Guard AOE -> Fissure -> Hit -> Enchant Totem -> Hit -> Cast Mana Boots -> Refresher Orb -> Fissure -> USE CONTROLLING THE FIELD LOGIC -> Cast Mana Boots -> Shiva's Guard AOE -> Hit -> Enchant Totem -> Hit -> USE SITUATION LOGIC
-- Theirs almost no more that can be done or should be done... This is the Ultimate combo that an Earth Shaker could do to keep the baddie team on lock down Yet again i did not echo slam again due to the lack of mana or the fact that you would have to have full mana to do it in the first place in combo 3..
SUPPORT: PERSONAL COMBO 4
GENERIC COMBO -> Mana Boots -> Shiva's Guard -> Refresher Orb -> BASIC COMBO -> Mana Boots -> Shiva's Guard -> USE SITUATION LOGIC
-- This combo will be best if their are no baddies outside the stun zone of Earth Shaker.
Note 1: The Support Earth Shaker is a lot harder to play than the other ones, Mainly because theirs a lot more you may have to do. I do not recommend this build if you are new to Earth Shaker
Note 2: Remember after casting refresher orb your blink will be off cooldown. So if you need to catch up to some one and the first battle is over chase after them by Blinking and Do what you can to either kill them or stun lock them to let allie champs catch up for the kill.
Note 3: If starting off with sheep stick or a different way just stick with the foundations and work around with what you have started. Make sure you use everything you have before refresher orbing more max potential output.
Creep blocking and ganking block spots
 Number 1, 2, 3, 4, 5 are spots to cast Fissure, and i have included the direction that works best.
The 'X' marked in yellow are placed where blocking does not work. Mainly because they spawn outside the walling zone in which fisher should be cast. The Dire side i show 1 way they walk around and the blocking is not used to it fullest.
Number 6, 7, 8, and 9 are perfect spots to wait to cast fisher to block champions so that their alli can not help in the fight or so that they will have to run a long distance to get back around. i will explain the locations in more detail
Number 6 is a interesting spot. their is a gap in the trees that you can hide in will be undetectable unless they run south of the normal creep wave rout. This blocking will leave no run away for the champion and will give you and your allie ample time to poke their health away.
Number 7 is a spot near the hidden shop. their are 3 trees kinda at an 'L' shape that you can hide in and will be unseen from all views outside of the hidden shop zone. Do not go to far north in the trees that is not where the set up is at. mainly as long as you can cast fissure to the other side to the other tree line then you'll be in the correct spot.
Number 8 is also in the hidden shot zone. their is no perfect spot but just make sure you cast it from 1 tree line to the other.
Number 9 is one of my favorite spots. their are 2 random trees by the tower. the trees are position in a way to where if you go in the middle and click hold possition you will not move form them. their is no sight of you till the creep wave is basically hitting the tower. this is a great spot to cast fissure to block the baddie champ near your tower and your alli champ(s) near them. make sure to cast it at like a 45 degree angle or a little less. its not a horizontal cast.
Tip 1: i normally try to block the range champs away from the melee champs. this is because the range champs normally are easier to kill and because other way around does not work as well. If the melee champ is hugging the fissure wall the range champ can still assist in poking.
Tip 2: Remember you can position yourself in these spots to help alli's get away from baddies. since fissure will be a low rank for a while jsut casting them to get them stund might not work all the time when their are 2 or more people after your alli. but if he is extremely low do what you can unless your already positioned in one of the purple spots.


 Clarity


Quick Comment (8) View Comments
You need to log in before commenting.