Hell To Pay - A Guide To Lion (7.20c)
Masked_Man98
November 28, 2018
Lore
Once a Grandmaster of the Demon Witch tradition of sorcery, Lion earned fame among his brethren for fighting on the side of light and righteousness. But adulation corrupts. With powers surpassed only by his ambition, the mage was seduced by a demon and turned to evil, trading his soul for prestige. After committing horrible crimes that marred his soul, he was abandoned. The demon betrayed him, striking better deals with his enemies. Such was Lion’s rage that he followed the demon back to hell and slew it, ripping it limb from limb, taking its demonic hand for his own. However, such demonoplasty comes at a cost. Lion was transfigured by the process, his body transformed into something unrecognizable. He rose from hell, rage incarnate, slaying even those who had once called him master, and laying waste to the lands where he had once been so adored. He survives now as the sole practitioner of the Demon Witch tradition, and those who present themselves as acolytes or students are soon relieved of their mana and carried off by the faintest gust of wind.
Update Log
2/3/2018
Patch 7.08 update
11/28/2018
Patch 7.20c update
Skills Overview
Earth Spike
|
|
|
Type:
Targets:
|
|
|
Active
ENEMY UNITS
|
|
|
Rock spikes burst from the earth along a straight path. Enemy units are hurled into the air, then are stunned and will take damage when they fall.
|
Level
1
2
3
4
|
|
|
|
|
|
|
|
|
Mana
70
100
130
160
|
|
|
|
|
|
|
|
|
Duration
1.4
1.8
2.2
2.6
|
|
|
|
|
|
|
|
|
Cast Range
500
500
500
500
|
|
|
|
|
|
|
|
|
Damage
80
140
200
260
|
|
|
|
|
|
|
|
|
Length
825
825
825
825
|
|
|
|
|
|
|
|
|
CoolDown
12
12
12
12
|
- Hit units will fly for 0.52 seconds before the real stun is applied (included in the duration on the infobox to the left).
- The ability can only be targeted at a range of 500 units on enemies or the ground, but hits units up to 950 units away.
- The rock spikes travel for a length of 825 units, and hit units in a 125 radius around this line, therefore enemies at a distance of 950 units are hit.
- The wave of tendrils moves at 1600 units per second.
 Earth Spike
 is
 Lion
Lion's signature skill. It has countless functions, from harassing heroes and clearing creap waves, To stunning enemy heroes after initiation.
This spell is maxed first because of Its damage and stun and lower mana cost than
 Hex
Hex.
In laning phase, If you want to harass your enemies, try to use the best of this skill, Hit both of your enemies and at least three creaps to provide easy last hits for your carry.
When
 Earth Spike
 is on cool down,
 Lion
Lion is a less dangerous target so be cautious and stay away from jungle.
hex

|
|
|
Type:
Targets:
|
|
|
Active
ENEMY UNITS
|
|
|
Transforms an enemy unit into a harmless beast, with all special abilities disabled.
|
Level
1
2
3
4
|
|
|
|
|
|
|
|
|
|
|
|
|
|
|
Mana
125
150
175
200
|
|
|
|
|
|
|
|
|
|
|
|
|
|
|
Duration
2.5
3
3.5
4
|
|
|
|
|
|
|
|
|
|
|
|
|
|
|
Cast Range
500
500
500
500
|
|
|
|
|
|
|
|
|
|
|
|
|
|
|
AoE
N/A
N/A
N/A
N/A
|
|
|
|
|
|
|
|
|
|
|
|
|
|
|
CoolDown
30
24
18
12
|
- Instantly destroys illusions.
- The target will have a base movement speed of 140.
 Hex disables experience gain.
- Has an instant cast time.
- Lion's hex transforms the target into a frog (It's good to know.)
 Hex
Hex is
 Lion
Lion's single target disable and temporarily turns a dangerous enemy into a harmless little animal.
In team fights,
 Hex
Hex should be cast after
 Earth Spike
 on the most dangerous enemy hero (That most dangerous enemy can be a nuker in mid game or a hard carry in late game.)
In manfights and roaming, hex should be cast first. This has three benefits:
1-It is impossible to not to stun a hexed target.
2- Hex
Hex affects the target instantly (Unlike
 Earth Spike
) and leaves no time for your enemy to react.
3-If another enemy shows up, you can still manage to stun both of them with earth spike and escape but you can't do the same if you cast
 Earth Spike
 first.
In laning phase,
 Hex
Hex is your plan B when
 Earth Spike
 is on cooldown and trouble comes at your door step.
 Hex
Hex mana cost is quite high and deals no damage so we put one point in level 2 and max it after
 Earth Spike
 and
 Mana Drain
.
 Hex
Hex Disables XP gain. Cast it on the more level dependent enemy hero when a siege creap is being destroyed.
AoE
 Hex
Hex is not blocked with
 Linken's Sphere
.
Mana Drain

|
|
|
Type:
Targets:
|
|
|
Active
ENEMY UNITS
|
|
|
CHANNELED - Absorbs the magical energies of a target enemy unit by taking mana from it every second.
|
Level
1
2
3
4
|
|
|
Mana
10
10
10
10
|
|
|
Channel Time
5
5
5
5
|
|
|
Cast Range
850
850
850
850
|
|
|
AoE*
400
400
400
400
|
|
|
Mana Per Second
20
40
60
120
|
|
|
Slow
20%
24%
28%
32%
|
|
|
CoolDown
16
12
8
4
|
- Destroys Illusions after 0.1 seconds.
- Can continue to drain as long as the target is within 1200 range from Lion and they remain visible.
- Total mana drained (100 / 200 / 300 / 600).
- Will stop draining if the target runs out of mana.
- Cannot be dispelled by anything.
- +3
 Mana Drain Multi Target causes Mana Drain to automatically target 3 additional units within 400 radius around the primary target.
- Only targets units which have a mana pool. The targets are chosen randomly, there are no priorities.
- The secondary links do not break if the unit turns spell immune, invulnerable, hidden or runs out of mana. It does break when exceeding the link break distance.
- All links break as soon as the primary target cannot be affected anymore.
 Mana Drain
 is your bread and butter skill. It allows you to have no mana problem in laning phase and slurp your target's mana and provide extra utility with the slow. It is a very reliable harass tool cause it costs no mana (Really it doesn't) and lowers your opponents efficiency specially strength heroes who always have mana issues in early game.
The link breaks once your target gets 1200 units away or enters the fog of war so plant a ward on the high ground if you are mid lane position 2 ganker.
You can harass you targets with both
 Earth Spike
 and
 Mana Drain
 you can drain more mana and refill your mana pool after casting
 Earth Spike
 but keep
 Earth Spike
 cooldown and
 Lion
Lion's vulnerability without it.
It is an exelent zoning tool in team fights. After initiating and casting your disables and nuke, you can get back and cast
 Mana Drain
 on an enemy melee hero, he has two choice, stand and fight while running out of mana or get away and be useless in teamfight for some valueble seconds. This very risky usage of
 Mana Drain
 can give you enough mana for the rest of teamfight.
Casting
 Mana Drain
 is risky, standing in one place turn you into a very easy target for skills like
 Sacred Arrow
,
 Meat Hook
 and
 Sun Strike
 and auto attacks so stay away from the jungle when there are these heroes in enemy team and position near your lane's creaps to avoid such skills.
Finger Of Death
|
|
|
Type:
Targets:
|
|
|
Active
ENEMY UNITS
|
|
|
Rips at an enemy unit, trying to turn it inside-out. Deals massive damage.
|
Level
1
2
3
|
|
|
|
|
|
|
|
|
|
|
|
Mana
200 (200*)
420 (420*)
650 (625*)
|
|
|
|
|
|
|
|
|
|
|
|
Damage
600 (725*)
725 (875*)
850 (1025*)
|
|
|
|
|
|
|
|
|
CastRange
900
900
900
|
|
|
|
|
|
|
|
|
AoE*
325
325
325
|
|
|
|
|
|
|
|
|
Cooldown
160 (100*)
100 (60*)
40 (20*)
|
|
|
|
|
|
|
|
|
Damage Bonus Per Kill
50
50
50
|
|
|
|
|
|
|
|
|
Kill Grace Duration
3
3
3
|
 Finger of Death is blocked if holder has
  Linken's Sphere but it is not blocked if holder is secondary target in the 325 AoE.
 Finger of Death's damage is delayed by 0.25 seconds, so it can be avoided by turning spell immune, invulnerable or hidden after cast.
- Cannot be disjointed.
 Aghanim's Scepter causes
  Finger of Death to be cast on all enemy units within 325 radius of the target.
- This includes invisible enemies and enemies in the Fog of War.
- An area indicator is added to the mouse pointer, to make easier to tell whether or not enemies are within range.
 Finger of Death
 is
 Lion
Lion's
Magical damage nuke. It gives lion huge killing potential and has a very good cast range that makes it great for killing fleeing heroes who are out of your allies reach. Although it is very tempting to kill steal with
 Finger of Death
, You shouldn't do it cause kill's gold has much more use for your allies (You are a hard support anyway.) but since getting bonus damage is important, If you must, kill steal. In teamfights it should be cast on the most important hero or the most squishy one.
Talents
+75 Cast Range OR +90 Damage
Although
 Lion
Lion is a LOT more right click than other supports, His skills mostly have short cast range. Since you are a hard support, You are not able to build
 Aether Lens
 most of the times. Better cast range makes you a better laner and roaming partner. Also the break distance of
 Mana Drain
 and travel distance of
 Earth Spike
 is increased.
+120 Gold/Min OR +200 Finger of Death Damage
See it your self. In the current meta where kills matter the most, Extra damage now, is better than agh's extra damage later. BUT if your enemies are too tanky, get the gold talent for buying luxury items or to ward and deward better.
+500 Health OR +2 Mana Drain Multi Target
 Lion
Lion is a very squishy hero and +500 health makes his late game easier but remember supports like
 Lion
Lion are not built to tank damage. +2
 Mana Drain
 Multi Target provides extra utility and refills you mana poll in a blink. See how your item build is. If you managed to build goodies like
 Force Staff
 and
 Aghanim's Scepter
, then go for +2
 Mana Drain
 Multi Target. If not, then tank up a little to survive.
+1000 Earth Spike Range OR +325 AoE Hex
Both talents are good but AoE
 Hex
Hex is just too good to be untouched. +1000
 Earth Spike
 range can be useless when you have
 Blink Dagger
 and initiation skills but in some cases can be used to secure a kill from a LONG distance or to farm two jungle camps at once. AoE
 Hex
Hex is simply game breaking and it can change the team fights in late game.
Item Analysis
 Tango &
  Healing Salve


|
 Lion has poor starting armor and he is very squishy so in order to stay in lane, Sustain your health and babysit your precious carry, You need health and both Lion has poor starting armor and he is very squishy so in order to stay in lane, Sustain your health and babysit your precious carry, You need health and both  Tango and Tango and  Healing Salve help you to do so in laning stage. Healing Salve help you to do so in laning stage.
|
 Bracer

|
 Bracer means cheap stats, more health, magic resistance and stronger laning. Don't hesitate to build this item if you're having a hard time in laning phase cause Bracer means cheap stats, more health, magic resistance and stronger laning. Don't hesitate to build this item if you're having a hard time in laning phase cause  Lion is very squishy and more health helps a lot. Lion is very squishy and more health helps a lot.
|
 Tranquil Boots

|
Your only boot choice until the ultra late game  Boots of Travel. Boots of Travel.  Tranquil Boots provide movement speed and HP regen which is lost when you are attacked. Tranquil Boots provide movement speed and HP regen which is lost when you are attacked.  Tranquil Boots help you sustain your health in lane and masks your bad base movement speed. The more movement speed you have, The better you perform as a support. (Faster warding, Pulling and stalking.) Tranquil Boots help you sustain your health in lane and masks your bad base movement speed. The more movement speed you have, The better you perform as a support. (Faster warding, Pulling and stalking.)
|
 Magic Wand

|
Cheap stats and charges that instantly restore health and mana which saves your life and helps you keep casting spells, Make this item a solid build for  Lion. And since your item build as a support is slow, Lion. And since your item build as a support is slow,  Magic Wand will stick in your inventory for quite long time. Magic Wand will stick in your inventory for quite long time.
|
 Blink Dagger

|
A  Lion with no Lion with no  Blink Dagger is a useless Blink Dagger is a useless  Lion and in one word he would be "Food". Lion and in one word he would be "Food".
 Blink Dagger gives Blink Dagger gives  Lion the element of surprise, mobility and escape mechanism. Quick blink initiations are very crucial as Lion the element of surprise, mobility and escape mechanism. Quick blink initiations are very crucial as  Lion and Without it, you will not be able to use the best of your skills. Lion and Without it, you will not be able to use the best of your skills.
Note: In some games saving up 2k gold is not an easy task and you are not able to afford  Blink Dagger on time. So the next option for initiation is Blink Dagger on time. So the next option for initiation is  Force Staff. Force Staff.
|
 Force Staff

|
I highly recommend building this item right after  Blink Dagger. It allows you to get in and out of fights without a scratch. Blink Dagger. It allows you to get in and out of fights without a scratch.  Force Staff provides ton of mobility for you and slow allies who lack mobility and a great escape mechanism for YOUR allies (You already have Force Staff provides ton of mobility for you and slow allies who lack mobility and a great escape mechanism for YOUR allies (You already have  Blink Dagger, manage to use it even if you're hurt.) Blink Dagger, manage to use it even if you're hurt.)
|
 Observer and Sentry Wards

|
A support who doesn't ward is better to uninstall DotA. Warding is one of the most important tasks of a hard support.
 Observer Ward last 6 minutes and provides vision and restocks in shop every one minute So always keep it on cooldown. Observer Ward last 6 minutes and provides vision and restocks in shop every one minute So always keep it on cooldown.
 Sentry Ward provides true sight in a shorter area than Sentry Ward provides true sight in a shorter area than  Observer Ward and has no limited cooldown and last 4 minutes and they are necessary for dewarding cause wards are invisible. Observer Ward and has no limited cooldown and last 4 minutes and they are necessary for dewarding cause wards are invisible.
More Warding Explanation in "How To Be A Good Support 102"
|
 Smoke of Deceit

|
 Smoke of Deceit provides invisibility and bonus movement speed for you and your nearby allied player controlled (like enchanted units). It contains 1 charge and invisible heroes can not be detected with true sight. The invisibility is lost if you attack or get too close to an enemy hero or tower (1025 radius). Smoke of Deceit provides invisibility and bonus movement speed for you and your nearby allied player controlled (like enchanted units). It contains 1 charge and invisible heroes can not be detected with true sight. The invisibility is lost if you attack or get too close to an enemy hero or tower (1025 radius).
 Smoke of Deceit has countless uses, From roaming and planting wards to roshing or counter roshing and gank. Smoke of Deceit has countless uses, From roaming and planting wards to roshing or counter roshing and gank.
|
 Dust of Appearance

|
 Dust of Appearance is a direct counter against invisible heroes (Buying dust is not an excuse for not planting Dust of Appearance is a direct counter against invisible heroes (Buying dust is not an excuse for not planting  Sentry Wards.) It contains two charges and covers 1050 radius around the caster with revealing dust that blows invisible heroes cover and slows their movement speed (Slow doesn't work on Sentry Wards.) It contains two charges and covers 1050 radius around the caster with revealing dust that blows invisible heroes cover and slows their movement speed (Slow doesn't work on  Shukuchi), The effect will also prevent them from turning invisible. Shukuchi), The effect will also prevent them from turning invisible.
|
 Glimmer Cape

|
A real support item.  Glimmer Cape provides +20 attack speed and +15 magic resistance that helps a lot against Magical damage harass but we build it for its great active, Glimmer. Glimmer grants 45% magic resistance and invisibility for 5 seconds after 0.6 seconds delay. Very useful to set up ganks or escape using both Glimmer Cape provides +20 attack speed and +15 magic resistance that helps a lot against Magical damage harass but we build it for its great active, Glimmer. Glimmer grants 45% magic resistance and invisibility for 5 seconds after 0.6 seconds delay. Very useful to set up ganks or escape using both  Glimmer Cape and TP or Glimmer Cape and TP or  Glimmer Cape and Glimmer Cape and  Force Staff. Also, Glimmer's extra magic resistance is a great counter against Magical damage DoT (Damage over time) and Force Staff. Also, Glimmer's extra magic resistance is a great counter against Magical damage DoT (Damage over time) and  Reaper's Scythe. Reaper's Scythe.
|
 Aeon Disk

|
 Aeon Disk is a great item for casters and heroes who rely on their spells. Aeon Disk is a great item for casters and heroes who rely on their spells.  Aeon Disk keeps you alive and protects you against burst damage and applies a strong dispel. gives you life, mana and status resistance which reduces the duration of debuffs on you. Aeon Disk keeps you alive and protects you against burst damage and applies a strong dispel. gives you life, mana and status resistance which reduces the duration of debuffs on you.
|
 Aghanim's Scepter

|
 Lion's butter and bread item. Lion's butter and bread item.  Aghanim's Scepter provides +10 all attributes, +200 health and +150 mana and upgrades Aghanim's Scepter provides +10 all attributes, +200 health and +150 mana and upgrades  Finger of Death by adding 325 AoE and decreasing mana cost and cooldown. AoE high Magical damage nuke is serious business even in late game. It takes away at least 30% of the target's health (The more kills, The more damage.) and destroys illusions instantly. A strong late game counter against cancer heroes and Finger of Death by adding 325 AoE and decreasing mana cost and cooldown. AoE high Magical damage nuke is serious business even in late game. It takes away at least 30% of the target's health (The more kills, The more damage.) and destroys illusions instantly. A strong late game counter against cancer heroes and  Manta Style builders like Manta Style builders like  Broodmother, Broodmother,  Phantom Lancer, Phantom Lancer,  Chaos Knight, Chaos Knight,  Terrorblade, Terrorblade,  Naga Siren, etc. Naga Siren, etc.
|
 Aether Lens
 Eul's Scepter of Divinity

|
A strong counter for skills like  Sacred Arrow, Sacred Arrow,  Meat Hook, Meat Hook,  Ravage, Ravage,  Skewer, Skewer,  Storm Hammer, Storm Hammer,  Avalanche, Avalanche,  Blood Rite and any other skill that takes time to have effect by making your self invulnerable for 2.5 seconds. Some buffs and debuffs are also purged when using the active. Blood Rite and any other skill that takes time to have effect by making your self invulnerable for 2.5 seconds. Some buffs and debuffs are also purged when using the active.
In teamfights, you can cast cyclone on the most dangerous enemy hero (Or the one that is not hexed).
|
 Ghost Scepter

|
This item is a great help when you are dealing with heroes who can deal ALOT OF Physical damage but little or no magical damage like  Ursa, Ursa,  Faceless Void, Faceless Void,  Drow Ranger etc. It can be used as an escape mechanism by casting it and using TP But be cautious around casters cause when Drow Ranger etc. It can be used as an escape mechanism by casting it and using TP But be cautious around casters cause when  Ghost Scepter is active your magic resistance will be -4% (with out any items). Ghost Scepter is active your magic resistance will be -4% (with out any items).
|
Early Game
Deny Harass (No Last Hit!)
The game begins! You have bought the courier and two wards which you have to give one of it to the off-laner. The mid laner may ask for two shards of tango so give them to him. Then head to the bounty rune spot near the safe lane with your precious carry and plant a ward and to have more vision on power up rune spot and prevent pregame's start ganks.
If your team wants to taste blood before the game starts, follow them the the target spot and kill the poor souls. Warding provides ton of advantage in these scenarios.  Lion can't deal much damage in level 1 but he can stun his targets for a good amount of time that makes him suitable for pergame's start ganks.
 Lion has a very strong presence in lane. 600 attack range,
  Earth Spike and
  Mana Drain gives him lot of options for harassing his enemies specially melee heroes.
Harassing your opponents with  Earth Spike has its own pros and cons.
Pros:  Earth Spike damages lots of creaps in its way and those damaged creaps are easy farm for your carry and keeps the enemy melee hero away from the creap wave.
You can also cast  Mana Drain on the stunned target or auto attack him.
Cons: It pushes the lane and makes farming for your carry harder when creap wave reaches tower. So it's better to be used once every 3 creap wave to prevent push.
 Lion is most vulnerable when
  Earth Spike is on cooldown and smart enemies abuse this fast and try to kill you or worse kill your carry. That one point on
  Hex is there to prevent such things.
Zoning enemy off laner is incredibly important and has huge impact on mid game.  Lion can zone easily, yet efficiently with
  Mana Drain.
Deny!
Denying creaps is one of the most important tasks of a support in lane. It makes farming for enemy off-laner harder and delays his item build process and Since you are not allowed to last hit, your secondary source of XP and gold in laning phase will be denying, (Main one is Kills.)
Having goals always help to keep going, When you have no goal, You'll become lazy after some minutes.
+For beginners, 1 deny per minute is good.
+ for experienced players +3 (Be aware babysitting, harassing and denying is not all of your job, there are wards to be placed and camps to be stacked too.)
Pick runes of bounty!
Bounty runes are supports best friend! While carries are farming in lane and your reliable gold is being spent on wards and consumables, Bounty rune are the best source of gold and XP available for supports who already spend notable amount of time in jungle, stacking and pulling camps and warding.
 Lion
Lion is a good lane partner because of the opportunities he can create for his carry with his disables and nuke based on his skill build and early game strength.
Sometimes all a
 Juggernaut
 or
 Ursa
Ursa needs to kill a hero is a simple stun or hex. Sometimes all a
 Sven
Sven or
 Monkey King
 needs to kill a hero is casting their nukes on the hero you
ALMOST killed with
 Finger of Death
. Be smart.
Summery Of Early game:
Deny,
Harass and
Last hit ONLY the dying creaps that are out of your carry's reach (If melee),
Set up kills with your disables, Never kill steal, pick bounty runes and Plant wards and stack and pull camps
(In depth explanations in "How To Be A Good Support 102").
Dual Roaming
 Lion is not a roaming support because he is a babysitter and he can't deal much damage without his ultimate but he has two strong disables that makes him suitable for being a roamer's partner who can deal lots of damage and almost all roamers sync with
  Lion's skill build and play style.
When pick Lion as roaming partner?
It's not wise to be roaming partner when there is a very hard carry in your team that need a lot of care.
 Lion
Lion must be picked as a roaming support in teams which are mid game oriented and have carries who can take care of them selves and do not need lots of attention and have one roamer. (Very situational, Yet very strong)
Benefits of Dual Roaming
+ Killing faster and safer.
Solo Roaming always had its own risks. Death chance is high
1-If roamer fails to kill his target fast enough before the enemy team reacts.
2-When one on one manfight suddenly turns into a handicap or a trap (enemies have good warding).
Unlike solo roaming, Dual roaming had much less death chance specially if done with a support like
 Lion
Lion who can provide vision with warding and blind enemies with dewarding. All roamers have abilities they can rely on when things just go bad. Two roamers together can survive most of handicap situations or buy enough time till their teammates come and aid them.
+ Much easier warding specially for deep wards.
A babysitter support's legs are always chained by his carry (hard carry). He can't go far for better warding or stacking and he can barely plant a deep ward. This was one of the reasons
 Lion
Lion was not picked in TI17 cause he is THE babysitter. But roaming partner
 Lion
Lion is a lot more free. He is able to ward the whole crucial spots while roaming with his partner and plant some deep wards once in a while.
Item Build
Staring Items


|
|


|
|

|
|
|
Good movement speed is crucial. You need to stay near your partner while warding, dewarding and stacking camps and you will not able to do that with your low base movement speed unless you want to join the party when it has ended.  Wind Lace and Wind Lace and  Boots of Speed provide that. Boots of Speed provide that.  Wind Lace starting item build has vision advantage over Wind Lace starting item build has vision advantage over  Boots of Speed starting item build and it is the recommended starting item build cause vision edged your team in pregame's start ganks. But if there is another support who will buy the Boots of Speed starting item build and it is the recommended starting item build cause vision edged your team in pregame's start ganks. But if there is another support who will buy the  Animal Courier or wards, go for Animal Courier or wards, go for  Boots of Speed. Boots of Speed.
 Clarity on Clarity on  Lion? Really? Yes while roaming, there is no range creap to get mana from and draining mana from jungle camps is too risky and not enough. Lion? Really? Yes while roaming, there is no range creap to get mana from and draining mana from jungle camps is too risky and not enough.  Clarity helps a lot and one Clarity helps a lot and one  Clarity can be all used while roaming to the next target. Clarity can be all used while roaming to the next target.
The next thing is a lovely  Observer Ward. In roaming, vision is very useful, It keeps you one step ahead of your enemies and allows you to approach them with a proper plan. Observer Ward. In roaming, vision is very useful, It keeps you one step ahead of your enemies and allows you to approach them with a proper plan.
|
Core Items


|
|

|
|
|
Yes, Core item build is same as other item builds but  Magic Wand can be skipped Magic Wand can be skipped
cause you don't get as much charges as you get in lane when you're roaming and its gold can be used to purchase extensions faster.
 Tranquil Boots should be built ASAP, Take one rune of bounty or two in order to get it. They are crucial for you as a roaming partner. Aside from very good movement speed it provides, Boosted health regen is the reason of its importance. Roaming hurts and between targets, Tranquil Boots should be built ASAP, Take one rune of bounty or two in order to get it. They are crucial for you as a roaming partner. Aside from very good movement speed it provides, Boosted health regen is the reason of its importance. Roaming hurts and between targets,  Tranquil Boots heal you fast and prepare you for the next target. Tranquil Boots heal you fast and prepare you for the next target.
 Blink Dagger is both an initiation and chasing tool. It provides additional mobility and escape mechanism and can be used to set up ambushes. Blink Dagger is both an initiation and chasing tool. It provides additional mobility and escape mechanism and can be used to set up ambushes.
Notes:  Medallion of Courage is mostly should be used for extra protection for your partner or to focus the target. More armor on Medallion of Courage is mostly should be used for extra protection for your partner or to focus the target. More armor on  Lion is useless. Lion is useless.
|
GamePlay
Your job as a roaming partner is to roam between the lanes and jungle, gank their laners and greedy junglers. Simple right? No, Not really. During roaming or ganking you can be ganked or ambushed or walk in traps. The risk of failure can be high if against smart players and good support; And all of this can be avoided with
Warding.
River wards and vision on high traffic areas can prevent ganks (For all your allies not just you) and provides useful information that can be used to set up ambushes or ganks.
Warding enemy jungle is crucial for ganking junglers.
Ganking junglers has strong impact on mid game and late game. Ganking early game junglers and delaying their core items cripples enemy in mid game. Heroes like
 Enigma
 and
 Legion Commander
 really need to have their
 Blink Dagger
 to be fully effective. What if you can delay it for 5 to 10 minutes?
Ganking hard carries who really need their jungle farm is the ultimate goal for the roamers. Ganking Hard carries like
 Anti-Mage
 and
 Medusa
 nonstop and delaying their key items or better yet forcing them to leave jungle decrease their efficiency and stronger late game for your team.
Ganking Techniques
Direct Approach:
Requirements: Nothing!
Direct approach is the the easiest and the most reckless Type of ganking with your partner. It is super simple. You and your partner ping a hero in lane and tell your ally in the lane that you want to gank then you'll approach them from jungle and kill them. Same thing goes for jungle ganks.
Scissor Gank:
Requirements: Allied hero in the target lane and a partner with good damage out put.
This technique is a little more difficult (Cause this one actually has a plan dawg!)
and it is used to gank dual lanes and it is much safer and has more rate of success.
In this method you must hunt like wolves and it has three steps:
1- Your partner shows up in lane and damages the targets. Making one target retreat is enough to make the other on do the same.
2- While your partner and that allied hero are damaging and then chasing the targets, You must be 1500 units away, Watching for any enemy hero who comes to aid them and waiting for the retreating target to come towards you. If no one is going to help them, blink in, cast
 Earth Spike
 on both of them and let your allies have the kill.
If one or two enemies are coming to help, Wait for the right moment until all of them come closer to each other then blink in, cast
 Earth Spike
 and try to stun all of them, Nuke the more squishy helper and
 Hex
Hex the other one (if there is any). BAM! Three or four heroes to kill for your allies.
Warning: This scenario can be ruined if all of their team comes to help. Even two good roamers and one ordinary carry can't handle a 3 vs 5. So don't be greedy, Blink in, Stun them and kill them if they are close and your partners cant kill them in less than 2 seconds, Then run away.)
There are tons of other ganking techniques but their roots end up to these two techniques. Mastering them is the gate for more advanced techniques.
Mid Game
Mid game is  Lion's time to shine. By this time, your carry must be capable of taking care of him self so Leave Him! Yes you must leave him alone in lane. When you are no longer in lane, You won't soak XP that results a stronger mid and late game for your carry by giving him level advantage over his opponents.
Leaving the lane and your carry liberates you and allows you to be able to manage your own XP and gold. Keep staking camps and pull them for more gold and XP, Pick up bounty runes and gank every time the opportunity shows up.
One of the things you'll notice about  Lion is his remarkable ganking potential in mid game.
Gank enemy jungles and force their junglers out of them. Keep their jungle unsafe. While doing that pick up their bounty runes if possible and plant some deep wards for further ganks. Ganking enemy lanes is your most important task in mid game. The goal is to out perform your enemies and more importantly, To keep your teams level and farm above theirs.
When both jungles and lanes are unsafe and their solo farmers don't dare to farm alone, They start to regroup which results in lower farm and lower XP for all of them and this makes their late game much harder because of the farm and level advantage your team.
Teamfight
Now we've got business. In teamfights your role is initiation. Initiating as a support is a lot more different than initiating like
 Tidehunter
,
 Sand King
 and
 Centaur Warrunner
 they are tanky and their job is to initiate, cast their spells and soak damage. Supports are not made for soaking damage in teamfights (No matter what some people say. Supports are no longer punching bags, Not after the patch 7.00) So your job is to initiate, cast your spells and get out. Combination of
 Blink Dagger
 and
 Force Staff
 is incredibly useful.
Here is your spells priority in teamfights:
The key for success is being quick, Not only in blinking on the best position but also in casting the spells on the right targets. If you blink in and don't be able to cast them fast, you'll die fast and sometime you won't be able to nuke somebody. That why you must cast
 Earth Spike
 first.
Casting
 Earth Spike
 as the first spell is crucial. You must stun at least 2-3 targets and if lucky, 4-5 targets for 2.6 seconds which is like a
 Ravage
.
Who should I hex? The best answer is the target that was not stunned and is able to kill you fast. If you managed to land a perfect
 Earth Spike
 that hit all your enemies, Forget about standing till 2 seconds of stun pass then hexing their most dangerous hero, Nuke him with
 Finger of Death
 instead and fall back then use your
 Hex
Hex and
 Mana Drain
 on the closest hero and try to not get your self killed.
If you are losing teamfight and allied heroes are retreating, Join them but stay close to them and stun and
 Hex
Hex enemy heroes who come close, Buy more time for your allies to TP away then blink on a safe place and run or TP.
If You are winning teamfight and enemies are retreating, Don't hesitate to blink close to them and stun them. Save kills but don't kill steal.
I Need Some Space Dammit!
At the end of laning phase, you need to farm in lane alone. But where should the carry go? Remember those camps you stacked? well while you are getting the needed gold and XP in lane, Carry must be farming the stacked camps. This provides a lot of gold and XP for both of you.
This method can be used in late game as well but mid game is the best time for it.
How To Be A Good Support 101
Support role is one of the hardest roles in the whole game. Huge amount of pressure is on you from both your enemies and your allies. Your job is not just to help your core allies kill the enemies, You must plant wards, Buy support items like  Smoke of Deceit and
  Dust of Appearance, stack and pull camps, sacrificing your self for your carry and many other tasks.
Supports are like the back stage staff who do their best to keep the show perfect while all glory goes to the guy on TV. Support are those invisible people who do a lot of things to push their team to victory but they are never seen. If your team wins, Your core heroes are praised the most but if your team loses, Everyone start to blame you (Even the feeders). But you do not pick a support hero for any of that, You pick it up cause The Team Needs You.
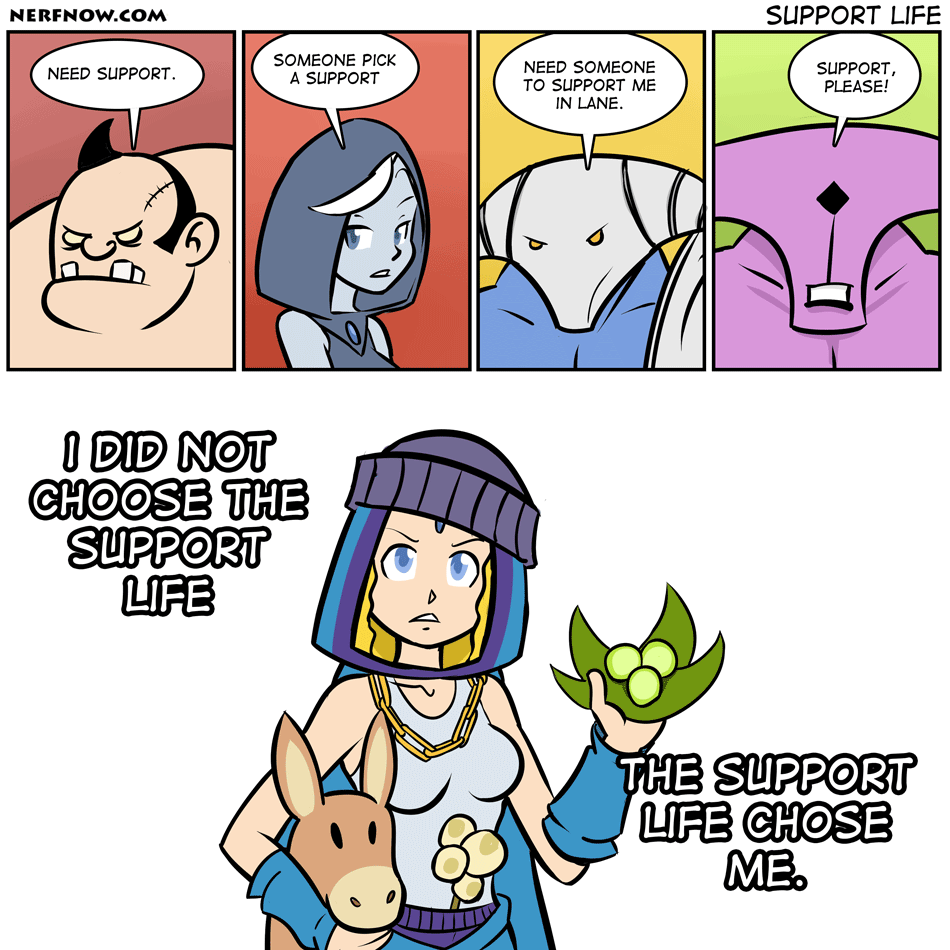
Don't even think about those stupid 5 carry teams which are very popular in pubs, A team needs at least one support. The reason heroes like  Bloodseeker and
  Pudge are very successful in pubs and low MMR pubs is all because of lack of supports in their teams. The easiest and simplest counter against 99% of pub stompers is Warding and I have never seen a carry spend his gold for wards just because a
  Pudge is killing everyone and already has 20 kills.
Yes supports impact in late game is not comparable to core heroes but they provide a strong late game for they by providing countless opportunities for them in early and mid game and warding. A team with no supports and no warding is always vulnerable to ganks and when there are 5 carries in a team, In dual laning, both carries try to get the last hits for them selves and this has no result but slow farming process for both of them.
Before being a good support, You must be a good person or at least a responsible one. You must be willing to prioritize your carry's need to yours. Offer the last hits on a silver plate and harass anyone who comes to deny it from your precious carry. Take care of your carry and keep him fed and safe even if he's dumb as dog'd foot, Babysit him until he grows stronger and "Carry" you to victory.
Should I sacrifice my self to keep my carry alive? Yes if necessary but you're better try to keep both of you alive, Most of your gold is being spent on support items and wards and death can delay your item a lot. Try to keep a disable off cooldown in order to save your carry (And your self).
Communication Is Ammunition
Trying to chat and create a bond between you and your teammates is always beneficial. But it is hard sometimes. All of use are used to play the game while keeping our heads down and remain silent so nothing bad can happen. All of us have been crushed and burnt in chats because of super toxic players who may even be capable of poisoning
 Venomancer
. This is a normal and understandable approach but not the best one.
Try to act like a human being. Say hi in order to break the ice and detect the toxic players. If someone said some thing like "STFU NOOB" or something like that, Mute or ignore him (He is beyond saving) and try to make conversation with none toxic players. Be friendly but also serious ask about the game and your position in it, Ask things like: "Which lane should I go?" Or "Who is going to be in my lane?" This way you show them you are a normal human being (And not a snake) and you care about the game and team.
Creating a bond will leads to better cooperation and if lucky, Friendship. Your team mates fine it much easier to rely on a good player who is willing to cooperate and actually talks than a stranger who says nothing and just plays the game.
Sometimes two idiots in your team start to argue and sweat to each other. It may sound like a healthy conversation among teenagers (Don't say it) but it has horrible results for your team. It tears the team apart and risks the victory.
Try your best to calm everyone down and for sake of god don't try to do it by swearing at them it like
Trying to put out fire with Gasoline.
If your desperate attempts lead you no where tell other players who are not arguing to mute them and continue to play.
That
Report bottom is there for a reason, It keeps scums away from normal player and makes the community a little bit cleaner.
Report toxic player and people who feed on purpose But
Don't Get Carried Away!
Compliment and Motivate (It won't kill you) :
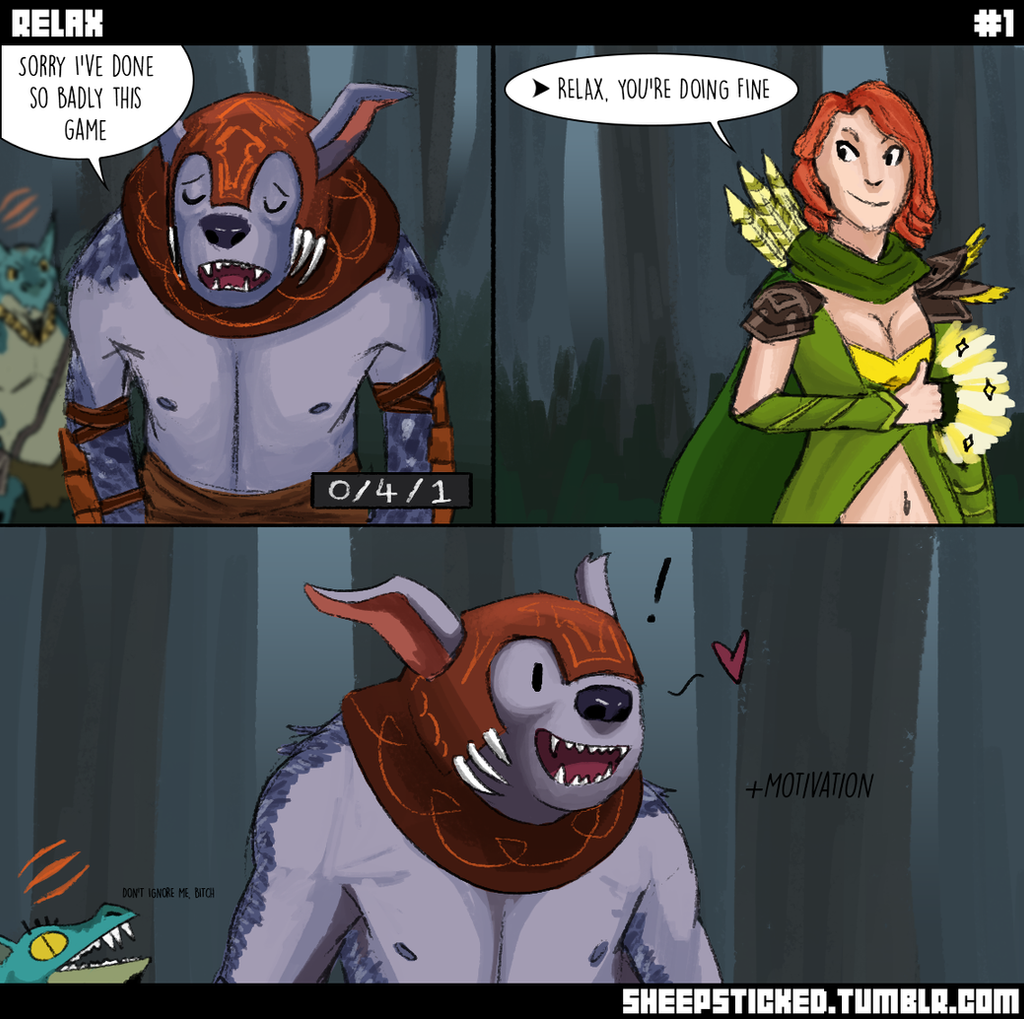
One of the easiest ways to create bond with your teammates is complimenting them. Saying "well played" or calling specifically-"wp huskar" won't take too much energy and time (It's even in the chat wheel) It makes them feel respected and special and it has a huge effect on your partnership with that hero.
Motivating is a very useful way for boosting a teammate's performance. If a teammate has poor performance,
Never rub it on his face, He already knows he's bad, Saying thing like "U suck" Or "Uninstall dota and never come back" just disappoints the poor guy even more and destroys his performance. Instead try to be nicer.
Give him suggestions. Explain his major mistake politely and wish he learns his lessons.
Keep your team informed:
Keeping your teammates informed of the events in the match using Scan, Ping and chat wheel properly is the key for fast reactions and counter attacks.
You just saw the enemy
 Weaver
 went out of the lane and there is more than a minute left till next bounty rune respawn, Cheesy huh? Hold Alt and click on weaver's icon on the top of screen and immediately a "Weaver is missing" pops in the chats then select "Careful" from chat wheel. This way your teammates notice it and they can take proper action against it.
Keeping your teammates informed about remaining cooldown of your spells specially ultimates will let them know when it is the right time for a gank or teamfight and will prevent disasters like "Oops
 Shallow Grave
 was on cooldown sorry you're dead".
Letting your teammates know about enemies remaining health and mana or key item allows your teammate to take proper actions against them It helps an
 Anti-Mage
 know when to use
 Mana Void
 and assures
 Sniper
s about lethality of their assassination (Expand these examples and thing bigger. Consider your teammates skills and play style). It prevents waist of ultimates on
 Linken's Sphere
 or painful encounters with
 Blade Mail
 carriers.
Being more specific is always better than simple pings. Pinging the enemy's
 Blade Mail
 is good but pinging it, selecting "careful" and typing "Huskar" is better (Having general knowledge about counters of all heroes is a great help here.)
How To Be A Good Support 102
Well now that you know the basics, Let's go for three of the most important tasks of a support shall we?
Map Awareness
One of the most important tasks of a support is planting wards aka
Warding. Warding provides vision and true sight across the map and avoids ganks or it can be used to plan one, It provides useful information about the enemies actions and allows your team to be one step ahead of them. During
warding, You must consider your team's and your enemy's team potentials in early, mid and late game ganking, pushing, Roshing, etc.
+How many enemy heroes are capable of ganking? How many of yours?
+Is the enemy team capable of split pushing? How about your team?
+How many of your enemies can solo Roshan? How many of your allies?
+Is the game going to become more defensive or aggressive in the next 10 minutes?
These are the basic questions you must ask your self when you want to plant wards if you want them to be more effective. There are three main types of warding in the game:
Rune Wards,
Deep Wards and
Defensive and
Aggressive Wards.
Rune Wards:
Rune wards provide vision on power up runes and bounty runes. Vision on power up runes boosts the mid laner's performance greatly and allows him to have much better rune control. Having vision on bounty runes in your own jungle doesn't provide much but planting a
Deep ward close to the enemies bounty runes creates ton of opportunities for ganking the heroes who come to pick them, It also provides good amount of information about your enemies actions cause they are placed in high traffic areas.
Deep Wards:
The most risky wards to plant yet the most rewarding. Deep wards provide tons of information about the actions of your enemies. You can see if their support is stacking camps, See if they are preparing them selves for a gank or smoke gank or if they want to go for Roshan or push the lane. But in order to place that valuable wards, You must enter your enemy's territory and this is very dangerous so it is better to be done with a partner or with
 Smoke of Deceit
.
Defensive And Aggressive Wards:
These wards are usually planted when your team wants to push a certain lane or when enemy want to do the same. Some provide vision around the target tower and some provide vision in deep parts of jungle (It can be yours or theirs.) These wards destroy the element of surprise for your enemies and put it in your teams favor.
Dewarding
Dewarding is as crucial as warding for a support, Making the enemies blind and preventing them to be able to plan ganks and counter attacks. The first thing you must do it to guess the location of the ward. The easiest spots are power up rune wards, They are very important wards specially during early to mid game and most supports plant on or two wards to have vision on the power up rune spots. So plant a
 Sentry Ward
 where it covers the area you believe there is a wards and deward it.
Those were the easy ones but the tricky ones are enemy deep wards and their locations can be guess according to the enemies
Reactions to your teams actions. If your team is up to something and
somehow your enemies keep having the upper hand, Then you must look for their deep wards. The major warding spots should be checked first then the best spots around them that can provide quite the same vision.
Think Like Your Enemies. Ask the same questions you asked your self in the begining of the game before you start warding and try to have the enemy support's point of view.
Your teams is planning to regroup somewhere, use smoke and go Roshan then a minute later all enemy team gank and crush you? Well unfortunately I have to say there is a deep ward close to the location your team regrouped.
Stacking And Pulling
Stacking is the act of pulling a natural creap out of their camp (Spawn box) by drawing aggression of the natural creaps around
XX:53 to
XX:55 and let them follow you in the right direction that put you and the creeps out of the spawn box. When clock hits
XX:00, One additional creap will spawn. BAM! The camp is stacked.
Pulling the creap wave is the act of luring the neutral creeps into your lane creep wave. When encountered, your creaps will follow the natural creaps back to their camp and fight them. Pulling has many benefits:
1-You creaps will tank the damage and makes it easier to kill the natural creaps easier and this means easy XP and gold for you.
2-Your creaps tank huge damage and even die and encounter enemy creap wave with notable delay this pulls the creap wave towards your tower and makes the farming for your enemies harder and riskier.
Note: There are slight differences between camp stacking time, The picture below lets you know about the exact time and direction of pulling and stacking camps.
Spawn Blocking: By placing a ward inside the spawn zone of creaps, You prevent creap spawning in that camp. It is crucial for preventing your enemies to pull the creap waves.
What are the benefits of stacking?
The most important reason for stacking camps is
Securing Farm. When the laning phase is about to end,When your carries start to head to the jungle and farm ancient camps and you farm the lane by your self (Cause it gives you the XP and gold you need to be effective in further stages.) Stacked camps give carry very good amount of gold and XP and boosts their item build progresses greatly.
Very Important Tip: Always plant a ward that provides vision on the camps you stacked. This prevents camp blocking or worse feeding enemy carries with your hard stacked camps.
THE Wet Job

One of the hardest support task to get used to is to "volunteer" for being the living bait. The whole thing looks super simple on the paper: You act like a lonely delicious support but in fact, your buddies are hiding in the fog of war and waiting for a fool to show up, A fool shows up and tries to kill you then your teammates jump on the poor guy and kill him. Sounds easy huh? Nope The whole plan collapses if enemy supports have warded the area you want to be a bait. Technically they will out smart you and them kill you by ganking you from unexpected side or trap you inside your own trap by bringing some more muscle. So always have two
 Sentry Ward
s around to detect the wards and locate invisible enemies. Another thing is you must actually
Look like a bait, Just standing somewhere is not enough (Unless you act like you are waiting for power up rune to spawn (Every four minutes remember!)). Many times being mobile is a better option, You are a support and they will think you want to plant a ward or do something else and they attack you and many times, It will be their last mistake.
Warding is the key element for successful baiting, Just walking around with 1 or 2 teammates close to you and hope to see someone is not working (Well it works in pubs, Like "Hey I know nothing about DotA 2" Kind of pubs). Good warding and one or two deep wards allow you to drag the poor guy into the trap. It lets you have a
Plan.
Baiting is mastered only with practice, failing and learning from those failures. Good Luck.
Last Words: Congratulations now you are a better support (I hope). The lessons I taught you are just the push, "YOU" are the one who has a whole journey ahead of him or herself. Practice, Practice and Practice even more cause supporting is not just knowledge about where to ward and when to stack, It's a skill that can be mastered over time.
Good luck and Have fun.
Here is also a link that might be useful for you since the map has changed after patch
7.20
Now that you know how to support properly, It's time to see who we can help and who we can kill as
 Lion
Lion.
Friends And Foes
Friends:
Every hero in the game can benefit from two strong disables and can kill highly damaged heroes with no mana. but there are some highlighted heroes.
 Lion
Lion is every right click melee hero who can't stick to his target like
 Phantom Assassin
 and
 Slark
Slark best friend. Both
 Earth Spike
 and
 Hex
Hex let these heroes stick to their poor target and kill it with ease.
Any hero who has spells with annoying delay or spells that need time to deal full damage benefit from multiple target stunned with
 Earth Spike
.
Building
 Aghanim's Scepter
 and picking +3
 Mana Drain
 targets talent is necessary when these heroes are in your team. They pull enemies into a certain location and turn them into great targets for your AoE nuke and
 Mana Drain
 Lion
Lion excels with any other hero who can deal burst damage and dominate the early and mid game with them.
 Lion
Lion basically turn
 Legion Commander
'
 Duel
Duels into animal abuse. Free and easy
 Duel
Duels and if you feel like she is not able to kill her target, Nuke it and let LC have her victory.
Foes:
 Lion
Lion only relies on his spells and with out them, He is useless. Building
 Eul's Scepter of Divinity
 is recommended since it purges the silence.
 Medusa
 and
 Visage
 and
 Bristleback
 don't care how much damage
 Finger of Death
 deals, Their built in damage reduction absorbs a lot of damage and makes
 Finger of Death
 like a joke for them. Ignores these targets and nuke others.
What makes
 Spectre
 very dangerous to your team is
 Dispersion
 damage return. 22% level 4
 Dispersion
 damage return really hurts your team if you were stupid enough to cast
 Finger of Death
 on her.
Never Nuke her with
 Finger of Death
.
Conclusions
 Lion is a good hero and can be played properly when you have good knowledge of his strength. Underestimating and overestimating his power has no result but failure and this is why
  Lion is hard to master but he can be mastered in time.
Enjoy playing him, Keep your KDA sky high, Kill steal if you have to and have fun.
You can also check out my other guides Here
If you have ANY questions, or you want to discuss something you've read in here, feel free to ask me in the comments here or via my Instagram: @soroush_s77
Masked_Man's out
 Wind Lace


 Hello welcome to Masked_man's guide to
  The hardest part of the game for
 One of the easiest ways to create bond with your teammates is complimenting them. Saying "well played" or calling specifically-"wp huskar" won't take too much energy and time (It's even in the chat wheel) It makes them feel respected and special and it has a huge effect on your partnership with that hero.

Quick Comment (1) View Comments
You need to log in before commenting.