Please verify that you are not a bot to cast your vote.
Help SupportOur Growing Community
DOTAFire is a community that lives to help every Dota 2 player take their game to the next level by having open access to all our tools and resources. Please consider supporting us by whitelisting us in your ad blocker!
Want to support DOTAFire with an ad-free experience? You can support us ad-free for less than $1 a month!
Hello everyone and welcome to the new, updated version of Impossible Brutality; also known as my guide to Pudge.
First things first I got some explaining to do:
When the update came out with all the new buffs to Pudge, the new Dismember, Aghanim's Scepter and Aether Lens I thought it was time to update my old Pudge guide from 6.83. So I started doing that and once I was a couple weeks into it I noticed I wasnt leaving any of the old stuff and pretty much remaking the whole guide. So I decided to change the name. Then I thought I might as well create a new guide because there is near nothing here left of the old version (except some numbers and spell explanations). But then I didnt want to release it as it's own guide, because I already said the other Pudge guide was like, the final version. BUT THEN I SAW THE COMMENTS ABOUT THE OLD STUFF IN THE GUIDE WHICH ISNT HERE ANYMORE, and the url said impossible brutality, so in the end, welcome to the NEW guide.
With that out of the way, I present my latest creation:
THE SHAPE - By Goo
My goal with this guide, once again, is to get it to be the go-to guide when it comes learning this hero; and considering how widely played Pudge is as a whole and how many great players have very many different ways of playing him, I’ll try to encompass it here for readers to pick and choose their style or mix-&-match playstyles of other players. The way I play Pudge is very different from Sumail’s, and his style is very different from Slahser’s.
The general consensus about the hero is that “is not good against good players”, but I think that’s wrong and I’ll talk about that in a bit on the following sections. I think it’s a hero with a lot of potential as long as the player behind the wheel knows the difference between Pudge and the rest of heroes, talking about how to think and how to behave as a Pudge in a particular scenario. My general advice for it is that if you have the experience and the mechanics, the right items are whatever items work for you.
Also, before I go into any detail about the hero and the builds I want to say that a big part of this hero is not just skills, items and laning style; Pudge is a hero which displays personal style and flair, and learning Pudge from someone else (opposed to trial & error, like back in the day) involves developing a sense of mechanical input from the player, what angles you prefer, how do you approach teamfights, which heroes will you focus and which ones you’ll avoid, etc. So in a sense, a big part of learning how to play a proper Pudge is gut feeling, and maybe a little contrived in theory but very intuitive in practice.
I’m also super active on reddit and a moderator on /r/LearnDota2; if anyone wants to talk or ask anything that’s the place to go.
I may get into coaching (formally) sometime in the future but right now I’m just working on the guides, spending time on reddit and just having fun messing with the game (which is what I recommend everyone to do). Guide is lengthy and not necessarily meant to be read from top to bottom (you can if you want); use the index under the item build summary to jump to a specific section of the guide you may want to read.
More than likely you are familiar with this, but I'm going to keep it in the guide anyway.
Pudge is a melee strength hero with the ability to displace enemies and allies, disable and nuke opponents through magic immunity and be a constant threat to the other team, especially if you are a support. So basically a cheap Batrider.
Because he is a rather level dependent hero early on he is sent solo, most of the time mid, but he is just as good as an offlaner (I'll talk about this later on the guide). He can work without much items, but he can do more if he has them.
In this meta of mid lane carries Pudge is a bit forgotten, he doesnt really fit. However, on the right hands you can still be a monster in pubs and if you trust yourself, use it to grind mmr. By following these simple steps you will do like I did, and get to 6k mmr in a few weeks. Proof.
A good Pudge can disrupt enemies at a Techies-tier level. He is a hero that really forces the enemies to stay on their side, reduces carry farming space and support warding options (and ganking routes). With good rotations and average farm, Pudge can be constantly setting the enemy carry back in terms of farm, he is a space creator.
The main factor to Pudge being an un-decaying roamer is his passive, Flesh Heap. Allowing him to maintain the threat throughout the game if you keep landing kills or taking part of teamfights, transitioning the ganking role to a more damage sponge/disabler hero, with the hook as a second option. However, with the new items around you can actually keep your hook relevant and even really scary to enemies up to the late game. If we talk pros and cons:
Pudge is a hero that doesnt really have many cons, we can certainly say that he isn't as effective against certain heroes and strategies, but it does not fall into a shut-down hero. The pros are of course having an easy way to land kills and all the other things that a Pudge offers, and the con is that he is using a space in your team.
Kind of like with Techies, sure he offers some useful stuff to the team, but would you rather have Techies or another hero that helps in more areas? Make the trade yourself. Is having Pudge on this team worth it?
At the moment, Pudge is a very strong hero in a few areas, he has always been a sort of teamfight disable presence; but now he can pure-nuke damage dealer and also, hero displacement is one of the strongest capabilities in Dota (see Earth Spirit). Right now I think Pudge can be picked by a player that knows the hero well and played on a pro level without that much of a bite-on-the-*** of the drafter.
I'm going to talk about some of the builds later on, that focus on either defensive or offensive play as Pudge. But first I'll go over the spells and some really cool stuff regarding the Meat Hook mechanics and interactions.
Ok, so I want to take a moment to talk about learning curves.Dota is a complex game, there are many skills you can improve at that’ll make you better at the game and more efficient at winning games. Knowledge, game sense, the amount of heroes you are comfortable playing, among other important factors build everything up.
But people nowadays, at least in the Dota player base, have forgotten about a really important part of getting better at the game; and that is just getting better at the game.
I am talking about (RAW MECHANICS). I am talking about being that weird guy at the corner of the arcade playing the same game over and over until he has all the top 10 scores; if you are that guy your ability to win games will skyrocket. A majority of high MMR players (talking 5k and up, and maybe even people at not so high MMRs like maybe 4k) advocate for a small hero pool, playing the same bunch of heroes or maybe a single hero over and over will not only make you better at that said hero (not exactly spamming, but having a focus group of heroes), but it will make you better at all the skills that surround it; really general stuff like looking at the clock more often will translate to any other hero you play; and it comes up from the necessity of learning that sort of thing when you are trying to in-depth your game in a hero in order to climb.
There’s no way around it, if you are the jack of all trades, you’ll be the master of none. And you know what they say, fear not the man who practices a thousand kicks, but the man who practices the same kick a thousand times.
Whatever, I may be a one dimensional player, but that’ll get me further than being dull all around. I have become the arcade weirdo.
Please remember this is just my opinion and what works for me; maybe playing all roles suits you best. This is the main reason I think Pudge is a strong hero on the hands of a player who understands the potential benefits of putting all the eggs on a single basket; if your mechanics are ****ing flawless then you are set for life.
It’s not easy at all. In fact, I think being a mechanics god is more difficult than getting to the same skill level by learning normally. However, as I said in the beginning, the former is much more straight-forward, and an intuitive experience.
Think of it as turning the “complex Dota learning curve” into the “direct Dota learning climb”.
And finally, if you are a hot headed player like me, you’ll find this approach much more relaxing as you’ll see every match as an opportunity to just improve at your mechanics, instead of flexing your hero picks to win, you’ll go into the next game all warmed up and feeling comfortable with what you are playing; no matter what heroes you are up against.
It really helped me look at Dota as more of a game I play to get better at and have fun, instead of a constant fear of dropping MMR. If you want to read more about learning curves and that sort of thing check out this article I wrote based off the teachings of Tf2 player Mr.SLIN.
But first, why do people play so much of this hero?
I have a few wild guesses:
- It takes practice to get good at the hero, so people will pick him over and over in order to get better.
- Once you get good at it, you can't stop. Its hook after hook, playing so much that once in a while you land one of those insane montage hooks, killing off carries farming with a single hook and generally being the bully of the match.
- And third, it's a hero that rewards playing alone and skill capping yourself. Also known as a hero that does not need teammates to success, at least to a certain extent (you do need a carry to actually win you the game in the end for example), so you can go solo queue while pubbing and not having to trust these fools to win the game, but go solo lane and do it by yourself. Or die trying. Keep these in mind, I know I am guilty of those at least a little bit.
On a separate note, but still importantly...
If anyone says anything negative about a hook, mute them instantly. Don't even think it twice. Even if it's a simple "lol" or "?", mute them.
If it's an ally: Do you really want to listen to the guy who is looking at you and actually typing in chat for what you are doing? If they comment on hooks they will very likely start bothering you or another teammate on their play. With just two clicks you shut them up for the rest of the match.
If it's an enemy: You'll get a lot of "nice hook" or "lol pudge" from enemies, especially the opposing mid (if you went mid). If they are doing this there is no reason not to mute them, they are not going to be using the chat for anything that isn't trashtalking your team (or talking during pauses). Most of the time they are just trying to push your buttons and test your patience. As a dota player, you probably wont be offended or anything, but it's still distracting.
OK. Meat Hook is in my opinion the signature spell for not only Pudge, but for all Dota 2. If you are reading this guide you already know what it is and what it does, but here is everything in detail (and you'll probably learn one thing or two):
Meat Hook is a ground targetted spell (of course), so you have to aim it. It's not as simple as it sounds though, there are 2 things you have to keep in mind when you time a hook.
- Cast Point: Meat Hook's animation is 0.3 seconds long. This animation is very natural though, and easy to get used to. It's not annoying as other casting animations like Midnight Pulse that really feel in the way of the combo (also 0.3 by the way). Use this casting animation to your advantage for cancelling a hook you already know is not going to land, preserve your mana; and you can also use it to bait people into thinking you'll throw it, baiting stuff like Phase Shift, Force Staff, even Manta Styles ocassionally.
- Travel Time: Meat Hook travels at 1600 units per second, at max level the hook has a 1400 range (included search range). So effectively we are talking about almost a second of delay from tossing the hook and going full range.
With practice you will be used to these two, dealing with them isnt the problem when it comes to landing hooks.
A backswing is basically part of the casting animation, but takes place after the spell is casted. Like so:
Cast Point (0.3) - Hook is thrown - Backswing (0.53)
The difference between regular backswings on spells (like Telekinesis for instance) is that Meat Hook's actually scales with levels (gets longer as the hook range is longer). 0.43/0.46/0.5/0.53 to be exact. Aether Lens gives you a longer backswing time as well, as I mentioned.
During the backswing you are disabled, and it's there to give the enemies a chance to initiate on you if you happen to miss a hook. Keep in mind that the backswing is the same, the distance doesnt matter. If you use hook as a point blank nuke to last hit a hero, you get the same full backswing. I will go over how backswing affects the hook mechanics and stuff in a section in a little bit.
The cast range of Meat Hook is, across all levels, the same as the hook max travel distance.Makes sense. This also applies to the Aether Lens range.
You can use this to check if the hook you are planning is going to reach and how far is going to reach by mousing over the spell icon (as it gives you the cast range).
And the range it gives you is a little misleading as well.
So, how Meat Hook works is that, around the hook itself (hook hitbox to be exact) there is an invisible 100 radius search range. This means you can hit someone 1400 units away ideally, past the actually Meat Hook range. It also means that, combined with the not-exactly-top-down-camera that Dota has, you will come across some hooks that look like they should have landed and some really sketchy hooks that should have missed or hit something else.
This means that Meat Hook goes right through, ignoring them. Also Meat Hook cannot hit anything while retracting, only extending. When the hook stops at it's max distance is considered extending, and will hook into units.
- Meat Hook goes through all terrain as well as the hooked unit when being pulled back. Also if you happen to hit someone inside fog of war you will gain vision of the place where the hook connected. 500 radius flying vision for 4 seconds. Oh, and hooking a unit into impassable terrain gives them free pathing for 5 seconds (sometimes you can go past the 5 seconds with 3 seconds of Dismember and bodyblocking, but it's not reliable.
- Meat Hook also fully disables the hooked unit for the duration of the pull. This depends a lot on what is that you hooked, Meat Hook changes depending on what you hook. This disable includes everything, like a regular disable, the unit cannot turn, cast, move, etc.
To explain this further take a look at this chart:
A Invulnerable target is one that cannot take damage but can still be hooked. Such as heroes in Eul's Scepter of Divinity.
Also, in order to cancel a channeling ability (TP, whatever), the move effect is not enough, is the disable effect that actually cancels the channel. So, you cannot cancel a magic immune enemy's Town Portal Scroll or an ally's, unless you perform this specific technique: The way Meat Hook works was changed about a year or so ago:
The change was made to the mechanic of hooking a hero itself, not balancing the spell or anything like that. Mainly to avoid exploits.
How it used to work was that when a hero is hooked, they are brought towards Pudge. This allowed Pudge to do stuff like hook and blink back to take the hooked hero way further, or as you have seen, all the way back to base with test of faith.
This was changed to how the new hook works: Now when the hook is thrown it marks that place, and if it happens to connect to a unit, said unit will be returned towards said position, regardless of where Pudge is. With this said, you can make the move the other way around. This means that if the hooked hero happens to be teleported out, from test of faith for instance, they will be brought right back to the position the hook was thrown from.
In other words: If you are hooked, doesnt matter what you do or where you went, when the hook goes back to Pudge you will be there as well.
This allows Pudge to "cancel" teleports of magic immune enemies and allies as well, because as he is not able to cancel them properly since he cannot disable allies/magic immune targets, he allows the teleport to finish while the target is mid-hook, and when the hook is back to Pudge, the target will be teleported back all the way back to Pudge. You can use this to cancel enemy TPs during magic immune abilities (not only BKB but Blade Fury, Rage, etc) with good timing. And also ally's but please dont do that to your friends.
This concept is kind of confusing, I think I explained it well. But anyway here is a video showcasing the interation.That's how my pudge looks btw.
This also works for any displace spell, including Relocate.Wonky isnt it? In this next section I'll cover the how to use the Meat Hook in real situations, so far I've only explained the working of the spell.
As you already know,Meat Hook as a casting backswing which basically disables you for a period of time right after you let go the hook (A.K.A. Fully casting it).
This bit of time is really short and it’s not going to get you killed in the middle of a fight if you happen to miss a hook or whatever, in fact, it’s a brief moment in which you are supposed to look if your hook is going to connect or not, that way you can see if you’ll be pre-casting dismember or shift-queueing it or whatever it may be (see next section).
Backswing time is one of the few moments the enemies may use as a window of opportunity without regarding cooldown to move around it. There’s ways to use this to your advantage and also ways around it in case you actually happen to miss a hook.
Here’s some stuff to keep in mind:
* A good Rubick will try to get meat hook most of the time, and you can expect him to try and Spell Steal you as soon as he sees the hook thrown; otherwise he’ll get Rot which is the most common case.
Rubick can only steal hook on the very small, fraction of a second window, which is Meat Hook’s backswing. You can pre-cast Rot during backswing, but obviously, it will only toggle on after backswing time; that’s why if you cast Meat Hook and press Rot at the same time, Rot will only turn on a bit later; doing this makes it so rubick only has the backswing window to steal meat hook, and not one instant more; so this is the second best way to not get Meat Hook stolen.
(The best way being actually killing rubick with the hook.)
* You’ll hear me talk about “angling” a lot, which is something I learned from watching old Dendi replays back in the ti3 times. To layman eyes it looks like you fake a hook and make an enemy (who has vision of you), move somewhere else, and right after cancelling throwing the hook to that second waypoint, effectively predicting their position and getting hooks more consistently. This is actually not exactly what’s going on, the idea of this fake hook is to make the fleeing hero turn a couple of times, and with the time it takes for them to turn (turn rates), make up for backswing time and casting animation. Essentially it’s a way to keep the distance between you and them the same after backswing makes you stand still.
* As I said, you can pre-cast stuff during backswing, for rot mainly, but this also works for Force Staff[/color]. If you miss a hook but pre-cast Force Staff on yourself you’ll get pushed after backswing, making up for lost distance. This works best in conjunction with angling hooks, allowing you to get most of the hooks in which enemies have vision of you; which are the hardest kind of hooks.
The best part about this interaction is that since Meat Hook was reworked this was not; and you can extend your hook range with that.Allow me to explain:
So, say you cast a hook on someone who is past your hook reach, and then you pre-cast Force Staff on yourself, having it push you as soon as backswing is over; the hook range will start wherever you are standing after the push, but the original place of casting will be wherever you were standing before the push. Which is a little bit ridiculous but the hero, if the hook happens to connect, will fly past you and land on that place; you can use this to extend the reach of your meat hook and pull enemies further behind you.
Also you can extend before backswing, since Force Staff does not disable you when you cast it on yourself, you can cast hook and cast Force Staff on yourself during the animation (not backswing, but cast point), and have the hook fly the normal distance but still bring the enemy hero behind you; I see a lot of people do this on accident, but it certainly come in handy for bodyblocking or whatever you may do with that extra distance.
So this is something rather simple that a lot of guides and Pudge players will just summarize it as “[i]just shift queue it[/i]”; but I want to talk a bit about it just because.
I’m talking about chaining Dismember after Meat Hook, for the most basic combo, and the intended use of pudge’s skillset.
The reason it’s important to learn how to do a perfect Meat Hook to Dismember chaining is because there are many heroes who have instant escapes and stuff like that, and if you can’t chain it perfectly, kills will slip away from your hands I promise. Heroes like Mirana, Slark, Weaver with Time Lapse, among others, are good examples. And even not really escapes but spells like Berserker's Call will ruin your day.
There are two ways to do these perfect combos; the first is using shift queue and the second, which is easier to learn but a bit less consistent is with pre-casting.
+ When using shift queue it’s very simple, you must hold shift starting from right after you throw the Meat Hook, and while holding shift, cast Dismember on the hero (you can do this even before the hook hits), then release shift. Make sure you don’t click anywhere or cancel the actions because this kills the queue; just let it work. If the hook lands on the target hero, Dismember will be cast as soon as they enter Dismember cast range; which is on essence a pixel perfect chaining.
+ Pre casting is different. It works on the base that in Dota if you cast a spell outside the cast range, your hero will have that set as the next command and will walk towards the target and once in range, cast the spell. Pre casting use is very common on higher levels of play, and it’s used mostly for defensive casts, Eul’s and Hex. So if you are a support and you see the enemy Tidehunter or something on the edge of the teamfight and you know he’s gonna blink in and ult anytime, you cast hex on him (outside of range), and as soon as he blinks in (and gets in range), your hero will instantly hex him, or eul’s him or whatever, messing up the initiation.
The idea behind pre-casting dismember is that the hero comes to you via hook instead via blink.
One thing about it, if you pre cast while the enemy is too far (so say, before the hook even hits the target), Pudge will walk too far towards the target trying to use dismember and the hook will bring them behind you, and sometimes far enough for you to not be able to cast Dismember, and Pudge will turn and run that way and chase the hero, which is obviously far from a perfectly chained Meat Hook into Dismember combo.
The way you can do a pre-cast Dismember without messing it up is waiting for the hero to get hooked first, and after a bit, when it’s being pulled back, cast Dismember; even with Aether Lens range, if you count backswing and just waiting this small bit you’ll get it every time.
Which one is better? I think pre-cast.
+ Pre-casting feels more natural. In actual matches you can’t always stand still and perform a shift queue, for obvious reasons. Even if you could, see the other reasons:
+ You can’t always cast dismember preemptively like when shift queueing, because fog of war exists. Luckily, if your meat hook connects you get 4 seconds of flying vision, for you to pre-cast dismember.
+ Without standing and setting a shift queue you can do what I often do in matches, which is turning in case I miss and have to leave. This is mostly used when ganking solo or when deep inside enemy territory with a smoke and such, not so much in teamfights (maybe in losing ones). I’d toss a hook and run away, with my camera still on the hook target area; if I get vision, I turn around and pre-cast dismember; if I don’t, then I keep running and I already have my head start; as, depending on how many of your allies are visible on the enemy minimap, if you are deep inside the enemy jungle and they see a hook fly by, they’ll try to go on you.
+ Without shift queueing you have the freedom to do some of the stuff I’ll talk about in the following sections, which includes chaining back to back hooks with low cooldown.
Back to back hooks are a (sorta) new thing that came in with the new Aghanim's Scepter Upgrade. I say sorta because you could do it with Chakra Magic before.
It’s what it sounds like, basically hooking the same person multiple times. Sick as **** I know, it’s the ultimate humiliation.
The shorter the cooldown you can get on Meat Hook the easier it is to perform back to back hooks; here’s a starter list (all values assume Meat Hook and Chakra Magic are at max level):
+ Octarine Core: 8.25 Seconds (Not short enough) + Arcane Rune: 7.7 Seconds (Not short enough) + Chakra Magic: 5 Seconds (Hard but possible) + Aghanim's Scepter: 4 Seconds + Aghanim's Scepter + Octarine Core: 3 Seconds + Aghanim's Scepter + Arcane Rune: 2.8 Seconds + Aghanim's Scepter + Octarine Core + Arcane Rune: 2 Seconds + Any Green One + Chakra Magic: 0 Seconds For meat hooks to be truly back to back you’ll need any of the green ones. With anything under 4 seconds you can perform the classic double hook combo, which involves a full duration Dismember; and with the 0 second ones you can perform double connections which is insane **** (you can do it with the 2 second one as well but it’s really difficult in actual matches).
With 0 second cooldown hooks you can actually hook the hero you hooked again while it’s still in midair(!), while this looks really cool I don’t recommend it because for you to have a 0 second cooldown hook you need chakra magic; and even if you are giving out 2 instances of pure damage to the hero in question you are kinda wasting the force movement factor of Meat Hook. If it’s a squishy hero that’ll die from it then by all means try it; It looks brutal.
If we don’t consider hooks that involve Chakra Magic or arcane runes (because you’ll maybe not have them at a particular point), we’ll look at the best possible items you can have which is Aghanim's Scepter and Octarine Core, leaving you with 3 seconds for cooldown.
The 3 second cooldown is actually shorter once you consider backswing, the travel time of the hook, etc. It has a 3 second cooldown but the uptime is better. And since it doesn’t use Chakra Magic you can do back to back to back to back hooks without worrying about the buffing. That's the Aghanim's Scepter plus Octarine Core duo in a nutshell.
Something you may experience when chaining a hook after Dismember is that since the hero is disabled and really close to you, there is not much room for you to angle them and it’s actually easy to miss. Enemies expect you to hook and will move randomly; you’ll see this mostly during the early game when you initiate with Dismember and enemies know for a fact meat hook is on cooldown.
Also something to keep in mind, especially with Aether Lens is that after backswing, the hook (and the hooked unit) is still in the air, but you can still walk around, allowing you to set your position up to chain the next hook. You can even use Force Staff and Blink Dagger while your current Meat Hook is still in the air.
Of course the standard stuff is Meat Hook into Dismember into another Meat Hook (you can do this just with Aghanim's Scepter, with the 3 secs of Dismember duration); you just have to watch that you don’t miss the second hook as it’s very easy to see it coming.
The more complex stuff comes with the 3 seconds or less CDs, which are basically similar to the original back to back hook combo but much more effective and less likely to miss; the only downside being is that you skip a lot of Dismember instances so your main source of damage is not that one and you won’t be healing from it either. For example this next one, which is just a faster version of the standard one:
It involves a “bite” which is a short way of saying only using the first instance of dismember channeling; you’ll see people use “bites” as a nuke during the very late game, where bites do a lot of damage because of Dismember's Strength scaling (back in the day even more with the other Agh’s damage on dismember upgrade).
What you’d do is hook somebody, and walk forwards or staff yourself so they fly past your position, then turn 180 and bite them to cancel the move command they are very likely to send in midair while disabled, and instantly hook again after the bite; enemies will not expect the dismember to be so short and 900+ pure damage from the two hooks + the bite damage will generally kill a hero or at least lower them enough to force them to get out of the teamfight.
Best part is that if you don’t mind losing the bite damage, this combo fully goes through bkb. After that we can go deeper into more intricate combos, which are rarely needed, which involve 3 back to back hooks or more:
This first one is very commonly used by HexOr (and I'll talk a bit about his playstyle near the end of the guide). He plays a really play-maker kinda Pudge, similar to mine but a little bit more focused on utility over killing. His combo involves the use of Eul's Scepter of Divinity as well; which is an item I normally skip.
The idea of it is super simple; it adds another chained Meat Hook after the standard combo using the cyclone as the disable. Straight forward.Things to keep in mind:
+ In order to damage the eul'sed unit you must time the hook to hit them as soon as they hit the ground; when they are up on the cyclone and even during the time they are falling down to the ground they are invulnerable. The hook will pull them but do no damage otherwise.
+ You can use the time of euls to reposition yourself, since they are not going to move, you can bring them further away from escape routes really easily as long as there is nothing in the way.
+ Ideally you'll have both Aghanim's Scepter and Octarine Core for this, for the 3 second cooldown; which makes it super easy to connect. However, you can perform this only with the Aghanim's Scepter and the 4 seconds, takes a little bit of practice but it's only a second difference. HexOr does it like that (4 secs).
You can get creative with the rest, they are all pretty intuitive combos you can perform.
There is one more combo I want to talk about, which is the old/new Dendi mixed combo; I'll talk about it in that section, but it involves a Refresher Orb and two dismembers, so look forward to that.
2.1.5. Predicting Movements Inside Fog Of War & Connecting Blinks
Ok so this is one of the biggest things about playing Pudge that people tend to forget when reading the guide.
Most Meat Hooks are thrown either FROM or TO a target inside fog of war. In a real match you almost never have clear shots with vision, you must become the king of prediction, knowing where heroes are even if you can't see them, so that you can actually pull them to you.
It's very simple in essence; but it gets complicated really quickly.
When you first start practicing your Meat Hook mechanics (you may be new to the hero or maybe just rusty), you'll have to get through some levels of prediction or predictivive aiming.In reality this just means landing your hooks having the feel of where it's going to land considering cast point and travel time:
*Clear Hooks Side-Side: This means being able to hit a target moving in a straight line. Super basic once you practice a little bit and get a feel for the hook delay.
*Side-Side Hooks Without Vision (but with input): This means your ability to hit hooks on heroes that you saw go inside a no-vision zone; by either following their projected straight-line, or by further predicting their movement. For example, if the enemy that you saw go inside fog of war didnt see you, chances are they walk in a straight line or take the shortest paths (especially if they are low health); but if they did see you they will very likely expect the hook to be thrown to their projected path, so they will change it. Often these changes are predictable, especially inside narrow paths like in jungles where there arent much options.
*Predicting Speed Changes: Against certain heroes with constant speed changes (like for example Slark, as he may or may not Pounce as soon as he goes inside fog of war. Supports with Force Staff and whatnot, Mirana, etc; are all targets that require further ability to predict when and where they will cast these movement changes, in order to pull off a hook.
*Predicting Terrain Play: This goes mainly to heroes that use Force Staff and other movements like that (even Sun Ray as a escape tool using terrain to create gaps between you and them. They are generally fairly easy to predict, but still, you'll want to remember they are able to, at least one, go around the map without following the paths. The king of this ******** is Batrider. Batrider doesnt give a **** he just flies wherever he wants and dissapears in ******** spots, he is the one of the most unpredictable heroes in the game to hook, AND he purchases Force Staff and Blink Dagger pretty much in all games.
*Connecting Blinks & The Use Of Tunnels: Considered by most players to be the most difficult hook to connect, it's on heroes blinking into fog of war. Because you have no real input or path line to project into your hook; you just kinda have to guess and toss you Meat Hook in their general direction. There is two ways I use to get these hooks consistently (at least a little bit more consistently than usual); the first one only applies to when heroes blink into the tree line ( Tinker comes to mind), and what you do is memorize the usual blink spots and hook there. Some of these paths are long and wide juke paths (like across dire top, between tier 1 and 2), and in that case there's a little bit more luck involved.
Tunnel Hooking is something really simple but unintuitive to some people appearently. Basically it means lining up your hero with a narrow path of terrain, where heroes get funneled down as a choke point, increasing considerably your chance of pulling one out. And I say unintuitive because to line up like that you sometimes need to blink (or Force Staff back a bit, and people tend to think closer is better for hooks (which is not always true).
Take a look at this sophisticated graphical organizer I've set up for you:
* Imagine a funnel (in green) * In Grey, Fog of War, or non-vision area. * In red your current position. * In orange, a target going inside the fog of war.
Since the no-vision area is a funnel, the hero (unless they do a 180), has no other option but to go through a narrow path; the idea is that you are going to predict at what time they go through it and hook.
* You could try to blink to the blue spot and attempt any of the red hook options. But you are likely to miss, especially if the enemy has some sort of ability that changes their speed or position quickly (so a blink).
* The better option, put yourself in the purple spot, and hook down the purple line, through the choke point. This way it's much more unlikely you mistime the hook and if you throw it right through the middle, considering the 100 unit search radius, it is an almost guaranteed hook. These funnels are ALL over the map:
You will see me use them a lot in the video (on my personal playstyle section).
Rot is Pudge's second spell and it's actually relatively simple, but there is still a handful of things to keep in mind. Let's look at what it does:
Rot is a toggle ability, costs no mana and you can activate and de-activate it whenever. You can even use it without cancelling channeling abilities, so it's great for using your ultimate Dismember without worrying of cancelling it on accident.
Rot deals 30/60/90/120 magical damage per second to everyone in a 250 radius around him. Including Pudge himself.
Rot also applies a slow effect to units inside the radius (this of course does not affect Pudge). Slowing them by 27% of their movement speed.
Rot's damage or slow do not pierce magic immunity. This is a good thing too.
If Pudge is silenced, disabled, muted, etc. Rot is not turned off, so watch out and not get Doomed with Rot on or you will get destroyed.
In detail:
- Rot has no cast point, at all. This means that actions such as walking or attacking a target will not be stopped, not even for a frame. You can be running someone down and turn Rot on and off without losing territory.
- Rot is lethal. You can use Rot to deny yourself if you need to, as the game progresses and you become tankier and more resistant to magic this becomes much harder to perform. A way to get the deny easier is to walk into a neutral camp with Rot on, this doesnt work on ancient camps or roshan though. Also, if you are being attacked by a single target you can wait for them to take your HP down to around 200-250, then turn around and use Dismember on them, just for the disable, and deny yourself easily.
- Since Rot is magic damage, the self damage is reduced with magic resistance, from items and also from Flesh Heap. Also with Black King Bar you can run around slowing and dealing everyone damage per second while taking 0 damage from it yourself.
- You can use consumables (such as Clarity, Bottle and Healing Salve) without cancelling their effects with Rot or it's first three levels, as the damage isnt enough for it to cancel them. With this you can run down someone and Bottle up yourself to resist through the Rot damage, if they do it you can just autoattack them and cancel it (since they are also slowed), and they can't really cancel your consumable as they would have to turn around.
- Rot's slow effect is considered an aura. This means it lingers for 0.5 seconds after they go out of the radius.
- Every 0.2 seconds, Rot checks if Pudge has Rot active, and if that is the case, Pudge and all enemies which have the slow debuff from Pudge are damaged. Therefore It is possible to rapidly toggle Rot on and off several times to drastically reduce damage dealt/taken while still maintaining the slow and enemies that get out of range can still can get hit by 2 to 3 damage instances, as long as Pudge has Rot active.
- In your combo during Dismember. Hook someone, Dismember and Rot. The basic, most "intended use".
- To chase people down, without Dismember, and to dish damage in a fight just by standing around.
- For farming.Now, there are two ways to use Rot for farming: The first one is to help you last hit, so when approaching to last hit double tap rot to get an instance of damage out with your autoattack swing, allowing you to CS a little bit easier, it does eventually damage you a bit so keep an eye on that. The second one is to take full creepwaves and jungle camps, so waveclearing and clearing the jungle; in order to do this I recommend you went Tranquil Boots. Rot's self damage does not cancel the Tranquil Boots effect, and even if you plan on taking damage from the creeps, you can drop the Tranquil Boots and do it like an Axe jungling.
Obviously this just makes you tankier and the magic resistance helps around with everything, plus it dimishes the damage you take from Rot yourself. This spell works by stacks, as a buff (similar to Legion Commander Duel damage counter). And the icon stays there throughout the match from the moment you put the first point in the skill. Something really important about Flesh Heap is that is retroactive, this means that even if you haven't learned the spell yet, the game will still count those as invisible stacks that will be taken into account the moment you get Flesh Heap and each stack adapts to your current level of Flesh Heap, so if you have a lot of stacks you will notice first hand how you get tankier every time you get a point in Flesh Heap.
Each stack gives Pudge X amount of strength (2.5 Strength at max level).
The scaling is as so:
-Level 1: 1 Strength per stack, and extra 6% Magic Resistance. -Level 2: 1.5 Strength per stack, and extra 8% Magic Resistance. -Level 3: 2 Strength per stack, and extra 10% Magic Resistance. -Level 4: 2.5 Strength per stack, and extra 12% Magic Resistance.
When an enemy hero dies within a 450 radius of Pudge he gains a stack. Pudge doesn't have to participate of the kill at all, just have the hero die inside the radius. On the other hand Pudge gets a Flesh Heap stack EVEN if the hero dies outside of the 450 radius if and only if Pudge is the direct killer.
This is mainly so long-range Meat Hook kills give Pudge Flesh Heap stacks, works for any kills you get with Urn of Shadows' damage over time too obviously. And also, heroes that are denied (by any means) will not give a stack, even if in radius.
Something that is kinda stupid but I want to point it out anyway: Flesh Heap stacks only give you added strength and the magic resistance is flat! You dont get 12% Magic resistance per stack when maxed out, it is just flat.
The reason I said this allows Pudge to scale into the late game is not just because he gets tankier as the game goes, but because of his Dismember damage plus heal.
Oh, and illusions get the magic resistance but not the strength, and the cannot gain any stacks (similar to how Shadow Fiend's illusions interact with Necromastery stacks).
Important note: Getting Flesh Heap stacks isnt as passive as you think, you will get a guaranteed stack if you land the kill, but not necessarily if we talk assists, in fights I want you to really get in there in the middle of the fight and make sure you get those stacks, dont take every kill you see in the screen as a granted stack, 450 radius isnt that big at all.
Ok, I think I didn't miss anything. Now let's talk about the real thing.
Dismember is Pudge's ultimate and it's more like, part of the combo, rather than an amazing ultimate. With the recent changes it has become much more useful than for just disabling, the heal can turn around an early game engagement, and the fact that it lasts twice on creeps, combined with the fact that some neutrals have magic resistance now allows you to get into the jungle and heal up by a substantial amount by ulting a big neutral (taking 60%+ of your max Hp).
On cast, disables the target unit (enemy or neutral) fully. It's considered a shackle disable, this means that it's channeled and the disable stops if you stop the channel, like Black Hole, Fiend's Grip and Shackles itself.
Last 3 seconds and deals damage once per second. The first instance is dealt instantly on cast, so you can use it to finish off heroes with the first nuke; in Pudge slang this is called "Biting" and it's used the most in the late game once Dismember's damage has scaled up considerably. The damage from Dismember is calculated with a flat value, plus a percentage of Pudge's strength stat.
This was recently changed: Before 6.86, Dismember would only deal the flat damage and did not heal Pudge for the damage he dealt with it. The Aghanim's Scepter upgrade however, added the heal effect and the strength as damage (100% of the stat as damage). Basically they took the Agh's upgrade and put it on the spell itself, tweaking it down of course.
On top of this they gave Pudge a new Agh's upgrade, which upgrades Meat Hook instead. All these changes actually rework how Pudge scales into the lategame, and it is actually a big improvement allowing you to stay relevant more consistently, as opposed to before, where it would either mean you were snowballing and dominating the enemy team, or you were kind of useless past the 25-30 min mark. Lasts twice as much on creeps. Lone Druid's bear, Visage's familiars, Warlock's golems and Roshan are considered creeps for Dismember as well.
It's casting range is technically 150. However, this is for when the spell is commanded not cast, so you will see that sometimes the hero can move and if you casted the dismember inside the 150 you will end up with a long range Dismember that looks weird and broken. Keep this in mind because since you are moving heroes a lot with Meat Hook, getting those long range Dismembers is very common, and you have to remember to turn Rot off if the disabled hero is not in the area of effect.
If you played a really aggresive Pudge and ended up with a lot of kills and so Flesh Heap stacks this will make you tankier and you will be scaling with damage.Which is great. However, as you'll see, your main damage output in these aggresive matches is not only Dismember like before, it's a combination of everything, including right clicks, but with a special focus on Meat Hook, with it's Pure damage.
If you did not. Dismember is still a bkb-piercing disable, so in the late game it doesnt even matter if you land a hook, walk up to their carry and Dismember them just like that, stop playing like a Pudge and focus on disabling with Dismember. (This is another good reason to pickup Blink Dagger but that's something I'll cover in a different section).
On top of this, Dismember also gives true sight of the unit being dismembered. The exceptions are Riki's permanent invisibility, Moonlight Shadow and Spin Web since these work on a fade delay instead of a fade time.
3. The Match Development (& The Cookie Cutter Build)
As I always say, knowing your hero's role and how to behave in each stage of the game is really helpful towards learning a new hero, and personally I think this is specially important for a hero like Pudge that is so dependant when talking playstyle.
This and itemization come together; and you need both to properly succeed.
Opposed to a more complex itemization hero such as Shadow Fiend, Pudge (at least this patch) has the possibility of a cookie-cutter style build, which is the following:
This is the most basic straight forward progression. It's not the best for all matches, but in general it won't be bad in any.
If you consider yourself a lower/lower-ish level player, you can use this as a template build and just go for it, without much deeper thought and it should work out for you.
So let’s talk about the thing most people considered as the no-go for Pudge and that is his early game as a solo mid. He has a lot of stuff going against him here, and very few positives, so it’s all about standing your ground on those and avoid death at all costs.
Pudge is melee; has a small mana pool and pretty much only Meat Hook as a spell ( Rot is used differently) throughout his early game, plus, he has really low armor; and is not a particularly fast walker.
On the other hand, his starting HP is decent, as well as his base damage; which allow you to certain extent to CS once in a while by pulling aggro to your ranged creep.
The true basis of laning Pudge as a solo mid on higher skill levels and not falling flat on your face relies on you being able to test the waters with the enemy mid and see how they play and behave in their lane. See if they are overharassing and use that to make them miss CS, see if they are overextending to get hook opportunities, and so on.
For the most part you’ll go the first starting item build, and then according to what the enemy mid does, borrow starting items off of the other starting item builds and build up a safe base of items for you to take the big step and get your Aether Lens. Something to note is that in some specific games, skipping Aether Lens to double down in early game items to later go double utility (like Force Staff on top of Eul's Scepter of Divinity is completely viable if you manage to justify going with it).
If the enemy mid is ranged and bullying you off the lane, you might consider ferrying a Healing Salve and going for a casual stout shield; if they are spamming you off and pushing the wave you might consider getting a Magic Stick instead, and so on.
Note: Often times you’ll feel like you don’t really need to get one of these and you’ll want to save up for straight Aether Lens. Do not risk it, if you get killed you’ll regret it.
Second, against strong mids you must think and play your lane like a solo offlane would; super patiently, cautiously, waiting for level 6 and snatching a couple last hits under tower. Your goal here is to get level 6-7 and a few items to set you off rotating the map and collecting body parts.
I’ll go over all this in detail in the matchup sections near the end; but here’s a bunch of general guidelines:
+ Always pull with aggro when possible; if you are just playing laid back and safe and your opponent notices this and avoids pushing the lane too far, you’ll be in trouble when the wave doesn’t come under tower for you to CS safely; if you plan to keep the game on your side, you need to keep the lane pulled back as much as possible.
+ This is also great for your allied supports to set up smoke ganks and come up behind the enemy mid, as, ideally, the wave will be on your side. Remember: Exp is the true bounty for you here.
+ Do not get cocky on people, often you’ll feel like you can kill that Invoker because you got level 3 and he’s only 2; considering how Rot works this is very likely to backfire on you; you could miss the hook, he could turn around you and kite away from rot, the creeps could block you and lots of other horrible things could happen.
+ Always have a TP since the first minutes, if you are being bullied mid you can at least land a kill or even just an assist for assist gold by Tping into a sidelane dive will give you the exp boost you need.
+ In the same vein, your supports should be ganking mid at least once to keep you afloat. Ask for help if you need it, a single stun can mean an easy Meat Hook and a kill.
+ Needless to say that if you are really good with how you play your lane, and careful with your hook timings, landing a solo kill on the opposing mid is a huge deal.
Best ways to land kills in the early game (pre-aether lens, pre-force staff and pre-lvl6-7) is:
1) Wait out of sight for enemies to make a bad move, go for a rune down the river at a good time for your team to rotate. This is one of the reasons it’s important to make sure you at least know where the enemy wards are planted.
2) Use smoke of deceit to put yourself in awkward positions for enemies, smoking and going inside their tree paths or their side-shops and waiting for initiation, as they underestimate your team’s numbers you come out of your hiding spot with rot and turn the fight around. Note that this sort of committed rotations must be well thought out beforehand, otherwise you are wasting valuable mid solo exp time.
3) Going on really low HP people abusing the range of your hook in the tight fights of the early game (during early game since there are no blink daggers and such around yet, fights will have allies closer to enemies, and enemies closer to you, hence making rot a strong teamfight presence and meat hook easier to land even when the skill is only at level 3).
Think Nature’s Prophet's rotations, he basically just waits for the worst moment the enemies could expect you in and messes with a single hero forcing the rest to make a decision of coming in again or backing out giving you a free kill.
If you are on the lower brackets however, and you do what I say about your mechanics, mid lane should be a piece of cake to handle.
Ok! In this section I'll go over the early game items. These are any items that are bought after the starting set. I mean, literally straight after starting items you put these items on your quickbuy and start working towards them.
Arcane Boots are mostly a step towards that early Aether Lens so don't get too attached. They sure are useful for that few minutes you have them, you can use Meat Hook more lightly, make up for any missed hooks maybe; gank with an ally and let them cast free spells.
In this case you'd just dissassemble them, but if you really want to have them, you can just buy a second Energy Booster and make new ones with the remaining Boots of Speed; you can then dissassemble those on the late game into Octarine Core, or you can make Guardian Greaves if you want.
However, you should be able to handle just with the mana pool from both the Aether Lens and Force Staff (plus Aghanim's Scepter later on), the Int will give you the mana back with natural regen. Pudge is not really a hero that spends a lot of mana if you think about it, in fights you'll use a bunch of hooks and that'll burn through your pool sure, you can go back to base and regen fully; but overall you'll only use mana whenever you have a kill opportunity.
Aether Lens is the first early game item and it's also the most expensive of them all. I'm going over it here as a really early pickup, but if you don't get it at this point for whatever reason, maybe you needed Urn of Shadows or whatever, you can surely get it afterwards, maybe before or after your first item. The point is that you want it, it's really good.
For the early purchase, you'll generally go starting build 1 (with the Boots of Speed), get Arcane Boots with it, and then buy the Ring of Health and the recipe; so you can finally dissassemble the Arcane Boots and get Aether Lens working. This is usually from min 5 to min 7-8 depending on your matchup.
Of course the biggest upside of Aether Lens is the anacondic range it gives to Meat Hook, but how you use this bonus range is a bit difficult to put into words; because of this I'll go over the other thing first, the 8% damage increase.
* Regular: 180 / 270 / 360 / 450 * Aether Lens:194 / 292 / 389 / 486 (486 Pure Damage on a 4 second cooldown; for reference, Level 3 Sonic Wave is 470 Pure Damage on 135 second cooldown).
Not including Dismember since it's damage varies a lot due to strength scaling. Meat Hook's range is increased from 1300 (1400) to 1500 (1600). (Extra search radius distance in parenthesis).
This addition may seem negligible to the human eye, but any Pudge player understands that this is such a huge upgrade (not necessarily to the range itself, but the amount of angles and hook positions it unlocks in the map is overwhelming) that it makes the item a straight core on Pudge. Seriously if your team is getting rolled, you included, but you got level 7 and Aether Lens, you still have kill potential.
I can't start listing all the hook angles it gives here, but I can tell you of some particular stuff that you can do that you can't without the Aether Lens.
*In-Line Hooking 1400 units away: If you are chasing down someone and both of you are running in a straight line, provided they don't move side to side and dodge, and that both of you are running at the same speed; if they are more than 1250 units away, you simply can't hook them; due to Meat Hook's cast point and travel time, they will be past max range (1400) by the time the hook reaches it's target.
With Aether Lens this point is moved 200 units forward, which is more or less 0.5 secs worth of running; meaning that it will easily hook units 1450 away from Pudge. And since 1450 is more than a regular Meat Hook's range, people will not expect it to reach (even if they know you have Aether Lens), and once they see it pass the 1400 unit mark (which most players are able to eyeball just because they play against Pudge, it will continue going forward and at that point they can't outrun it, and they can't dodge it either, due to turn rates. The only way for them to dodge one of these hooks is to sidestep before the hook is past 1300-1400 distance.
You must be thinking, "well, doing that sidestep is really easy", "extra range doesnt matter if the hook is off target". And you'd be right, but the thing is that in a real situation, Pudge will be moving around as well, not only you. With that extra 200 range, if he is chasing you, he has time to fake a hook, or to fake a sidestep, or even better, to Force Staff your way and hook at the same time, making it pretty much impossible for you to reach in time.
And even further! This we are talking here is if Pudge is 1400 units away, but if he is like say, 800 units away, he can fake his hook like 3 times before you are too far for him to hook, and a good Pudge will fake a couple hooks to bait you into turning to sidestep, and using your turnrate as a opportunity in which you are not running straight away from him, hence giving away the easier hook.
Oh and something people tend to forget: Aether Lens actually increases the distance of your Blink Dagger. (both max range and overshoot range).
You'll get the feel for it once you start buying it in your games.
Aether Lens is the natural follow up for starting build 1.
Tranquil Boots used to be my boot of choice, but that was before the whole Aether Lens thing came along. Nowadays I'll get tranquils if there is a lot of physical damage on the enemy team, as Pudge lacks the armor and really he is only weak to strong physical, Flesh Heap allows you to soak magic quite well.
Also they allow you to walk faster from lane to lane, provided you don't miss that many meat hooks when roaming around, you should have your HP and Mana situation set up until the mid game.
Tranquil Boots are the natural follow up for starting build 2.
Urn of Shadows has lost popularity in my book as well, for the same reason as Tranquil Boots. You don't need all the tanking up and HP regen anymore, Aether Lens provide you with a solid +8 HP regen, and +250 Mana Pool which sets your stats for a while as I said. If you really need to heal up you can Dismember a neutral or a siege creep, and just move on.
Still Urn of Shadows is a stronger heal that you can use on allies, and also enemies (though you probably won't need it to secure a kill).
Urn of Shadows is the natural follow up for starting build 3.
To be honest I never thought Bottle would get so trashed with nerfs, but whatever, there's already a way around it.
The reduced HP and Mana per charge, on top of the fact that you can heal with Dismember and that you are trying to get Aether Lens early leave you with pretty much no reason to pick it up.
Except for dual mids:
Recently I've seen Pudge ran as a duo mid along Io, both with Bottles and abusing runes to spam hooks and Spirits; similar to how a Tiny + Io dual would be played.
The idea is to make up for the Bottle nerf by using the charges on Io exclusively, hence multiplying the mana output, the mana excess on Io is used in Spirits.
In this section I'll go over the main items that you'll be looking forward to purchasing right after those early game pickups. They mainly consist of mobility items to help land your hooks, but they can also be defensive utility items.
The big ones, Force Staff and Blink Dagger, are the main decision you will be taking regarding your mobility option; because of this I've dedicated a section to it, right after this one.
Here we'll see Glimmer Cape and Hood of Defiance as defensive options. Note: Purchasing one here does not necessarily discard the rest, you can have both Force Staff and Blink Dagger, and buying one of the defensive ones does not mean you will not need mobility. Common sense for this one.
Glimmer Cape is a weird combination of utility and defense. I get Glimmer Cape on matches where I need both the invis and the defense, so if I get Glimmer Cape I am usually losing the match and not have much stacks on Flesh Heap. The invis allows you to take less damage from all sources of magic damage, including Rot which is extra helpful, and it allows you to disable someone with Dismember with a little more safety and not get cancelled so easily. Remember you can cast this during the Dismember and it will not cancel it.
It's a relatively cheap item for what it does, the main downside is that you pay that with your mana. If your built went something like Blink Dagger and Glimmer Cape and you didnt go Arcane Boots then you are going to be in serious mana problems. Also the invis is so short that it doesnt really suit for scouting purposes and other stuff you would regularly do with invis, its more of a "in the spot" usage. Also it has a rather low cooldown so if you still have mana you can use it twice in a fight. If you plan on using it defensively to extend into enemy territory always have a TP on you.
Hood of Defiance is a fantastic passive defense item, it's basically a more defensive Glimmer Cape without the utility factor (the magic shield it provides is usually just going to block some Rot damage and then dissappear, but if you manage to use it on-response to block a nuke, then great).
Hood of Defiance provides you with big HP regen and 30% extra magic resistance. If you add up the 25% natural resistance, plus the 12% from Flesh Heap, plus the 30% from Hood of Defiance you are looking at 67% Magic resistance. With all that magic resistance you take almost no damage from Rot and people will have a real tough time taking you down (unless they do something like minus armor on top of heavy physical damage), and if you have a bunch of stacks on Flesh Heap you are not only tanky on magic resistance but tanky overall. Builds into Pipe of Insight, this does not add more magic resistance to the mix unfortunately, but gives you the active magic damage block and even more HP regen. Tranquil Boots + Pipe of Insight is amazing.
All in all, if you can't decide on which of these 3 items to buy and nobody in your team is getting a pipe, then grab Hood of Defiance.
Both items provide you mobility and they both cost the same amount of gold (2250). But they are both very different items, let me explain:
There are obviously core differences to both items:
Also note that Aether Lens give Blink Dagger 200 extra range. It also gives 200 extra range on Force Staff, but that does not apply to the push itself, but just the casting range of using Force Staff on others. So, according to this comparison chart, Blink Dagger looks like the better pickup, but it isnt and I'll tell you why.
The upsides we see for Blink Dagger come to be irrelevant when we look at what Pudge needs in a mobility item.
Cooldown: Blink Dagger has a lower cooldown, of 12 seconds. However, Meat Hook is on a 11 second cooldown, and you dont usually have to hook something one time after another, and if you do, you rarely need repositioning with something like a Blink Dagger. You will notice that it becomes a matter of combo uptime, and 20 seconds on Force Staff's cooldown is just enough for you to set yourself and prepare for another hook. Also, Dismember is on a 30 second cooldown, Blink Dagger's low cooldown doesnt really matter when you are not going to be engaging every 12 seconds.
Mana Cost: 25 Mana is irrelevant.
Travel Distance: Ok this is a big one, so assuming you don't overshoot your Blink Dagger, you can travel 1200 units, plus 1300 units from hook you can engage enemies 2500 units away. Now, in actual matches you never see a situation where you have to hook someone 2500 units away, even considering in a gank scenario where there are no allies or wards, you are looking to hook someone over 2000 units away, without vision. The travel distance of the Blink Dagger isn't really utilized by Pudge and it's not a make or break point like if you were playing an initiator like Magnus or something. In comparison 600 from Force Staff sounds pathetic, but it's enough to jump through terrain, close gaps and also to push yourself ahead of your allies so the hook isnt blocked.
Terrain travel: Both items provide travel through terrain. However, traveling through terrain is something used mostly to create gaps when escaping, and you cannot use Blink Dagger to escape a fight already started, due to it's cancel on taking damage. In the video at the ending of this section you will see how I utilize the Force Staff to create terrain gaps that you couldn't with a Blink Dagger.
Instant Travel: This is one of the more important upsides the Blink Dagger has to it's name. The instant travel can come in handy when timing hooks more quickly, however you can get used to Force Staff's delay and land hooks just as easily (like I did). The instant travel comes in handy when we are talking jump in initiation with Dismember. When you can just instantly jump next to the enemy carry and disable it with your Dismember, especially in the late game, it can be a really important move that the Force Staff doesnt cover as well as the Blink Dagger.
Disjointing Projectiles: This is not something that you will be doing much, as Blink Dagger will likely be on cooldown during fights (you being attacked as I said Pudge focuses enemy fire a lot, and also cancelling your own Blink Dagger with Rot.
Break trees: Breaking trees is most of the time a negative, if we are talking escapes. The reason Force Staff breaks trees is for it to be able to go through all terrain, to match the Blink Dagger. But when escaping as so, across only trees, you create a path for enemies to catch up, not really ideal. The Blink Dagger on the other hand can be used to blink in the tree line and Tp out without risking anything.
Stats/Regen: The Hp regen is really passive and you wont really notice it, the 10 extra Intelligence is much more interesting, it's almost an extra hook. And having about 100 extra mana pool pays for the 25 mana cost of the Force Staff in the first place.
Cancels on Damage: This is one of the strongest points of a Force Staff if not the strongest. As any damage taken will cancel your mobility, and Pudge is a hero well known for damaging himself.
Components: In ganks it's very likely you will get killed once of twice, the building of Force Staff allows you to avoid total gold loss and grants you the 10 Int even when the item is not yet finished.
And to top it off: Force Staff can be used on allies and enemies too. Now you may be thinking:
"oh yea this forcestaff thing looks neat now"
But wait, there's more!
So something a lot of people and Pudge players tend to forget is the fact that you actually have to cursor to aim a hook.
How I like to put it is as so:You want to be using your mouse exclusively for moving and using your Meat Hook. There is a certain mouse moving custom that you build when you only cursor where you move and hook, you start getting more consistent at landing hooks and so on.
Now, the fact that you have to move your cursor in to use your Blink Dagger and then quickly aim your hook, again moving your cursor to a point "B", leaves a lot of room for mistake, especially if the enemy you intend on hooking can see you, and will try dodging.
Force Staff on the other hand can be casted by double tapping the key, this allows you to aim your hook even before using the mobility, allign your hero and use the Force Staff and hook simultaneously, for a more consistent mobility+hook combination. This is especially important when we try to hook in an angle, so not in a straight line, but move the foe to a third position. In conclusion:
If you don't already know what it does, it's actually simple:
* Increases Meat Hook damage to 450 on Level 4.
* Reduces Meat Hook cooldown to 4 seconds.
The point of aghanim's scpeter back in the day was scale Pudge to late game damage by using his strength to add damage on Dismember (which is now built in, really weak though compared to what it was). The damage from Dismember is magical, so, reduced by spell resistance and furthermore, blocked by magic immunity. Meat Hook damage on the other hand, goes right through it.
Aghanim's Scepter then, effectively (and with Aether Lens 8% bonus), provides Pudge with an almost 500 Pure Damage, Bkb piercing nuke on a 4 second cooldown, which is actually 2-3 in it's downtime considering cast point and backswing.
Considering repositioning, getting a hook off on some agility hero or a support is basically killing them instantly, or at least, taking them out of the fight. In essence, you hook them taking at least 1/3 of their Hp instantly, then bringing them to your side with your team; even without using Dismember, they will be low enough your your team to kill them off before they have time to get away from the center of the fight; better even, someone on your team stuns them, and by that time you already have Meat Hook up once again.
In terms of killing solo, the combo is just Meat Hook into Rot and Dismember, followed by a second Meat Hook. For this you can cancel Dismember early or wait a bit before using the second hook, as it is relatively easy to miss those point blank hooks on Dismembered targets because they always expect it.
This combo allows you to kill heroes you normally would not be able to gank by yourself, Anti-Mage, Juggernaut
Eul's is a straight utility item, and because of this, similar to the Blink Dagger vs Force Staff debate, is up to personal preference.
For example for me, euls is rather situational and I get it when the other team is being tough to play around in the sense that if I get a hook I may not be able to follow up because their team falls on top of me. Basically you can euls a hero and create a gap and such. That's how I use it personally.
Euls also provides you solid mana regen and a little bit of int plus some movement speed which in my opinion is a super good inventory slot passive benefit. It's main downside is the fairly expensive mana cost to use.
Apart from using is as a disable to timeout people in fights and to dispel debuffs off of you, like any euls user can, Pudge can get some extra uses out of the cyclone:
+As a reliable gap closer. Sometimes you and your team are chasing a hero or something and there just isnt any angles for you to try and go for a meat hook. Euls then serves as a gap closer for you to walk over and maybe follow up wih dismember or whatever.
+As a blink escape ability. One of the big downsides to blink dagger in pudge is that since you tend to stick around enemy heroes a lot, to deal damage with rot and whatnot, and rot itself, your blink dagger is rarely available for escape because it keeps getting cancelled. With euls you can cyclone yourself and have a much better shot at blinking out, using shift queue ala puck.
+As an instant cancel. Euls has an instant cast point, hook does not, obviously. Sometimes you are at a mid range with an enemy and you can see them about to cast something on you, you can create a good gap by cycloning them mid animation. This works for pretty much any animation past 0.3 cast point. A scenario that comes up a lot is against queen of pain and anti-mage blink abilties, which have a casting animation. Sometimes you'd find them, maybe on accident even, and as soon as they see you in vision range, they'll blink away. Unless you are really good predicting blinks in fog and you have the range for it; the way to do it is just cycloning them while they cast and then get the easy hook on them. Also, sometimes you just have to cancel someone and theres stuff in front of you, for example if your team gets black hole'd and you arent in a position to hook enigma, you euls him (but goo what about bkb? Yeah hook is not going to cancel black hole either if he has bkb on remember; you need dismember for that). Or when a magnus blinks in and there are allies in between you and him, you can euls him to cancel his reverse polarity setup instantly.
+ As a hook crutch. When enemies can see you and in the middle of fights it is not always possible to fake and angle hooks on heroes. With euls you can just take your time, line up the throw and displace them to wherever you want pretty much. Many people think the euls pickup is just for this use here, but there is more to it.
+As a hook setup. This is different to last one because this is for when you could land the hook but your objective is not to pull the hero in question towards you, but to a particular spot. You can euls the target, then blink or force staff or walk to your objective position (which can be behind a treeline, behind terrain barriers, to your allies, or under a tower, etc) and then hook from there. This is a really big part of the euls pickup especially on the higher levels because it turns meat hook into a precise hero displacing tool, which is nasty.
+As a hook chaining tool. Talking late game, after agh's, you can use the eul's to combo hooks as I explained over the back to back hooks section up there.
Many people grab Blade Mails when they dont play mid and lack the gold to go for items like aghs and such. In my opinion it's a bit more situational than what a lot of people think.
I don't grab it much myself in matches unless they have a team high on physical damage, as Blade Mail is one of the few items you regularly buy on pudge that provide substancial armor, the other being shiva's guard.
The active itself isnt that significant either, the best way to use it is to activate it when Dismembering an important enemy, that way if someone on their team wants to save them they have to trade some hp away.
It's also good to encourage disengament, heavy nukers will hesitate much more when you have Blade Mail off cooldown, so heroes like Tinker and Lina will not solo gank you anymore if you play your cards right. Also, if you notice they want to bait the blade mail to wait it out, then you go aggresive and hook them or something.
If you manage to build a big hp pool it's good against heroes that cant avoid damaging you, so any aoe stuff like Invoker later game and stupid spells like Rupture become a way to dish damage on enemies. It's fun to put yourself inside the chaos meteors and see invoker panic away. For the rest of occasions you want to use the Blade Mail on response instead, wait for that Finger of Death cast animation instead of running around expecting people to hit a blade mail pudge.
Black King Bar is I think viable in any hero that does something during fights. The idea behind bkb on pudge is obvious:
+No Rot self samage. +No cancelling Dismember. +No worry when walking into fights against spells (E.g. Walking through kinetic field or pushing against echo slam).
It's a mostly situational pickup, purchase is your call. Look at heroes and consider it, just dont forget it exists. Also, it's a way to get strength and tank up if your game isnt going that well.
Black King Bar is part of a Dendi combo I'll go over in his playstyle section later on. Popularized by the fact he buys bkb probably twice as often as other pudge players.
Ghost Scepter is a "oh **** I forgot about ursa!" item for most people. I think it's one of those utility items like euls, though on the defense side. And I dare say I buy it a bit too often.
Apart from the intended use as an in-response defensive item there is some stuff you can do with it, and the best part is that it costs no mana (and not that much gold either for what it does):
People will argue that if I want defense and I'm not going for a full Black King Bar then Glimmer Cape is the superior choice over Ghost Scepter, but I'll most of the time go Ghost Scepter not only because of the mana cost thing but because of how it scales later with Ethereal Blade, which is a really underrated item and a personal favorite of mine.
+ Think of Ghost Scepter as the opposite of a BKB, but with some overlapping on the usage. After the big spells and stuns are casted, using Ghost Scepter during Dismember is a good way to avoid major focus damage. Just remember you'll be taking a little extra damage from rot.
+ Ghost Scepter is an amazing distractor. Allow me elaborate:
Say you are setting up for a hook to initiate a fight but you get scouted out and the enemy team comes to focus you, while your team tries to get there in time to follow up on you getting pretty much ganked due to your over extension. Here's what you do, you pop ghost scepter and enemies have to decide if they want to put their spells on cooldown trying to kill you (which takes a lot of nuking, due to your high hp pool and flesh heap resistance), or they leave you alone and brace for your team about to jump on them. If they decide to leave you, then you can wait just as your team is going in and pull one of their heroes to you.
Provided this only works if you dont get nuked by something awful like Mystic Flare or Life Drain while you use Ghost Scepter. Just dont be dumb with your uses.
If enemies have a very magic damage based teamfight this is the way to go. I'll help your team endure the fights, but more importantly, it will help you take even less damage from magic.
It's one of the offlane sort of item pickups but if it's getting late and enemy teamfights are strong you can get one of these whole and bring it with the courier. Very rarely you regret going Pipe of Insight and if you do you were probably ****ed anyway.
Heart is a big expensive item for what it does, and really the idea with Pudge is that you tank up naturally. I dont like that much having it on my inventory taking up a slot, but the amount of HP it provides plus the ability to never go back to base as long as you have mana, and the fact that the strength only will make dismember deal and heal more damage makes it so I have to mention it.
One thing you probably know already about Pudge is that he is like Doom in that both get super tanky but have very low armor so their ehp is not that much more than their raw hp. Meaning that even if you have 4k hp, a Legion Commander with Desolator will kill you in 5 seconds.
Heart doesnt help that, in fact if thats the problem and you are getting killed by carries like Juggernaut or Lifestealer (or Legion Commander), you are better off getting a Shiva's Guard. Heart of tarasque is for when you are up against those teams that have their kill potential on number advantage, so when their carry is not really being the tip of the spear on fights, or when they straight out have no carry.
In these kinds of matches a heart of tarasque will put you so far out of their killing posibilities that unless you are completely outnumbered and by yourself they wont even bother going on you.
Here's one passive item that I dont mind having. First of all, I'm going to talk about octarine core like it's the best thing ever just when I'm mentioning what it does, this does not mean you are supposed to purchase it every match, it's not really situational (because that would imply it's affected by enemy heroes) but more like it's an item you buy when you don't NEED any other big item and you feel like getting it.
With that said:
+ Octarine core is expensive, but it will give you huge extra hp and mana pool (really pretty much fixing your mana related issues).
+ It will reduce all of your cooldowns, including items of course, so you can use Force Staff more frequently, blink dagger too. If you have Aghanim's Scepter it will reduce hook from 4 to 3 allowing you to perform some hook combos more easily.
+ You will lifesteal from spells, huge pure damage nukes from hook turn into HP, getting into the middle of a fight with rot is much easier and dismember will heal you even more than normally, as you will heal from it's in built heal and also heal a percentage of the damage you are dealing.
Octarine Core and bkb go together nicely mostly for the lifesteal part of it, so they cant cancel your healing from Dismember, but also because you can turn on your bkb and turn on Rot and walk into 5 people getting healed by Octarine Core lifesteal.
Shiva's Guard is an awesome item. People sometimes look at it as a AoE slow they dont need but it is in fact a really big helper in passive abilities Pudge needs.
It's a big armor item and on top of this also slows enemy attack speed passively, in conjunction it helps you a lot against the type of damage pudge is most vulnerable to, which is big physical.
Also a lot of int for mana pool, which does not scale with pudge's scaling HP pool. And later on and especially with aghanim's scepter you will be using a lot of mana from multiple meat hooks.
The active is secondary. But I really like it for two reasons:
+ If you hook a hero you plan commiting dismember to, activate shiva's guard while the hero is in mid air, this damages and slows the hero but also makes it so people of their team who may want to come help him/her take longer to arrive to where you are.
+ Flying vision is overall great for finding people especially in places like the jungle with tons of dark spots. And for those uphill pushes fights.
Boots of Travel I think is a must on all heroes in the late game, the issue is: How late?
The time to buy travels for me is generally when I have the items I really truly need and I'm left with no Town Portal Scroll slot in my inventory, when I need to tp to places.
Sometimes you have no space for tps but you dont need tps so no problemo.
I very rarely buy them earlier than that, but you can make an exception for when your team has units like with a beastmaster or if your team is going for a rat/splitpushing game.
Also to be bought on the spot in case of base race. Your call.
Linken's Sphere is not that common on pudge because bkb is overall a better alternative in most matches (being unnafected by rot is a big factor for that), but Linken's Sphere is a defensive item that works all around all the time, tanks you up and gives you huge regening allowing you to stay in the map unlimited time.
If you buy it you'll know how it feels never having to bother regening, but you'll also see how it's the only item you have.
It's extremely situational, and I'm not talking about "buy it if they have doom or bane situational"; even if they have doom you dont buy linkens.
You buy linkens only if they have doom AND your carry could get ruined by that Doom.So you put linkens on them. The big part of the item in this case is being able to protect some ally and having the awesome regen and stats for yourself.
Heaven's Halberd is another situational pickup against specific heroes. With it and Dismember you can keep a carry hindered for quite a bit, so dont forget to buy it if your team needs that peace time in fights.
I personally dont go for halberd that much because I'm an Ethereal Blade guy, but still, this is much cheaper, gives you strength and ehp in the form of evasion.
The new Aghanim's Scepter on Pudge made it so you don't longer scale the strength to Dismember damage fully like before, this was a huge nuking capability that was increased by ethereal blade ghost form. However, the item is still amazing on the right hands.
Pudge is a hero that scales infinitely with strength, essencially making Ethereal Blade blast damage scale infinetely. The more you kill, the stronger the nuke gets. Ether blast nukes on some games start to average 500 damage, which is a huge nuke considering you also have Meat Hook's pure damage and the also scaling Dismember damage.
Similar to euls, Ethereal Blade gives Pudge something he can cast reliably and from a range, opposed to Meat Hook which needs a clear shot. But instead of a cyclone it's a slow, you can close a gap by slowing a hero from far away and then hooking them much more easily. Plus, as you know, you only get Flesh Heap stacks from heroes within a close radius around you and heroes you kill directly; ether blast is a way to secure those far away kills so they give you Flesh Heap stacks and you keep scaling.
You can also use ethereal on yourself like ghost scepter and do all that cool stuff (see the ghost scepter explanation on the previous section). And even to rescue allies.
Basically Ethereal Blade allows you to perform more cool plays.
If you are already tanked up from a lot of Flesh Heap stacks (which is usually the scenario for a an ethereal blade purchase) you also start right clicking for 250+ damage, agility from ethereal blade gives you a bit of attack speed so you can get into fights with no mana and rot on just right clicking supports. Also natural armor from agility.
HexOr has his euls, dendi has his bkb, slahser has his soul ring, I have my ethereal blade.
The offlane is a good alternative to the midlane because of what Pudge needs for a good laning phase.
Talking about solo offlane if it wasnt obvious before...
Pudge as offlane has one goal, Get level 6-7 and start rotating. The time where you are in lane is actually fairly intuitive, avoid harass, stay in exp range as much as possible, when the creepwave comes pull it around the tower, get any CS you can and so on.
More than often you will see some of the supports (usually the one that harasses the most) to get out of position and make an opening for you to hook him. Now, first of all you have to remember you are still in lane with other enemies and they can easily dive the tower to save their ally or at least get you killed in return.
In order to hook someone as a solo offlane Pudge you have to look at certain things:
-Make sure the creepwave under your tower just died or is about to, as you want no enemy creeps tanking the tower in case your victim's friends try to come help.
-Get into a blind spot, if you hook from a juke spot or behind trees they are going to first have to find you, and in that process path around the tower and paths and that usually gives you enough time to land the kill and run back to a safe zone. An offlane Pudge starting items are quite different.
You will see yourself going for stats less or not going at all, as stats from something like Gauntlets of Strength's main purpose is to allow you to use Rot a little bit more, to harass and last hit, and these are things you do not do as an offlaner. HP regen and armor is more valuable in scenarios like this, this is why I recommend the following:
These two build into Tranquil Boots and these boots are the best for a Pudge that is going to be playing mostly defensive as you dont have the items for a more invasive playstyle.
Pudge offlane revolves around two items, the first one being Tranquil Boots and the other being Soul Ring. These two items replace the Bottle one for HP and one for mana, as you wont be able to pick up runes as you would if you were midlane. You get the passive regen from tranquils and you use your Soul Ring before each hook and it basically pays for itself.
As starting items, building into Tranquil Boots and Soul Ring. The reason I don't recommend this is because you wont be using that mana regen as often, because you will only be wasting mana when an opportunity presents itself, and you will be using the HP regen much much more, to deal with harass to start off.
Also, Town Portal Scrolls and Smokes are much more crucial to offlane Pudge, it's defensive playstyle often results in lack of Flesh Heap stacks, you have to try help your team in other lanes every time you can, TP into enemy dives to even the playing field, and use smokes to gank mid, even if you dont land kills you will be helping your allies and getting stacks of Flesh Heap.
THE OFFLANE PARALLEL POOL OF ITEMS. A fancy name for the group of items that look weird but are viable in a combination of the situation you are in a match and your lack of gold from playing offlane/getting rekt. Because of these situational sorta nature they won't be listed up these on the itemization display.
Decent items, but amazing in those situations.
Soul Ring is extremely useful in the right situations, and, if you play around the sacrifice Hp loss, only has one downside, and that is delaying a first bigger item like a mobility or aether lens.
The idea is to turn some of Pudge's big Hp pool into a mana free Meat Hook. Having 150 mana over the 140 cost. This is a replacement to bottle and arcane boots, instead having Tranquil Boots to fix for the sacrifice cost. On top of this, as a Pudge offlane you'll be killed or close to death many times during laning stage, using sacrifice when low Hp and with Rot toggled on is almost always a guaranteed suicide deny.
The Soul Ring + Tranquil Boots tandem is ideal for roaming between lanes, having no Hp or mana problems and extra movement speed; on top of it's relatively low cost and easy build up. It's arguably the best way of starting a game as an non-midlane pudge (so offlane or even roaming full time). Even the components alone help you out quite a bit during laning.
Power Treads are relatively underrated and if you are playing low level dota you may even get some bad looks from your allies for not having utility boots. But the idea is to have a little more stats, for more mana and hp pretty much.
I recommend this for higher level play or for people that are stuck in matches where kills are hard to come by, because pairing Urn of Shadows with Power Treads will tank you up pretty hard without Flesh Heap stacks.
Also for treadswitching and Bottle. Dendi still builds like this to his day but we'll talk about that on the right section.
Purchasing Shadow Blade will get you flamed unless you are stomping, and it's a waste of money unless it's a very specific situation.
The idea of it is to be able to dive into unwarded enemy territory like jungles and gank heroes without needing angles for hook, breaking invis and dismembering first. I'd only get Shadow Blade if there is no other invis in my team, and when enemies have really high map vision, with heroes like beastmaster and his hawks for example, or when lanes are very pushed back and enemy heroes are missing constantly. Think of Shadow Blade as a reausable smoke of deciet with no break range.
Also, you can use it to escape which is kinda sloppy but can work. And you can turn it into Silver Edge in the super late game, that way you can have another inventory slot that provides strength without sacrificing the invis utility.
I'll say it again: extremely situational.
Sange & Yasha ( Pudge has had their proper purchase ratio on the really high brackets of play; and it's mainly because it's a slot that provides decent strength, and adds to your movement speed. Paired with Tranquil Boots and euls you can go racecar Pudge and Rot people down.
You'd get Sange and Yasha in a situation where your team isnt losing, but you arent that present in fights; which helps you from the lack of Flesh Heap stacks and the strength from the SnY.
Basically helps you not be so weak in fights without having to feed yourself Flesh Heap stacks (this is why it's more commonly seen in very high mmr matches, where kills arent that easy to come by as Pudge).
Drums of endurance falls in a similar category, making pudge a sort of tip-of-the-spear aura carrier, providing him with early stats and movement speed.
Drums are solid, the problem is that they do delay your mobility item/aether lens, and only work their full potential when your team groups up. So not recommended for a ganking sort of pudge, more of like the teamfight Dismember Pudge.
Assault Cuirass is a different version of an aura, different than drums of endurance but sharing a purchase phylosophy. Making Pudge the center of the fights due to his high hp and Rot to encourage disengament; AC's aura mainly helps your right clicking carry; but also fixes your low armor issue forever. In combination with Shiva's Guard you can become extremely tanky, even against your main weakness, physical damage.
Finally Veil of Discord which is another underrated item that falls in the items that you should buy early but you dont want to delay mobility so you would buy it later on but it's effect isnt the same at that point" category.
It's pretty good if you ask me. Amplifies Rot's damage output and Dismember. Plus gives you a bunch of mana pool in the form of int, on top of a good, much needed armor boost.
Delaying mobility is something nobody likes doing, but if you have at least one really big nuker on your side, consider an Veil of Discord viable. Examples, Zeus, Disruptor, Lina.
With such a simple concept-mechanic hero, it is expected of players to put their own sort of style to their play. The following sections are about these styles, how they play Pudge and what items do they pick, and why.
Remember that after all, it's all about the same hero, and playstyles can only be that much different; it's mostly stuff regarding laning, item decisions, and the role in the team, which ranges from a roaming sort of role to a full on kill-focused mid laner.
Naturally I'll go over mine first so you guys can easily skip it... :(
My Pudge is and has always been Meat Hook centered, I play solo mid and focus on disrupting farm and killing key heroes over being the aura carrier or a teamfight component.
The way I build and my item decisions are already laid out across the guide, but here's how I personally build:
+ I do not get Bottle anymore. After the nerfs I think going for Arcane Boots first and bringing healing salves if I need HP regen is the way to maintain myself on the lane.
+ I buy Boots of Speed, a set of Tangos and two Iron Branches as starting items, then usually contest the bounty rune; if I'm outnumbered or their heroes are strong lvl 1, I just go back and bodyblock the mid creep.
+ If I manage to get the bounty rune I'll generally try to kill the enemy mid as soon as I hit level 2, having both hook and Dismember and knowing they only have a single spell to fend for themselves. The exception being if they are a Queen of Pain that went Blink level 1 or something along those lines.
+ Play carefully during laning and try to wait for the enemy to misposition themselves to go for a hook. I dont get greedy pre 6-7 because if I die that's gonna hurt my Aether Lens time.
I prefer Force Staff over Blink Dagger mainly because of how I've formed muscle memory to aiming my mobility without using a ground target cursor; this allows me to focus more on hooks, and also escape deeper dives using terrain.
What I try to do as soon as I get Aether Lens is to kill the carry as many times as possible until the safelane tower is killed; in between the times he comes back I go for supports or junglers. If i'm going to kill the mid I generally buy myself a smoke. And always have tps so if the enemy mid ganks my bottom guys while I gank top I can to and help, since my effective range is already pretty long. Here's a video of me playing: Note that I don't have the editing or the time to get a cool super compilation, these are just hooks I took for the latest matches I had played at the time of recording, even if there's some cool stuff the majority of it is pretty vanilla.
The supamida has gone through a lot of changes with his playstyle through the years and through the patch changes.
Even if Pudge itself as a hero is much stronger now he doesnt play it as much anymore, and I blame the competitive meta for the most part.
I'll go over his current style first and more in detail, as the old dendi style isnt reall up to date anymore (one thing from it does carry over today's playstyle and I'll go over that last):
+ Dendi plays a super aggresive solo mid right from the start, capitalizing on the fact that he double downs on early game items and starting stats, using rot to land a couple right clicks on the enemy mid, then pulling the aggro to his ranged creep.
+ He does the classic Bottle stat build to this day, even if he doesnt go Bottle all the time. That's two gauntlet of strength (which he turns into an Urn of Shadows), three Iron Branches (he uses one of them with a Tango, and the other two he builds into a Magic Wand), and the Tango set.
+ Right after starting items he goes either Bottle or brown boots; he gets one after the other usually what changes is just the order. He rarely skips the Bottle.
+ Right after Blink Dagger he either starts building a bkb, or if he went Arcane Boots he'll get Aether Lens and bkb afterwards. If he didnt go arcanes then he goes bkb first and then gets Aether Lens whole. The reason he does this is because he doesnt want to rely on hook in case they get initiated on he can jump into their carry with bkb and dismember him in the middle of the fight for the full duration, giving his team time to come in.
Dendi plays his Pudge as a pickoff once in a while but centers his role as an anti-carry disabler with ganking tools to help his team.
Dendi is known for getting the early bkb, he has done that build for many years now, and back in the day his full set would be something like Blink Dagger, Black King Bar and a Refresher Orb. And he would dedicate his position to disable the enemy carry for as long as possible.
Note that with Refresher Orb he can use his bkb again, turning a 5 second bkb into a 10 sec bkb, with 6 of those seconds dedicated to Dismember.
The bkb refresher build can work nowadays but it's a really specific itemization to do a single thing, and you have to keep that in mind.
If you build something like Blink Dagger, Aghanim's Scepter, Octarine Core, Black King Bar & Refresher Orb; you'd have lower cooldowns on blink, hook is at 3 seconds, dismember, bkb itself and refresh. And you could hook a hero, pop bkb, dismember them for a full duration, hook them again, refresh, hook them again, then pop bkb for the second time, dismember again for a full duration, then hook one last time.
It does not matter what hero you are playing, at this point you are already in hell.
HexOr plays a Pudge I really enjoy watching, mainly because he has a cool hook, but also because his playstyle is really hook centric like mine; he plays mid solo which I think is the most high impact if you know how to play it, and gives you the true killing power Pudge can achieve.
He goes Arcane Boots first into Aether Lens, and then turns his remaining brown boots into Tranquil Boots. The reason he goes Tranquil Boots is because on top of the fact that he will be roaming enemy territory a lot, he wants the hp issue fixed on passive (for example, I fix my hp issue by dismembering neutrals in between ganks), and the extra movement speed for the roaming stacks up with the movement speed from eul's. Also, unlike dendi who goes any boot and has urn of shadows pretty much every game, he handles with the tranquil boots regen.
And my playstyle (Goo) is about killing killing and invading space, dendi's playstyle is all about teamfight disruption and creating bad situations for enemies,; and HexOr's playstyle is about going for the individual plays, disabling some specific hero, hooking low hp heroes instead of carries and so. Whatever has the potential to screw enemies over the most that's the objective, and he uses euls and mobility to take that objective as far as possible from the fight.
The main flaw in my playstyle is that if I fail to get kills throughout the game my teamfight contribution will be weak due to my aggresive itemization; this flaw doesnt exist in Dendi's and HexOr's builds; but they are not a huge ganking threat either, because their itemization isnt focused on that.
Here's a video of him playing. Even in rather old, his playstyle has remained near unchanged.
Slahser plays completely differently; to start off, he plays as a solo offlane, and has a parallel itemization.
The way he plays Pudge capitalizes on Pudge's early game, as he considers displacement is the strongest during laning, where dives are more easily punished.
With solo offlane he can get levels (but not gold, which he doesnt need much of for this build), and roam from early without taking the mid lane off a farming position.
Slahser's early game is based on two items: Tranquil Boots and Soul Ring, and so he purchases his starting items often with components of the two. The idea is that you get 5-6-7 in the offlane and with those two items pair yourself with an ally and roam using the range of hook while your carries farm.
It is the closest we have to a consistent roamer pudge position.
He doesnt side with either Force Staff or Blink Dagger so strongly and gets whatever he thinks he may need; this is probably because he doesnt play Pudge as much as a gold hoarder from ganks and needs to spend his gold a little bit more carefully than the previously mentioned players.
After mobility (if he did purchase any at all) he tends to go either Glimmer Cape or Blade Mail, depending on the enemy team.
Late game I've seen him pick up a lot of auras and utility over stuff like Aghs or Octarine Core, probably because he doesnt trust to be able to kill carries with more farm just from hooks and keeps himself as an aura carrier and damage sponge.
Slahser's playstyle is, in my opinion, the easiest playstyle to understand if you are not a pudge player; since it doesnt require you to land crazy kills on the enemy lina when playing mid as a melee itemless hero. Instead it's all about offlane and roaming ganks, which is a more universal concept.
Leaving Sumail's style for last because, even if he doesnt do this ALL the time, he is the player who does this the most in regular ranked matchmaking; so we could say it is sort of his style of play.
Sumail plays a duo mid with wisp and using double Bottle to dedicate the laning phase only to shut down the enemy mid, this means going deep with Rot and Overcharge, using the Tether movement speed to chase people down, and spam your mana with Meat Hook and Spirits.
This section is not done yet. I was going to finish everything and update the whole thing but this sections take a long time to make; I will update again including sections going over the mid matchups against:
Pudge is a hero that isnt hard countered by anything as he messes with enemy positioning, and that isnt something you can really counter directly (with the exception of Time Lapse).
However, there are certainly heroes that are annoying to deal with, here are some of them:
Puck: Pudge has a tough time dealing with Puck for several reasons, he can dodge Meat Hook with Phase Shift, you need Dismember to kill it and even then it's not guaranteed as he can escape any time with Illusory Orb, he has a silence ( Waning Rift) and during the early game a silence can mess you up because Rot toggling. And he is ranged, so tougher lane.
Queen of Pain: For similar reasons, she is a very escapy hero and you need to time Dismember perfectly, and it's still not guaranteed a kill. Also she will destroy you mid, and you can't get farm back by killing her as you would with other heroes (like Viper, etc) because of the escape.
Storm Spirit: Storm has really high mobility when he hits 6 and becomes annoying to deal with then, but also before ultimates, Storm Spirit is a hero that's really scary at close range, and he also runs over melee heroes in the mid lane.
Ember Spirit: Ember is one of the few melee heroes that messes with Pudge a lot, mainly because Flame Guard. Meat Hook goes through it completely (pure damage), but Rot doesnt, and if you want to kill the Flame Guard you are going to have to tank both Flame Guard and Rot damage's over time, and gets scary. Also I've seen Ember Spirit players dodge my hooks with Sleight of Fist but they aren't that consistent at it.
Magnus: Magnus is a really scary matchup because he is basically better equiped than Pudge if we compare them as melee heroes, he has a way more mana-cost efficient nuke for the creepwave and as harass, and he can use Skewer to escape you and also to get you into tower range. This happens when you are both CSing and he turns around or kinda turns to the side, when you see that you have to retreat a bit or you'll get Skewered, and it hurts a lot because of Pudge's really low armor value.
Bounty Hunter: Invis escape and courier sniping. In a more deeper level, Track is the most annoying thing ever, because one of the things that counter Pudge the most is vision, and being Tracked is like running around with a enemy ward strapped to your forehead.
Spirit Breaker: He is very effective at countering ganks, so if you hook someone he will be quick to follow up. Also, he ganks mid.
Nyx Assassin: He scouts around, he can gank you early game, Mana Burn, etc. Also it happens that when you hook a Nyx Assassin they will immediately pop Spiked Carapace and it will either cancel your Dismember as soon as it starts or you will be stunned from Rot Aoe.
Silencer and outworld devourer: Both of this heroes screw you over by reducing your mana pool and mana in general, be careful around them. Especially Silencer as the pool reducing is permanent and he has multiple silences in his skillset.
That's all I have to say for now. The rest of non-guide stuff is up there on the preface.
On a separate note, lately, along Pudge, I've been spamming Slark; which was until recently a sort of new hero to me (in that I had never spammed him before), and I feel I've gotten really good at it mechanic wise (dispeling, disjoints, controlling dives, all that stuff).
The next guide, whenever that is, could be on Slark. Just saying.
Someone on reddit asked me about music to listen while playing; so I made a medium sized playlist with 40 songs that are in my music library (not necessarily my favourites but the ones I think the most people will enjoy). Click here.
DOTAFire is the place to find the perfect build guide to take your game to the next level. Learn how to play a new hero, or fine tune your favorite DotA hero’s build and strategy.


 Tango
Tango


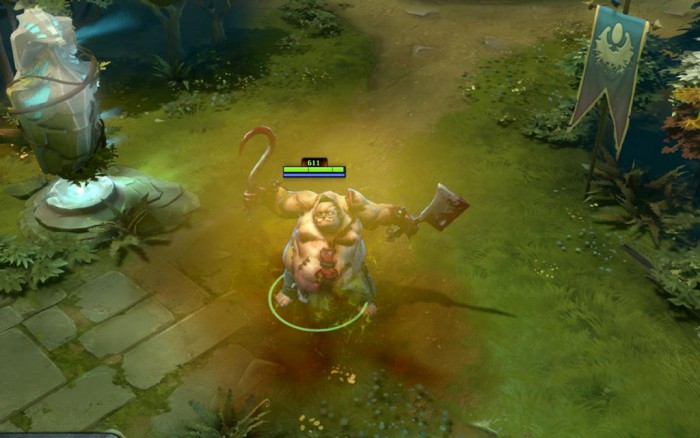


Quick Comment (5) View Comments
You need to log in before commenting.