Sando's Guide to Abaddon
Sando
August 20, 2014
Introduction
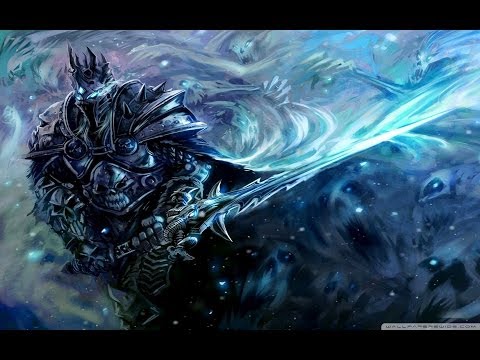
 Abaddon
, Lord of Avernus; a multi-role hero who can be incredibly frustrating to play against. Healing allies, removing stuns with impunity, and even gaining health from the damage you inflict on him, he can be a nightmare to deal with.
However, his powers require careful usage, and even his amazing tanking abilities have to be used carefully to get the maximum effect - tough isn't the same as invincible.
Abaddon also runs the risk of simply being ignored by the opposition once they get wise to you, so we'll also look at how to deal with this issue.
Strengths and Weaknesses
+ Flexible, multi-role hero
+ Incredibly strong tanking ability
+ Can instantly remove debuffs from allies
+ Powerful buff placer in  Curse of Avernus
+ Good base movement speed
+ Can heal and protect team mates
- Lacks any hard disable
- Can struggle for damage output
- Needs some equipment to be effective
- Skill scaling isn't brilliant
- Ultimate can be minimised by good play or big burst damage
Borrowed Time
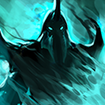
Borrowed Time is your ultimate, and what a nightmare it can be for the opposition. Activated manually, or automatically when you drop below 400hp, it will remove most negative buffs immediately, and for the duration any damage you take will heal you instead.
Obviously this is a really big deal - it can get you out of a lot of trouble, heal you to full health from almost zero and make you a real handful for the opposition.
Be very careful to only engage in risky encounters when it's off cooldown - your survivability is significantly lower, and the cooldown on it is relatively short. Don't accidently waste it when jungling for example.
Abilities like  Culling Blade, Lagune Blade and
  Finger of Death can kill you without activating Borrowed Time
 (
 Axe
Axe can even kill you with it active if you're below the threshold). Same with big critical hits from heroes like
 Phantom Assassin
. Manual activation is recommended here.
Good opponents will stop attacking you when it activates and wait out the duration, so you need ways of forcing damage on to yourself, such as using
 Mist Coil
. This is part of the reason I recommend items like
 Armlet of Mordiggian
 (careful with those toggles!)
 Soul Ring
 and
 Mask of Madness
.
However,
the best way of using Borrowed Time is to pick Abaddon against opponents who are not "in control" of their damage output. For example, if
 Jakiro
 uses
 Macropyre
 or
 Tinker
 uses
 March of the Machines
 then they can't stop that damage from healing you. You're really good against heroes who can't precisely target or stop damaging specific units.
Another important part of using it well is simply to make yourself enough of a problem - if you're running in and hurting people with
Curse of Avernus, removing debuffs from allies and generally making a pain of yourself, the opposition have to do something to deal with you - which is exactly what you want.
A quick note here on the
 Aghanim's Scepter
 upgrade - it's pretty tremendous really. Although the time increase isn't that significant, being able to absorb damage for the rest of your team is. Not only will the enemy be unable to avoid healing you in most situations, but it provides considerable damage reduction for everyone else.
Skill Builds
The three builds I've listed above are pretty standard, and you'll want to pick one based on your main role in the game, and the situation.
I've generally left Curse of Avernus until last because it's your best scaling skill, and the benefits of higher levels in it only really come through later in the game. However, there may be situations where you want to max it sooner - such as if the extra slow will almost definitely lead to kills, or you have an unexpectedly large amount of farm.
Mist Coil may not seem that useful early on, but it can be the difference between a kill secured or a carry saved. It's also extremely useful to have more points in it when you're operating under Borrowed Time. All that self-damage is guaranteed heal, and you get a "free" nuke out of it.
Playstyle
Support:
Abaddon is not a conventional support as he lacks anything approaching a strong stun or slow, and he's melee which makes it harder to harass and deny in some lanes. He's reasonably level dependent and doesn't want to be stuck babysitting in a lane for too long.
You can be quite aggressive with him in the laning phase by running in to harass with Curse of Avernus, you can combine this with  Aphotic Shield to make yourself a real pain and generally force opponents backwards. However, you won't have the mana to keep doing this indefinitely, and have to be more restrained until you reach level 6 and Borrowed Time.
Personally, I think Abaddon works better in a dual lane than a trilane, unless it's a very aggressive trilane that doesn't mind diving to get kills and will generally be ballsy. Those early assists will help a lot.
For dual lanes, he does extremely well in those really tough situations that most heroes don't want to be in. Say you're against a  Bane and
  Mirana looking to setup big arrows - you and your lane partner should be able to look after each other and ensure that those big stuns don't last.
You want lots of healing equipment so you can make use of Mist Coil to help allies, do some tanking where possible, but your most important job is to ensure your key heroes like carries and initiators have timely Aphotic Shields.
Carries/Offlaners:
Obviously your gold income will depend on which lane you get here, but either way you'll be able to afford some items which are usually out of the reach of supports.
The most important thing here I find is that you need to make yourself genuinely threatening to enemies, while also increasing your HP to get maximum benefit from
Borrowed Time - every point in your pool can be essentially tripled with the right plays (lose it once, gain it back, lose it again).
Any damage you can add automatically makes you more threatening, and the attack speed bonus of
Curse of Avernus can compensate for your agility here. Additional effects like
 Skull Basher
 add to the threat, and make it hard for enemies to ignore you. You can also be pretty ballsy with dives and aggressive play provided you think you can make it out again - given time you'll start thinking of enemy towers as "guaranteed healing" :)
What mixture of tank/DPS you go will depend on the composition of your team - if you're the primary carry you'll need more damage, while if you're a #3 offlaner you will probably be happy just to tank up and add some threat.
Items
Starting:


A fairly standard selection of starting consumables and stats. The Stout Shield is always a good pickup if you can possibly afford it, as you can harass and compete much more effectively - sometimes I'll even pick it up before boots as a support in the laning phase.
The Clarity potion is situational - you won't get the chance to use it in some lanes as you'll likely be getting hit, but it can be useful to have if your role is more passive.
Core:


A sizable number of options here, and completely different choices depending on our role. Lets start with the support items...
It's usual to pickup the
Tranquil Boots for the healing and armour bonus, with
Soul Ring providing your mana restoration ability. Between these two items and
Urn of Shadows you have considerable sustain for both health and mana.
Soul Ring has the additional bonus of damaging you - always useful when under
Borrowed Time to get a free 150 health back and enough mana to ensure you can cast
Mist Coil.
This would usually be my preferred core, but you may consider replacing items with say
 Ring of Basilius
 or
 Bracer
 if you're rushing to pickup a
 Vladmir's Offering
 or
Drum of Endurance.
The carry options are distinctly different. We want to pickup damage here, and also items that will let us manipulate our health pool, or offer more threat to opponents.
Phase Boots should almost always be your preferred choice due to the increased damage and chasing speed.
Curse of Avernus will provided the attack speed we need, so
 Power Treads
 aren't really that desirable.
The other options are quite interesting -
Drum of Endurance gives you an all round bonus, plus an aura for your team. It's the most generalist choice.
Armlet of Mordiggian is a statement of intent - the fastest and cheapest way of boosting your damage output. The health drain can actually be quite useful when under
Borrowed Time but the effect isn't hugely noticeable. The main thing to be careful of here is toggling it off when doing so will leave you under 400hp and potentially activate your ultimate accidently.
Mask of Madness is another really useful aggressive item - lifesteal combined with a big bonus to attack and movement speed can make you really threatening and force opponents to engage you. Even the increased damage vulnerability can be helpful - taking more damage when under the effects of
Borrowed Time will just heal you faster! Combines well with
Skull Basher and
Armlet of Mordiggian.
Maelstrom is our final interesting item. I wouldn't say it's a standard pickup, and you'll need more early levels in
Curse of Avernus to boost your attack speed and make it viable. However, it can greatly boost your farming and pushing speed, while adding extra damage in team fights.
Extension Options:


Again, we have a fairly distinct split between the support and other roles, although it's not impossible to move
Abaddon up the farming priority as the game progresses.
Mekansm - you're a strong carrier for this due to your survivability, and it helps manage your health and provides an aura.
Pipe of Insight - another item that suits you well, providing improved tanking abilities as well as team utility against strong magic damage attacks.
Drum of Endurance - improves all your stats and provides another strong aura for your team.
Blade Mail - an interesting item on
Abaddon, but one that requires careful choosing. The general stats are cheap and extremely good, while your relatively high HP makes the active component interesting. You need to be careful not to further dissuade enemies from attacking you during
Borrowed Time, but it can be useful just afterwards, or when bathing in uncontrollable enemy damage.
Orb of Venom - this should really be picked up during laning, provides a useful additional slow on top of
Curse of Avernus, and is very cheap.
Vladmir's Offering - good all round stats and aura boost, combined with some team lifesteal and bonus damage. It's very useful, especially a little later in the game.
The carry options continue our themes from our core - with even more emphasis on either tanking, threat or both.
Skull Basher is the logical progression of
Armlet of Mordiggian/
Mask of Madness builds, with your attack speed now proc'ing frequent stuns and yet more damage. This item makes you extremely difficult to ignore, while also boosting damage and effectiveness.
Black King Bar is for if your threat is attracting a little bit too much attention - you don't want to be getting disabled for long periods during fights or eating huge nukes before you can activate your Ult. BKB gives your more flexibility and survivability. Situational, but important.
Aghanim's Scepter is really strong for you if you've taken on a tanking role. It increases your
Borrowed Time duration, and most importantly channels 35% of all damage taken by allied heroes within 900 range to you while it's active. Not only does it almost guarantee you'll fully heal, but it provides a huge defensive bonus to your team.
Mjollnir obviously is somewhat dependent on you already having a
Maelstrom but it's a further improvement. Gives you great farming/pushing ability plus extra damage in fights, while the lightning shield can help with tanking.
Luxury:


There's likely to be some convergence here if you make it to luxury items as a support, although there should still be more of a focus on utility and tanking rather than damage.
Heaven's Halberd is a great item for increasing your own survivability, but it's primary job is to disarm out of control enemy carries temporarily.
Assault Cuirass massively increases your attack speed, but also increases your armour and provides a very strong aura for your team. While this is preferrable on a carry
Abaddon, it still provides good utility on a high-level support. Personally, I prefer it over a
 Shiva's Guard
 on him.
Necronomicon is another good utility item, especially against invisible heroes and
 Shadow Blade
 carriers. Nice strength and intelligence gain too.
Heart of Tarrasque is a good general tanking and healing item, making you exceptionally hard to kill, and fast to heal provided you can escape engagements. Also provides a nice little damage boost.
The carry items generally require you to have already focused on items to give you damage and/or attack speed.
Abyssal Blade is an upgrade to your
Skull Basher and provides big extra damage combined with a reliable physical stun.
Daedalus is a nice way of boosting your damage output. While not a particularly natural carrier, your fast attack speed should guarantee regular procs and increase your average damage considerably.
Desolator is another nice damage boost, and will even play nice with
Mjollnir if necessary. Armour reduction helps with pushing and fighting.
Satanic is the fighting man's Heart, providing big lifesteal and an active that lets you rapidly heal during combat. A great way of further expanding your survivability once you have sufficient damage.
Conclusion
Abaddon is great as a utility tank on most teams, and is a great go to pick if your team have very aggressive early heroes, or the enemy lanes look horrible to play against.
He's a very fun hero to play as you can get away with some frankly ridiculous plays that you wouldn't even consider with many heroes, let alone try. Easily one of the best tanks in the game, he's a great aura carrier, healer and debuff remover.
Remember to shout "Have at you!", "tis' but a scratch" and "I'll bite yer legs off!" as you charge bravely into mortal peril :)


 Animal Courier


Quick Comment (19) View Comments
You need to log in before commenting.