Please verify that you are not a bot to cast your vote.
Help SupportOur Growing Community
DOTAFire is a community that lives to help every Dota 2 player take their game to the next level by having open access to all our tools and resources. Please consider supporting us by whitelisting us in your ad blocker!
Want to support DOTAFire with an ad-free experience? You can support us ad-free for less than $1 a month!
Hi everyone, Yzreel here! This is my first guide ever (so do spare me from your torture please!), and I am going to make a guide about... Bounty Hunter!!! I am by no means a pro, and I can even be considered quite new in Dota 2 (around 500 hours + some years back in wc3) compared to you guys. However, I will try my best to write what I have learned through experience and watching tournaments, as well as from other people kind enough to teach me. Do note that every video and image I use here belong to their respective owner and I DO NOT claim each of them as mine.
Bounty Hunter is a really great (semi) carry hero that is extremely hurting in the early phase of the game. He is a solid off-lane hero and is one of the most-picked off lane heroes because he can effectively get last hits and exp even in trilane off-lane with relative ease and safety. This is caused by his trademark invisibility skill in the form of Shadow Walk and his passive Jinada that gives him a reliable critical every few seconds.
However, in early game, his threat is not just that. His true threat in early game is his active skill, Shuriken Toss that deals terrifying damage early phase and combined with Track, he can snowball himself and his team through mid game and late game.
This guide is made because I personally think that there are just too many pub players that play this great hero wrongly (Rush Battle Fury, anyone?) As one of my favorite heroes, I cannot let this goes on, and I want to provide a guide on how this hero is supposedly played in tournament. Other than that, I will also throw in my own personal gameplay and experience that does not follow the tournament build and is played mostly in pub.
Before we begin the actual guide, I'll give you summary of the whole guide as a forewarning that the actual guide will be in-depth and too lengthy for casual reader. If you only want to read for a little while, read only this (alt-tab friendly.)
What are you: You are semi-carry, not hard carry, not support (position 3 normally, can be 2 if really needed). It's not your job to farm or to buy wards. Your job is to roam as much as you can and get as much kill as you can. However, taking farm early on (in laning phase, before your hard carry goes around the map for farm) is pretty much essential to be a good semi-carry.
Which lane should you go: Take off-lane or mid-lane if possible, your combo of Shadow Walk --> Jinada essentially lets you last hit in peace and safety. Keep in mind to not die, and roam whenever possible as soon as possible.
The off lane is also called hard lane, and for the radiant it is top lane, while for dire it is bottom lane (you can see in the image on top)
What not to do: Taking farms from your hard carry, staying in a single lane, not checking inventories for detection items, forgetting to use Track in team fight, being a coward and misses lots of kills, and most of all... BUYING Battle Fury
What to do: Go offlane, and NOT die. Continue this until someone is capable on taking your lane (preferably as soon as you are level 6) and start roaming and ganking. You should be able to get lots of kill early on. Remember to roam with permanent invisibility trick (casting a Shadow Walk before the previous invisibility ran out), always cast Track, and use Shuriken Toss to prevent channeling / Town Portal Scroll. Keep in mind that enemy can see you while you are fading out (meaning that permanent invisibility can be seen for a brief moment.
What items to buy: Starts with a durability early item, then take items that increase your burst damage output as soon as possible after a sustainability item that allow you to roam without going back to base. After that, get a durability item to allow you to last long enough in team fight to put in Track to all heroes. Keep in mind that Track is very powerful and it allows your friends to snowball, while keeping your enemies scared. EXTREMELY SCARED.
Simple, the common rule is to not take Bounty Hunter when there is a Slardar on enemy's team. It's common sense to evade extra detection that makes you even squishier. However, Bounty Hunter is much more player reliant than the condition, and can actually be used against Slardar if used properly. Therefore, if your team REALLY needs the an offlane hero, and also mid-game dominance and Track gold, taking Bounty Hunter is alright.
Friends: These are heroes that synergize well with Bounty Hunter's kits as allied heroes, and can bring great damage to enemy if used properly.
High Burst Damage Heroes
This kind of heroes is great friends for Bounty Hunter, especially early on in the game because a combo of Shadow Walk --> Jinada --> Nuke Attack --> Shuriken Toss usually ensure a kill early on. This is great whenever possible, but is best when used early on while roaming mid because this ensures early kill for your mid hero for bonus gold and experience. When used in pub, it is great especially if you have a carry with at least one nuke because it allows you to get easy early kills that will allow your carry to snowball into late game, however, it can also be used with a nuking support. This will be viable throughout the game even in teamfight because the both of you can simply nuke down a glass cannon in split second.
Invisibility Profitable Heroes
This kind of heroes are heroes that are very great to be combo with Bounty Hunter because they profit for having a hero that is unseen by their enemies. Dark Seer, Lifestealer and Omniknight are very great because Dark Seer can put in Ion Shell while you are using Shadow Walk, and you just dance around them merrily while they suffocate from nothing (be wary that using this on experienced players might cause your death). Omniknight can simply cast Purification when you are standing right next to them. They will get damaged by a huge amount of damage when usually it's hard to land one, while Lifestealer can simply infest you and do a 2v1 roaming gank. The others are heroes that can be your combo simply due to the fact that you can provide them with visions of heroes, while they use their hard-to-use skill shot to land accurately (if this miss, blame your teammate lol)
Slow Inducing Heroes
This kind of heroes are great because combined with your Jinada, their slow can pretty much allow no escape. This is relevant even until late game, especially if it's done with one of the carries, and allows them to snowball. However, if done with in dual lane or roaming, this can pretty much ensure early kill.
Invisible Heroes
This kind of heroes gives the both of you double invisibility prowess. This causes the ganking and roaming to be EXTREMELY QUICK. It is like this (example with Nyx Assassin):
It won't even be like 1 second, basically killing them off before they even realize what hits them (forget reinforcement). I also include some heroes that uses Shadow Blade commonly because of mid-late game potential of double invisible ganking. If done properly, this will cause uncontrollable snowball through the game. Be wary of good supports on enemy team putting Sentry Ward basically everywhere you go. It needs to be noted, however, that having 2 invisible heroes in a team is rarely a good option.
Meddling Heroes
This kind of heroes are are total scumbags for your enemies simply because they can meddle in your gank to kill heroes that are not supposed to die by you alone. For the Bloodseeker, he is different because he provides Bounty Hunter with more accurate roaming capability due to his Thirst, not with bonus killing potential.
Personal Best Friends
Ooh, the early game trip to mid is just so cozy with this guy in your mid lane. "Oh, you want to TP? Eat my Shuriken Toss and his Headshot". "Oh, you managed to escape? Think again! Track and Assassinate escalates". Once he gets Shadow Blade... oh, the hunt IS ON!
Early Open Wounds + Jinada = I CRIPPLE YOU SO DAMN HARD YOU DON'T MOVE ANYMORE!! Mid game Infest + Shadow Walk, 2v1 gank has never been so easy. Late game? Grab popcorn while watching Lifestealer rampaging throughout the map.
Foes: The kind of enemies you wouldn't want to use Bounty Hunter against, or you can try and make your life a living hell.
Invisibility Detection Heroes
This kind of heroes is simply annoying. Slardar can just cast Amplify Damage and you are practically useless. Zeus can accidentally cast Lightning Bolt on ground and spots your attempt to gank him since 6.81 update. Oh, let's not forget how he can also simply deward the Sentry Ward you bought to destroy their Sentry Ward. Rubick, however, get an honorable mention here because he can simply Spell Steal your Track if given the chance and kills you with your own medicine.
Durable Heroes
This kind of heroes is the bane of your existence. Why? Simple. They are hard to be killed but so easy to kill you. Try ganking one if you don't believe me. What I stated above are the worst of durable kind because they are durable AND has high burst damage. However, normal durable heroes like Axe or Bristleback are as annoying, even if they might not be able to kill you.
Double Agents
Basically some heroes I listed above in Friends section. These heroes are very good if they are allied, but a nightmare if as enemy units. They are heroes that are listed in High Burst Damage Heroes and Meddling Heroes because they can easily turn successful gank into a failed one.
Personal Nemesis
I HATE THIS GUY WITH MY WHOLE EXISTENCE!!! Or at least whenever I use Bounty Hunter. This guy is not only the bane of Bounty Hunter's existence, he CRUSHES IT TO SMITHEREENS ALONG WITH YOUR EGO! "Solo squishy hero I can gank. Stampede!" "Let's try solo-ganking Centaur Warrunner --> Hoof Stomp! Double Edge!" "Teamfight: Why did I die? Oh, I was hitting myself..."
Preys: The heroes that you can "eat" so deliciously. If you pick Bounty Hunter and meet these heroes, be very happy for you can essentially make them petrified of their own shadow and hug the precious Sentry Ward the whole game.
Squishy Heroes with no Escape Skill
These are the kind of heroes that will die from just some mere hits + Shuriken Toss from you. Even if they have slow or disable, it is invalid escape skill because you only need to land some hits, and Track make them unable to run away even if you are slowed or disabled. No matter how high their movement speed is, usually you can chase them with Track and kill them so hard they will never do anything alone ever again. Heroes like Enigma, Enchantress and Chen are even better simply because they won't even be able to jungle early on without dying lots of time.
Invisible Heroes
These are basically the two heroes that shiver whenever they see a Bounty Hunter pick in their enemy's team. Why? Simple! Your ultimate skill basically nullifies their whole existence! These heroes are so squishy it's not even funny if they don't have their invisibility. Weaver deserves some mention, but is not quite a delicious sitting duck (or roach) simply because even if you Track him, Shukuchi is still a huge pain because of the maximum movement speed. Heroes like Sniper, Drow Ranger, Shadow Fiend, Slark, etc. that normally use Shadow Blade will also think twice before actually buying Shadow Blade, rendering them less effective.
Channeling Heroes
These heroes hate you because of your Shuriken Toss. Once you see them channeling something, use Shuriken Toss ASAP and they are sitting duck for your whole team to finish off. However, be wary that these "preys" are dangerous. The reason is because if you are caught IN the spell, you are basically doomed.
Like I stated before, this guide was primarily created because I see to much problems of pub players playing Bounty Hunter. These are the big common mistakes that are done tremendously much in pub and I hope these can help you not to do the mistakes like commonly done.
Hard Carry Bounty Hunter
Look, I know that Valve stated his role as a Carry, and to some degree, it's true (not as true as Semi-Carry though). However, you need to know that his main power is not in late game, but early-mid game to early-late game, when the game goes to late game, there are MANY carries that can outcarry Bounty Hunter.
As Bounty Hunter, your main strength comes in your roaming/ganking capability in the early to mid game. With Track, a successful ganking provides tenfold profit (okay, not ten) when successfully killing enemy heroes, since it provides more golds for the whole team and allow your team to snowball with great advantage to late game. When you become a hard carry, your team loses the gold bonus from Track, and trust me; you would profit more from farming heroes than creeps. There is a reason why your name is BOUNTY HUNTER, and creeps' bounty are not the bounty you are supposed to be hunting for.
I don't understand why you would go to empty lanes while your hard carry strive for creeps to eat, scavenging each and every bit of gold they can get, when you can actually just roam and profit so much from killing heroes, even with limited items. This talk about Battle Fury on Bounty Hunter too... Let me just simulate a little bit: "NO!! IT'S LATE GAME AND WITH MY 6-SLOT ITEMS I STILL LOSE TO ENEMY 5-SLOTTED SPECTRE!! HOW COULD THIS BE???!!?" "THESE STUNS!! I HOPE I HAVE MY BKB NOW!!" "NOOB BH! I CANNOT FARM!! - Teammate Carry". Yeah, you get the idea. Bounty Hunter is quite an item independent hero, it's ridiculous to farm for more items while you can do your most with just Black King Bar. Especially buying a 4350 gold Battle Fury for better farms while halting your own carry's growth. Just... don't.
How to gank and roam effectively:
Really, I'm not kidding when I said Bounty Hunter doesn't need that many items, with your Poor Man's Shield and Phase Boots you are already such a scary threat for 1v1 situation, especially when you are ahead by 2-3 levels from being in solo lane. As soon as you are in level 6, you are ready to go.
Coordinate with your teammates or just check the situation on mini map for potential hero kills, and while you are moving to gank, try to search for enemy jungling carry and kill them if possible. When you are ganking someone, you need to initiate the fight if there are no disabler/slower as your allies, Jinada works as a wonderful slow early on and can potentially bag you a kill.
However, what you really need to know before ganking someone are:
Move from lane to lane with permanent Shadow Walk (casting another before / as soon as the effect is gone), this provide no ward detection except if there are sentry on the rivers (or you recast it on enemy's vision).
Do not start the battle (in case you initiate) while the Shadow Walk still has long cool down time. This provides you escape plan in case battle goes awry or boost burst damage for one hit in case needed.
DO NOT FORGET to cast Track as soon as your Shadow Walk bonus damage is hit, or if you are still too far to hit the enemies and your teammates have already started the battle.
If enemy channels a channeling spell, or tries to TP to safety, forget about your low mana pool and cast Shuriken Toss immediately to the enemy ( Shuriken Toss gives mini stun)
Otherwise, don't use Shuriken Toss for damage, use it to safe the kill as last hit method (don't use it if your carry can get the kill though, but don't stop chasing the enemy just in case he got away)
Single Lane Bounty Hunter
Single lane is different from solo lane, single lane Bounty Hunter means the kind of scumbag that is too lazy to go from his lane and roam or secure the jungle of enemy's jungling carries THE WHOLE GAME. Why is this such a big problem, you ask? Well, let me state it for you:
Higher threat potential of detected by Sentry Ward
One less lane for your carry to farm
A single lane Bounty Hunter ruins the game because it will cause disadvantage the whole game. It speaks for itself that without you; the early to mid game will be harder for your team to dominate, since they lose their main source of damage in mid game, as well as bonus gold from Track.
In early game, you will feed so much because your lane is always covered with Sentry Ward and Dust of Appearance (especially in aggressive tri-lane). While in late game, your carry will suffer from the farm not being enough because you are taking one of the lane for yourself. I am asking you to please, don't be this kind of Bounty Hunter.
Coward Bounty Hunter
Now comes the king of pub games! Coward Bounty Hunter!! Oh, don't even get me started on this! Imagine how many kills run out of hand by this and how much gold can I get if not by this kind of player. A coward Bounty Hunter can be spotted by how he uses Shadow Walk, usually he uses it only for escape maneuver. Let me give you an advice: Shadow Walk is best used to ambush a solo hero, not for escaping.
Now, what does coward Bounty Hunter do? They walk into battle without invisibility, tracking one enemy, and then hitting them. Suddenly enemy teammates come, it's now 3 to 4 in our advantage. Bounty Hunter was hit and stunned! His HP is now half! What does he do? Shadow Walk!! Okay, it all seems sensible until here. But then, he runs to base completely, disregarding the teamfight, while all the enemies are stunned and has 20% HP less. This lead to his team dying, leaving only 2 survivors from enemy team and his team receiving no gold bonus from track.
Even more advanced: Bounty Hunter uses Shadow Walk, closes in to enemy units. Ping relentlessly, when the initiator of your team initiate, he doesn't attack and run away instead. Someone give this kind of player a medal of cowardice! Never play this kind of Bounty Hunter, because the void of Track means less potential gold from the team. However, keep in mind that it is always better to stay alive in team fight for it reduces enemy profit, and boost your team DPS. Oh, did I mention that these people buy Shadow Blade on Bounty Hunter?
How to be effective in team fights and stay alive:
If possible, do not initate the fight (outside from using Track in safe distance), wait for your initiator to jump into the battle first, your job is to stay alive and put in track to all enemy heroes
Do not dive into the battleground (full melee) while you have your initial Shadow Walk, but aim for the ones hitting from the back line first (the glass cannons likes of Sniper and Lina).
When your health drops below 30% and there are still many enemy heroes, back away. Stay within Track range to heroes that are still not afflicted by Track, and switch role to nuker with the usage of Shuriken Toss, especially if there are still of channeling spell users. Main priority in this situation is to put in Track as much as possible
Never forget that you have Shadow Walk (and keep at least 50 mana)
If you are going to die no matter what, prioritize getting at least one more Track for the team (it can even save you with the speed boost), and getting Shuriken Toss to lowest HP enemy hero helps a lot.
Here, I will explain about what I shall explain to you later on, some glossaries and what each segments means, what it is about, and why I explain those parts.
Proper Tournament Build: This is the build that I write based on the most popular and reasonable builds of Bounty Hunter by analyzing the competitive plays. This build is meant to be played ONLY in solo lane, be it off-lane or mid lane, but preferably is off-lane.
The sole purpose of this build is to make Bounty Hunter as good as possible competitively, as a solo off-laner that roams around the map, giving allied heroes free farm while halting enemies' growth and dominates the mid phase game, allowing the carries to snowball uncontrollably.
This build is recommended for pub players or even ranked players that are striving to learn how to play Bounty Hunter properly. This build is basic for Bounty Hunter and is the textbook build for him that is easy to pick up and has quite a high skill ceiling due to many aspects and is effective in many tiers of competitive plays. Inexperienced players can also read through this build to evade the things that a lot of pub players like to play but is considered very wrong in competitive plays.
Personal Build: This build is based on my experience of playing Bounty Hunter in pub, and as you expect, mostly is played as a dual lane hero. This build is a condensation of my games in Bounty Hunter as a dual lane hero that is created only to be played in pub, not competitively.
This build emphasizes early killing potential of Bounty Hunter, by maximizing Shuriken Toss first, and net some early kills with a proper nuker support. Other than that, this build also capitalizes on your lanemate to allow Bounty Hunter to roam faster than in proper tournament build (as soon as level 6, because you have another hero to protect the tower).
Basically, this build is created for early killing potential of Bounty Hunter, to peak faster than usual and stay relevant until late game. However, this build will be unlikely to work against experienced and well-organized teams. Even if I have tried this several times in ranked match and performs admirably, this build is supposed to be played in pub only.
Items Build
Early Game: This means that these items should be taken as soon as possible. However, in some instances, it is possible to skip these items entirely and go for bigger items. These items are supposed to be taken between 0-10 minutes into the game and be replaced later in game. These items are important in an aspect that without them, you might not survive the laning phase and early gank attempts and will peak too late in game.
Mid Game: These are the items that need to be taken around ~20 minutes into the game. These items are items to boost your damage potential or survivability so that you can transition into core items faster. Usually, these items will stay a long time, and replaced only when inventory is full of luxury items or items that can be upgraded in late game but is better to be taken in mid phase of the game for the effects it gives.
Core Items: In every game, there are always items that you must take (no, I'm not talking about Boots of Speed or Healing Salve) on a certain hero. That is called core items. Essentially, core items are items that must be taken in most games simply because those are the items that are "made for this hero". Usually these items must be taken right after mid game items, however, you might skip the mid game items and simply go to the core. In no situation, nonetheless, should you ever skip a core item (except in extreme situations)
Core Extensions: These are normally items that you have to take after core, however, being core extensions mean that these items are normally easier to purchase compared to luxury items and more useful in wider situations than situational items. This means that core extensions basically are items that need to be taken quickly, sometimes even BEFORE then core items. If the game doesn't go as it is supposed to go, however, you can skip the core extensions and go straight to a luxury/situational items that you think can change the flow of the game (right after your core item, of course)
Situational Core: You have heard about core items, but situational core are basically core items that you SHOULD NOT take IF, essentially different from situational items in a sense that you should normally take it. These items are usually items that provides great use, but is not always useful. Examples: Ethereal Blade on Morphling if there are 3 or more nukers, Hood of Defiance on Centaur Warrunner if there are no magical damage dealer, and in this situation, Black King Bar on Bounty Hunter if there are no disabler/nuker. (which is very common in pub) or Vladmir's Offering if you receive practically no damage from roaming. Of course, this group of items still needs to be taken sooner or later, but situational core means it could be either BEFORE OR AFTER core items according to the situation.
Luxury Items: Items that provides great bonus but expensive cost falls to this group, essentially, items for late game when you are already very rich. However, taking one of these items early usually make you a great threat, but be wary, farming it up is not some sweet little recreational park.
Situational Items: Okay, situational. You get the idea. Basically it is a group of items that are not usually needed, but in some instance you should take it.
Gameplay: How I recommend you to play this hero in different phases of game (early, mid and late) Of course, it is by no mean the "hard guideline" as how to play the hero, it is more like a textbook that I provide you to mold into your own playstyle. I also put in some tips and advise that you might need.
Shuriken Toss: This skill is your only burst damage skill, and is best used for a last hitting (kill securing) method that denies enemy's attempt to run away. However, the huge early damage output, combined with relatively low cool down time can also cause this skill to be used as a nuking skill, especially with a lanemate (unlikely) that can deal great burst damage nuke as well early.
I generally am against using this skill pre-team fight or to initiate a team fight. Why? Because using this skill before team fight takes off your surprise ability with Shadow Walk, and initiating a team fight with Bounty Hunter is just plain stupid without Shadow Walk. If you break invisibility with Shuriken Toss, it is a waste of good 120+2.25* damage.
However, the most important thing to note about Shuriken Toss is this part: "dealing damage AND mini-stunning the target". Shuriken Toss provides a tremendously useful side effect, a simple mini-stun. This is very, very useful because mini-stun can often affect how a gank/roam goes. Single enemy almost dead and trying to teleport away? Shuriken Toss!!! Enemy Witch Doctor cast Death Ward? Shuriken Toss!!!! Sand King preparing Epicenter? Shuriken Toss!!!!
Jinada: This is your one and only passive skill, and arguably one of the best last hitting methods in the laning phase. This, combined with Shadow Walk is the reason why you are such a solid off-laner. Jinada is a simple critical strike passive, however, what makes it stands on different ground from the other critical strike is that it gives an absolutely certain critical strike/maim in the first attack after a cooldown duration.
In my opinion, Jinada is better than other critical strikes for Bounty Hunter. You might argue: "but Yzreel, that means it can only procs once every 6 seconds even in level 3! Surely, other critical strikes that can proc multiple times have better DPS?" Yes, it's true that Jinada inarguably loses in DPS to other critical strike users, especially in late game (more the reason why you SHOULD NOT build Bounty Hunter to be a hard carry)
However, Jinada has many utilities; it's not made to be a late-game usage skill (which is why you level it relatively earlier than other critical strikes). Its primary usage in the laning phase is to get last hit safely, why? Because having a 100% critical chance that increases your damage output to 150% basically increases your last hitting capability by A LOT.
When you transition to mid-game, Jinada is a very dependable ganking/roaming method, because of the 25% slow that it implies to the enemy on first hit. Combined with Shadow Walk, the damage output critical is also hurting very much. I've used Bounty Hunter quite a lot of time, and against squishy heroes, it can easily cut their HP to almost half instantly.
Shadow Walk: Here comes Bounty Hunter's trademark skill. This is the reason why you are an efficient off-laner (combined with Jinada), because with this skill you can turn invisible, and without proper detection items it will be near impossible to kill you. This skill allows you to always be inside of exp range from creeps, even in heavy aggressive tri-lane and can potentially net you a save few last hits.
This skill is immensely useful and has many utilities. It is most commonly recommended to level this skill twice early game because it can provide you with permanent invisibility (using this skill again before the duration has ended). I did say that this skill has many utilities, and let me list those:
Laning phase last-hitting and EXP farming tool (staying near creep without having any real threat)
Permanent Invisibility = roaming / ganking without being spotted by wards (of course, except if the wards are Sentry Ward)
Great initial damage combined with Jinada's slow for quick beheading and surprise initiation tool
Great positioning skill in team fight (mostly used to kill squishy glass cannons first to reduce damage input to team)
Decent escape method (provided there are no detection items)
These are just some of the utilities that I remember on top of my head, I believe Shadow Walk can be used in much more situations, making Bounty Hunter even much more scarier. Here are some things that you need to remember about using Shadow Walk:
Do not use Shadow Walk only as escape maneuver, invisibility is not meant to be used as escape ability, especially with the cheap cost of Dust of Appearance. Use Shadow Walk mostly for ganking/roaming with permanent invisibility trick.
When you are being invisible, SCOUT. Scouting increases the opportunity of being success in winning ganking by tenfolds because it evades those ridiculous Meat Hook and 5 men team ambush
Don't forget to check for enemies' inventories (mostly supports) for detection items. If there are Sentry Ward, check frequently to the holder's inventory. In the laning phase, this allows you to grasp the approximate location of the wards and allow you to stay in "safe area" (exp gain area that does not intersect with wards vision). This can also allow you to bait, acting like you do not know about the wards location.
Never, ever, ever ping an enemy hero in Shadow Walk if you don't plan to attack. It will make your allies assume that you are going to attack, and they might initiate. Without you helping them, you can be quite certain that they are going to lose or at least not get gold bonus from Track.
Shadow Walk grants you invisibility after a little bit long fade time, keep in mind when you are trying to disjoint a projectile with this skill, or when you are attempting to chase an enemy too far (by chasing a unit, and quickly using this skill before dying). The fade time is around 0.25-0.75 seconds, and even if you cast it in invisibility, you become visible until fade time ends.
Even when you are channeling, you can still use Shadow Walk. Do you know what it means? It means: 2 seconds cool down on Shadow Walk --> Enemy tries to gank --> Cast TP --> Enemy Closes In --> Shadow Walk 1 second cool down --> enemy tries to stun --> Shadow Walk disjoints stun projectile --> TP continues channeling --> Bye-bye *****es!
Track: ARE YOU READY FOR THISSS?!? HERE COMES TRACK!!!! This is your ultimate ability and your trademark, most inarguably valuable skill. Track is the reason why ALL invisible heroes are scared of you, and also the reason why your teammates don't seem to want to start a team fight without you. If there is any reason for Bounty Hunter to be taken in professional scenes, Track outweights it by God-knows-how-much.
Track is a skill that provides vision and true sight to the target (Ha! Who needs dust now?), and hard counter every single invisible-depending hero (actually, this includes himself. Beware of Spell Steal) Do you need any other reason to pick this skill? Hang on! I'm not even close to the good part.
Track also grants you 20% bonus movement speed if the tracked unit is 900 units radius from allied units. What does it mean? It means: Friends chasing fast moving enemy --> Track --> enemy dies. Friends being chased by enemy hero --> Track --> Too fast to be caught. Even if Track receives quite a major nerf in 6.77 (doesn't reduce armor anymore), this move speed boost is quite major and important in ganking.
Now comes the good part! TrackGIVES MONEY! It is, IMO, on of the most OP skills in the game. Think about it like this: "wow, I killed a hero and got 325 gold, cool enough I guess" WITH TRACK ON: "I killed a hero and got 325 gold AND 250 bonus gold for me AND 150 gold for my allies! OP PLEASE FIX!" let's calculate the situation: there are 4 allied heroes on 1 enemy hero (level 15, no streak), you gank successfully and kills the unit: you get (200+15*9) = 335 gold, while the rest of the team get (6*15) = 90 gold. The whole team gets a total of 335+90*4 = 695 gold. With Track (lvl 3) on: you get 335+250 gold = 585 gold and the rest of the team get 90+150 gold = 240 gold. This means the whole team gets 585+240*4 = 1445 gold. Look at the difference and weep!! With Track on your team profit sky jumps to more than twice (or 250+150*4 = 850 gold). See why I said don't pick Bounty Hunter if you forget to Track in team fight? (Everybody loves math doto)
If you have seen the utility of Track, you should have realized how important it is to land Track on all enemy heroes if possible. Because a successful 5v5 teamfight with Track on all enemies will give a profit of 850*5 = 4250 gold for your whole team, and it's just... Well, you get the idea. Here are tips and advise of how to use Track properly;
If a teamfight is going to happen (while both party positioning), land as many Track as possible (especially since 6.81 increases the initial level range to 1200 points) before the fight actually happens. However, do not forget to use Shadow Walk a moment before the fight clash and aim for glass cannons (with Track on, of course)
Note that if enemy units have Rubick, you need to be careful on using it inside 1000 range; you wouldn't want enemy team to get the 4250 gold. To land Track against team with Rubick, keep in mind that Spell Steal has 1000 range, while Track has 1200 range (when Rubick tries to closes in, you can Shadow Walk instantly.
ALWAYS aim to land Track for those who have invisibility first (even before the fight starts). This will make them lose initiation power as well as escape maneuver.
Do not track a single target repeatedly, it has 30 seconds duration and 5 seconds cool down in lvl 3. It is potentially possible to get all 5 heroes tracked before the first tracked hero duration wears off
While you are scouting before a gank, and you think that you will lose in teamfight, don't be afraid to use Track as soon as Shadow Walk is off cool down if you meet ganking attempt by enemy party, do Track on one enemy from maximum range and Shadow Walk to safety. This will make them more likely to be discouraged to continue ganking because they know that they have lost the surprise factor. Even if they do proceed on ganking, the true sight vision should allow your party to evade any big initiation, and having 1 extra Track before fighting is always a plus. However, if your team can win in team fight, do not use Track in that situation, because it will make enemy aware of your presence and more likely evade any ganking attempt by your team.
When you / your teammate is ganked, don't forget to use Track on at least 1 enemy unit first. This increases you / your teammate survival chance by actually a significant amount (20% movement speed is 4% higher compared to Sange and Yasha bonus)
If you are going to die anyway, fight. You should be able to deal quite a hefty damage (and even kill) because of your huge burst damage ( Jinada and Shuriken Toss), and most of all, increasing even 1 Track count is very useful rather than dying without doing anything (if you are lucky, getting a Track kill will net you more gold than your death)
I suppose that's all I can give you for his abilities. I believe that learning it by yourself in-games will provide a much more personalized and comfortable gameplay. Note that what I just stated are not always fixed rule, sometimes, people prefer one over the other (I prefer only 1 level of Shadow Walk than two levels for a game in pub, even if I know it's supposed to be otherwise)
They speak for themselves; you are going to be expecting a degree of harasses, and these items keep you up and alive. However, if you think you are up to safe tri-lane, or probably dual lane, take the double Slippers of Agility rather than Stout Shield because it helps you take last hits.
Early Game
This item grants Bounty Hunter higher defense potential via 100% 20 damage block. Combined with his very high base armor (5.94), he can soaks up a lot of damage early on. Starts the game with basic items to build this item ( Slippers of Agility or Stout Shield) and finish up the item in secret shop because you might fight an aggressive tri-lane, and this help to survive A LOT.
You can get this item as early as you need if you need additional HP, this item will later become a component of Drum of Endurance that you will inevitably need in mid-game, while increasing survivability early on.
I suggest getting this item quite early since this item has saved my life / secure my kill dozens of time. The faster you finish this item, the better it is, since it empties the inventory slot that the Iron Branch was taking.
Getting this item early on is quite crucial as well, the mana regen provides you with enough mana for the permanent Shadow Walk trick, and a little bit more of armor is never bad (don't forget to turn the aura off)
Boots... Yeah, this item is a must for everybody. At the very least, you would want to get this item before you start roaming, simply because you wouldn't want to miss the roaming kills due to lack of speed. Oh, let's not forget that moving through the lake in the speed of a snail is not the wisest thing to do.
Mid Game
This item provides a substantial boost of damage in early game (24 damage. Why should you get this boots? You need to finish your gank as soon as possible, especially a single man ganking since you don't want to extend the gank and potentially getting their team mate to help them.
If there is one item that increases a hero's survivability, escape / killing potential and mana pool at the same time in mid game, it is this item. You will probably need all of those things to roam and gank successfully and thus this item is quite crucial to get in mid game.
Core Items
If there is an item on Bounty Hunter that is a must for him, it would be this item. In team fight, enemy heroes will most likely prioritize on killing Bounty Hunter because of his high burst damage, and you cannot afford taking disables and nukes, considering your pretty low HP pool. Black King Bar provides you with magic immunity to survive a teamfight and put Track on everybody, as well as bonus damage and HP.
This item is primarily bought for its utilities and cheap price. You can even get this item bit by bit even if your laning phase is so bad, keep in mind that Ring of Basilius should have been built from early stage. This item provides enormous global presence and forces your enemies to be more passive because you can just go jungling whenever you need to go home, giving your late carry some sort of free farm and reducing their farming phase. The damage aura and lifesteal aura also grants him a higher team presence.
Core Extension
Usually, you would like to take one of these items. Desolator if your roaming/ganking is going well and you have enough money, Yasha if your laning phase is poor, and Orchid Malevolence if there are a lot of heroes with escape abilities in enemy's team. Note that Yasha has the versatility that the rest don't, and can be build to Sange and Yasha, that can also be Heaven's Halberd and Manta Style late in game.
Luxury (Offensive)
In late game, getting Monkey King Bar can help a lot if your enemies are evasive or Butterfly carrier (like Phantom Assassin or Brewmaster). If not, be one! Getting Butterfly boost your EHP by more than 25% and is also very deadly offensively, Take Abyssal Blade only if there are magic immune units that are very annoying and your carries are not good Abyssal Blade carriers.
Luxury (Defensive)
Heart of Tarrasque is simply the best late game survivability item, however, if there are lots of single target burst damage dealer ( Lina, Lion, etc.), take Linken's Sphere. Manta Style is an utility item that is more of a pusher/escape item material, while sometimes also killing and durable potential. Consider buying this if you bought Yasha earlier, because the active can disperse Dust of Appearance or Amplify Damage and make you survive. As of Assault Cuirass, it is great option to increase your team presence, if no carry want to build it.
Situational Items
These items are generally taken if your laning phase / ganking / roaming doesn't go as well as you expected. Making Medallion of Courage, Orb of Venom or Urn of Shadows can be a cost-effective insurance to safe your roaming kills. Ring of Aquila and Medallion of Courage are both items that can be made from Ring of Basilius, and provide you with more armor if your laning phase is bad. Bottle should be taken if you are in mid lane, but if you are not, taking Bottle has the same reason as taking Urn of Shadows, to have as long effective time as possible to increase global presence. Sentry Ward is needed in some laning situation if you meet dificult opponents to deward.
Only get Sange and Yasha if you have already bought Yasha, and are expecting your enemy right clicker will be a burden later on. In late game, break Sange and Yasha to build Heaven's Halberd to disable the right clicker, and change the leftover Yasha to Manta Style for better defensive/offensive capacity
DO NOT BUILD
Damage boost is great, but Desolator gives more
Farming potential SHOULD NOT be taken for Bounty Hunter
Regeneration is great, but agility boost / armor reduction is better
You are not meant to be a hard carry
Cleave is wasted on Bounty Hunter. You ARE NOT Kunkka
Any person creating Radiance on Bounty Hunter deserves a place in LPQ. First of all, like stated about Battle Fury, Radiance is also a farming item and you are not meant to be hard carry. You do not want to take the farms of your team's carry. One thing I don't understand most is... Roaming invisibly is your most powerful ability. WHY THE HELL WOULD YOU SPEND 5150 GOLD JUST TO TELL YOUR ENEMY THAT YOU ARE THERE???
Oh, hey, did you know that Volvo just created a new skill on Bounty Hunter called Shadow Walk? Oh, wait! IT'S ALWAYS BEEN THERE! Why would you need another invisibility then???
Shuriken Toss: This skill is essential to be taken at least twice before level 6 (alas, the reason why it's taken in level 4 and 5) because it boost your roaming / ganking success rate by a whole lot. The reason why you do not take 3 levels in this skill before Track is because level 2 Shadow Walk simply gives better utility (permanent invisibility), and the scaling of Shuriken Toss from level 2 to 3 is HORRIBLE compared to level 1 to 2. This is due the mana increase is the same (+20 / level), while the damage increase is different (100/200/250/325). This is also why some people prefer to finish leveling these 2 levels last and proceed to finish Jinada and Shadow Walk first. However, I believe that it is necessary to finish this in level 8 because 325 damage last hitting skill is better than 200 damage (even if at the expense of higher mana cost)
Jinada: There is no way around it, take this skill at level 2 in tournament build. It is VERY essential to take this skill if you are going to the offlane because it boosts your last hitting damage by half the amount (you can kill the creep much earlier than enemy's attempt to deny). You can max this skill later in game, though, because the slow stays the same (same gank capability), and the damage increase is barely noticeable in early stage of game (unlike Shuriken Toss)
Shadow Walk: In tournament build, you take this skill at level 1,3,13 and 14. The reason behind it is because that you only need 2 levels in it to get the most of it, considering how the duration becomes a duration that allows you to get permanent invisibility (15 cooldown and 20 duration at level two). This is why you need to take two level of this skill as soon as possible. Now the question is why do you need to take it in first level? Simple, because it allows you to evade killing attempt right away that is highly probable in aggressive tri-lane as well as having no gap in staying within exp range of creeps.
Track: If someone says to delay taking this skill, DON'T listen to them, there is not a single skill that Bounty Hunter has that is more valuable than this (of course, it all depends on the situation, but this is most of the time). If some ultimate skills are good to be delayed (such as Weave, Time Lapse, True Form, etc.), Track is not one of those and it you should take it as early as you can. Why? In those instances of ultimate skills, the reason why they are good to be delayed is simply that at that stage of level, the hero's other skills are more valuable ( Shallow Grave, Shukuchi, Synergy, etc.) However, for Bounty Hunter, all his skills are nowhere near as valuable as Track in this stage of game. Two points in Shadow Walk and one point in Jinada is all you need in this stage of game. The only thing worth upgrading in this stage is Shuriken Toss, however the bad scaling make it a lot worse to upgrade compared to Track.
Early: Focus on getting levels and not being killed, then start to roam
Purchase one of the two starting item build according to how you expect your lane enemy to behave ( Stout Shield if they're going to be aggressive or two Slippers of Agility if they're going to be more passive.) I myself recommend the Stout Shield build, just to be safe (since you have a high chance to meet a tri-lane and you do have Jinada to help you last hit.) You might notice that you don't have enough gold to finish the starting items, this is meant to be like this because you will only need to wait for a little while and you can use Shadow Walk to buy either Stout Shield or the Slippers of Agility in the secret shop safely before/when the creeps clash.
Play safe, just be passive and stay in exp range. Note that the point of playing off-lane is to get as high level as possible, NOT as much money as possible. However, with your Shadow Walk and Jinada combination you should be able to get a decent amount of last hits.
Do not try to harass. I know, it's tough to see those hopelessly squishy supports unwary of your presence. However, they can quickly turn the harassment to their kill, especially if it's a tri-lane.
When there are Sentry Ward nearby, you can know by seeing how the heroes behave. If you think they are being suspicious, stay a bit farther, and check with their creeps when it's safe (going around near suspicious area when there are enemy creeps and see if they attack)
If they do have Sentry Ward, just stay in exp range and don't try to attempt last hits except if you see no apparent harm.
DO NOT be hasty and leave your lane without anyone to back it up, good enemies can often use this space to destroy your tower.
If someone can take care of your lane, start your roam immediately, go around their jungle and hope to find a farming carry because you can solo-kill them at this early stage and halt their farming items to be bought. If none is at sight, just go to other lane and help get the kill (don't forget to bring Town Portal Scroll to (counter) gank, or to get back to your lane if it's unsuccessful)
Mid: Focus on getting as many roam/gank kills and item as soon as possible
This is marked by ~20 minutes mark, and you were already supposed to bag some kills from your roam. Now, this is when you get scary. You should have already gotten at least Vladmir's Offering done. Now, get one (or more) of the core extentions and start to own! Preferably, get Desolator ASAP, or if the kills are not as you expect it, getting Yasha is fine. However, if there are too many squishy escape heroes, take Orchid Malevolence
Roam the whole map searching for farming "late-bloomers" or simple extremely squishy alone supports that just happen to be alone (what I would love to call hare-hunt), and kill them miserably. This will cause your team to have more places to farm and your enemies to weep in their sleep and jump at the slightest voice in the map.
Help in as many gank attempt as possible (which is why you need to ALWAYS have Town Portal Scroll with you. It is important to note that sometimes, going to the further tower is better because they won't see you when you teleport and goes invisible) This is the stage when even one Track can get your carry to snowball and win the game.
This is also the stage when you get as many luxury items as possible as you see fit. Never be scared because you can mostly solo kill every single hero in this stage, but don't be overconfident because I doubt you can go 1v5 (most likely if all is missing and there is only 1 carry farming visible), if you do want to ambush a farming carry, scout the entire area first for potential gank
Early Late: Focus on getting as many kills against glass cannons in team fight and halt the growth of enemies carry.
This is the time when your efficiency wears down (most likely 5-6 slotted already) while the enemy carries are starting to bloom. This is probably around ~30 minutes mark, and you have just few minutes more to dominate the game until their carries are going to outcarry you. If you do not have Black King Bar yet, it is a must at this stage
Mostly, go with your teammates in this stage. This is because you are not as strong anymore and most likely unable to solo-kill (especially because in this time, your enemy will also sticks a lot). Other than that, Track bonus is more effective if there are more of you to receive the bonus (250+150*x, the x being number of allies nearby).
If possible, get your teammates (1 or 2 should suffice, but even all 4 is good) to gank on their 4-slotted carries before your efficiency wears off and thus unable to gank anymore. This will also allow your carries to snowball better while their carries' progress halted.
If there are team fights going in, it's your job to finish off the glass cannons as fast as possible. Especially in this stage of the game when they really hits HARD, the sooner you kill them off, the better chance of the team fights to be won by your team.
In team fights, don't forget to pop your Black King Bar. It is very essential to use Black King Bar in this stage of game because it ensures you to kill off the glass cannons of enemy teams and ensure your Tracks to hit more enemies. I prefer getting Black King Bar in around 30 minutes mark because the duration is still full 10 seconds, and trust me, it is VERY essential late game.
Late: Focus on getting as many Tracks as possible and as much DPS as you can in team fights. This will make you viable and effective in late game.
Most likely, you will be outcarried by any carry enemy has in this stage of game, even the ones that you have been killing all over the game
Don't be overconfident and try to solo kill, even if the enemy is alone. This is the stage where every death can mean your defeat.
In team fights, stay in a relatively save distance and use Track all the time until the fight breaks in. In this stage, Shadow Walk is practically useless since the enemies should have gotten Necronomicon or Gem of True Sight, use it just to get the bonus damage and not to try to escape/initiate
In team fights, pop your Black King Bar right up and try to survive as long as possible because you should at least have Vladmir's Offering and Assault Cuirass/ Desolator. DO NOT underestimate how this impacts a team fight, without these auras / armor reduction, your team loses a hefty amount of power. If possible, try to kill supports first since you should have more than average movement speed and burst damage.
What About Mid Lane?
If you are taking mid lane, you can go with this exact build, just with different priorities and item arrangements. Mostly, you will need to get your killing item as fast as possible (the core extensions) because you will have the early phase as free farm (most probably.) These are the most important things to note in playing mid lane Bounty Hunter and the item build sample (in buying steps):
Things to remember in mid lane:
Unlike off-lane, playing mid lane makes you much more flexible in roaming because of the lack of firepower from a single mid hero. This will allow you to roam without fear of getting your tower destroyed, however, you need to note that in mid lane, you are getting free farm, and roaming around without any result will make you lose the farm. Decide for yourself when to efficiently roam and get the kills. If not, just stay in lane until opportunity to roam presents itself (always keep a Town Portal Scroll with you)
It is essential to take Bottle in mid-lane because you will need to roam a lot and thus controlling the rune in the river. This item will also keep you alive and kicking for a long, long time and make your global presence so strong
In mid lane, the free farm will allow you to get one of your core extensions faster. Whether it be Yasha/ Desolator/ Orchid Malevolence, it will make you so much stronger, but not much more durable. This is why my next point: in mid lane, you will most likely proceed to the mid game like Clinkz, a raging persona of glass cannon. This is when you need to roam as much as you can and kill as many person as you can (surprisingly easy once your item is there)
However, when you get the Vladmir's Offering and Black King Bar, you are incomparable to Clinkz, since you are able to a decent amount of damage and a much better team player. This is when you start to 5 men gank a lot to maximize Track gold bonus.
Mostly the same as tournament build, I will only write the explanation of those that has different role / unused in tournament build, and you can check in Tournament Item Build Explanation section for the rest
This item is very useful in laning phase because it provides you with better stats, mana regeneration and armor. In my personal build, I prefer this rather than the Poor Man's Shield because it allows me to spam my skills with the boost in mana (from stats boost) and mana regeneration. This also increase survivability with increase in armor and HP, and can be disassembled to get Vladmir's Offering later on if needed.
In my personal build, this item is more important than in tournament build. You do not take this only if your laning phase is bad; take this because Sange and Yasha is a core item (check below to see why it is core item.) This item will provide a lot of killing potential and additional global presence.
The reason why this item is a mid game necessity is simple, because in my personal build, I aim to get my core items ASAP and this item is an ingredient of both Black King Bar and Desolator. Additionally, this item also grants bonus damage and is useful for ganking in mid game.
This item is also a mid game item with same reason as Mithril Hammer, that this item is an ingredient of Sange and Black King Bar. You need to choose what you want to create first, and finish the whole item based on the situation. This item also grants quite some boost of survivability.
Some people don't like this item on Bounty Hunter, but I love this item. Why? Simple, this item grants bonus movement speed (global presence), damage output, attack speed, maim, and durability. This item basically acts like drum, but is much better and scale to late game because it can be made into Heaven's Halberd and Manta Style. I recommend getting this item as soon as possible, considering the low price of each ingredient making it easy to buy. However, if you have enough gold, getting Desolator first is a better option.
This item is very needed if there are a lot of disabler/supports capable of dishing out huge damage. Sometimes, in pub the team consists of 4 carry and 1 support, thus reducing the importance of this item. I myself usually buy Black King Bar after I get Desolator and Sange and Yasha, however, being in core extensions means that this item can be taken first according to situation.
This item is pretty much needed for the same reason (global presence), but due to different gameplay of tournament and pub build, sometimes it is best not to take this item at all and take Urn of Shadows instead
Shuriken Toss: In a dual lane, this skill is much more important than in solo lane because it can get you huge potential burst damage, especially combined with a good support that can nuke/slow. Take this skill at level 2,3,5,7 because you can spam it as soon as you reach level 3 for maximum damage/mana cost efficiency with Ring of Aquila. However, you take this skill at level 5 because even 50 damage is capable to decide whether the target dies or not, thus same reason for maxing this in level 7. With Ring of Aquila you won't even notice the 20 mana difference. However, do not forget to save at least 50 mana to Shadow Walk
Jinada: I take this in level 4 simply because this skill is not as useful in dual lane as in solo lane. Main reason to take this skill early is to last hit efficiently, however, in dual lane you usually have a "babysitter" and thus allowing you to farm even without this early on. It is better to get a 200 damage nuke in level 3 to get early kills easily rather than this skill in level 2.
Shadow Walk: This skill is taken in level 8 rather than level 3 is because the three levels in Shuriken Toss is more useful in early dual lane stage, and having permanent invisibility is not that important considering how in laning phase it is easy to farm with a support. However, I take this skill twice in level 8 (rather than maxing Jinada before level 11) is because the permanent invisibility help for moving around the map undetectable at all.
Track: Take it in every level possible with the same reason as the other build
I will only explain about the early and mid phase of game in this part, because the late part of the game for Bounty Hunter is almost always the same and you can check it in Tournament Build Gameplay section
Early: Focus on getting last hit and early kills (starting lvl 3) and roam as soon as you reach lvl 6 and try to get early roam/gank kills
Focus on last hitting until you reach at least level 3, use Shuriken Toss/ Shadow Walk only when you can get a kill before level 3 or when you need to escape/disrupt channel
Once you reach level 3, you are supposed to have Ring of Basilius already (or Ring of Aquila if you have good last hitting skill.) This is when you start to nuke with Shuriken Toss whenever you see fit. Don't be afraid to use it frequently since your mana regen should be high enough. This can get the enemies away from exp range or even killed.
Use Shadow Walk only in times when you can get kill / to bluff the enemies away from exp range
When you reach level 6, you should already have the Phase Boots and Ring of Aquila at least. Start roaming from this stage onward and leave your support to guard the tower.
Secure their jungle from jungling heroes and roam to unwary enemies, at this stage your Shadow Walk > Jinada > Track > Shuriken Toss (especially with +44 damage from Phase Boots and Ring of Aquila) should be able to deal a hefty amount of damage (1.5*(74+44+30) + 250 = 222 + 250 = 472 damage) that is practically 2/3 maximum HP of squishy heroes of this level. To finish up, just chase them until Shuriken Toss is off cd while hitting them. If you cannot chase them, getting Orb of Venom might be a good idea.
Roam through the jungles in hope of ward-putting supports / jungling heroes on your way to different lanes. Don't be afraid to fight 2-3 enemies, considering the lane you are trying to gank should have around 2-3 heroes as well, and with you as additional, you should be able to win and bag kills
If you think that you are losing too much HP after each gank, you can proceed to buy Vladmir's Offering or Urn of Shadows. If not, focus on getting Desolator right away or Sange and Yasha if your roaming is not that successful / you need more durability
Mid: Focus on getting as many roam/gank kills as possible
In this phase (~20 minutes mark) you should have already had either Desolator or Sange and Yasha (or both), An item of that caliber this early in game will allow you to get solo kill as quick as possible
Roam all the time and gank any hero that is farming solo, even if there are no nearby allied hero. You should be able to quickly dispose of the hero even before any reinforcement comes, and you won't lose too much HP.
Keep on roaming, and if there are a lane that has 3 enemy heroes and 3 allied heroes, don't hesitate to join the fray. In fact, initiate if there are no initiator in your team by doing normal combo to the squishiest hero in the lane. This should be able to turn the tide of battle and snowball your carry into a vicious monster. Of course, you need to consider the situation before initiating by scouting and rough consideration of what each unit can do.
In this phase, you also need to start to think about survivability, start building Black King Bar and Vladmir's Offering ASAP because it provides you a much better global presence and late game power.
If possible, start building luxury items and get as much kills as you can. Remember that this phase is when you reach your peak, and supposedly you reach it as fast as you can to halt the growth of enemy carries
In this chapter, I will explain about some of the gameplay normally done by advanced players. Note that most of these are supposedly use in solo offlane by Bounty Hunter, but if the situation is right other offlane heroes can also use it. There is nothing more important in solo offlane than to soak exp and maximize the occasional last hits, which is why this chapter will focus mostly in that, rather than the whole gameplay of Bounty Hunter. However, I also put in some advanced techniques/gameplay for roaming and ganking.
Creep Blocking
This is the most basic of all advanced techniques and can even be commonly seen in pub. However, do not underestimate the effectiveness of this technique, if done properly (and enemies don't do this as well) it can pull the creep equilibrium up to your tower. This is particularly useful if you expect to meet aggressive tri-lane and cannot use another technique that is quite risky. Remember, your most important job as a solo offlaner is not to die (then getting as much exp/gold comes in close second).
This technique is commonly mistaken. Most people think that this can only be done when the starting horn blares, however, it has more usages than only that. In solo offlane the creep equilibrium is common to be pulled too far into enemies' tower. Of course, you can try and stop that from happening (which is better), but if that has happened and you can do nothing about it, creep blocking is a risk-proof way to pull the equilibrium nearer to your tower.
Compared to other techniques, this is the simplest and actually, least effective. However, this one also has the least risk, and can sometimes be good in offlane because it accomplish your goal of not dying. Run this technique if you think that your situation requires low-risk, low-return rather than high-risk high return techniques (usually when you cannot actually get close to enemy creeps).
This technique is done by blocking your own creep with your hero's body to slow the creeps' movement and thus dragging the creep equilibrium closer to your tower. There are several ways of doing this effectively, and usually varies upon players. Some people use right-clicking while rapidly pressing stop, some right-clicking near the ground where the creep will move, and some moves from left to right in timed interval. Important thing to note about this technique is that even if the creeps spawn at xx:30 or x:00, it is usually more efficient when done in xx:33-35 (xx:03-05) a few distance away from the tier 3 tower (where the land goes down), especially in Radiant since the creeps spawn in two groups (thus making it harder to block efficiently), until they reunite in front of the tower.
When to use:
You are to meet aggressive tri-lane and are going to die if you attempt higher risk strategies
Creep equilibrium is too near to enemies' tower and there are Sentry Ward around that you cannot even attempt to soak exp
You do not understand how to use more complicated techniques
Spawn Blocking
This technique is also pretty commonly used even in pub (though not to a strategic extent), and is the most efficient in term of safety and effectiveness. This technique is great to be used in any situation, but can be countered quite easily. Usually it is countered by having the 5th position support in enemy team buying Sentry Ward. This however is the interesting point of this trick. If done properly, you can force the 5th position of the enemy to waste their precious 200 gold (you know how hard it is for them to farm) on Sentry Ward CONTINUALLY.
The technique itself consists of a simple idea: to negate the usage of an advanced strategy of opposing team, which is Creep Pulling (there is another section of this below). Of course, theoretically, this DOES NOT pull the creep equilibrium closer to your tower. What it does, however, is stopping the most efficient way for your enemy to pull the equilibrium closer to their tower, thus pulling the equilibrium closer to your tower POTENTIALLY. This is the reason why it is always done in competitive scene, but is situational in pub
The question is how do you actually negate Creep Pulling? Since it is an act of pulling own creep to the easy camp, Spawn Blocking, like the name suggests, block the spawn of the easy camp. Neutral creep spawns can be blocked in a way: To have vision is certain spots around the camp when the creeps are supposed to spawn (xx:30) Because of that, this can be done in several ways, which are:
Observer Block: This is the act of putting Observer Ward on the spots where it would halt the spawn of the neutral creeps. This is the most common used technique in pub because it requires no further gold other than the initial wards purchase. However, this is not a good way of doing this because Observer WardHAS COOLDOWN. If you use one ward to do this technique, you are wasting a good 1800 vision for your team for the next few minutes.
Sentry Block: This is a technique where you put Sentry Ward instead of Observer Ward on the spawn-blocker spots. This is usually better than Observer Block because Sentry Ward doesn't have any cool down, and is potentially capable of destroying pre-placed Sentry Ward by enemies unit. As Bounty Hunter, having Sentry Ward also allow you to counter enemies attempts to zone you out by putting their own wards. The only down side of this technique compared to Observer Block is that it doesn't provide you with vision around that area which might be useful to scout/anti-gank (according to places put)
Body Block: Body Blocking is a technique where a unit is set to be present on the spawn-blocker spots in the spawning time (xx:30). This skill is different compared to the rest because it DOES NOT require any gold and is hardest to counter, but is less consistent. Other heroes can use their minions, but Bounty Hunter profits from this technique in a different way. This is because in Shadow Walk, the creeps will still not spawn (thus making it harder to differentiate from the Wards Blocking.) What you need to remember about using Body Block, however, is that you will lose your experience and possible last hits the time it take you to move to the camp and back.
Spawn Blocking is more efficient if you can combine the techniques and outwit your enemies in a mind game. Great players can use this technique more efficiently because they know when to use which version of the block, thus maximizing the efficiency and bait the enemy supports to waste their money on Sentry Ward. Example to combine Spawn Blocking:
" Bounty Hunter went to enemy easy camp with Shadow Walk, going through the river and there he puts his pooled Sentry Ward from his support at the spot farther away from his lane. Right away, he went to his lane the same time as the creeps reach the tower. When enemy support (say, Shadow Demon) tries to pull the creep, to his astonishment, the neutral creeps don't spawn! Quickly, he ordered his courier to bring him Sentry Ward. This provides Bounty Hunter with 1-2 minutes of free soak in exp. Once the Sentry Ward has arrived, Shadow Demon puts it in the ground closer to the lane because he thinks that it will cost him too long to put it farther. However, he didn't manage to see the ward, and he was forced to put the next ward further away from the lane, and there he found the Sentry Ward. Thus, his first pair of Sentry Ward is finished for a single pooled ward. That didn't put him down, and he was determined to get first blood by going back to the lane and set a combo with farming Mirana and babysitting Lina. However, he was let down by the fact that Bounty Hunter is only seen by a split seconds everytime before he vanishes. Determined to get first blood, he got another set of Sentry Ward. While waiting, he noticed the clock is now 1:30, and he went to pull the creep, only to find nothing, again. As soon as the Sentry Ward came in, he put it near the secret shop in hope to get the first blood. However, Bounty Hunter plays way too careful to even step within Sentry Ward radius. Shadow Demon was furious and indecisive. Should I put it to deward? Should I put it in lane? He finally decide to deward in the other spot, and the ward is unfound because what he didn't know was that Bounty Hunter was body blocking. Wasting his second pair of Sentry Ward, he was underleveled and underfarmed, and cannot contribute enough to the team."
From above example, the Bounty Hunter manages to outwit the Shadow Demon, and forces him to waste 4 pieces of Sentry Ward by using only a single pooled Sentry Ward. This is done by properly combining the Spawn Blocking technique, and is extremely important to be played properly.
Single Ward Double Block: This is a dire-offlaner-only spawn-blocker spot that is rarely known, but is very useful to know since it block TWO jungle camps in a single spot. This is especially effective if there is a jungler in enemy team because this can cripple both the support and the jungler if done properly. Because this is a rarely known spot, it can also be capitalized to block creep spawns.
When not to use:
If you can get free exp, but only have the chance to body block
If you do not understand enemy mindsets, and will instead risk dying
If you do not understand how to use the technique efficiently, and will waste level trying to execute this technique
Creep Pulling
Creep Pulling is commonly seen by supports to pull their creep to their easy camp in an attempt to get the creep equilibrium much closer to their tower, but on an off-laner, it is also an act of using Creep Aggro (baiting enemy creeps to hit you) while they are still between first and second tier of their tower, then pulling them to your tier one tower through the jungle. This will pull the whole wave (if done properly) into your first tier because the creeps will not clash, letting you last hit safely behind your tower (and probably denying some of next wave's creeps.) This technique will also force your enemy carry to tank some damage if he wants to get last hits, thus actually harassing him.
This technique can be done repeatedly in around xx:20, but is most notably and best used in the first wave because you will waste experience points by moving around and pulling creeps on other waves. This is extremely effective, and can give you one of the leading creep kill, however, is very risky especially against aggressive tri-lane with 2/3 disables. This is more efficient if used by Bounty Hunter because his Shadow Walk allows him to evade kill attempts.
When to use:
You are confident that you will not die by performing this technique
There is no chance for you to take exp because the equilibrium is too close to their tower or it is first wave
Creep Wave Stacking: This technique is done the exact way as Creep Pulling, with the only difference being that you simply move around with the creeps instead of pulling them to your tower. Once you are being targeted/feel endangered, use Shadow Walk and escape from sight. To maximize the effectiveness of this skill, wait until their next wave is on sight. DO NOT stack more than 2 waves because it will eradicate your tower really quick (remember old Earthshaker creep blocking?)
You might be wandering now: "Yzreel! What the hell? Are you dimwit? This will cause the equilibrium to be closer to THEIR tower instead! You are giving them free creep pull!" No, you're the dimwit if you do think so. True, it does pull the equilibrium closer to their tower, but the double wave mean double pushing power (imagine active Vladmir's Offering + Ring of Aquila), and will push the creep equilibrium to your tower in no time.
This technique is particularly useful if you think pulling to your tower is more dangerous and the creep is too near to their tower. However, you need to keep in mind that this will QUICKLY reduce your tower's HP if done improperly, especially against pushing trilane. This technique also makes it harder for enemy carry to last hit since the creep damage output is doubled.
When not to use:
You are fighting aggressive pushing trilane or aggressive disabling trilane
You can still take free exp from creep equilibrium
Hard Camp Pulling: This technique is only usable by radiant offlaner (top lane) because of the position of neutral creep hard camp. To execute this technique you will need to use a Quelling Blade or Tango, I am against using Quelling Blade on Bounty Hunter and thus recommending you to use Tango (you can buy another set of Tango, get a Tango (Shared) from your supports or just borrow your carry's Quelling Blade)
You benefit less from this technique compared to the other two Creep Pulling techniques, but you will be much less likely to die compared to the other two. This technique is similar to the other two in term that it should not be used except if the creeps are too near to enemy tower.
You can benefit from this technique because you might actually reduce enemy's exp and gold gain (compared to the other two which gives them free farm), and potentially getting neutral creep last hits. However, this technique is easier to counter in term that enemy supports can simply use Creep Aggro and pull your creep to their carry. In that case, do not try to continue this technique with this wave, but use the same technique for the next wave.
When to use:
The creep equilibrium is too close to enemy tower
You need to deny gold and exp from enemy heroes
You fear enemy early lane-killing potential
Alternative Starting Items
(For purpose of initiating advanced strategy)
This three core-starting items ( Stout Shield, Tango and Healing Salve) are the bare minimum Bounty Hunter (if played off-lane) to reduce incoming damage and staying alive in lane. This starting set is the bare minimum that you need, while keeping your inventory empty for additional items to run the strategy.
Sometimes, you need to combine the strategies, thus combining the needed additional and situational items. One thing to note is that Bounty Hunter excels in taking minor items to benefit teams quickly, so it might be wise to provide empty spaces in inventory.
Invisible Double Last Hit
Have you seen some games when you saw Bounty Hunter hitting after Shadow Walk, then using it again right away but land another hit without breaking invisibility? I believe you might go "Was it a bug?" I assure you, it is not. This is a commonly used technique that capitalizes the fade time. I did state about fade time, and you should have known that it is the phase where you have "reduced opacity", or in other words are going invisible.
During fade time, you are not counted as being in invisible state. What does this mean? It means those "bugs' that you see. What is the advantage of using this you ask? It provides more efficient last hitting capability in laning phase. Compared to usual "invisible --> hit --> invisible" that capitalizes on only one hit and going invisible to avoid disable/silence, this can actually have the same safety amount but provides twice creep kill amount.
Although it doesn't seem much, this technique is unbelievably useful in laning phase of the game to evade early kills while maximizing last hit potentials. Throughout the game, it can also be used to maximize burst damage. One thing to note about fade time is that it actually reduces by the level you put into this skill. This is also another reason why putting only one or two of this skill early is good, because the "gap" between your attacks are usually around 1 second, and at level 3 it is 0.5 seconds, while level 1 it is a full one second. This means that you can attack a creep to break invisibility, goes invisible and then delivering your second hit right away without accidentally breaking the invisibility off.
Although that the idea is simple, and it is not necessarily an "advanced" trick, but this technique, if done properly can potentially double your last hit amounts in laning phase (which is much more precious in offlane). This technique is often overlooked and underestimated, but you need a good amount of timing to actually get 2 creep kills with this technique.
When to use:
You can actually land the second hit properly, otherwise you might actually die instead because you waste your invisibility
Your enemy cannot capitalizes on a little increase on visible state
Any time possible
Slingshot Tracking
This technique is a common sense actually, but is commonly overlooked and can get you to lose some kills. Although called an advanced trick, this is pretty simple. This technique is used as a chasing tool, for killing down dying enemies that has become a bit too far from your Track range.
If you have experienced some "almost kill" moments because somehow, you fail to finish off a hero with 100 HP left and he has gone from 900 area radius of Track bonus speed. One of his friend comes and you are forced to escape, losing a chance to get your team bonus gold. This moment is one of the most irritating moments in the game, and this technique reduces that moment by quite a lot.
This skill is done by casting Track to a hero other than the actual target that is closer to you, therefore giving the speed boost bonus even if you cannot Track your actual target. This is very simple and useful, but is commonly overlooked.
When to use:
You are chasing a hero that is farther than your speed boost range
6.81b: In this gameplay change, Bounty Hunter receives what is quite possibly the biggest change in his gameplay since 6.77 update ( Track doesn't reduce armor anymore). In this change (6.81b), Shadow Walk receives a minor buff on duration from 15/20/25/30 to 20/25/30/35. This may not seems much, but trust me when I say that it's A LOT.
The most notable difference is not really of the duration, but more to the impact of the game. 20 seconds duration in level 1 is the same as the old level 2, and this means that there is no necessity in which you need to level this to level 2 because you can still do the permanent invisibility trick. If you get what I mean, this mean that you can get permanent invisibility trick since level 1, making you that much more useful.
Because of this, I change my personal build (I don't take it at level 8 anymore for Jinada instead). However, this gives an option instead for competitive build. I have yet to see a professional scene where Bounty Hunter is used since 6.81b update, so I will analyze this part instead.
We will go with standard skill build (E-W-E-Q-Q), with 2 levels of Shadow Walk, one Jinada and two Shuriken Toss. In level 5, assuming that his damage is 70 and he attacks a hero once with bonus damage from Jinada and Shadow Walk, then use Shuriken Toss (disregarding any armor and resistance.) This build will deal around (1.5*70)+60+200 = 365 damage.
However, if we go with another build (E-W-W-Q-Q), 2 levels on Jinada instead and one in Shadow Walk, with all the same situation as before, we can deal around (1.75*70)+30+200 = 352.5 damage.
This concludes only a difference of 12.5 damage with an easier chance to last hit due to Jinada cool down reduction and damage increrase. Not to mention that Jinada damage will continue to increase with his own damage, thus reducing the difference of damage compared to Shadow Walk usage and even out powering it.
Therefore, I assume that it is a better option overall to go with the second build rather than usual build, and thus I changed the skill build. Of course, if situation dictates it can be done differently and getting 3 points in Shuriken Toss (like in my personal build) can also be a much more viable option compared to before.
This concludes my first guide ever, and I hope that it helps you guys to some extend. Moreover, I wish that you like this guide, and if you do I might post another guide soon enough. Any feedback/critic/comment is much appreciated, and I highly encourage you to do so, even if it is quite harsh. I assure you, I don't mind it and won't hold it against you.
As my parting gift, here is how I aim to make all your enemies to become by using this guide, good luck in your games and remember to hunt the puny heroes' head. The chase is on!
DOTAFire is the place to find the perfect build guide to take your game to the next level. Learn how to play a new hero, or fine tune your favorite DotA hero’s build and strategy.


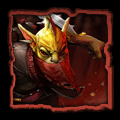
 Slippers of Agility


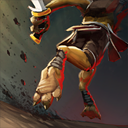


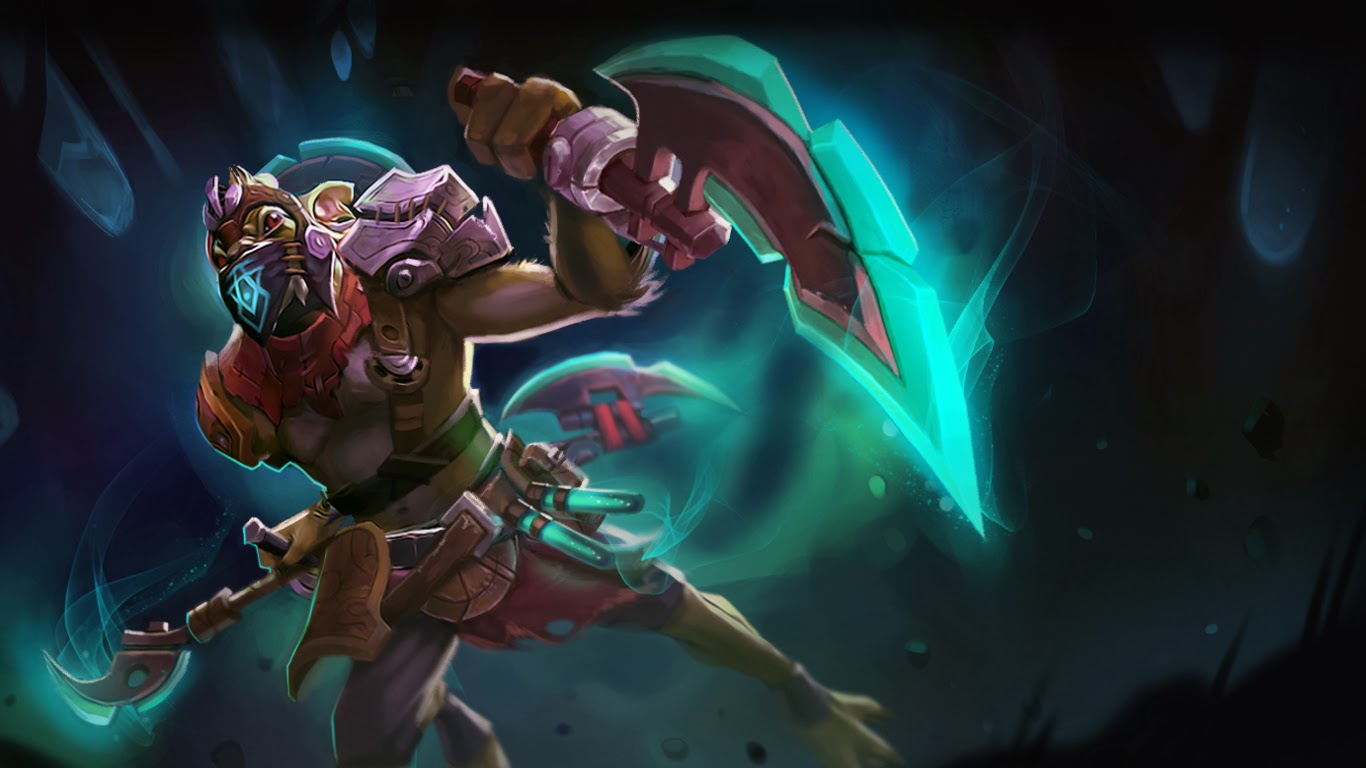


Quick Comment (49) View Comments
You need to log in before commenting.