Help Support Our Growing Community

DOTAFire is a community that lives to help every Dota 2 player take their game to the next level by having open access to all our tools and resources. Please consider supporting us by whitelisting us in your ad blocker!

Want to support DOTAFire with an ad-free experience? You can support us ad-free for less than $1 a month!

Go Ad-Free
Smitefire logo

Join the leading DOTA 2 community.
Create and share Hero Guides and Builds.

Create an MFN Account


Or

3 Votes

Black Arachnia becomes a Black Widow, a carry build.

November 13, 2013 by Techpriest Enginseer
Comments: 10    |    Views: 22706    |   


Build 1
Build 2
Build 3

Killing Blow

DotA2 Hero: Broodmother


Hero Skills

Insatiable Hunger

2 4 7 8

Spin Web

1 5 9 10

Silken Bola

1 5 9 10

Spawn Spiderlings

6 11 16

Talents

15 17 18

Introduction

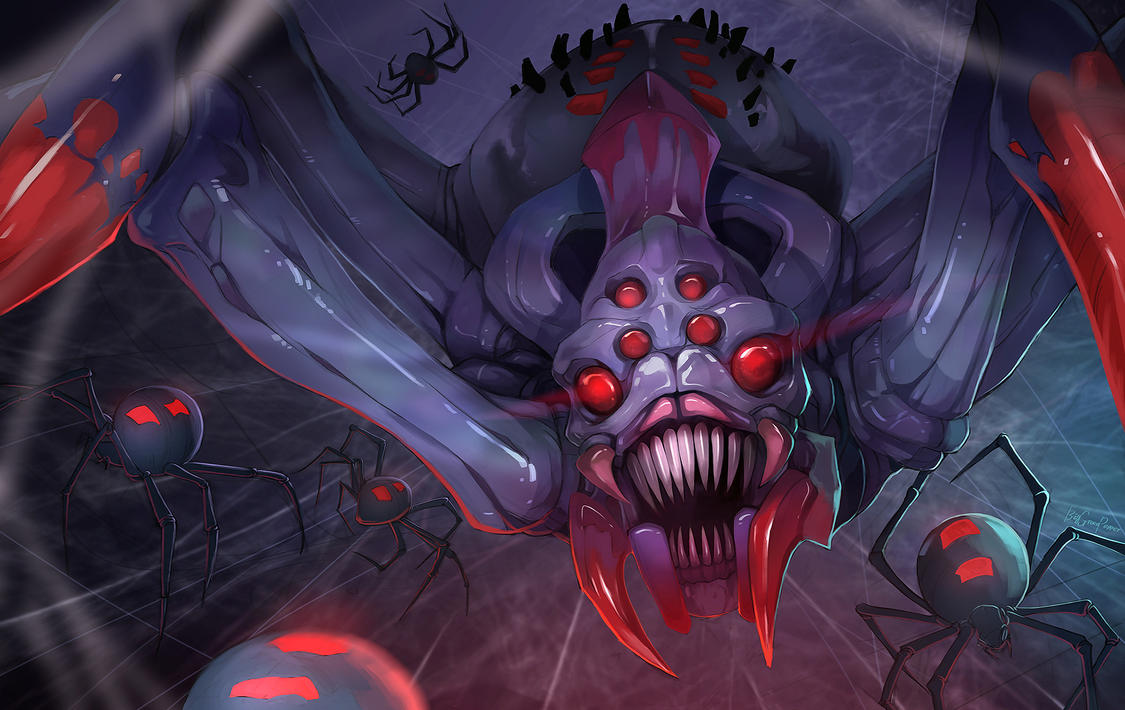
DISCLAIMER: I do not own this image and the owner of the image may have the right to take down this image if needed.


Broodmother is one of the heroes that are commonly known to scare her foes into abandoning the game right away due to their phobias but if that don't work, Her abilities allows her to push through creep waves and towers with her Spawn Spiderlings or become a great crowd control to contain heroes preventing their escape. She can hide and remain a deadly threat with her Spin Web harassing the enemies and recovering from counter-attacks faster than usual heroes. Her Incapacitating Bite remains deadly tool for harassment. Insatiable Hunger is her ultimate that grant a powerful attack bonus

Broodmother Information

Stats


17 + 2.5
18 + 2.2
18 + 2
44-50
2.52
295

Skills


Lore

For centuries, Black Arachnia the Broodmother lurked in the dark lava tubes beneath the smoldering caldera of Mount Pyrotheos, raising millions of spiderlings in safety before sending them to find prey in the wide world above. In a later age, the Vizier of Greed, Ptholopthales, erected his lodestone ziggurat on the slopes of the dead volcano, knowing that any looters who sought his magnetic wealth must survive the spider-haunted passages. After millennia of maternal peace, Black Arachnia found herself beset by a steady trickle of furfeet and cutpurses, bold knights and noble youths--all of them delicious, certainly, and yet tending to create a less than nurturing environment for her innocent offspring. Tiring of the intrusions, she paid a visit to Ptholopthales; and when he proved unwilling to discuss a compromise, she wrapped the Vizier in silk and set him aside to be the centerpiece of a special birthday feast. Unfortunately, the absence of the Magnetic Ziggurat's master merely emboldened a new generation of intruders. When one of her newborns was trodden underfoot by a clumsy adventurer, she reached the end of her silken rope. Broodmother headed for the surface, declaring her intent to rid the world of each and every possible invader, down to the last Hero if necessary, until she could ensure her nursery might once more be a safe and wholesome environment for her precious spiderspawn.

Where to place her webs

Remembers, this is during laning phase.
Green are recommendations, it provides either a safe access to a shop or hiding spot, or a rather useful ganking position.

Yellow are not recommended but not discouraged.

Red are discouraged as they have no hiding spot or a good chance of escaping, not to mention there's no practical uses for it.

Top Lane


Middle Lane


Bottom Lane

Spiderling and Spiderite Information


Spiderling

  • Duration: 60 seconds
  • Hit Points: 450
  • Damage: 18-19
  • Armor: 0
  • Movement Speed: 350
  • Passive.
  • Deal 4 damage per second as a damage over time.
  • Last 2 seconds on hero.
  • Last 6 seconds on unit.
  • Slows unit by 15% and stacks with Incapacitating Bite
  • Goes through magic immunity.
  • Passive.
  • Applies debuff on attack. If debuffed unit dies, a spiderite will spawn. Similar to Spawn Spiderlings


Spiderite
  • Duration: 60 seconds
  • Hit Points: 175
  • Damage: 9-10
  • Armor: 0
  • Movement Speed: 350

Pros/Cons When to pick Broodmother

Pros
  • Gain stealth, increased health regeneration and speed with Spin Webs
  • Spawn Spiderlings can be used as a ranged nuke or a pushing method.
  • Insatiable Hunger grants increased damage and lifesteal.
  • Incapacitating Bite maxed can solo Roshan due to his inability to hit.
  • Spiderlings can be used for trapping a hero
  • Spiderlings can also spawn a smaller spiderite when a person die under their attack. Allowing a greater push
  • Spiderlings can slow down enemy units by 15% and stacks with Incapacitating Bite.
  • Reliable starting armor.
  • Webs grant unobstructed movement which allows mobile escapes from anywhere covered in webs.
  • Allows Broodmother to hide in webs to last-hit and deny when she needs to.
  • Can solo any lane allowing junglers to jungle at ease.
Cons
  • Spawn Spiderlings consumes too much mana at the early stages.
  • Insatiable Hunger isn't a reliable ultimate compared to other heroes.
  • Incapacitating Bite cannot go through Magic Immunity and is easily countered by Monkey King Bar
  • Spiderlings can be used to feed the enemies gold and experience.
  • An extremely low starting speed early-game.
  • Web-dependent.
  • Is only able to take out enemy heroes one by one, not reliable at teamfights.
  • Lacks long range capacity.
  • Requires great farm.

Pick Broodmother
  • When your enemies are heroes that relies on physical damage(Ex. Drow Ranger, Sniper, Elder Titan, etc)
  • When the enemies have a definite phobia of spiders.
  • When you know the differences with items that have Unique Attack Modifiers.

Don't EVER pick Broodmother
  • Shadow Blade is a definite must-have.
  • Your team needs a support. Don't be that guy.
  • When you think spiderlings can be wasted effortlessly.
  • When you think tower diving without any webs nearby is fool-proof.

Skills


Spawn Spiderlings

Type:
Targets:


Active Target
Enemy Units
Broodmother injects her young into an enemy unit, dealing damage. The spiderlings will hatch if the target is killed while under this influence.

Level

1


2


3


4

Mana

120


120


120


120

Cooldown

10


10


10


10

Range

700


700


700


700

Radius

N/A


N/A


N/A


N/A

Duration

2


2


2


2

Effect

Deal 75 damage and spawn 1 spiderling if the target dies under the duration.

Deal 150 damage and spawn 2 spiderlings if the target dies under the duration.

Deal 225 damage and spawn 3 spiderlings if the target dies under the duration.

Deal 300 damage and spawn 4 spiderlings if the target dies under the duration.

Notes:
  • Units from which the spiderlings spawn leave no corpse on death.
  • Units killed by spiderling will then give birth to spiderite, smaller and less powerful versions of the spiderlings.
  • Will work on allied creeps and units when denying.
Spiderlings are mostly used as crowd control or as a pushing method as they can help bring a tower down or even prevent an enemy from running due to their abundance. Their ability to slow them stacks with Incapacitating Bite and applies poison damage. Their next ability allows them to spawn Spiderites which are weaker version of themselves when their poisoned target dies under their debuff. Be wary of people with great AoE abilities. As they can make your spiderlings for quick-farming. Remember, that these spiderlings can act as bait to tell you the location of the Sentry Ward or the source of the Gem of True Sight user. Although, these spiderlings make great pushers. They cannot use the unobstructed movement ability that grants Broodmother inside her webs. Concluding that they cannot be used with Broodmother on her escape from danger.


Spin Web

Type:
Targets:


Self
Target Point
Throws out a web that renders Broodmother invisible in its vicinity, while also boosting regeneration, and granting a passive movement speed increase.

Level

1


2


3


4

Mana

50


50


50


50

Cooldown

30


30


30


30

Range

1000


1000


1000


1000

Radius

900


900


900


900

Duration

Never


Never


Never


Never

Effect

Provide 2 health regeneration, 20% movement speed, unobstructed movement, and invisibility of 2 second fade delay. Allows 2 webs to be placed.

Provide 4 health regeneration, 25% movement speed, unobstructed movement, and invisibility of 2 second fade delay. Allows 4 webs to be placed.

Provide 6 health regeneration, 30% movement speed, unobstructed movement, and invisibility of 2 second fade delay. Allows 6 webs to be placed.

Provide 8 health regeneration, 35% movement speed, unobstructed movement, and invisibility of 2 second fade delay. Allows 8 webs to be placed.

Notes:
  • All other bonuses such as movement speed and health regeneration are instantly granted and lost when moving in or out of the web.
  • Also affects spiderlings and spiderites, but does not grant unobstructed movement.
  • Webs have a 150 sight range, and don't prevent neutrals from spawning.
  • If more webs are spawned than allowed, the oldest one will disappear.
  • Webs are marked by icons on the minimap.
These webs are essential to Broodmother's drawbacks: slow movement speed, lack of escape mechanics, and much more. These webs also boosts health regeneration and promote invisibility which allows hiding in the shadows more easier than usual. Keep in mind however that Sentry Ward, Gem of True Sight, and Dust of Appearance will reveal your invisibility and keep your silent hunting ability at rest. However, unobstructed movement will allow you to hide in trees to prevent the enemy from attacking you in your webs. You just got to find the source of the detector and wipe it out.

Incapacitating Bite

Type:
Targets:


Passive
Enemy Units
Broodmother's venom cripples enemy units, causing her attacks to slow, as well as giving the affected unit a chance to miss its attacks.

Level

1


2


3


4

Mana

N/A


N/A


N/A


N/A

Cooldown

0


0


0


0

Range

N/A


N/A


N/A


N/A

Radius

N/A


N/A


N/A


N/A

Duration

2


2


2


2

Effect

Slow the enemy by 10% and make the enemy miss by 30%

Slow the enemy by 20% and make the enemy miss by 40%

Slow the enemy by 30% and make the enemy miss by 50%

Slow the enemy by 40% and make the enemy miss by 60%

Notes:
  • The affected enemies' miss chance stacks with evasion and terrain dodge chance.
  • Incapacitating Bite is a Unique Attack Modifier, and does not stack with other Unique Attack Modifiers.
Incapacitating Bite is deadly but it prevents you from using other Unique Attack Modifers like say Morbid Mask. This ability allows escape opportunity because it slows down the enemy and prevent them from actually hitting you. The ability also allows you to solo Roshan once you have this skill maxed. This ability is also deadly on auto-attackers as their main source of damage has been severely weakened.

Insatiable Hunger

Type:
Targets:


Active
No Target
A violent lust for vital fluids increases Broodmother's attack damage and gives her a vampiric attack.

Level

1


2


3
Mana

100


100


100
Cooldown

60


45


30
Range

N/A


N/A


N/A
Radius

N/A


N/A


N/A
Duration

14


14


14
Effect

Grants 60 damage and 40% lifesteal.


Grants 80 damage and 60% lifesteal.


Grants 100 damage and 80% lifesteal.

Notes:
  • Fully stacks with all items providing lifesteal (both Unique Attack Modifiers and auras).
  • Can only be removed by Purge (from Diffusal Blade, Stone Gaze, Demonic Purge, Unstable Current, or the Satyr Trickster).
This ability is used as a last resort to gain health or prevent death or as an initiating ability, while containing a damage bonus that allows killing heroes to be easier. Combine it with Incapacitating Bite for deadly combinations.

General Gameplay

You have two three methods as playing Broodmother: Deliver the killing blow, becoming the patient warrior, or harass as the central warrior.

Delivering the Killing Blow


Delivering the killing blow will cause you to hide in her webs and last-hit and deny as you can. Predict the creep's health and hope that you actually kill it in one hit. Remember to hit retreating enemies on low health. Spawn Spiderlings can be used as a ranged nuke to deliver a deadly killing blow on low health enemies. The killing blow will require the method of good farm and wiseful precision of when to attack and push.
First Stage(Early game)


What you should start with of course.

These three items should help suffice in farming, minimizing harassment and recovering wounds that early levels in webs cannot heal.

Second Stage(Early-mid game)


These items should be bought off the Side Lane Shop. Only the recipe of Soul Ring should be bought first, right away.

Soul Ring offer a nice regeneration bonus not to mention an emergency mana pool that expenses at health which the health can be recovered from your webs. Power Treads offer a variety of styles. Strength for being a early tank. Agility for a damage boost. Intelligence for spawning spiderlings.

Third Stage(Mid game)


These items, you should be buying after the 10 minute mark.
]
Sange and Yasha offers a nice deal of stats. The ability to increase movement speed allows Broodmother to go maximum speed once inside her webs. The passive ability helps reduce attack and movement speed which allowing killing made easier. Crystalys offers critical damage and a damage boost. The Crystalys can act like a Daedalus if Insatiable Hunger is active due to the physical damage increase.

Last Stage(Late game)


You should get these after the 25 minute mark.

Orchid Malevolence allows to silence annoying pests and be a great threat in 1 versus 1 duels. Skull Basher allows to stun any hero that attempts to escape out of your webs. If you're feeling a little luxurious try Daedalus, big brother of Crystalys, semi-guaranteed victory.

Becoming the Patient Hunter


Becoming the patient hunter will require you to become patient, knowing when to hit and harass to make sure that your prey is psychologically thinking on the run. Becoming the patient hunter will require you to use lure such as your teammates to help soften up enemies before wiping them off if they dare run. The patient hunter method is your usual strategy on lane, just remember to be patience and know when to attack.

First Stage(Early game)


What you should get at first.

The Quelling Blade helps with farming which is important in every carry's breakfast. Ring of Protection helps increase your physical armor and helps to build a Vlad. Since you are patient, a Tango will help, but a healing salve rewards better for those who wait without harming.

Second Stage(Mid game)


What you should be trying to get after the 5 minute mark.

Boots of Travel allows you to move fast even without webs and allows pushing and escape easier. Yasha overall improves Broodmother's ability to attack and move. Vladmirs Offerings provides a good amount of lifesteal and damage which can benefits the entire team, provided they are melee heroes. Not to mention, they increase the livability of spiderlings and spiderites

Last Stage(Late game)


You should be focusing on these after the second stage.

Manta Style confuses the enemies and help people chasing you rather difficult for you to find. Heart allows her to recover the fastest as possible to keep pushing on as soon as possible. Butterfly dramatically increases her potential at lasting out at teamfights and ganks before finding a safe place to heal.

Harass as the Central Warrior


Harassing as the Central Warrior will cause you to be at your most dangerous situation. Middle lane. How the lane lacks trees to let you escape. How you could be flanked from top or bottom lane, but you are a warrior. You must harass to survive. You do not need to insure a kill, but you will need to harm the enemy. Combing both the elements of the Silent Hunter and Killing Blow, you must be patient but deliver a blow.

First Stage(Early game)


What you should get...

No reason to not have one at the middle lane. This can help you with recovering lost health from failed harasses. Not to mention bottle will reveal you out of your webs with each usage for a 2 second fade-in. Iron Branch provides a nice stat for low gold. Use Observer's Wards to observe where your enemy middle hero are and Sentry Wards to counter the enemy's wards.

Second Stage(Early-mid game)


Only need the courier for the Boots of Speed.

Makes Broodmother go faster helping with escaping or charging. Helps recover health and mana while granting a minor damage boost. Not to mention, it just requires you to go missing for a few seconds to go to the Secret Shop.

Third Stage(Mid-game)


This stage focus on speed as escape mechanics and charging mechanics are crucial in the game, this is the point where mid-laning are no longer necessary.

Yasha will allow you to go faster while granting a nice agility bonus along with it. Grants a damage bonus and an ability that gives a speed boost when you need to get out of your webs.

Fourth Stage(Mid-late game)


This stage is where you should shine on almost every lane, being a rather good harasser and pusher.

Battle Fury will provide a handful amount of mana regeneration allowing you to harass with your Spawn Spiderlings and great farming potential. The ability that creates illusions are handy for a push, gank, or escape.

Last Stage(Late game)


This stage is for luxury items and if you're somehow out of towers to push.


Skull Basher provides a handful stun which is great for harassing and taking out potential heroes. When Crystalys gives out that little damage boost.

Latest Patch Notes

In Patch 6.79:
Spin Web

  • AoE increased from 650 to 900. This is good. Bigger webs, bigger distance to harass.
  • Cast range increased from 600 to 1000. Makes more sense since you can cast your webs further.
  • Cast point nerfed from 0.2 to 0.4. Not bad. It makes up for the new buffs she gets.
  • Cannot destroy trees. Destroying trees help removed some obstructed sight so you couldn't see the enemy surprise you but helps make up since you can now move inside the trees.
  • Broodmother now have unobstructed movement while moving in her webs. Spiderlings cannot benefit from this. Be super annoying by going in the trees and cliffs but be wary of enemies that can still attack you with AoE effects and can hit you if you're not deeply in the area.
  • Removed buffer time when leaving the Spin Web. That means enemies shouldn't have to be afraid if Broodmother walks out of her webs for a few seconds...

Friend or Foes of the Brood Colony

I use a scale of five to see how you would need them or avoid them.
1-I might as well solo/Always Avoid
2-Useless/Sometime Avoid
3-Neutral/Neutral
4-Useful/Not a problem
5-Best Friends/Free farm!


With him, brings a curse and a gift. He fulfills almost every roles but like a layman, he is not specialized.
Friend: Able to Aphotic Shield to protect and Mist Coil to heal, not to mention a useful Curse of Avernus to increase movement speed and attack speed on a certain enemy to increase chances of kills. 3/5

Foe: His Mist Coil allows him to deny himself, preventing you from gaining anything. His Aphotic Shield counters your harassment in early-game. Curse of Avernus feels like forever, if he constantly hits you. Borrowed Time doesn't feel a threat since you have no high-damage components beside physical damage. 2/5


Alchemist is a carry, like all carries. Carries should not be put together in the same lane. No one will ever benefit greatly especially from this person.
Friend: Beside, that he's a carry. He likes to steal your kills and last-hits. Unstable Concoction is probably the only thing that helps Broodmother during a gank. 1/5

Foe: The only annoying thing is his Chemical Rage, being able to regenerate wounds faster and throwing bottles of stun at you that can't be evaded? Fun. 3/5


Kaldr is a hero who has his uses. His abilities revolves around weakening the enemy and strengthening allies which is what Broodmother wants on every harassment.
Friend: He can benefit from Broodmother's Incapacitating Bite and his Cold Feet. Ice Vortex can also stack with slowing the enemy down to a complete halt, not to mention weakening the enemy's resistance to Spawn Spiderlings. Chilling Touch also gives a boost to your harassment dealing more damage on each attack in exchange for a little slow. Ice Blast is also effective when attempting to kill runners. 4/5

Foe: There really is nothing that can stop Broodmother, Cold Feet does not work well with fast heroes. Ice Vortex can be ignored by hiding in trees temporary. Chilling Touch would only work if you get yourself attacked and Ice Blast has a first warning blast to inform you of the second deadly blast. 4/5


"I bring an end to magic."
Friend: His Mana Break combined with Blink makes up for a good duo team of ganks. Being able to slow and depletes their enemies' mana is a definite force to be wary of. 4/5

Foe: His Mana Break will deplete your mana pool for Spawn Spiderlings or when you need it desperately, Insatiable Hunger. Not to mention his Blink will provide an easy escape providing death for the skilled anti-mages. Spell Shield also helps reduce the damage of Spawn Spiderlings meaning Brood cannot make spiderlings off Anti-Mage that easy. Mana Void is a definite danger as Brood requires a huge amount of mana in early and mid game making for a Broodmother waiting to be popped with it. 2/5


Axe makes chaos. Broodmother uses that chaos to increase her potential.
Friend: Berserker's Call provides an easy bait for your teammate allowing you to kill while they are forced to hit Axe. Battle Hunger helps weaken the enemies and if you keep denying. They can stay in that hunger until their death, but an awful part is that he will steal kills with Culling Blade, but it will benefit you with a bonus speed if he manages to kill someone with it. 3/5

Foe: Berserker's Call can force you out of your hidey spot and be revealed if you're too close to him. Battle Hunger causes you to go crazy just trying to farm. Counter Helix is a counter-harassment measure to prevent you from harassing him if you want a little damage drawback. Overall, he hates harassers and harassing will guaranteed an instant death for Broodmother early-game. 1/5

Quick Comment (10) View Comments

You need to log in before commenting.

Similar Guides
Featured Heroes

Quick Comment (10) View Comments

You need to log in before commenting.

DOTAFire is the place to find the perfect build guide to take your game to the next level. Learn how to play a new hero, or fine tune your favorite DotA hero’s build and strategy.

Copyright © 2019 DOTAFire | All Rights Reserved