Abyssal Underlord: A Definitive Guide
ReAlChemist
January 15, 2014
Chapter Title
Azgalor, the Abyssal Underlord is a Dire STR hero that specializes in area denial and team mobility. He was formerly called Pit Lord, but I guess he got demoted (Damn you Blizzard!). His two active spells are both AOE with significant duration, one is a nuke ( Firestorm) and the other is a BKB-piercing disable (
 Pit of Malice). His ultimate allows him to mass teleport allied heroes, bestowing almost unparalleled team mobility and map control. His passive,
  Atrophy Aura, reduces base damage of enemy units and temporarily grants him bonus damage when enemy units near him die.
He is an extremely strong laner because not only does he have a nuke and disable, he is one of the tankiest heroes at start and has a ridiculous damage advantage from his very high base damage and Atrophy Aura. He doesn't scale well with farm, so its best to use the farm he gets to build team-oriented and pushing items.
At present, this guide won't be as detailed as my  Legion Commander guide or the
  Winter Wyvern guide that I am working on. Frankly, I don't find Abyssal Underlord as interesting and don't have quite as much play time on him. If there is anything you would like me to add or expound on, leave a comment and I'll try to do so.
Pros/Cons
Pros
- Extremely high starting damage (2nd highest average and min, 5th highest max).
- Possibly strongest laner in game (with Atrophy Aura, hits harder than any opposing hero).
- Very high base STR (25, tied for 4th highest in game).
- Good STR growth (2.6, tied for 27th in game).
- Good starting armor (3.7).
- Very high INT growth (2.6, tied for 2nd highest among AGI and STR).
- Semi-Spammable AOE BKB-piercing disable (Pit of Malice).
- AOE global teleport.
- AOE damage reduction aura (Atrophy Aura).
|
|
Cons
- Terrible AGI growth (1.3, tied for 5th lowest among STR heroes) and armor growth (10.8 at 25)
- Mediocre attack animation (0.46 sec attack point, tied for 46th longest in game).
- Bad cast point (0.6, tied for 7th longest in game).
- Nuke is an AOE DoT, so easily dodgeable.
- Early mana problems (Two spells basically consumes entire mana pool at early levels).
- Mediocre solo kill potential.
- Atrophy Aura pushes very hard, so he can only lane mid or aggro.
- Dark Rift has a significant delay (6/5/4) and a fairly long CD (130s).
|
The Skills
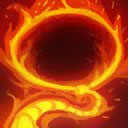
Firestorm
|
|
|
|
Type:
Targets:
|
|
|
Active
Area
|
|
|
Calls down 6 waves of fire that damage enemy units in the target area, and continues to burn them for additional damage over time.
|
Level
1
2
3
4
|
|
|
Mana
100
110
120
130
|
|
|
Cooldown
14
14
14
14
|
|
|
Range
750
750
750
750
|
|
|
AoE
400
400
400
400
|
|
|
Duration
6 (Storm)/ 2 (Burn)
6 (Storm)/ 2 (Burn)
6 (Storm)/ 2 (Burn)
6 (Storm)/ 2 (Burn)
|
|
|
Effect
25 Magic Damage (Wave), 5 Magic Damage per Second (Burn)
40 Magic Damage (Wave), 10 Magic Damage per Second (Burn)
55 Magic Damage (Wave), 15 Magic Damage per Second (Burn)
70 Magic Damage (Wave), 20 Magic Damage per Second (Burn)
|
Notes:
- One wave/second.
- Maximum damage: 160/260/360/460.
- Basic combo is Firestorm then Pit of Malice to keep them inside, not the opposite.
- At Level 7 each cast consumes 23/26/28/31% of your mana pool and you regenerate the mana in 76/84/91/99 seconds.
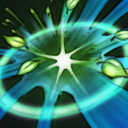
Pit of Malice
|
|
|
|
Type:
Targets:
|
|
|
Active
Area
|
|
|
A deadly pit is conjured at the target location; any unit that enters is unable to move for some time and takes damage. Each enemy unit can only be affected once.
|
Level
1
2
3
4
|
|
|
Mana
100
115
130
145
|
|
|
Cooldown
24
21
18
15
|
|
|
Range
800
800
800
800
|
|
|
AoE
275
275
275
275
|
|
|
Duration
1 (Ensnare)/ 7 (Pit)
1.5 (Ensnare)/ 7 (Pit)
2 (Ensnare)/ 7 (Pit)
2.5 (Ensnare)/ 7 (Pit)
|
|
|
Effect
100 Damage, 1 Second Move-Disable
100 Damage, 1.5 Second Move-Disable
100 Damage, 2 Second Move-Disable
100 Damage, 2.5 Second Move-Disable
|
Notes:
- Disable affects Magic Immune targets, damage does not.
- The pit lasts 7 seconds, but can only affect a unit once.
- Basically an AOE
 Ensnare: Disables magic immune units, does not disable ethereal units, prevents movement and interrupts channels but does not prevent attacks or casts.
- Does not affect cycloned units.
- At level 7 consumes 23/27/31/35% of your mana pool and you regenerate the mana in 76/88/99/110 seconds.
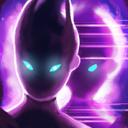
Atrophy Aura
|
Atrophy |
|
|
Type:
Targets:
|
|
|
Passive/Triggered
Enemy Units
|
|
|
Nearby enemy units are weakened, losing a portion of their base damage. If it dies while under this effect, Pit Lord gains bonus damage.
|
Level
1
2
3
4
|
|
|
Mana
NA
NA
NA
NA
|
|
|
Cooldown
NA
NA
NA
NA
|
|
|
Range
NA
NA
NA
NA
|
|
|
AoE
900
900
900
900
|
|
|
Duration
30
35
40
45
|
|
|
Effect
-18% Damage
-26% Damage
-34% Damage
-42% Damage
|
Notes:
- Duration refers to bonus damage duration. Grants 5 damage for enemy creep death and 30 for enemy hero death at all levels.
- The damage reduction only refers to base damage (ie. enemies lose damage equal to 18/26/34/42% of their base damage).
- Affects enemy heroes and creeps, neutrals, ancients, and Roshan.
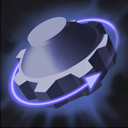
Dark Rift

|
|
|
Type:
Targets:
|
|
|
Active
Allied Unit/Structure
|
|
|
Opens a dark rift at the targeted friendly unit's position. After a short delay, Abyssal Underlord and all nearby friendly heroes are teleported to that unit's location. Dark Rift can be cancelled at anytime during the cast. If it is cancelled in this way or the target unit dies before the spell becomes active, Dark Rift goes into cooldown.
|
Level
1
2
3
|
|
|
Mana
75
150
225
|
|
|
Cooldown
130
130
130
|
|
|
Range
Global
Global
Global
|
|
|
AoE
400
400
400
|
|
|
Delay
6
5
4
|
|
|
Effect
Mass Teleport
Mass Teleport
Mass Teleport
|
Notes:
- Only affects allied heroes.
- Cannot be stopped by stuns or silences and affects cycloned units, but will not teleport hidden units (eg. those under the effects of
 Disruption,
  Astral Imprisonment,
  Infest,
  Phase Shift, or
  Supernova). I will update what happens when Abyssal Underlord is hidden, if his allies will still teleport.
- Essentially a 400 AOE
 Boots of Travel: can teleport to any friendly unit or structure, will be stopped if the target is destroyed, and if ground-targeted will target the closest low-priority target.
- Has a subability to cancel during the delay. The ability will still go on CD, but you won't teleport.
Mid Guide
Playing a mid Abyssal is fairly straightforward: use your huge damage advantage to get a farm and exp advantage on your foe. Combine the facts that Abyssal has the 2nd highest starting damage in the game, Atrophy aura grants +20 permanently damage after the first wave, and level one aura reduces damage by at least 7 ( Invoker and
  Shadow Fiend) or up to 15 (
 Treant Protector), there's almost no way anyone can compete for last hits. The only heroes that can give you even a small amount of trouble are high damage melee heroes (
 Tiny, Legion Commander,
  Night Stalker) since
  Quelling Blade more than neutralizes the -damage from Atrophy Aura and heroes that get last hits through nukes (Zues, Night Stalker). If you want, you can pick a QB yourself in these cases, making you hit creeps for ~115 damage, much more than anyone else can hit for early and stronger than low-level nukes. The combination of Atrophy Aura and a Stout Shield also make it ineffective to harass Abyssal Underlord.
Firestorm can be very useful in zoning out the enemy hero, particularly if they are melee or have short range. You can use it on top of the creepwave to keep them away, or behind the melee creeps to force the enemy closer to you where you can harass them with right-clicks.
You should have no problem in establishing rune control, since you have extremely good push. Not only do you hit hard, Atrophy Aura and Firestorm are quite good for pushing the lane. Firestorm should also be used to prevent the enemy from approaching the creepwave.
Your decent armor, very good HP, slightly above average MS, and -damage aura make it fairly difficult to gank you mid even though you lack a true escape ability. If you are getting ganked, cast Pit of Malice or even Firestorm in your path of retreat so the enemy will have to eat a nuke and/or disable to chase you.
Killing/Ganking
It takes some skill to get kills solo as Abyssal Underlord since his nuke is easily dodgeable and his disable isn't all that long compared to his cast time. If you have help, your life gets easier but that is not always the case.
The general idea is to go aggressive on your target while you cut off their best path of retreat with Firestorm. The AOE is usually large enough to cover an entire path, particularly at a choke point. If they decide to go into the AOE use Pit of Malice to hold them there and throw in some autoattacks while chasing them. If they avoid Firestorm and take an alternate path, keep attacking them then throw Pit of Malice ahead of them after they have committed (remember, the pit has a 7s duration). If they double back, you get more hits in and if they go forward, they eat a nuke/disable and you get more hits in. Keep chasing while attacking and you should be able to get a kill.
As you might have guessed, MS buffs (Phase/Drums), slows (OoV/Atos), and initiation items (SB/Blink) really help in this process. S&Y deserves a special mention since it has a strong MS buff combined with a chance to proc a strong slow, while providing some useful stats. Eul's is also quite good since it grants a +40 MS bonus and the active lets you gap-close easily (Important note: cycloned units are not disabled at all by Pit of Malice) while completely solving your early mana problems. Urn is also quite strong since its not difficult to get two or more charges (300 or more damage as HP loss).
Anti-Gank
Abyssal Underlord is a much stronger anti-ganker than ganker, since it is inadvisable to dive into Firestorm and Pit of Malice while he can always Dark Rift his allies to safety should it look like the gank will succeed.
Making the Most of Dark Rift
Pushing
The unparalleled team mobility
Dark Rift provides makes it an extremely strong pushing tool. You can always mass teleport to a lane then push it for a tower, but there is a slightly more subtle approach that results in bigger gains.
Push to a tower that you know is not currently defended to force out TPs. If there is no TP response, take the tower. If there is, Dark Rift to another lane that is close to an enemy tower and take it. The enemy will be unable to respond since their TP will be on CD. This forces the enemy to group up and follow your team (so they can be at the first tower, then all TP to the second tower) or take fights at a numbers disadvantage. Once you get
 Refresher Orb
 and can switch lanes yet again there is almost nothing the enemy can do.
This strategy requires multiple lanes to be pushing in so you have the option to switch and so that you don't get split pushed (which is a significant danger since you are grouped up as 5). So heroes with good split/global push (eg.
 Nature's Prophet
,
 Ancient Apparition
) make this strategy much stronger.
Anti-Gank
Particularly in the early game,Dark Rift is a very strong anti-gank skill. Besides being a very reliable escape for yourself, it also allows you to save teammates. If you have to TP from another lane, start Dark Rift before you TP to decrease the delay (3 seconds can make a huge difference) and try to have your allies converge on you.
If you do use Dark Rift to save yourself or an ally, it can be a good idea to teleport to another lane rather than your fountain. Since probably 2-3 heroes will have been devoted to the gank, if you go to another lane you will have 4-5 heroes and should be able to take the tower easily.
Teamfight
To initiate a teamfight with Rift, it is best to teleport to a summoned unit behind the enemy so they can be backstabbed or caught in a pincer. DR can also be used to escape a teamfight that is going awry, although the delay and limited AOE make this a bit difficult. These are the simplest, but probably least useful, teamfight facets of DR.
DR is better used in a teamfight to allow your team to blow a lot of short or medium CDs and focus down 1-2 targets quickly then fall back. After healing up and letting the CDs refresh, you can force another fight or push while the enemy is down a few heroes.
An even more advanced, but riskier, use of DR is to counteract big teamfight abilities. Basically, if you start DR at the begginning of the engagement you have a window of protection from these abilities that can really turn a fight. Since your team can just disappear, heroes like
 Enigma
,
 Warlock
, and
 Tidehunter
 won't want to use their ultimates since they will most likely be wasted. However, if your team can secure an advantage in those few seconds that makes the fight favorable for you (eg. bursting down Warlock) you can simply cancel Dark Rift and continue fighting.
Item Explanations
Note that I split my item builds into two parts since you build one of two ways early (gank or anti-gank; builds 1&2) and then can build several ways later (push, teamfight, split-push) but these are basically independent. Also, I will be updating the item builds a bit as time goes on since they aren't quite as playtested as I would like.
Early-Mid Game Items

Almost always picked up on melee mids, Stouch Shield is particularly good on Azgalor for its synergy with Atrophy Aura: enemies do less damage, so blocking 20 is a greater % of their potential.
 |
|

All the regen you need to stay in lane until your Bottle. Its not usually worth picking anything up past the shield and HP regen since you have more damage than anyone you will encounter, you have good starting HP/armor and you're spells are too expensive for stat items meaningfully increase your mana pool and you can't afford to sit back and sip a Clarity.

You have an extremely good push between your damage, spells, and Aura so getting runes should be no problem. You also desperately need the regen, particularly the MP.
 |
|

If you are ganking you will need the damage and chase that Phase Boots gives you. If you are anti-ganking you want Arcane Boots to make sure you have mana for full combo and your teammates have mana to cast their spells.

You need to be where you can gank or counter-gank. Core on most mids.

You are a chasing ganker, which means you will usually be tanking creeps and tower diving, which Vanguard makes cake.

You get a lot of farm mid and don't have any real core so getting a fast Mekansm is great for your team. Not only does it make you even better at counter-ganking, it makes you an even better pusher and gives some nice stats and armor.

The 6 STR makes you even tankier while the Mana regen is very helpful. The active lets you heal up an ally after (or sometimes during) your counter-gank or do a nice chunk of damage to an enemy.
 |
|
 |
|

Abyssal Underlord really benefits from slows because they can keep people in his Firestorm and allow him to chase. Orb of Venom is by far the cheapest slowing item, but while its slow is decent (10%) you have to hit the enemy first. I would generally pick one up early if I plan to gank since its a very small investment but can net you a kill. Sange and Yasha gives a decent amount of stats (16 AGI & STR, 16 AS) and a large amount of MS (16%, usually ~57 MS) with the chance temporarily greatly slow the enemy on hit. Its rather expensive for a ganking item, so get S&Y if you need the stats and are angling for a teamfight build which inlcudes Halberd and Manta. Rod of Atos gives a large amount of INT and HP (25, 325) combined with a powerful, long-range slow (60%, 1200 range). The slow lasts 4s, so combined with Pit of Malice it allows you to land a full Firestorm.
 |
|
 |
|

These items allow you to gap-close or sneak up on heroes but fall off quickly after laning. You aren't hitting that much in teamfights, so the stats of Shadow Blade don't do much for you. Your offesnive spells have long ranges, so the main use of Blink Dagger in a teamfight is to be able to Dark Rift, wait 5/4/3 seconds, then blink in to pull your team out. Smoke of Deceit is the best option if you need it since the investement is very small (100g).

Eul's is very useful on Azgalor for a couple of reasons. First, it gives him all the mana regen he ever needs. Second, the active and bonus MS allow him to gank much more easily. Third, he can purge silences from himself with the active. Fourth, it makes Dark Rift a reliable escape since you can spend 2.5 seconds of the dealy invulnerable (and few things can kill you in 1.5s). Remember that a cycloned unit is completely unaffected by Pit of Malice.
Mid-Late Game Items
Refresher Orb changes your nigh unparalleled team map mobility into imba mobility. Being able to jump your whole team around the map not once but twice is just not something most any opponent can handle. Being able to use your abilities and items a second time isn't bad either. This is core for a team push strat, but not quite so necessary in a split-push strat.

These little/medium/big guys are quite a boon to a push or teamfight, particularly if you have refresher since you can drop twice as many. If you are jumping around the map, it can be a good idea to drop the Necrowarriors at the first tower and use them to apply pressure to it (since one enemy will need to remain behind to deal with them). The warriors last 40s and can be targetted by Dark Rift, so you can make b1g pl4yz by dropping them and getting them to a favorable position (eg. behind the enemy) and Rifting to them.
Boots of Travel
Great split-pushing item since you can TP to a lane, push it, and then bail if you are in danger with
Dark Rift. Combine with
Refresher Orb to keep constant pressure on the enemy by constantly pushing for a period to force reactions or take towers.
 Pipe of Insight
The easiest way to counterpush is to nuke down the creep wave, and
Pipe of Insight prevents that and protects you and your team. Particularly good if the enemy team is primarily or heavily magic damage based.
 Veil of Discord
Your damage falls off late game and this somewhat balances it. Get if you have a magic-heavy team and are teamfighting.

|

|

If you plan to teamfight, basically get whichever of these you can afford that your team doesn't already have. In a teamfight you make a good aura carrier since your spells have long range, you are tanky, and you carry
Atrophy Aura to start with. You shouldn't be positioned at the front line usually since your DPS isn't good (terrible AGI) but you should be between the tanks/melee carries and your supports/ranged carries so that your defensive aura's cover everybody while your offensive aura's hit at least the enemy front line.

|

Both give you more teamfight contribution through disable. Go for
Heaven's Halberd against physical damage, particularly ranged carries. Go for
Scythe of Vyse against heroes with important spells or evasion.

This is a very unconventional item on any support, particularly a non-AGI one. The reason you sometimes want to get it on Abyssal Underlord is that his main contributions are usually auras, and illusions can carry (but not benefit from) most every one. This means that the enemy can't just burst you down, they need to kill your illusions too. This means they either won't bother and you give your team an advantage, or they spend a lot of time and damage on you and your illusions (which are quite tanky) diverting it from the rest of your team. It also allows you to purge silences, which is always nice.

|
|
|
|
|
"But ReAlChemist, it never makes sense to get more than one
Abyssal Blade since they don't stack bash chance. Also, isn't Abyssal Underlord not a DPSer? And doesn't he only have two hands, making 6 blades unusable?" All of those are valid points, but since the hero's name is
Abyssal Underlord if you ever find that somehow you can get six
Abyssal Blades you are obligated to.
Counters
Displacement


Dark Rift has a good AOE of 400 but its not hard to move AU or a teammate enough that when it goes off he will leave teammates behind, turning a retreat into a ditch. To make it worse, the heroes with displacement abilities (
 Pudge
Pudge,
 Vengeful Spirit
,
Tiny,
 Earth Spirit
) also generally have stuns and/or silences, which prevent AU from canceling the Rift if the situation calls for it. There are a couple ways to deal: (1)
Eul's Scepter of Divinity cyclone renders you untargettable/invulnerable for 2.5 seconds but doesn't interfere with Dark Rift (although this doesn't help against
Meat Hook), (2) Proper positioning to avoid Meat Hook, be out of range of Boulder Smash, and make Toss unreliable, (3) Stay back and use Blink or Force to get in range of your team just before Dark Rift goes off, (4) BKB is quite useful against Force Staffs (minimum duration same as lvl 3 Dark Delay) but all the other abilities movement effects go through magic immunity.
Hidden Debuff Placers
A hidden unit will not be teleported by Dark Rift. Usually this means that one shouldn't
Infest.
Phase Shift, or
Supernova but against an Outworld Devourer or
 Shadow Demon
 this means the Rift can be effectively cancelled or transformed into a ditch. The easiest thing to do is silence them or make sure the heroes in range of Astral and Disruption (550 and 600 respectively) have BKB and/or Linken's.
Global Mobility


,
+
One of the primary strengths of AU is that he allows his team to jump around the map and push with very high mobility. Usually the enemy is incapable of keeping up (especially after AU gets Refresher) but these abilities decrease that advantage. Particularly notable is
 Tinker
 since he is just as mobile once he gets BoTs and his
 March of the Machines
 allows him to counterpush well even solo.
Silences


Silences are particularly good against Underlord for two reasons. The first is that he only has a brief window where he can save his team from a bad teamfight using Dark Rift, and most silences can easily delay the teleport for 10s. The second is that use of Dark Rift in a teamfight heavily relies on ability to cancel it, and silences prevent Azgalor from doing that (eg.
Last Word allows the cast of Rift but you will not have the opportunity to cancel). Silences aren't too difficult to deal with because you can generally purge the off, dispel them, or get ignore them via Magic Immunity.
Mana Drain

Curse of the Silent
Mana drain can prevent repeated casts of Pit and Firestorm in a fight or prevent entirely casts of Rift. This is a bigger problem early when AU has a small pool but his very high INT gain makes it less of a factor late. If you find you don't, or expect you won't, have enough mana for Rift when you need it (it is a hefty 225 mana at level 3) then get Soul Ring and Arcane and hold them in reserve; Using both items then immediately casting Rift means you always can have enough mana for ult. Alternatively, a 15-charge
 Magic Wand
 gives you exactly enough mana for lvl 3 Rift.
Offensive Illusions

Replicate


Illusions can carry, although not benefit from, most auras. AU starts with a very powerful one (Atrophy) and and tends to build strong aura items (Vlad's, Shiva's, etc.). These abilities allow the enemy to benefit from Azgalor's auras which is a serious factor in a teamfight. To make matters worse, AU is rather tanky so taking out his illusions is not easy. Against these heroes, make sure you can either kill illusions of yourself quickly or don't build aura items. Against
 Enchantress
, don't build
Manta Style (I explain why/when you build it elsewhere) because she would love to steal one of your manta illusions.
To do:
-Wait for Abyssal Underlord release.
-Update based on further playtest and community feedback or balance changes.
-Add replays.
-Add offensive dual lane support early item build, and possibly one for defensive/safe lane support.


Quick Comment (6) View Comments
You need to log in before commenting.