A Full Guide to Kunkka(6.88)
Dimonychan
June 24, 2016
A quick 6.87 review
6.87 brought a lot of changes, but  Kunkka mostly remained unaffected. There were changes that him him hard, but overall the situation changed for the better since outworld Devourer vanished from the meta and
  Invoker became less common.
- Huge  Abyssal Blade nerf. It only makes sense to go for that item on frontline Kunkka, where it became somewhat better. Otherwise forget about it. Get
  Silver Edge instead, this item is crazy good right now.
- 50 bonus mana on start and manacost reduction on  Torrent which lets you spam Torrents in lane a lot, and I mean it, A LOT more. Huge buff, and very welcome. If your enemy has no
  Observer Ward on your highround, they are about to have some really bad time midlane.
- 2 armor bonus, plus 1 from the tower. For a low-armor hero, a godsend. Even before, on early levels, you could just go in and trade hits with some heroes( Ember Spirit,
  Templar Assassin without
 Refraction, almost any ranged mid that comes close to the wave), now I strongly encourage you do that if there are not too many enemy creeps around.
- Meta change, a lot of disgusting mids that ruined your day vanished or became less popular. It's too early to judge what will be this patch's cancer(if there will be any, this patch seems fairly balanced), but some strong heroes right now are not really scary for you.
Pros / Cons
Pros
- Very potent abilities with a fairly low cooldown
- Strong throughout the whole game
- High strength gain, naturally durable
- Good chaser and ganker
- High farming speed coupled with solid lategame scaling
- Very fun to play once mastered
- Sexy(no ****)
|
|
Cons
- Skills have to be used wisely in order to be effective and are unreliable
- Needs careful mana management and calculation(especially with the build highlighted in the guide)
- Relies too much on timed combos which can be easily disrupted by some heroes or with some items
- Poor agi and int growth
- Unreliable damage output
- Requires careful and aware positioning, pretty useless when initiated on
|

Torrent
Damage: 60+6*10/90+9*10/120+12*10/150+15*10
Stun duration: 1.6
Range: 1500
Radius: 225
Delay: 1.6
Movement speed slow: 35%
Slow duration: 1.75/2.5/3.25/4
Cooldown: 10
Mana cost: 90/100/110/120
Torrent is an AOE nuke that also stuns and slows everyone who happens to be in it's AOE. The effect has a delay of 1.6 seconds and AOE is pretty small so it's recommended that you use it on static target(like stunned heroes and creeps), or in combination with
 X Marks the Spot
.
Torrent deals damage in 8 equal parts - which means it removes
Refraction and
 Living Armor
 completely.
Your main uses for this spell will be stacking, harassing enemy in lane, and providing an extra disable for your combo to help you close in and finish the job.
You can also annoy your enemy in lane if you hit
Torrent. 120 damage isn't much, but the disabling component will give you time to close in and hit your enemy with
 Tidebringer
 splash damage. This is especially effective if you stun your enemy, hit him with
Tidebringer and get a lasthit, and then deny a creep your enemy was about to lasthit. Gets on their nerves really hard.
Feel free to use this spell on jungle creeps as well - not only you will deal damage to them, but the disable and the slow will save you some hitpoints which is very nice for a low armor hero like
Kunkka.
Don't forget that
Torrent gives vision in it's AOE so you can scout Roshan or fog of war with it. Also enemies that are hurled up in the air lose their collision size(you can walk under them) but retain hitbox(which means you can still attack them and affect them with spells). If you can't hit a stunned enemy, use A-click.
As you can see, it is a multi-purpose ability which can be used in a variety of ways. Still, it's main selling point is disable which helps you chasing and pulling your combo off.
Tip! You can stack every creep camp if you start casting
Torrent at around ~57 seconds. This will hurl up enemy creeps in air, taking them out of spawn box and spawning a new portion of creeps right underneath them. This is especially useful on Radiant side, so you can earn yourself some extra gold without much effort - just practice the timing in lobby.
Tip! Since 6.86 patch
Torrent gives vision not jsut upon eruption, but immediately after cast. You can use it to get vision to quickly cast
X Marks the Spot. This is especially useful at level 6, since when you reach it it's nighttime and you couldn't kill enemy midlaner who was on their highground if you didn't have a ward there or were not on their highround yourself because you had no vision. Now, if you know the position of enemy mid, cast
Torrent there and use the vision to immediately cast
X Marks the Spot and Ghost Ship on them.
Tidebringer
Damage bonus: 25/45/65/85
Radius: 45/500/550/600
Cooldown: 13/10/7/4
Tidebringer is a passive ability that lets you cleave every time it is off cooldown. It is a great farming tool, but, unlike most other cleaves, it can be also be relied upon as your main way of dealing damage because of it's huge range(you can hit units up to 1200 units away with
Tidebringer).
As of 6.86, it can be toggled on and off, just like
 Liquid Fire
 or
 Poison Attack
. If toggled off, it won't apply the bonus damage nor cleave and won't trigger the cooldown. If toggled on, it works the same way it used to. By the way, there's no reason to have your
Tidebringer on when you are attacking a tower unless you want to secure a last hit ion it, so make sure to turn it off when you siege.
It is very important to understand cleave mechanics when you play
Kunkka. Firstly,
cleave ignores armor values. It means that you will deal the same damage to 30 armor enemy as you would to unarmored enemy. Contrary to a popular belief, cleave damage is
not based on damage you deal to the primary target you hit. The target you hit is actually unaffected by cleave and will take armor reduced damage from your attack, though you will still benefit from damage bonus when you attack this target.
Also note that cleave AOE is a circle, not a cone or triangle or anything. To get an idea of what area you will cleave, draw an imaginary line through
Kunkka and his attack target of 1200 units length, starting with
Kunkka. Then take the middle of that line as a center of a 600 units radius circle and you get your AOE. It is important to have a general idea of what area your will cleave.
Keep in mind that cleave affects invisible units(you can also detect invis enemies with it - if you see a strange blue splash in the air, it means that you are either hallucinating, hitting a target in fog of war, or there is an invis enemy nearby. Run). Also,
Tidebringer does not activate when you hit allied units, but it still applies bonus damage. You can use it to deny a creep and get a lasthit right after that.
Cleave also ignores evasion. You can, for example, kill
 Windranger
 who has activated
 Windrun
 in that way.
Tip! Be aggressive with your cleave. Now that you can turn if on or off, you can really be a pain in the *** even for aware players:
1)Deny your enemy all the creeps you can with bonus damage;
2)Turn
Tidebringer off when you go for a lasthit so you won't waste
Tidebringer;
3)Turn it back on when your enemy steps in range and hit them with the cleave;
4)Rinse and repeat. You can dominate a lane with that, but not every midlaner will allow you to be so cocky. Also you should use
Tidebringer when you lasthit a creep if your enemy has high attack damage and easily denies creeps to you.
Tip! Unless your target's armor is negative, you will deal more damage if you don't attack your target directly, but rather hit them with cleave. You can also use this when you are farming jungle. If you have
Tidebringer up, don't hit the fattest creep, but the smaller one so a fat creep takes more damage.
X Marks the Spot
Range: 400/600/800/1000
Enemy duration: 4
Allied duration: 8
Cooldown: 26/20/14/8
Mana cost: 50
Easily the most overpowered spell in
Kunkka's arsenal. Not a surprise with all the buffs it received during the latest patches. X-Mark my words
(what a pun): it will not be long till Icefrog powercreeps the hell out of
Kunkka, so he becomes 6.83
 Lina
Lina or 6.85
Windranger.
You can pick people off from up to 1000 range away and devastate them with your combo. You can flee from a pursuer by casting X on him and waiting for full duration. You can do the same, but with an opposite aim: get your enemy back and finish him off alone or with your teammates. You can refill
 Bottle
, HP and Mana at whim by X-ing yourself and teleporting to base. You can push any lane at any moment the same way if you have
 Boots of Travel
. You can X yourself in a safe place and go cleave a creepwave, hit the sieged tower, get a rune or perform any other action which may be potentially dangerous without fear. You can also do the same to any ally. The possibilities are endless and it has only 8 second cooldown on maximum level. Be creative.
I'd like to go deeper into combos with
X Marks the Spot,
Torrent and Ghost Ship. There used to be a lot of variations depending on your level of X(spell's duration used to scale as well), but now that
 X Marks the Spot Return
 costs no mana and duration is always 4 on enemies it really comes down to two combos:
1)
X Marks the Spot ->
Torrent -> wait a second ->
X Marks the Spot Return. Costs 170 mana. You can use this as soon as you get
X Marks the Spot level 1, but you'll have to get close in order to pull it off on low levels. Use this combo in lane to punish overextended enemies(add a
Tidebringer load and a few autoattacks on slowed enemy), when you are low on mana, when you chase an enemy alone or with friends or to snag a kill on a careless enemy who is low on hp.
2)
X Marks the Spot -> wait a second -> Ghost Ship -> wait a second(optional) ->
Torrent(optional). Costs 195/245/395 mana depending on Ghost Ship level. If that's just X and ulti, you will need 175/225/275 mana.
Always watch your mana so you won't suddenly realize you have run dry on it in process of casting your combo! You can cast Ghost Ship immediately and return the target manually if you need to catch an enemy with an escape(
 Slark
Slark,
 Queen of Pain
) so they will have no time to react. Judge for yourself if you'll need to cast
Torrent additionally or you'll do without it. Generally, if you plan to solo kill an enemy, it's better cast a full combo to give you more disable time and damage to help finish them off. Don't forget to keep a distance of at least 575 units between you and a target when you cast Ghost Ship(or else it won't hit). Your combo is also harder to disrupt this way because enemies will have to get closer to stun/silence you.
There is also one more, non-combat combo, and that's
X Marks the Spot ->
 Town Portal Scroll
/
Boots of Travel. Costs 125 mana and lets you either refill your
Bottle and restore your health and mana, or teleport to a lane and kill an enemy creepwave there to push/counter-push the lane and get some gold. It is extremely useful if you are being forced out of lane and denied rune control and when you are pushing with your team so you can have infinite sustain and keep fighting.
It is very important to remember that invulnerable units will not return to X after duration ends nor manually.
 Eul's Scepter of Divinity
,
 Astral Imprisonment
,
 Disruption
 can dodge your combo(in that case cast combo #1, and then make them set up Ghost Ship for you with those spells), but, more importantly, they can prevent you from returning to X, so be very careful if you face heroes with Eul's!
 Linken's Sphere
 is highly recommended as a lategame item if you plan to continue X-ing yourself and jumping into danger.
That was a lot of material. Practice timings and get used to cast ranges and you'll land combos without problem. Also don't forget how multi-purposeful X is, using it to its fullest potential is an important step to mastering
Kunkka.
Tip! X Marks the Spot doesn't affect spell immune enemies, which you can use to bait out enemy BKBs, but it does affect spell immune allies now, so you can return yourself or an ally to an X even if under
 Black King Bar
/
 Repel
Repel.
Ghost Ship
Damage: 400/500/600
Stun duration: 1.4
Range: 1000
Radius: 425
Travel time: 3.07
Rum movement speed bonus: 10%
Rum damage reduction: 50%
Rum duration: 10
Cooldown: 60/50/40
Mana cost: 125/175/225
Ghost Ship is often misunderstood and used wrong. First of all, a giant 425 AOE ship appears 1000 units behind
Kunkka and travels for 3 seconds to a point 1000 units ahead of
Kunkka in cursor's direction. It will always travel 2000 units total - if you order
Kunkka to cast it further than 1000 units away, he will close in for the range before casting, and if the point is closer than 1000 units, he will just cast it at once and the ship will travel farther than the point you clicked. That's one misunderstood thing about Ghost Ship.
The other one is rum buff. Rum buff is applied to all allies who happen to be it ship's AOE while its travels, causing to take 50% reduced damage for 10 seconds and move 10% faster. Reduced damage is then returned in 10 ticks for the next 10 seconds. Those ticks are non-lethal and do not prevent you from healing with
 Urn of Shadows
,
 Healing Salve
,
Bottle etc.
So this basically doubles your teammates' effective hitpoints for 10 seconds and allows then to survive engagements they otherwise wouldn't.
You can use Ghost Ship offensively - as a part of your combo, or just by throwing the ship into the fight. You can also protect yourself and allies with this spell and it is very legit due to Ghost Ship's low cooldown. If you are getting ganked, immediately cast Ghost Ship wherever you want - you won't hit it anyway, and you need it for rum and movespeed boost. This can save you endless times - you have more than 1000 HP on level 6 and if you cast it in time, your enemies just won't rip through 2000 HP that early on unless they have some long-lasting DoT like
 Poison Nova
. Same goes for allies - see a friend in need? Send him a ship to buff him and fend off attackers! It is very effective against burst damage heroes like
Lina or
 Ursa
Ursa.
In teamfights you either initiate with this spell by X-ing someone, throwing ship, buffing your entire team with rum and taking a target out, or counter-initiate by throwing a ship into an already erupted teamfight. Later in the game your priority should always be buffing allies because it will become more important than damage(you'll deal way more damage via
Tidebringer by that time anyway)
Watch your mana when you cast it and don't be afraid to use it frequently - it has low cooldown and if you fail, that's not a big problem. You can even use it to help you farm jungle sometimes, especially if it's stacked.
Using Ghost Ship to it's fullest takes some practice, as with other
Kunkka's spells, but it is well worth the time.
Gameplay: Pre-Game

Due to Kunkka's nature, he can fit into any lineup, because he is both an amazing space creator and space user and is capable of doing many things fairly effectively. So if you have to, don't be too afraid to firstpick him - he has some nasty lane and overall game counters, but he is pretty hard to force out of the lane with X Marks the Spot- Town Portal Scroll trick and for the game in general there's probably just one hero that makes him borderline unplayable, and that's  Omniknight(I'll address him and other nasty counters later in the guide in a dedicated section).
There's one thing, however, that Kunkka does just perfectly, and that is participation in 15 minutes davai-davai tower and rax pushes, so if you are deciding what mid to pick and you see a nice early-midgame lineup on your side, pick Kunkka freely - after all, if your push fails, you can still recover, unlike many push-dedicated heroes.

There's one trusted starting build I go on Kunkka 100% of the time, and this is, in my opinion, the best build(though it may not seem like it), and this is  Tango and
  Gauntlets of Strength.
Why Gauntlets of Strength? Because they give strength, and they build into Urn of Shadows. Why not 2 Iron Branches then? Because I don't get  Magic Wand on Kunkka. Sure, it's a great item for a low INT hero who relies on costly spell combos to do stuff, and Kunkka has an early slot for it, but... it's just my preference. I play without Magic Wand on Kunkka, and for me this is perfectly playable as long as you calculate your mana before you cast spell combos. Especially now that Ghost Ship got -25 manacost on all levels which is actually pretty big for Kunkka. If you do not agree with me, feel free to go for it, and add(but not substitute Gauntlets of Strength with it) 2 gg branches to your starting items.
You don't really need anything else, Kunkka has beast starting STR and growth, so he can get most lasthits and denies, especially with Tidebringer, as long as he's not bullied out. You can just go straight for Bottle after this, add in a TP if your lane is going bad.
Gameplay: Laning Stage
To go for  Bounty Rune or not is your choice and depends on situation, anyway you should skill Tidebringer(very rarely Torrent/ X Marks the Spot if you are 100% sure you will get first blood on rune with it) to secure some lasthits for Bottle and go mid.
And this is where the most interesting part begins.

I will list some of meta or just popular mids you are most likely to meet during laning stage and get a bit into laning against them.
 Easy/Even He is not a very potent laner, destroyed by most meta mids ATM, but with Kunkka he has better chances. It's not even about Alchemist himself, but about his supports that can very likely be near helping him control runes and ruining your day. If that happens, make sure to check the map constantly and play safe, only go for runes under X Marks the Spot and use X-TP to recharge health and mana. If you do that, you have pretty high chances to end up ultimately winning the lane because you drew their support's attention and still managed to survive and ruin Alch the lane a bit. If he's alone you'll have an easy time against him as long as you don't stay too much under
  Acid Spray, and don't trade hits under acid.
 Easy You might have faced Arc Warden already in your games, and probably have seen that he is a really underwhelming midlaner. After huge
  Spark Wraith manacost nerf(from 50 to 100/110/120/130!) he can't even spam them anymore. The only thing good about him mid is that he is very hard to gank if he uses Spark Wraith defensively as wards, and he has good rune control if he stacks Spark Wraith on a runespot. But you don't really care about going for runes to fill your Bottle, eh? Just remember to not run away from allied creeps when he casts
  Flux on you. And be careful about staying away from the creepwave in general. The only thing that can ruin your lane is ganks. Arc Warden is really good when someone ganks his lane(I mean his allies) because he can cast Flux on you and you either have to stay near the creepwave and get pummeled by your gankers or run away and get slowed hard which lest your enemies catch up and Arc Warden set up Spark Wraith. Watch the minimap.
 Challenging Pretty annoying to lane against. Sure, your cleave ignores evasion, but what's the use in it if you can't even land a hit under Drunken Haze in the first place? You can't lasthit normally and you can't kill him unless you get level 6 earlier than him. At least he can't either if you won't come too close after he gets level 5. Just draw creep aggro, you don't even need to aggro the creep you want to la**** because of cleave. Leave the lane and go jungle/gank after he hits level 6, staying there when he has ulti up is suicide.
 Easy Besides
  Breathe Fire, he barely poses any threat before level 6 and gets full blast of your Tidebringer, rendering his passive pretty useless. Don't trade with him too much though, he will usually win it. Try to kill after 6 if he's not careful.
Hard Becomes quite annoying after level 3, deadly after level 5. You just can't get rid of his  Flame Guard and if you come close he can just activate it and you either run away and get chained or stay there and burn. Also pretty much unkillable due to Flame Guard and
  Sleight of Fist. Your only window of opportunity is before level 3 when he's not that strong - try to deny and lasthit all you can and get him low - you win the trade with his garbage HP and armor. After that you've got big problems - you can't even approach the creepwave. Be very careful. If you came close and he activated Flame Guard, X him and run. If he follows, you can X him back and even if he chained you, he won't be able to kill you. Until he gets level 6, at least.
 Hard While you may counter him gamewise, a good Huskar player will destroy you in lane. He can just get behind the creepwave and spam
  Burning Spear if you dare to approach. Try to hit him with Torrent and snatch some lasthits if you have regen. Also he will most likely push the lane under your tower, so there's another chance to get some creeps. He can't kill you alone before level 6, so just measure how much damage you would get if you came close, and make sure you have enough regen and go. No point in not using the regen you have from Tango and Bottle if you can get some lasthits for that. Always carry a TP, especially if supports help him. Don't even come to a lane without a TP after he gets level 6. You can try to aggro creeps and harass him a bit with Tidebringer after level 5, getting his HP low enough to attempt to kill him when you get Ghost Ship. He'll be dealing no damage to you under rum so as long as you have ship and TP you can try and kill him every time you get a chance.
Even Both QW and QE Invokers are a pain in the *** to lane against but they can't kill you if you don't do dumb things. They can't really force you out of the lane or bully you out of the creepwave early if you aggro creeps. Just play with you brain on and don't do stupid stuff and you'll be fine. QE Invoker is way harder to lane against, while QW Invoker is very hard to kill at every stage of the game.
Impossible One of your hardest counters, not just in laning, but game-wise. Extreme burst, huge range, very potent 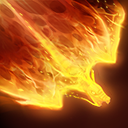 Dragon Slave which she can spam recklessly(nice balance OSFrog), and you can't even kill her, because, chances are, you'll get a
 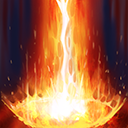 Light Strike Array in your face if you dare to close in for X Marks the Spot. Random Torrent+Ghost Ship hit is your only chance, also always re-aggro the wave before you lasthit because otherwise you'll get hit by Light Strike Array. Also try not to stand in line with low-hp allied creeps because Dragon Slave really hurts.
 Easy Really,
  Shockwave is super-predictable and not hard to dodge, and so is
 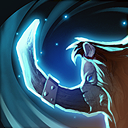 Skewer. He can't even kill you once he hits 6 if you are full HP, even if he drags you under tower with Skewer, just cast Ghost Ship and TP out. Be aggressive, but watch out for Shockwave and Skewer. Kill after 6.
 Easy Ask for an Observer Ward at the fountain. If you don't get one, but it yourself, it's only worth 75g. Put it at Pudge's highround near his usual hooking place. Easy mid as long as you don't get hooked. Kill after 6.
Hard Oh boy. If she knows what she's doing she will just jump on you at first 3 levels with Poison Strike and 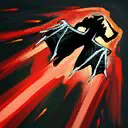 Blink and there's nothing you can do about it but back off under her autoattacks. You can quite control the runes against her either. Make sure you don't stay low on HP in lane, use X-TP trick. If you're full, you can trade hits with her at level 4 - she might blink in X's range herself. Be very careful when **** hits level 6 and make sure to cast Ghost Ship immediately if she jumps on you. It is pretty hard to kill her if she doesn't do stupid things, so just lane passively after level 6, go to jungle or try to gank someone.
 Hard Ridiculous. This guy can just stand behind the wave and threaten to
 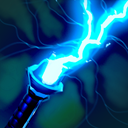 Static Link you once you come close enough. You should change your starting items if you are laning against Razor. Get all-time favorite trench build of
  Boots of Speed+ Tango so you can run from Static Link until he gets his own boots. Never fight under Static Link. Another trick - skill X Marks the Spot at level 2, and then go for lasthits when you are X'ed so you immediately return when you get Static Linked. Mind the cooldown though. Also remember that Static Link only lasts 18 second while the cooldown on the thing is 32/30/28/26. Those 10-14 seconds are your window of opportunity. Other than that, you can feel safer when the lane is on your highround because he can't chase you under your tower for long, use it. Also aggro the wave when you can. Don't cast X Marks the Spot on him, chances are, he took a point in Unstable Current if he's smart enough. You'll only hurt yourself and gift him an easy Static Link. You can try and test if he skilled it, and if he don't, then kill him at level 6, otherwise just abandon it and try to find other sources of income(jungle stacks/ganks) until you get
  Phase Boots. Killing Razor is next to impossible until you get level 3 X Marks the Spot.
 Even/Challenging Depends very much on Shadow Fiend's skill, the amount of souls he gets in first 2 or so waves, and the amount of help he gets from supports. Can even be an easy lane if you're playing against a dumbass with 0 help. Before level 3, do everything to deny him as much souls as possible. After that, staying near the creepwave is dangerous due to
  Shadowraze damage. Every game against SF is different and there is only so much you can do - it depends more on whose supports will be more active. Don't play games with him, don't X him because you can get 2 razes in the face, unless he just razed a wave - then you can go for his face and chew through his small HP pool. It is really worth to skill X Marks the Spot instead of Tidebringer at level 5, so you can kill him at 6. Otherwise you are unlikely to catch him because usually SFs just doubleraze the wave to take all the lasthits and go do their business.
 Hard The main problem about the guy is
 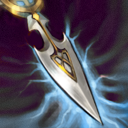 Glaives of Wisdom which let him casually orb-walk you and stand behind a creepwave not giving a ****, similarly to Huskar. Actually, he is very similar to Huskar in laning because both are annoying and do a lot of damage but can't really kill you unless you make a big mistake. What I said about Huskar also applies to Silencer. Just mind that you can't channel your combo against aware Silencers(because of preventive
  Last Word so I'd rather not try to kill him. Lane or take stacks if you can, maybe go for ganks, but remember about
 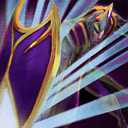 Global Silence! Yes, Silencer is a ***** - you can't really lane against him and you can't gank other lanes if he is aware enough.
Challenging Often regarded as Kunkka's hardest counter in lane. Not even close, boys. Sure, she isn't easy, but as I already said, level 2 Torrent removes all Refraction charges. It's more about her crazy damage bonus and  Psi Blades. You'll have to do a lot of micro job of aggroing the wave, playing with creeps and angles etc to avoid getting trashed by her in lane. You can take level 2 Torrent instead of Tidebringer or X Marks the Spot. Better skip Tidebringer if you can get help from your supports(one is enough, TA without Refraction is an easy prey with True Sight), skip X Marks the Spot otherwise. It hurts you ganking and killing potential though and it is unreliable so you may as well not bother and follow the usual skillbuild. The lane will be hard, but at least you'll be able to recover with jungle farming or ganking. You can also try to go for a lucky sniper kill at level 6 if you have level 2 Torrent.
 Challenging Haven't laned against many good Tinkers yet, to be honest, so only some general advice here. Firstly, you are doomed to lose some lasthits with his
  Laser, and there's nothing you can do about it. Secondly, watch out for his burst - don't show up in lane when you're low enough of health - half health Kunkka is a free kill for him. Control the runes if you can - his spells are pretty costly and he can't spam them without constant mana supply. Lastly, don't stay in
  March of the Machines obviously. You can kill him after level 6, watch out for Laser though - 4 seconds is a lot, make sure you either kill him with ship and Torrent or you are engaging at full HP to tank his attacks and tower hits for ~3 seconds.
 Hard Basically, a more annoying version of Huskar. Similarly to him, he can easily orbwalk you, but with a slow added, and makes you pay for every Tidebringer hit with
  Corrosive Skin. Brrrrr. Do the same things you would do against Huskar, just mind the slow from Poison Attack and Corrosive Skin. Luckily, he can't kill you because he has no disables so you just TP out in case things go wrong. Yiu can try to kill him at level 6, but that's pretty optimistic - his magic resistance, plus slows plus
  Viper Strike may not let you finish the job. Judge for yourself if you want to take the risk or not.
Even Everyone's favorite/hated ginger girl is a surprisingly easy prey for Kunkka. As long as you're not hit by 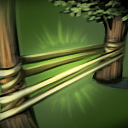 Shackleshot her kill potential is pretty low - just don't step into obvious
 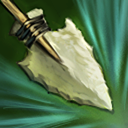 Powershots, play with the creepwave by aggroing creeps, deny creeps if you can, harass her with Tidebringer, and, please, watch your angle so you don't get shacked. Now her Windrun hardly help her trading with you so you can X- Torrent-cleave her from level 4 onward, and on level 6 you can wait until she activates Windrun(you can try to bait it out), X her and kill. If she is not full Hp you can not even wait for Windrun as long as you are sure Torrent+Ghost Ship+ Tidebringer cleave hit will kill her(if she has 500 HP or less(including possible Bottle healing), this is a guaranteed kill).
 Challenging First of all, you're going to be hit by
 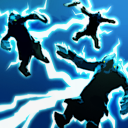 Arc Lightning. A lot. And there's nothing you can do about it, you won't be able to deny him creeps even with bonus damage from Tidebringer. I recommend getting a
  Magic Stick instead of Gauntlets of Strength or Healing Salve in addition to your usual build. You'll need something to mitigate the amount of harass he has. Luckily, it is very mana-intensive, so if you have rune control you can starve him out of mana. Watch out for
  Lightning Bolt, this thing hurts and he can easily kill you if you are not careful. Try to cancel his
  Clarity with Tidebringer if you can, you can stand in the middle of the wave, threatening to cleave off the ranged creep if he comes close. As an alternative variant of lane behavior, you can sit out during the first two waves, only coming close to get a lasthit with Tidebringer. This way Arc Lighning won't hit you and you will not hage to suffer that much, However, you'll have to be at least 500 range away from your ranged creep to not get hit, so you may lose quite a chunk of experience. To avoid this, try to deny the ranged creep ASAP so you can stay behind the wave and still get experience. Zeus can be tricky to kill even after level 6 because of Arc Lightning huge range, but if he makes a mistake and comes close, he's as good as dead. Just make sure he doesn't blast you instead - don't even bother if you have less than 500 HP.
And that's all about mid matchups I guess, if some midlaners will get changed or shift in the meta' I'll make sure to keep this up to date.
There is some general wisdom for midlaning if you're interested, this will be a good read if you want to improve your mid skills.
ChaQ's Advanced Solo Mid guide
ChaQ's Advanced Last-Hitting Guide
Goo's Midlane Guide
Also don't forget to turn
Tidebringer off when you don't need it and stack when you can(especially if you are Radiant, or on your way to the top rune if you are Dire) and let OSFrog be with you.

Laning itembuild order is pretty much set in stone for
Kunkka. Aside from situational starting build deviations against specific mids, you are going to get the same set of items over and over again, in every game.
Bottle - your go-for item, lets you cast
Torrent often in lane or to stack, saves up runes for better time, but most importantly, it lest you sustain since you will be taking a lot of damage being a melee hero with low armor. And it synergies perfectly with
X Marks the Spot - you can refill your
Bottle at whim at any point of the game, and also distribute extra HP and Mana to your teammates during pushes by abusing fountain's lingering effect. You're basically a walking fountain with
Bottle. Absolute core on
Kunkka in every position.
Boots of Speed +
Town Portal Scroll - yes, both of them. I personally think TP should be bought that early in lane on 99% of mids, but if for other heroes there may be an argument, for
Kunkka there is none - TP is like a second life for you on a 70 second cooldown. Use it if things go bad and you are denied all the runes. You'd be fresh again and it would be like all those awful things never happened.
Boots of Speed are a no-brainer - they are core on every hero, but
Kunkka benefits a lot from early boots because he can use the bonus movement speed to quickly get in range of X.
Phase Boots - boost your farm, further enhance your movement speed to get in X's range, give crazy cleave damage for early ganks and pushes. The best boot choice for an active
Kunkka playstyle.
Urn of Shadows - a very good early game item for
Kunkka with a lot of benefits. Use urn charges offensively to help you finish off the enemy or just nuke them - when you're engaging, urn your target and then do it again to refresh the duration before they manage to escape. Few heroes can survive that. Use urn defensively to save yourself and further boost your survivability, or save or heal allies in between engagements, which is perfect for a constant early aggression playstyle. Also you can use the charges to heal yourself while farming jungle camps - neutrals don't cancel it, and while it may seem gimmicky, it is actually a great source of jungle sustain if you get enough early kills. Finally, stats it gives are just perfect for
Kunkka. Don't forget to warn potential urn carriers(
Pudge,
 Spirit Breaker
,
 Witch Doctor
 etc.) about your intentions to get Urn.
That's all for laning stage items, after you get these, you should look for opportunities to get in some engagements. Just don't waste your item, remember that you need to get
 Shadow Blade
 as fast as possible.

There are two main optimal skillbuilds for midlane
Kunkka, and they only alternate skill choices at levels 7 and 8. There are also two that you will use more rarely but that are still viable.
The farming build:
Ghost Ship
Ghost Ship

Ghost Ship - the safest and the most stable build. You max
Tidebringer over
Torrent because the farm acceleration and lane presence from high-level
Tidebringer is more profitable than a maxed
Torrent which is pretty much singe-purposeful. Then you max
X Marks the Spot for the range which is again more important than
Torrent damage because you have a lot of damage at that stage already, it's just about applying it, and 1000 range setup skill does this perfectly well.
The ganking build:
Ghost Ship
Ghost Ship
Ghost Ship - basically the first build, but with
X Marks the Spot instead of
Tidebringer skilled at level 7 to provide more killing potential in lane and in ganks. It's recommended to go for if you want to kill an enemy mid at 7(for example, it's much better to kill say
Shadow Fiend instead of boosting your own farm rate with
Tidebringer) or go gank hard and snowball early. It's more risky, but if your ganks succeed, you will get a much earlier
Shadow Blade than if you were passively farming and your team would have a huge advantage that would let you go pushing. If you are playing at MMR below ~3.5k, you can go for it every game since people are very unaware there and you are almost guaranteed to get a lot of kills with your combo.
Tip! You can also max
X Marks the Spot before
Tidebringer at that point if you really want to go full-time ganking. If you don't farm jungle camps, level 3 and 4 of
Tidebringer won't make much difference anyway, while 200 bonus range and 6 seconds off the cooldown really matter.
The "game is hard" build:
Ghost Ship
Ghost Ship
Ghost Ship -
X Marks the Spot and
Torrent are swapped here. Use it when you are really getting pressured on at midlane and need to use X-TP to sustain yourself. Don't forget to get
Town Portal Scroll ASAP and buy a new one at base!
The "kill at 6" build:
Ghost Ship
Ghost Ship
Ghost Ship -
X Marks the Spot instead of
Tidebringer on level 5 so you can kill enemy mid once you get level 6.
You have to have at least 320 mana to do this! Useful if you have level advantage(
Bounty Rune/ a lot of denies) against mids with powerful ultimates that can kill you at level 6 themselves, such as Brewmastrer,
Lina or
Zeus. Kill them before they kill you.
Tip! You can get even more creative with skillbuilds. For example, against
Lina, you may need to get X at level 2 and to kill her before she gets
 Laguna Blade
(if you happen to have level advantage despite being dominated), so you go X at level 2 and 5, getting
Torrent and 4 and
Tidebringer at levels 1 and 3. There is also a possibility to pick up a second skillpoint in
Torrent somewhere when against
Templar Assassin, as mentioned in "Mid Matchups" section.
That's all about the skill builds I think, see for yourself what you will need in every game.
Gameplay: Early Game

So you've got level 7-8 and are ready to do something aside from hitting creeps in your midlane. Your main goal should be to get Shadow Blade as fast as possible - the earlier, the better. You can do it in two ways, or a mix of them: the farming way and the ganking way.
The farming way is safer and more reliable. If you are not denied too much space, you will get Shadow Blade about 13-14 minutes in on average.
You want to go that way when:
a) You expect no real action and a passive play on sidelanes from both your team and your enemies;
b) Enemy heroes are tough to kill or there is a strong saving hero in the gankable lane( Omniknight, [[Tidehunter]);
c) Enemy mid is either very active on the map(ganker type mids like  Night Stalker or
  Tusk);
d) Enemy mid is able to quickly destroy your Tier 1 mid tower if undisturbed( Death Prophet, Templar Assassin, Shadow Fiend).
Also passive farming is better if your lane went very well and you don't want to risk your advantage and just safely get your Shadow Blade.
The ganking way is more risky but much more beneficial to you and your team if you succeed. You can get a very early Shadow Blade(up to 11 minutes) if you grab some early kills and your team gets a lot of economical and strategical advantage which you can further increase with pushing.
You want to go that way when:
a) You smell a lot of action happening, allies or enemies having a really aggressive lane capable getting kills;
b) Enemy heroes are an easy prey - immobile, squishy, etc. You don't even need our allies to help you in taking them out;
c) Enemy mid is rather passive and you want to punish them for that or get an advantage you wouldn't get if you were just farming like them( Shadow Fiend, Razor);
d) You had a bad lane or your allies are losing their lanes pretty hard.
You can recover from a bad start with some successful ganks and some Tier 1 towers destroyed. The best way to gank is to TP to a lane you want to gank(make sure you are undetected) or just walk there with a Haste Rune or Invisibility Rune. Watch your mana and don't forget to use Urn of Shadows. You can get very aggressive and dive towers if you have to because of your high HP and rum buff.
Tip! Use  Smoke of Deceit. It is dirt cheap, can be bought right at fountain and it's nothing short of amazing. When you TP to gank someone from fountain, buy it and use it before you activate teleport. Upon arrival you can either walk around the target to get close or just run forward, activating Phase Boots when smoke gets dispelled. This makes ganks a breeze even in warded areas.

There are two items you should aim to get before 20 minutes.
Shadow Blade - if you get it early enough, it will make you a monster in early-midgame fights with this 175 bonus damage and improved mobility. This bonus damage hits really hard. If you would not like to fight in that stage of the game, you can use it both for solo-killing enemy heroes(again, bonus damage matters and invisibility makes you get close unnoticed) and for pushing so you can get away more easily as ling as you are aware of enemies coming to you.
 Crystalys - or Baby Crit. Another great boost to your damage on your way to Deadalus. This item won't make as much impact as Shadow Blade initially, but if you get a juicy crit in a teamfight, it's usually a teamgiht autowin, provided you lay your hand on Crystalys early enough(before 18 minutes or so).
You should basically go for those items in that order every game unless you go !Attacker's Kunkka with Armlet of Modriggian and  Blink Dagger... but that's another build and another story, in this guide I explain a more standard build with Shadow Blade.

Time to get a bit into the flow of an average gank or an early engagement you might take part in. Remember some golden rules:
1) Positioning is key. Your ultimate need you to stay in range to be effective and you can dish out damage from long range anyway. Only close in to get a kill on an enemy and generally try to stay away from the center of the fight.
2) You and your team are really fat early. You can go for some dangerous dives or chases as long as it's reasonable. Don't hesitate to heal yourself of allies with Bottle and Urn of Shadows in case of emergency.
3) Taking a tower after a successful engagement is always a good thing to do if you are all not low on HP and barely made it alive. You provide enough of healing power with Urn and Bottle(don't forget you can refill Bottle with X-Tp trick and distribute the charges between your allies) otherwise. Also towers > kills. If your enemies stay back and spam their counterpush spells, let them be - just chew down the tower and back off, don't go balls deep to get them unless you really need to.
4) You can go for as long as your allies have HP and Mana. There is literally no such a thing as a long cooldown spell for Kunkka, and he can do a lot of impact by himself, with just a spell or two thrown in by his allies. There are no brakes on the push train with Kunkka on your team. Don't go for T3 and rax straight away though, that's stupid and reeks of a game throw attempt.
5) Always, always watch your mana.
Every game is unique and special, of course, but you better follow this advice until you get experienced enough with Kunkka to decide for yourself what you want to do in a teamfight at every given second.
Gameplay: Midgame and Late Game

With Shadow Blade and Crystalys/ Daedalus you are a mean physical damage dealer. You can easily kill most heroes with Shadow Blade Tidebringer hit, then X Marks the Spot, Ghost Ship, Torrent and they are pretty much dead. This works for ganks and teamfights alike so you can do pretty much everything you want.
The most optimal thing to do is push with your team - if you snowball off early fights and get Daedalus early enough you will just deal too much damage to soak up. Kill Roshan with your team(you can take Aegis, but better give it to your frontliner so they can carelessly initiate a fight) and just go for their barracks.
Tip! If your team is at stalemate near the enemy's highground and you can't destroy their Tier 3 tower, you can wait until your creepwave arrives under enemy highground and then throw in Ghost Ship to get any creeps/heroes out of the way. Then your team, temporarily granted double their EHP, can just charge in and hit thee tower. This is effective at any stage of the game, especially if your carry has a Black King Bar or Aegis of immortal - your team is basically unstoppable in that situation.
You can also continue farming and picking up occasional solo kills if your team isn't very active. Kunkka is very good at both, and he really benefits from a farm advantage. Just don't get too cocky when going for solo targets, enemy supports with True Sight can easily get you if they are aware.
However, things will not always go well for you. You can be ganked mid a lot, have some unsuccessful ganks, denied space or youmj7st can have a bad day. That's important to learn how to play Kunkka from behind. He farms pretty fast and has high kill potential with his spells and Shadow Blade alone so you can comeback the same ways you could snowball.
Often if you failed to get decent farm and your game is going bad, it's because the enemy lineup is very early-game intensive and you are going to be pushed instead of pushing yourself. Luckily, Kunkka is an excellent counter-pusher. Low cd spells, huge AOE damage with Shadow Blade + Tidebringer and an ability to pickoff pushing heroes. You can drag the game late enough for enemy lineup to lose its potency and your carry to come online as long as you don't die. Be careful.
You generally want to finish the game after you get a Daedalus if everything's going well, or drag a game later until you get one more damage slot if you are behind.

Daedalus - your core item and ultimate damage steroid. You should aim for it every single game, it's just that good. Tidebringer + Shadow Blade crit is 700+ pure physical, unresisted damage, and it only gets bigger as you get more damage items. Optimal timing for it is anywhere under 25 minutes, under 30 minutes is decent, but if you get it later you're having a really bad game or should work on your farming.
Daedalus - yes, another one. Two Daedali give you 51% total crit chance, and the second one gives hefty 81 bonus damage, making your crits much more reliable and more severe, especially when farming or pushing a lane. It is so good you should go for double Daedali most of your games, the damage reliability they provide is unmatched.
Tip! With two of those, it is really worth "controlling" your crit sometimes. With 51% pseudo-random chance, if two consecutive attacks don't crit, there is a high chance the third one will, if three attacks in a row didn't crit, it's an almost guaranteed crit on your next attack. This can decide a close game where you need a crit, for example, if you carry  Divine Rapier and are your team's only hope.
Boots of Travel - they become core on every hero sooner or later. You can get them after Daedalus + 1 more item(replace Urn of Shadows with it or straight after your first Daedalus if you don't need more damage right now(for example, when you got an early Daedalus. 45 second cd instead of 70 is very convenient for your X-TP fountain trips, and BoTs let you splitpush very efficiently.
Abyssal Blade - sadly, after 6.87 it lost it's main selling point - damage, which made it obsolete in one-hit builds. However, damage block and reduced active cd makes it pretty good if you go for frontilner build. Basically, never get it on one-hit Kunkka and always get it on frontliner Kunkka.
Divine Rapier - risky and deadly, you generally want to get it when you are losing and you want to win against all odds. Also works in even games as the best damage item you can get after your second Daedalus. It has amazing synergy with Tidebringer and it's relatively safe because of X Marks the Spot, your innate tankiness and Ghost Ship rum buff. Just be very careful, always X yourself, get a Linken's Sphere/ Black King Bar if you have to, Blink Dagger is obligatory so you are harder to catch and enemies have less time to react. Divine Rapier carries even the most desperate games, I've once solo won a game against 2 overfarmed enemy carries with that(granted, they were not particularly smart and didn't even tank up so I could one-shot both of them if I got a crit so it's not that impressive :)). You just need a very good game sense and a cold mind to keep it and make a good use of it.
Tip! Shift-queuing when carrying Divine Rapier is your best friend. Here's a click tutorial on how to use Rapier in a bold and a safe way at the same time:

Shift-queuing 101
Black King Bar - not really the item you want to go for, get it if enemy team has too much disables for you to be safe even if X'ed, as a complementary item to
 Satanic
 or if your game is going bad and you can't allow yourself the luxury to just stay at the edge of a fight and cleave every 4 seconds and need to go into hand-to-hand combat. Also a must sooner or later if you want to be a frontline tanky bruiser rather than a deadly AOE critical striker.
Linken's Sphere - great if enemy team tries to counter you with
Eul's Scepter of Divinity(which can be quite often),
 Scythe of Vyse
,
 Orchid Malevolence
,
 Hex
Hex or other instant cast single-target disables(especially if they bypass BKB). It is almost impossible for an average pub team to coordinate to disable your Spell Block and instantly disable you afterwards, especially when you suddenly blink in for just a brief moment. While
Black King Bar may be better for prolonged, general fights,
Linken's Sphere is much better if you are playing passively and defending your highground or splitpushing. Be aware of AOE disables like
 Static Field
 though.
 Heart of Tarrasque
 - poor man's
Satanic +
Black King Bar. Get it if you need to be a frontliner in your team but can't afford former two. It is also good if enemy team has BKB-piercing disables so you won't hit with
Satanic anyway.
Blink Dagger - a must when carrying
Divine Rapier or when running out of slots - lategame
Blink Dagger is way better than
Shadow Blade, mainly because of instant initiation and disengagement with X + Blink. Don't dismiss
Shadow Blade too early though, the combo of those items is very powerful.
Tip! You can effectively and very boldly rat with
Blink Dagger.
X Marks the Spot yourself in a safe place, blink right in front of the tower and hit it. If enemies try to defend, X yourself back, wait for
Blink Dagger cooldown and repeat. It's especially effective when two or more lanes are pushed in so enemies have to spread their attention and resources in order to defend.
Satanic - an ultimate survivability item for
Kunkka, if you intend to actually manfight and take damage rather than preventing disables. Core for tanky bruiser
Kunkka, can also be useful if you mix crit-oriented
Kunkka with a bruiser(basically you X, Blink in and fight for the remaining X duration rather than hitting once and X-ing back).
Black King Bar is doggedly recommended to purchase before of after
Satanic so you won't get disables when you activate it.
Abyssal Blade is very useful too.
Silver Edge - honestly, while it seems a natural pickup for a hero so reliant on
Shadow Blade, early game
Crystalys gives more damage and lategame there used to be no place for it. But now that
Abyssal Blade is nerfed as a damage item, it makes a very good mobility item and serves as a straight upgrade to
Shadow Blade. I recommend you to get it along with
Blink Dagger which will allow you to be very mobile and hard to catch.
 Moon Shard
 - a usual pickup for a 7th slot, but you can get it earlier if you want to rat a bit with
Blink Dagger. 120 bonus attack speed on a hero who almost exclusively builds raw damage is a huge DPS boost which you can apply to towers to melt them in seconds. You can also get it as your poor man's
Divine Rapier if you will have your last fight soon and can't afford a Divine, then desperately try to pummel someone to death with your +120 IAS and crits. Though for this,
Black King Bar is usually a safer variant for the same price range and it does not require a Secret Shop access, but to each his own.
 Aegis of the Immortal
 - almost always it's better to let your carry have it, however, if you carry
Divine Rapier or you went for a tanky frontliner build and dish out more damage than your carry, it's better to get it yourself if you have the slots.
 Refresher Orb
 - your 8th slot after you've eaten
Moon Shard, saved for buyback and upgraded to BoTs level 2. Keep it in stash/in your personal courier, use it to refresh BoTs or Ghost Ship when you defend highground or need to TP to the enemy base to finish after you've won a fight.
 Necronomicon
 - another item for those 1 hour long games where you are maxed out and walk around with 10k gold in you pocket. X yourself, tp to a lane and drop 'em. You don't really care about feeding gold at that point but the utility is always welcome, be it for pushing, dewarding/scouting the area(for example, Rosh pit or enemy jungle)or serving as a mobile teleport targets for some cheesy str[A]ts.
 Manta Style
 - seriously, why is the isn't over yet at this point? Drop them in the same way as Necronimicons, you can also swap out Blink for Gem before you TP and then swap it back(fro courier/stash) so your illusions get True Sight. Basically they are Necronomcons that last half the time, are melee(thus can't deward cliff wards) and require BoTs level 2 to teleport to them. Well, if you have nothing to spend your gold on anyway, then why not?

Early game-oriented heroes
As I mentioned quite a lot of times already,
Kunkka is best played in early game-oriented lineups. If you get enough strong early game heroes, you can just roll over your enemies and get a 25 minute win since between your healing and protective abilities, damage, pickoff potential and whatever your allies bring to the table you are unstoppable. Always encourage your team to pick such lineups and pick
Kunkka into them. The important things about this is that your cores have to be strong early game, since supports are already early game-oriented 90% of the time.
Examples:
 Undying
,
 Bristleback
,
 Gyrocopter
 etc.
Tanky heroes
Tanky heroes add a lot of beef to your teamfight(especially under rum buff) and it is very important to have some frontliner hero since you want to stay at the edge of the fight casting long-ranged spells and cleaving with
Tidebringer most of the time. If you don't have any, you'll likely have to become one yourself.
Examples:
 Abaddon
,
 Wraith King
,
 Centaur Warrunner
 etc.
Healers/Protectors
They let you snowball more easily because you can dive almost anything with rum buff + some heals/defensive buffs. Same goes for early pushes. They also boost your survivability, of course. But the best thing about heroes with defensive spells is that they can save you if you are getting focused or disabled. Special mention to
 Dazzle
 and
Omniknight. They are extremely handy to have against long-range initiators in enemy team or when you got
Divine Rapier since they make you almost immortal when you are X'ed and if you are careful enough, getting your
Divine Rapier is next to impossible. Also don't forget about
 Mekansm
 carriers, rum buff + Mek makes your team unkillable.
Examples:
Dazzle,
Abaddon,
Omniknight etc.
Gankers
Your ultimate snowball helpers.
Kunkka in combination with a hero with some good disable and damage can gank the whole map and get a lot of kills. Their lane is also very easy to gank. Don't forget they can also gank mid and net you some very early kills to grab an advantage.
Examples:
 Lion
Lion,
Tusk,
Night Stalker etc.
Initiators
Can initiate under the rum buff to break the stalemate, for example when either team is pushing highground, can draw attention to them allowing you to get it and deal damage without a fear to get focused, can set up a situation for a perfect Ghost Ship and
Tidebringer cleave. Great friends for any hero who intends to teamfight, and especially for
Kunkka.
Examples:
 Tidehunter
,
 Vengeful Spirit
,
 Phoenix
 etc.
AOE setup heroes
You know, those combo-wombo heroes that get highlights on YouTube. With your amount of AOE damage, those heroes can be very handy and can help you devastate enemy team.
Examples:
 Dark Seer
,
Magnus,
 Winter Wyvern
(situational) etc.

Tanky heroes
Yes, they are here too. They are just annoyingly hard to kill. It can be a pain early-game as the more heroes like that are there in the enemy team, the harder it is to snowball and gank their lane. But it can be especially crucial if there's a tanky enemy carry because you can't take them down with your huge crit and in the next 4 seconds they can eat you or your team alive if they are farmed enough. The more health enemy carry has, the harder it is for you to deal with them.
Examples:
Tidehunter,
 Medusa
,
Bristleback etc.
Healers/Protectors
The more defensive capabilities yours enemies have, the harder it is to kill them and thus harder to snowball or focus down in a teamfight. They force you to play passively and think twice before you go for a gank. Some can even disrupt your combo.
Examples:
Dazzle,
Omniknight,
Winter Wyvern etc.
Long range initiators
Very nasty midgame and late game if they know what they're doing. They can get you almost anywhere, even a thousand dotameters behind your team, they can also initiate on you when you return to X location in some cases.
Linken's Sphere is recommended.
Examples:
 Storm Spirit
,
 Clockwerk
,
Pudge etc.
Basically any support hero can get Eul's lategame to counter
X Marks the Spot, but there are heroes who can get Eul's almost always, and you don't really want to face those midgame, especially since it disrupts your combo. Be careful around Eul's carriers and when initiating on them, don't cast Ghost Ship right away, cast
X Marks the Spot +
Torrent to bait out Eul's - it has higher cooldown than both X and
Torrent so you can try again soon.
Examples:
Lina,
Death Prophet,
Invoker etc.
Heroes with Spell Immunity/Invulnerability
Talking about innate Spell Immunity there,
Black King Bars are not that scary to you, on contrary, you can bait out BKBs with X +
Torrent and make enemies waste them. But
 Rage
Rage or
Disruption make it almost impossible to get full combo off on these heroes and therefore' it is very hard to gank and kill them.
Examples:
 Juggernaut
, Outworld Devourer,
Tusk etc.
Hall of Fame: Friends and Foes

A great defensive hero that can protect you with 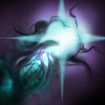 Mist Coil and dispel disables with
 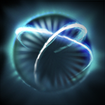 Aphotic Shield, he is a great help at all stages of the game. With
  Aghanim's Scepter his ultimate redirect 50% of the damage taken by your team in 900 AoE to him, just like host Ship rum buff, but damage is redirected rather than returned later instead. Under both of those your allies and you will take 75% less damage for 7 seconds. 4 times their EHP will make even Silencer fat like Centaur Warrunner .
An amazing early- and midgame bully, attention magnet, slower and just an amazing guy to have on your team. He is probably the best frontilner to have on your team, especially in a push-oriented team.
 A great early game pusher and a walking Mek. Remember how I said rum buff and Mek makes your team unkillable? Well, don't forget that this guy also goes
  Guardian Greaves every game and can get them very early, stacks up defensive auras with creeps, can gank your lane or sidelanes and generally make your push train unstoppable. Oh, this guy also got massively buffed in 6.86. If someone on your team plays a good Chen, just pick Kunkka afterwards and your team will become immortal.
 Great ganking support with massive teamfight contribution. A team caught in an Aghs
  Static Storm is as good as dead with your amount of AOE damage.
A great carry to have in your team - strong well up to lategame, with great AOE damage output and potent early game presence. Perfect for early push strats.
Your best combo-wombo buddy, lategame if he gets 3+ enemy heroes in 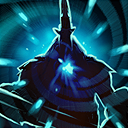 Reverse Polarity, it's a teamfight autowin because you just don't survive a farmed Kunkka's strike with
 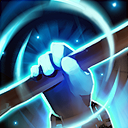 Empower.
An epitome of an early game oriented hero, Night Stalker is your best friend when it comes to snowballing and mowing enemy structures down. He doesn't lose his usefulness even lateame, beause he builds into a tanky frontliner hero most of the time and his Aghs provides you with huge vision advantage( X Marks the Spot range is 1000, Blink Dagger max range is 1200 while enemy vision(including wards) is only 800, they just won't see what hit them).
A dedicated healer and protector, you two boost your team's survivability to the skies, but most importantly, he can dispel almost any initiation on you and can also provide a permanent Spell Immunity which is extremely handy later in the game when you X yourself and blink in, especially if you carry Divine Rapier. It is also great is you are playing a frontliner role with Satanic as you don't need to waste a slot on BKB and can get some damage.
Another early game monster, I'd say he is the best hero for early game domination. Wrecks enemy lanes, autowins fights with  Tombstone, heals you and your teammates, and with Aghs he steals a lot of strength from enemies so he becomes very tanky and your enemies become even more squishy, to the point where you can sometimes kill them with a single Shadow Blade strike.
A good ganking support that can help you snowball, but what makes her great is damage aura(though you don't get stat items, but you have high strength naturally and it's sill something) and  Nether Swap that can save you from bad situations or, on contrary, put an enemy in a bad situation. You have a beneficial partnership - she saves you/sets up kills with Swap, and you buff her with rum so she can survive after it in some situations. Also
  Wave of Terror can give you vision to cast X Marks the Spot on a fleeing enemy.

A very annoying hero that can get you out of position with his long-ranged  Glimpse, but the worst part about his is his almost instant Static Storm. With Aghs it's like an AoE
  Doom, if X yourself and blink in, chances are, you are going to get instantly silenced and ripped apart and there's nothing you can do about it. Even without Aghs it's a great nuisance as you can't return to X without Spell Immunity, but with Aghanim's Scepter it's just a nightmare. Be extremely careful around this hero, if you have a chance to win without Divine Rapier, don't buy it - you may lose it pretty quickly.
Great in lane against you, extremely hard to kill with his Flame Guard cast point escape, can solo kill you unless you are overfarmed, very hard to push into. A nasty hero to have in the enemy team, Abyssal Blade is recommended to force him to buy Linken's Sphere. If he doesn't, he's pretty much dead, you can just pummel him down in Overwhelm duration with his garbage armor.
An annoying laner, often carries Eul's Scepter of Divinity, a lot of AOE disables and lockdown, very mobile and hard to catch, also it's very hard to pull your combo off on him as he has a lot of low cast point AOE disables that disrupt your combo. But if it only was for this.  Tornado is basically Eul's with crazy range, if you get caught in it when you have to return to X, you won't. Be very careful around him lategame.
  Deafening Blast is also a pain in the *** with it's long duration.
Completely obliterates you in lane and a natural Eul's carrier, you are almost guaranteed to have a horrible early game against Lina unless get a lot of help from supports or Lina is low skilled. Try to avoid picking Kunkka into this fiery wench when there is a chance she will go midlane, she's a real nightmare and is one of your hardest counters despite not having any outstanding counter to you lategame(aside from Eul's and occasional Vyse).
Your hardest counter in the entire game, in my opinion. His lane is basically ungankable because Repel disrupts your entire combo. You can't initiate with your X during teamfights either because of Repel. Repel, Repel, Repel. Oh, you got a lot of damage items and do not rely on your spells to do damage anymore?
 What. A. Pity.
. Never pick Kunkka into Omniknight if you are not playing against a bunch of low-skilled(compared to you) players in a low bracket.
What. A. Pity.
. Never pick Kunkka into Omniknight if you are not playing against a bunch of low-skilled(compared to you) players in a low bracket.
Again, we have an annoying and dominant laner, but what's more important, this guy can ruin your life outside of laning stage without being here. One good Global Silence and your gank is failed because you can't even cast your combo. Try to time your spells instead of using X Marks the Spot Return, especially when he is near, because Last Word will not let you cast Return if you cast another Ghost Ship or Torrent before that. Lategame he is also horrible to play against because he can instantly silence you at any moment his ulti is up, and if you don't have BKB, you just won't return to X. Getting BKB and going for a tanky Kunkka build is advised against Silencer if the game went late.
Not only he is scary to play against when you are mid, he also denies you a lot of possibilities throughout the game. You can't really splitpush or just farm a lane against this guy because will get charged and bashed to death and your chances to survive are rather grim(the only thing you can go is throw Ghost Ship for the rum buff, cast X on him, Torrent him and TP out... but that's if you won't get permabashed. His global range initiation is also very annoying in teamfights, with BKB and his team's help he can recklessly charge into you and mess up your positioning. I would recommend getting Blink Dagger over Shadow Blade in case you face Spirit Breaker.
Not only she is good in lane against you and hard to kill alone without True Sight, she is also the only carry in the game who doesn't have to tank up to survive your huge crits. No matter how many Rapiers you have and how big your crit is, Refraction will save her. You'll have to rely on your teammates to deal with her, and if she's fed it is very hard to come back to a game for you.
Has a disable that pierces everything(Walrus Punch! isn't blocked by BKB nor Linken's, gj OSFrog), a way to initiate on you from fairly long range and save his allies from your combo at the same time. Enough to screw your game up. You can play around the fact  Snowball requires him to have a vision on at least one enemy unit(cast combo from the fog of war when your creepwave dies), but you can't do anything about Walrus Punch!. The disable itself isn't very long, but enough for enemies to stack disables on top of it and bring you down even if you are X'ed. Watch out for him ,especially when he has Shadow Blade or Blink Dagger(i.e in 95% of the games :) ).
The same way she can boost your damage with  Vengeance Aura and save you with Nether Swap, she can reduce it or initiate on you from long range and if she swaps you, you won't return back to X. Get a Linken's Shpere against her lategame.
Changelog, just for fun
Spring 2014 - guide started.
22 July 2014 - guide published.
25 July 2014 - added Friends&Foes chapter.
26 July 2014 - added this useless changelog.
30 July 2014 - reviewed the guide for typos, edited "Skillbuild Explanation" chapter, added "Gotta keep my Rapiers" sub-chapter("Gameplay").
2 August 2014 - added some pictures, tidied the guide a bit.
5 August 2014 - added second skillbuild.
7 August 2014 - edited itembuilds a bit, added  Bracer as core(sidelane) item.
12 August 2014 - added some tips, edited some chapters.
17 August 2014 - added "When Things go Bad" chapter.
22 August 2014 - added "Endgame itembuilds" build&chapter, added new group of foes.
25 January 2015 - completely rewritten the guide, it's now a different guide from what was there before.
30 January 2015 - finished "Friends and Foes" section, added 1(pathetic, I know) replay.
3 February 2015 - added another replay. Two is better than one!
8 May 2015 - updated for 6.84. Probably will update the guide once more soon.
17 May 2015 - moar 6.84 replays, and updated info about stacking(in "Gameplay - Early Game" chapter), tnanks to YellulzQuiet.
21 December 2015 - rewritten the guide again, updated for 6.86.
13 May 2016 - 6.87 update.
24 June 2016 - 6.88 update, re-added Smoke, added more ultra-lategame items.


Quick Comment (55) View Comments
You need to log in before commenting.